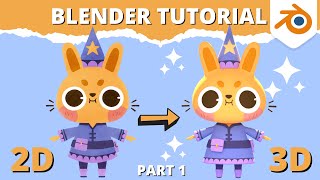
Blender Tutorial - Use Rigify to Easily Rig Your Characters (Part 1)

ฝัง
- เผยแพร่เมื่อ 26 มิ.ย. 2024
- In this Blender 2.92 Tutorial I'll show you how to use Rigify to easily rig your 3D characters!
This is Part 1/2 of this video. In this part 1 I show you how to set up and generate a rig as well as how to attach your model to the rig. In part 2 of the video I'll explain what weight painting is and how you can adjust skin weights for good deformation. So stay tuned!
If you have any questions, leave them in the comments and I'll do my best to help.
Subscribe and turn on the notifications for more useful tutorials!
✷MORE TUTORIALS✷
2D Drawing to 3D Model Tutorial Part 1: • Blender Tutorial - 2D ...
2D Drawing to 3D Model Tutorial Part 2: • Blender Tutorial - 2D ...
360 Turntable Animation Tutorial: • Blender Tutorial - How...
✷SOFTWARE✷
•Download Blender•
www.blender.org/download/
✷DETAILED HOTKEY MANUAL✷
download.blender.org/document...
✷MY SOCIALS✷
•Instagram•
/ evepaints
/ gizmoandoz
•Twitter•
/ evepaints_
/ gizmoandoz
✷VIDEO CHAPTERS✷
00:00 - Intro
00:34 - Prepping the Model
1:43- Setting Up the Bones
09:40 - Generating the Rig
10:54 - Possible Issue - Disjoint
12:00 - Possible Issue - Rig Scale
12:46 - Attaching the Model to the Rig
#blender #tutorial #3D #3dmodelling - ภาพยนตร์และแอนิเมชัน


You're the first youtuber to show possible solutions to issues that can occur while following along. You are an excellent teacher.🤩
That's, definitly, turn her in a great profissional!
This is exactly what I wanted to learn after modeling and texturing thank you so much!
That's great to hear, I hope you enjoy the video and find it useful in showing you the next steps!
You explain the steps so well thank u so much! Literally your series is one of the best tutorials I’ve seen so far😌✨
a big thanks to you, so far it has been the best tutorial about rigging a character (for example nobody ever mentioned the elbow and knees bending)
This video is truly a gem! Well explained with lots of detail. Thank you so much for sharing your knowledge with us!! can't wait to see part 2!! i neeeed it for my chibbbi character :)) Hope you have a great day~
you explain things so well and I'm so glad you explained issues you could have and how to fix them. This has helped me so much and really made my day. Thankyou!
I just wanna thank you so much for these videos. It is helping me so much! I can't wait to apply the things i've learned with you on my original characters.
Lovely series. Would love to see a whole world in this style in tutorials. Keep up the great work!
Thank you! I’ll definitely do some more tutorials in a similar style 🙌
I've watched 10 videos on rigging and yours is the best. Especially liked that you said tips for the bone placement (eg. keep bends, heel bone, foot flat) and common problems
you're a lifesaver i cant thank you enough! been watching a lot of rigify tutorials but yours is just full of detail,and the only one most similar to my model's body proportion (no neck 🤣) cant wait to reattempt rigging it after this thanks again!
Really happy to hear my one has been useful for you! None of my characters have necks either haha so I use this method quite a lot. Or you can just skip the neck joint if rigging from scratch. Good luck with rigging! 🙏
I want to thank you for these videos! You are a very good teacher!
How does it feel to have the best rigging and modeling tutorials on blender right now? Legit, I've looked. This IS the best one. I can't wait for part 2!! 🤩
Ah thank you so much, I’m really glad you think so!! I wanted to make these to help people understand the process from start to finish and help make 3D less scary 🙌 Part 2 is in the making now and will be up soon!
Really grateful for your videos, they've been incredibly helpful 🥺
I’m so happy to hear that! Hope you have lots of fun with Blender ✨
Thank you so much for the tutorial
Thanks Eve! Great that you included fixing the issues.
I'm teaching myself blender and this is very helpful! :) Thanks for making these videos.
I have saved this video and the next part as a reference to get back to whenever I need to rig something! Thank you!
Thanks for sharing, Eve! Great rigify breakdown
thanks you, this is really awesome tutorial can't wait for part 2 !!
Thanks! Well done with the video edits and how you illustrated the concepts!
Thank you Eve, great tutorial
clear and effective. earned a new subscriber :)
Loved your tutorial! your explanation! loved your voice! everything! So sweet to learn from you!
Great tutorial! Easy step by step!
Thanks a lot!!!
Thank you very much for this tutorial! You explain everything very good and clear. And the lifehack with a magnet is just game changing!
Yay I'm excited to try this out! Thank you 😌
I hope you have fun!
You are an angel! OMG, thank you! This is subject it most harder for me on 3D!
Hope this is helpful for you! Rigging from scratch can be intimidating but if using Rigify instead, it’s super straightforward 🙌
Thank you for your awesome tutorials, best wishes.
Thank you! My character came alive with this tutorial :)
Tank you so much for this tutorials!
wow i really like your art! keep up the good work
Thanks for maked that video! You helped a lot! I was almost giving up!
Thanks teacher Eve! love your tutorial, eazy to learn!
Glad you think so, happy learning!
Wonderful video, I'm still following along. Very fun!
Great videos! Really helped me refresh and get back into blender
(Your videos are very calm and soothing, and I love your accent but cannot place it for the life of me!)
This tutorial is very useful.
thanks
Thanks so much for doing a rigging vid!!
Very easy to follow and concise. Lovely voice as well.
All I want to say is thank you very much for bring this great tutorial~ After I saw many modling character videos, I was struggling with rotate my character's arms by adjust the mesh...(lol...)
Hi! Thank you so much for your super-very-kindly useful tutorial
omg such a good rigify tutorial! tysm!
Thank youu!
Thank you for saving us so much time
This is really high quality!
Thank you!
A new blender guru
PERFECT!
Thank you for your awesome videos! They are really helpful and well done :)
I'm really glad you think so and find them useful!
omg another perfect tutorial! 😺
Thank you! 😊
Love this tutorial..
I'm just starting out in blender and I follow your tutorials religiously
your voice makes it very easy to follow :>
I'm glad to hear they've been easy to follow, thank you for watching!
THANK YOU VERY MUCH!
Thanks to you I am improving a lot on Blender.
If I can ask you just one thing, it's about the texture paint, can we paint directly on the UV flat in symmetry?
And for the next video it would be great if you could do a tutorial to put the character on Unity :) Thank you for your great work!
i love that model so much ^^
Thank you!
Amazing! Thank you so much! So informative! I've been using Rigify wrong this whole time :/
Great video, and awesome character!!
Thank you!
Thank you!!
thank youuuuuu
great tutorial
thank you so much!
Excellent :)
OMG thank you for showing common issues finally I have a rig...
Awesome tut ✌️
Thank you!
THANK UUUU VERYYYY MUCHHHHHH~~~!!!!
hello, I just subscribe you and I want to tell you that all your tutorials are very helpful to me! Thank you very much!! 🥰
7:34, I see what you did there, lol! thank you for the tutorial
I luvvv this
you are literally the best!!! i just have one question: what about characters with no hands, do you still keep the hand bones, or if you delete them
Thank you for this video, even tho i couldn't complete the first video, i got stuck like twice... You make it seem easy XD
I will try it again, i wish i can succeed this time T_T
Good luck! Let me know if any part in particular isn't clear and I'll try to help.
thank youuuu
Thank yoou!
This is cool
Thank you, didnt bother to google why rig is not matching after generation, but now i know
I already know how to do it, but I still watch this video because I really like this character. I'm waiting for the next characters, if of course they will be.
Ah thank you for watching! I’ll definitely do some more characters like this one in the future 🙌
I made a model using your previous tutorial videos and have just started rigging it. I literally started giggling like a child when it actually somewhat worked
Thank you so much for these tutorials! They really help!
And just for the sake of curiosity, I've been wanting to do something called a "cheat angle" in 2D animation but with a 3D model. The character I'm modeling has hair that has the same silhouette regardless of whether the head is looking forward or to the side, and I was wondering if there was some way of accomplishing that in Blender. Kind of like Mickey's ears in the game Epic Mickey where they slide along his head as the camera is being moved.
Thank you again for the tutorials!
I have already rigged it and animated it. Blender handles weigh painting so well. 💖
That’s awesome! Yes it really does, it’s super straightforward in Blender 🙌
@@EveSculpts I learned so much in the last couple videos that you posted. Thank you 💞 would you be rigging the mouth and eye shapes for this character? Or is it not possible for this character?
Thank you for this! Your videos are amazing 👏
Thank you!!
Very bnuy 👍
Hi, I love the video! I had a quick question, I was wondering if you rig a character like this, can you also keyframe move the face features (simple stuff like just moving the irises and brows around), or do you have to do that in rigify?
Hi, thanks so much! Your voice feels warm and the tutorial es really good. I was wondering..What if I delete one of those two neck bones? It that bad ?
Beautiful. There are other tutorials on this but yours has stuck with me the best. Thank you!
Thank you, I'm glad you think so!
Good video ma'am
Боже до чего ж ты сладкая булочка! Спасибо большое!
Thank you for file hotkey
I think I've fallen in love with you, lol. Great video, thanks.
Thank you so much i always scared from rigging cuz every time is wrong scale , so the solution was one click 💀💀.
any advice on rigging the whiskers and ears so we can pose them as well?
This is amazing and I'm glad I found this, is it possible to teach expressions?
Sure, I'll try to cover that in future videos!
Commenting for the algorithm
Simple enough for me
Aunque este en ingles es mucho mejor que como explica mi profesor, gracias
I'm making some great progress! But I've run into an issue, I'm all rigged up, but when I go into pose mode and move my controls, my rig moves but my model doesn't! I'm pretty sure I parented it all, but I'm not sure what's gone wrong 😅
EDIT: My metarig is connected to my model, but my rig is not connected to the metarig or model?
EDIT 2: If I select the bones and the controls the model moves!
Edit 3: But I'm pretty sure thats just because the bones move the model. My controls don't control the rig T_T
Edit 4: Solved! I deleted my rig, re-generated it and then went into the metarig folder, selected my objects and then shift selected my new rig and ctrl+p parented it with the automatic weights and it worked! No idea what I did before!
I really enjoy creating my favorite characters and moving them. but i am newbie i cant understand it yet. can you suggest me related tutorials on youtube. Or can you make a video showing me how to create 3d characters from 2d character cuts, or chibi stickers,... can you? Is there a way to scan and add them without much use for creating blocks and drawing?
Help me! Thank U, love U somuch!!!
Hello!!
This is an amazyn tutorial a found to learn rigging in Blender, I have a question! hehe
I tried to press Ctrl+P but "With Automatic weights" is not shown :( What could I do?
uh, when I generate rig it assumes the pose of the original armature bones. How can I fix this?
edit: I hadn't applied transforms. Thanks for this beautiful tutorial!
i ended up like disconnecting the heel from the foot is there a way to fix this ?
I am having troubles connecting the rig to the model. the option for setting the parent with automatic weights is not showing up, what do I do?
Do you know how I would make the rig work with a character with a tail? I tried everything and nothing works
Hello you expalin it very well. I tried this on my model but my rig doesn't show any bone icon between the two stick figures on mine, please help I've been struggling on my model so much. Thank you!
Link to part 2 - th-cam.com/video/f3fn6JK0VrY/w-d-xo.html
what to do if mesh moves along with armature but doesnt move with the control rig that i generated with the armature?
Just a question: what do I do with the hands rigging if my character has no fingers (nub hand)?
did you figure this out at all?
@@brycemate lemme check the blender file I think I had figured it out?
I think I just removed the fingers?
Heya, i'm doing my own model following this and the model making tutorial and i got a big problem rn
I'm at the step in 12:46 where you attach the model to the rig, and i'm selecting each part of my model through the list by clicking each one of them with ctrl, but then when i click the rig with shift, it deselects a chunk of the parts and only keeps selected the parts from the rig to the bottom of the part list or the top of the list, any idea what could i be doing wrong?