@@appliancerepairamerican My new pump arrived today and I watched your video a second time to make sure i got it right. Like you, I noticed several screws missing.
@@sfredleo6733 I can not say without being present. standard procedure is to take the front panel off. You will have to judge for yourself by observing the machine
Well I can’t thank you enough for posting this alternate way of doing it. I’m a 71 year old widow and because of your video this only cost me $24. Although I didn’t realize how heavy a washer was, but I persevered and it wasn’t a fast repair, but I did it and I did a diagnostic test and ran a rinse spin and I was so proud of myself when I heard the hum of the drain pump. Also my old pump was also loosey goosey 🤭 Have a blessed day🙏🤍🕊️
This is the best thing on the internet right now. Holy crap. This is my second time replacing the drain pump and the torturous thought of trying to get the door clamp back on is giving me waking nightmares. I thought about the side and underneath, but seeing someone actually doing it give me such calm peace of mind.
Any idea why the water pump some just hums but not pump, other times it pumps. Also.us.it normal for it to cycle every 5 seconds or is that program problem. I can only wash light loads. Currently, had to take out 5 towels. So only wash 5 towels at a time.
Absolutely massive time save. Second time replacing this pump and the first time I took the entire washer apart and it took 8 hours total. This way took 30 minutes. Thank you so incredibly much!
exactly, this content is spot on thx so much for posting. I have not done it yet but have done other work on the washer...and I see a few vids for this where they literally take the entire machine apart (almost) to do the repair...taking the p*** out of DIY'ers I reckon. Cheers
Best lg pump replacement guide on youtube. So easy going through the bottom rather than dismantling the top and entire front panel like in every other guide out there. I really appreciate you taking the time to share this.
I wish all DIY videos were this straight to the point. I always wondered why people would begin tearing the entire washer apart just to reach the pump that's very easily accessible from the bottom. Great video!
THANK YOU. After I called several local companies and ones suggested by LG.. none seemed think it was worth their time to assist me, so I got fed up at my washer being out of service for two weeks, decided to DYI. Found your video, and even though I have never taken apart a machine like this, you made it seem simple. I ordered the part overnight delivery, had a guy friend assist me with the heavy lifting. We had it running within an hour. 🙏🤘
Thanks from Northern CA (and thanks for the quick reply). Big time saver for a part that breaks every two years. I was given multiple estimates from $350-$150 for labor and $100 for the part (bought it for $32 on Amazon). I recommend latex gloves to avoid cuts from the sharp metal inside. The LG model I worked on is an all-in-one washer/dryer but the components are basically the same. I kept the hoses on for convenience and shut off the water to the house. I did it a bit differently- I removed the two screws holding the rubber grommets to the pump/pump housing and was able to twist it to get access to the screws (only two were there) for the pump. Also recommend reading the comments from others as they had helpful tips as well. Take your time, folks, and you'll get it done!
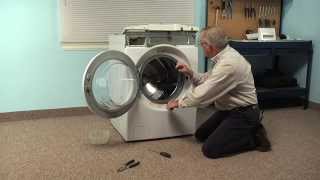
Great video! Major difference in water output after replacement. I managed to tilt the washer and access the drain pump from below. I placed small chairs, against a wall, to hold the back of the washer and braced the feet of the washer to prevent movement while working underneath. One primary challenge was the misaligned screws on the bottom access plate, making them hard to reach through the small rectangular slot. Initially, I considered enlarging this opening by cutting or drilling the bottom plastic grid. However, I realized that by using another screwdriver, I could shift the metal plate (on which the drain pump rested, equipped with rubber grommets for noise reduction) to align the screws with the existing holes. This allowed me to unscrew the two at the bottom and the one behind the front drain access panel. While I did disconnect the main tub drain line, it wasn't entirely necessary. Yet, it did afford me more space to maneuver the drain pump housing out of its slot. Notably, I didn't detach the circ pump or the metal plate holding the pumps. Upon observation, the new and old pumps seemed nearly identical, save for the slightly warped plastic impeller fins on the older one. The distinct difference lay in the feel. The older pump had a consistent resistance when trying to manually rotate the impeller. In contrast, the new one had a magnetic pull on the impeller, resulting in a distinct "thump, thump, thump" sensation as it turned. Post-replacement, I dissected the old pump to pinpoint the problem, finding no issues on the electrical side. The culprit? A compromised inner gasket around the rotating magnet was collecting washer drain residues, behaving like abrasive sandpaper. Over time, this residue seemed to be pushed by the brass key against the impeller's inner plastic hub, leading to wear and tear. This resulted in the impeller merely gliding over the brass key, hindering its rotation. An interesting aspect: The choice of brass against plastic is likely a safety design. This reduces the risk of heat accumulation within the pump's electrical components. If a metal-to-metal design were used, and the pump impeller got jammed due to debris, it might overheat the electrical side. Thus, the use of plastic, which can yield under pressure, is arguably a safer and smarter choice than metal-on-metal within the pump. Summary: Plan to replace again in 4-8 years depending on how often the washer is being used.
This is exactly what happened to mine, the way the pump broke, the screw behind the front plate and everything, I get the new pump tomorrow should be an easy install. My pump housing also has 2 water intake inlets on it as well as another pump on the other side I’m assuming for hot and cold water but you just described exactly what I had to do😂😂.
You deserve a gold medal for this shit. Some guy quoted $500. LG wanted to charge $114 for the part if I use an authorized $500 guy. All other videos tell you take the whole bloody thing apart. I bought the part for $30. It took 1.5 hours cause there were more screws in there than your video. A few which had no clear line for a screwdriver. A little creativity and done. Tip if you come across that issue. Cut a little plastic off the bottom to get one of those inaccessible screws. There's a screw not showing in the video on the front at the bottom of the housing. its jammed behind the metal on the front. I jammed a screwdriver beneath the housing from the front and pushed it up to unscrew it. Again. You saved my ass. If you're in vancouver, holla at me. Beers on a patio somewhere, on me!
Just did the same thing. Was considering removing some of the plastic and sheet metal that some wingnut designer put in the way to make the screws "almost" accessible. So that when this made-to-fail part fails for the fourth time, I'll have an easier time getting to it.
I followed this video step by step to replace the pump on our 9yo LG. Saved me hundreds of dollars and days waiting for technician availability. THANK YOU!!
You're the only one I saw online that did the tilt the washer and access from underneath. Pure genius! That saved me hours of time avoiding full disassembly. So good! Thank you! Amazon same day deliver should be here with the new drain pump shortly.
This video saved me about 200$! A note to the fellow novices out there. There is a second pump to the right(when facing the machine) do yourself a favor and don't take that one off by mistake. Added an additional headache that nobody needs, lol. Also, if the screw at the bottom that was missing is actually there, just drill an access hole through the plastic base to access the screw.
Thanks for posting. I read your post and almost did the same thing since the other pump connected on the other side of the pump housing looks very similar. DIY folks, make sure the pump you are removing looks exactly like the new replacement pump.
Thank you for this video. Simple and straightforward replacement. The original pump lasted 13 years, which I thought was impressive for a family of four.
For the record I am NOT considered handy. My drain pump stopped working Monday. Found your video and ordered replacement pump for 20 on amazon. Put it in and it worked!!!!! Thank you so much!!!!! 🙏
I just read the comment about safety and not being under the machine and potentially getting crushed. Since the weight is highly biased towards the rear and you would be working from the front, the center of gravity is rear aligned. Basically, even if the very worst happened and the front of the machine fell fully upon you, you're not getting crushed, there is just not enough weight on you. Remember that even with the machine resting directly on your skull it is still tilted towards the rear with the weight away from you. This way is the absolute best I've seen and I'm doing the job as soon as the part arrives. This is so much easier and faster than taking the whole front of the machine apart. Huge thanks for taking the time to put this to video and share it. YOU ROCK!
What a time to be alive, vids like these are what TH-cam is truly about. Saved me SO MUCH time and effort, thank you 🙏🏾 I got into a “fun project” from the wife and I’ve replaced damn near everything on this LG washer. I said next time I need to disassemble it, to the scrap heap, but 7mins? Yeah okay I’ll invest that much.. gets to live another day because of you. BUT NEXT TIME 💥😅
THANK YOU THANK YOU THANK YOU. Every other video about this on TH-cam had you disassembling the entire front of the washing machine. It took me less than 30 minutes and that includes disconnecting and reconnecting everything.
Best procedure on TH-cam. Thank you so much. It avoided me to dismantle half of the washer. A quick tip: Since the procedure requires to tilt the washer, I used the "LG Shipping Bolt Assembly" to secure the tub. These bolts were installed when I received the brand new washer.
Your video was perfect for us to understand. We got the pump switched around and I can happily wash all my laundry now!!!! Thank you for your instructions!!!
It worked!!! I highly recommend this method of replacing the drain pump. I have an LG WM2050C washing machine. It wasn’t draining, it was making that growling noise. I checked the filter, it was clean. Watched a few videos and then ordered the part, cost me under $30. I was NOT looking forward to taking the top off, then the door, etc. I had to do all that when the dryer rollers needed to be replaced - not fun. Then I found this video and WOW. My washer and dryer were stacked, so we had to remove the dryer, put it aside, then tilted the washer back. We didn’t have enough room to lay it on it’s back so we let it rest on a bucket that we propped against the wall behind the washer. It then took less than 15 minutes to change the pump! It’s working great, no leaks, we’ve already done four loads of laundry since yesterday 😊. THANK YOU FOR POSTING THIS VIDEO!!
This video perfectly explained the growling sound and OE code if you let it run till it beeps. He advised to install from bottom which worked great if you have someone to help tilt. Really did take only about 20 minutes.
This is the one. I watched over eight different videos in preparation for replacing my drain pump and all of them except this one say to take off the entire front of your washing machine. You don’t have to do that. I fixed the problem in twenty minutes this way and I want to assure anyone else, I am not handy. The washing machine works great now. Thank you.
Thanks so much!! I’ve taken the washer apart before to replace the boot seal and the other videos say to take the front off and it looked like a total pain. I found your video and it saved me so much time and money! Thank you again.
Other videos have the front panel of the machine removed (some models have a small panel at the bottom, mine has one large panel on the entire front) - so, I greatly appreciate you going at this from the bottom and not having to mess with the huge front panel. Most appreciated. Now, to find a drain pump to install.
I like getting parts from partsdr.com. Or at least use them to put your model number in and get the part number. Once you have the correct part number you can shop various suppliers
Thank you for this post. This worked perfectly for me. My washer model is LG WM3370HVA. I ordered part number 4681EA2001T and the washer is now up and running. Two small issues I had were - 1) Dryer is on top as this is a stackable unit. Another TH-camr showed the process of sliding the dryer onto your garbage/recyling bin. With the help of my son this took 5 seconds. Then we just wheeled it to the side and tilted back the washer onto two big buckets to swap out the pumps. 2) Other issue was a screw that was hidden under a metal flange. With some persuasion the pump housing can be slightly shifted to get at the "damn" screw. Thanks for saving me time and money.
Thank you for this!! I take care of 2 mentally and physically challenged adults that live here full time and it’s hard to get time to fix stuff. This video vs the others was by far the best!! I got the washer working in 45 minutes!! Thank you again!!
@@MA-vm6jl You will have to look at the schemes for that model and determine the location of the pump and the most efficient way to access it. Some LG washer you can access buy removing the back panel. Some, like the one in this video, can be accessed from the bottom. They intentionally leave an access hole in the bottom of the machine. If you have to remove the front of the machine it is not difficult, it just takes a bit more time.
Now this is how to make a TH-cam video! I’ve had to replace mine several times through the years, but I was always doing it the hard way. Thank you for showing us a much easier way. I always keep a spare pump on hand because these things are so prone to failing. Your video got me back in business much faster. Thank you again.
Huge time saver to do it this way, now on my second replacement pump. On my model (wm4270hva) there was another front screw to find and remove, and there's definitely some twisting to it but way easier than taking the whole front off. Also might want to point out that you only want one gasket/ring in case the old one is stuck on the housing.
Perfect! Most easy way to change pumps for most of the LG front door machines. Just to add there is one more screw that holds coin catcher that is in the front hidden underneath the front metal plate. Just. Need to wiggle a bit to take it out the pump assembly. Rest was just a breeze to change the pump. The machine is working now.👍
Thanks! A lot easier than the other videos that take the front off. Also, one of the screws in my pump were stripped, so I just rotated it about 22.5 degrees to the next set of screw holes. Wife's been using the machine all morning, so far, so good. Also FYI mine didn't have the screw in the bottom. It had a little clip built into the white plastic base where the screw in the video was. I just pulled down on it with a little screw driver, and the pump slid out, after removing the two screws in the font.
This was very helpful! $25 part from Amazon and in about an hour my husband and I got this changed out and my washer is back up and running! Thank you!
Many thanks for this video! Very clever way of replacing the pump without unmounting the entire washer. I was able to replace my pump easily thanks to you man!
Great video, saved me a ton of time. Not sure how I got so lucky but yours was the first video I watched and it did the trick. Pump went out last night at 10:00 PM. Watched your video. Ordered replacement pump from Amazon delivered overnight for $24. Part arrived at 7:45AM and was installed by 9:30 AM. Less than 12 hours from failure to success! Trickiest part for me was that the screws holding the pump to the frame (not the pump housing) were not aligned well and I had to stretch and pull and twist to get access to them. Finally got it without breaking anything. I put it back together with more of the screws to the front of the housing as there is room for several there to secure the filter housing portion to the front bracket of the frame. It was all snug and will be easier to get to next time which I hope is a long time from now. Thanks again for the excellent video that saved me a bunch of time and money. Wife’s very happy so that’s a huge bonus!
Today, I purchased the needed pump, installed and then did the diagnostic. Fantastic video. It is like i have a new washing machine. Thank you. You helped my household budget.
@@appliancerepairamerican Thank YOU! 🙂. Got it done Thursday night. It's a lot easier to take it apart than put it back together. But, we have a washer again! Happy Holidays to you...
I think I had a slightly different model, this technique was close, but didn’t work exactly as shown On my machine, there were three bolts that connected a chassis between the pump housing and the bottom of the machine. I pulled out those three bolts and the whole chassis and pump housing all came out in one shot. Also, the chassis the pump was on is connected via rubber bushings. So you don’t want to screw that chassis to the case of the machine as it would bypass all the dampening from the rubber bushings. Thanks for video, it got me on the right track.
What an amazing video. Solid content. Great explanations. Great lighting and angles. Clear instructions. Just got this done for only the $40 part I found on Amazon. 20-30 minutes all-in with disconnects, install, some cleaning, and reconnects. 10/10 video. Thank you SO much!!!!!
Excellent all the way… great instruction, lighting, and camera. The best DIY I’ve ever used! I’m not super handy and because of your video it only took about 40 mins and works perfect…. Many thanks, keep it up!!
I wish you would have done every DIY video I’ve suffered through. You have a knack for sharing the right amount of information and you’re as smooth as Barry White. The first pump video I watched wants you to hold the pump while replacing its washing machine. DIY types are taking advantage of the info, including myself, but are not service repair technicians. One and done. Unfortunately you need a Tool Time’s Heidi to launch on YT these days. I’m subscribing to support continued videos. Everyone on here knows it’s not if Shiz will hit the fan; it’s just a matter of when. Great Job!
Our washer was about seven years old when the pump went bad. I was pretty surprised when shopping on Amazon for a new pump there were thousands of reviews across the different sellers. When I got into removing the old pump screws were also missing. Video was great, it guided me well through the process.
Thank you! I had the exact same scenario with the screws missing. The video was informative, save me hundreds of dollars and blew my wife’s mind that I can fix her beloved washer. Thanks again!!
Thanks for a very informative video. Did you simply lean the washer backwards against a wall at about a 45 degree angle to work from underneath? It would be helpful to get more information on that. thanks!
Thank you for subscribing and commenting. Good luck with your washer repair. I am happy that the video was helpful. If you are to lean the machine back make sure to put a support underneath to prevent the machine from falling on you while working on it.
Amazing video! My machine was only slightly different, but this saved me so much time and money. Took me longer than 7 minutes, more like and hour total, but I’m including draining a full tub, unstacking my dryer, and cleanup time. Only snag I ran into happened when I didn’t pay attention to which direction the pump went and which wires went where. But I slowed down your video and found the orientation. Something worth mentioning is that there is a little “N” and “L” on the casing right under the connectors. N for neutral where the black wire connects and L for live for the red/brown. Additionally, there may be different sizes of screws and it’s good to pay attention where each goes.
Thanks to your video, this single gal just replaced the drain pump all by herself! What took you 7 minutes, took me 2 hours, BUT...I also had to unscrew 16 screws on the pedestal, then tilt the machine back on the pedestal, to get to the bottom. So thankful for finding your video AFTER the ones I watched that woulda had me taking apart the whole daggone machine!!! My washer is working perfectly!!! :)
I saw a tech come and do this in 10 minutes. this will be this pumps third replacement and a hell of a lot easier than that full disassembly nonsense. Thank you very much
@@appliancerepairamerican we are getting ready to do this repair. I am glad you mentioned that it is ok to lie the washer on it's back. I was worried about tilting it.
Hello, I have an OE error message even after replacing the water pump. I can hear the pump running but its not pushing the water out. Any suggestion on to what it may be?
Did you replace the drain pump? There could be a clog in the drain hose, or in the hose from the tub to the drain pump, or your drain hose may be too deep inside inside the stand pipe
Totally agree with everyone about finally finding someone who shows how to do this without taking the front and top and electronics off. Thank you so much. Just FYI, on my LG WM9000HVA, there were no screws behind the facade, just like the one in this video. I don't think they were missing, just not used in some models. I also had to drill a hole in the plastic on the bottom to get to the 2 screws holding my pump in place. The little hole you used in your video to get to this screw allowed me to see the screws, but not access them both. Just a heads up for others with the same model as me.
If you take the front off you can access the base plate that the pump is mounted on. it has 4 bolts with 4 rubber vibration pads.. If you remove the bolts you can lift the base plate and unscrew the pump from the bottom without drilling a hole. I have never drilled a hole. If i see that i can’t get at the bottom screw I take the front panel off. I have other videos on my channel demonstrating. Glad the Video helped.
@@daddypdizzle now that I look back on it, I could have got the pump out without drilling the hole. I ended up taking out 4 screws, but only 2 of them were really needed (front and back of where the pump attached to the washer frame). Taking out all 4 of the screws made it easier to maneuver the pump out, but it can be done without removing the 2 side screws. I wish I could explain it better...i wish you the best of luck. I also did this while leaving the washer on top of a sidekick washer unit, so I probably made it all harder on myself than it needed to be. I just wanted to leave as much of it in place as possible.
Tnx man. Literally took me less than 10 min. I spent more time pulling dryer from top and putting machine on jacks to go from bottom. Front 3 screws are easy to take, some models have bottom bolt or like mine a plastic push in tab. If you are confident washer is secured ( jacks or leaning it like in video) its piece of cake.
Replacing the $25 pump was way easier by going through the bottom of the washer. I had to cut a notch in the metal circle (at the 6 o'clock location just below the face of the coin filter) to access the one screw attached to the pump at this location.. There were holes for two more screws at the 10 o'clock and 2 o'clock locations of the coin filter, but those screws were missing just as in this video. There were also two screws through the bottom of the machine attached to the pump. I had to cut away a small portion of the white plastic grid below the machine to access one of those two screws. The other bottom screw, located just an inch and a half away, was easily accessible. This seems a whole lot easier than removing the entire front face of the machine. Thank you!
Mine was as yours was described as far as screws to remove. Difficult. When I put mine back together it leaked. Sitting here now wondering if I give it another try. Hav no idea why it’s leaking g. 😢
Thank you for the informative video. Our LG Tromm has 2 of these. Did not discover until I removed the assembly. Randomly picked 1 side to replace since I ordered only 1 pump. With my luck, I probably replaced the wrong one but with your instructions, learned it is a quick repair if I need to order again to replace the 2nd pump. Thanks again.
Thanks, saved me a few hundred for an hours worth of work, most of which was moving things out of the laundry room to give me access to the bottom of the machine!
Thank you so much for your easy to follow instructions. I ran into one problem. When securing the pump back on I somehow pinched the O ring. You guessed it water everywhere on the first test run. Second time around I lubricated the O ring with silicone put it back together and it ran perfectly. Whew! Thanks for including how to run the diagnostic cycle very helpful!
Such a great tutorial. I was planning to dismantle the whole front but found your tutorial. Mine had only front screws holding the assembly so it was even more simpler and took only 15min. Thanks, saved my Sunday!
Thank you so much for this very helpful video that saved us from taking the top and door off of the washing machine. My model is from 2015 and one of the screws to remove the pump was awkwardly behind the metal plate of the drain clean out assembly. To access this screw I used a drill with a metal bit to enlarge a hole in the metal plate. After that it was easy to remove the old pump and install the new one.
This is my second pump replacement on an LG and it literally took me only minutes compared to my last replacement, thank you for the alternate method. Incidentally, it was a dime that seized the impellers of the pump this time.
Thanks for the best video, your instructions were easy to follow and greatly simplified the task. The pump was successfully changed in less than 20 minutes.
Thanks for this video. Easy out and easy in. This video gave me confidence to do this on my own. Start to finish, it took me 2.5 hours and cost about $30. Much of that time was photographing what I was doing so that I didn't screw things up.
Machine leaks water on the spin cycle, especially with a heavy load. It was suggested I check the water pump and related connections. I was getting ready to remove the front panel (🤦♂️) which is not a fun experience (replaced the front seal in the past). This video made my day! As a note, I just checked my washer and the three screws attaching the motor to the frame are also missing.
You are welcome. LG is not consistent with their screw placements . leak on spin cycle is interesting. you can observe it with the top lid off to try and see the leak. also many of the LG have a removable back panel where you can observe. sometimes i place two 2x4” piece under each side of the legs to get it up 4” off the floor and observe with a mirror underneath during spin cycle. You can also place a piece of dry cardboard underneath and then get an idea of the location by observing where it gets wet. best of luck
Thanks for the very quick response! I did remove the top and rear panels. No water from above nor on the right side. There does appear to be some water on the left side. Washer sits on a LG pull out drawer, with a pan under that. It appears like it’s coming from the water pump area. If we run the washer on tub clean cycle, no water comes out. If we add clothes to wash, it leaks. But the leak is not a lot. Maybe 1/2 to one cup of water. I’m thinking there may be a worn hose. Will also check out the pump. It’s definitely not the hose on top of the tank which has a zip tie holding it in place.
Thank you so much! Mine was also missing the same screws and they were never there. Last time I replaced the pump I tried to add the front screws but it put things in a bind so I left it as is. My LG was slightly different as far as screw placement. I removed the screws shown and it was still tight but by sticking my head up through the bottom I could see the hidden screws. 4 total, two thru the bottom and others on front and back that video does not show. Still doable without tearing the whole thing apart like I did previously. I don't think my pump is bad but a small Phillips bit fell out when I turned the pump over. Not one of mine so I have no idea where it came from but I think it was stuck in the impeller. New part arrives tomorrow so I'll install anyway.
Thank you for this. I’m not very handy so this was still a bit of a project. But I was able to finish in about an hour. Saved a ton of money on a repairman. Thanks!
Excellent video, good camera angles, good narrative and sumple and easy to follow. I just pulled my pump and it is sitting on its back waiting for the new part.
Tilting like thay saved so much time vs all these other videos thay take the whole thing apart. Just installed my new oump and everything is working smoothly! Thank you!
Great video, kudos. My LG had one screw in the front that was essentially inaccessible, I basically had to pry the metal open to get to it to remove the screw holding in the drain pump. It also had 2 that I could access from underneath, however they were not aligned in a way that could be gotten with a screwdriver. I had to basically brute force a drill and apply leverage forcing the pump housing into a more straight position to extract them. It wasn't pretty but this video got me through. They seem to be making them more annoying lol, why have an opening at the bottom and have the screws line up outside the opening.
in this case you may have saved some headaches by removing the front panel. I also have videos showing how to do that. Thank you for sharing your experience
FYI - on my LG there was no bottom screw - pump held in by simple plastic snap fit/detent. Super easy to remove once you take a look and figure it out. Thanks for the excellent video!!!


Thanks!
You are very welcome. Thank you for the tip 😁
@@appliancerepairamerican My new pump arrived today and I watched your video a second time to make sure i got it right. Like you, I noticed several screws missing.
@@brucewilliamsstudio4932 same!
I see the other guys unnecessarily disassembling the entire washing machine. Best LG Washer repair video on youtube hands down!
Thank you, not always unnecessary. on most models i have to take the front panel off. I have otehr videos showing how to do that,
@@appliancerepairamerican Do you happen to know which method works with model wm3570hwa ? I hope it's this one.
@@sfredleo6733 I can not say without being present. standard procedure is to take the front panel off. You will have to judge for yourself by observing the machine
Agreed! Glad I found this one! I was about to have a stroke watching the other videos! LOL!
I ended up taking the front panel off, I could see myself getting frustrated.
I’m so relieved after hours of watching videos. Everyone taking the front assembly off. This tech goes through the bottom 😮. Wow. Greatly appreciated.
you are welcome
Well I can’t thank you enough for posting this alternate way of doing it. I’m a 71 year old widow and because of your video this only cost me $24. Although I didn’t realize how heavy a washer was, but I persevered and it wasn’t a fast repair, but I did it and I did a diagnostic test and ran a rinse spin and I was so proud of myself when I heard the hum of the drain pump. Also my old pump was also loosey goosey 🤭 Have a blessed day🙏🤍🕊️
God bless you
How did you get the pump loose? It seems stuck. I removed the screws
This is the best thing on the internet right now. Holy crap. This is my second time replacing the drain pump and the torturous thought of trying to get the door clamp back on is giving me waking nightmares. I thought about the side and underneath, but seeing someone actually doing it give me such calm peace of mind.
Thank you
Same here... second time found this video. Way easier.
Welp, I’m fixing to do mine….
Any idea why the water pump some just hums but not pump, other times it pumps. Also.us.it normal for it to cycle every 5 seconds or is that program problem. I can only wash light loads. Currently, had to take out 5 towels. So only wash 5 towels at a time.
Yeah me too the pump have giving her last breat and its time to remplace. The pump shake well and dont work
Absolutely massive time save. Second time replacing this pump and the first time I took the entire washer apart and it took 8 hours total. This way took 30 minutes. Thank you so incredibly much!
YOu are very welcome Chris. Thank you for taking the time to comment
exactly, this content is spot on thx so much for posting. I have not done it yet but have done other work on the washer...and I see a few vids for this where they literally take the entire machine apart (almost) to do the repair...taking the p*** out of DIY'ers I reckon. Cheers
Best lg pump replacement guide on youtube. So easy going through the bottom rather than dismantling the top and entire front panel like in every other guide out there.
I really appreciate you taking the time to share this.
Thank you. I appreciate you taking the time to comment
If there is a dryer on top, it's a little difficult. Going to try anyways. Tilt the whole assembly
Our assembly w the coin catch has a screw at the bottom and we are looking for a way to take it out.
I wish all DIY videos were this straight to the point. I always wondered why people would begin tearing the entire washer apart just to reach the pump that's very easily accessible from the bottom. Great video!
Thank you Joseph. I appreciate you taking the time to comment
It is easier to tear the unit apart if you are good with a hand drill
apparently people are scared of a little water on the floor 😂
THANK YOU. After I called several local companies and ones suggested by LG.. none seemed think it was worth their time to assist me, so I got fed up at my washer being out of service for two weeks, decided to DYI. Found your video, and even though I have never taken apart a machine like this, you made it seem simple. I ordered the part overnight delivery, had a guy friend assist me with the heavy lifting. We had it running within an hour. 🙏🤘
You are very welcome. Glad to help. Thank you for taking the time to comment
Best pump replacement video. Based on other videos, I was about to pull the whole machine apart. I am so glad that I ran upon your video.
Thank you for the positive vibes. Im glad i could help
Thanks from Northern CA (and thanks for the quick reply). Big time saver for a part that breaks every two years. I was given multiple estimates from $350-$150 for labor and $100 for the part (bought it for $32 on Amazon). I recommend latex gloves to avoid cuts from the sharp metal inside. The LG model I worked on is an all-in-one washer/dryer but the components are basically the same. I kept the hoses on for convenience and shut off the water to the house. I did it a bit differently- I removed the two screws holding the rubber grommets to the pump/pump housing and was able to twist it to get access to the screws (only two were there) for the pump. Also recommend reading the comments from others as they had helpful tips as well. Take your time, folks, and you'll get it done!
Owen, Thank you so much for the tip $$ . glad to help and thank you for sharing your experience with the community. God bless you
Great video! Major difference in water output after replacement.
I managed to tilt the washer and access the drain pump from below. I placed small chairs, against a wall, to hold the back of the washer and braced the feet of the washer to prevent movement while working underneath.
One primary challenge was the misaligned screws on the bottom access plate, making them hard to reach through the small rectangular slot. Initially, I considered enlarging this opening by cutting or drilling the bottom plastic grid. However, I realized that by using another screwdriver, I could shift the metal plate (on which the drain pump rested, equipped with rubber grommets for noise reduction) to align the screws with the existing holes. This allowed me to unscrew the two at the bottom and the one behind the front drain access panel.
While I did disconnect the main tub drain line, it wasn't entirely necessary. Yet, it did afford me more space to maneuver the drain pump housing out of its slot. Notably, I didn't detach the circ pump or the metal plate holding the pumps.
Upon observation, the new and old pumps seemed nearly identical, save for the slightly warped plastic impeller fins on the older one. The distinct difference lay in the feel. The older pump had a consistent resistance when trying to manually rotate the impeller. In contrast, the new one had a magnetic pull on the impeller, resulting in a distinct "thump, thump, thump" sensation as it turned.
Post-replacement, I dissected the old pump to pinpoint the problem, finding no issues on the electrical side.
The culprit? A compromised inner gasket around the rotating magnet was collecting washer drain residues, behaving like abrasive sandpaper. Over time, this residue seemed to be pushed by the brass key against the impeller's inner plastic hub, leading to wear and tear. This resulted in the impeller merely gliding over the brass key, hindering its rotation.
An interesting aspect: The choice of brass against plastic is likely a safety design. This reduces the risk of heat accumulation within the pump's electrical components. If a metal-to-metal design were used, and the pump impeller got jammed due to debris, it might overheat the electrical side. Thus, the use of plastic, which can yield under pressure, is arguably a safer and smarter choice than metal-on-metal within the pump.
Summary: Plan to replace again in 4-8 years depending on how often the washer is being used.
Wow! Impressive analysis. Thank you for sharing
This is exactly what happened to mine, the way the pump broke, the screw behind the front plate and everything, I get the new pump tomorrow should be an easy install. My pump housing also has 2 water intake inlets on it as well as another pump on the other side I’m assuming for hot and cold water but you just described exactly what I had to do😂😂.
You deserve a gold medal for this shit. Some guy quoted $500. LG wanted to charge $114 for the part if I use an authorized $500 guy. All other videos tell you take the whole bloody thing apart. I bought the part for $30. It took 1.5 hours cause there were more screws in there than your video. A few which had no clear line for a screwdriver. A little creativity and done.
Tip if you come across that issue. Cut a little plastic off the bottom to get one of those inaccessible screws. There's a screw not showing in the video on the front at the bottom of the housing. its jammed behind the metal on the front. I jammed a screwdriver beneath the housing from the front and pushed it up to unscrew it.
Again. You saved my ass. If you're in vancouver, holla at me. Beers on a patio somewhere, on me!
You are welcome. I hope you subscribed 😊
Just did the same thing. Was considering removing some of the plastic and sheet metal that some wingnut designer put in the way to make the screws "almost" accessible. So that when this made-to-fail part fails for the fourth time, I'll have an easier time getting to it.
Um trying to figure out how to remove that same screw. I think they put it there on purpose so you would have to call a tech😮
I followed this video step by step to replace the pump on our 9yo LG. Saved me hundreds of dollars and days waiting for technician availability. THANK YOU!!
Glad it helped
You're the only one I saw online that did the tilt the washer and access from underneath. Pure genius! That saved me hours of time avoiding full disassembly. So good! Thank you! Amazon same day deliver should be here with the new drain pump shortly.
You are welcome!
This video saved me about 200$! A note to the fellow novices out there. There is a second pump to the right(when facing the machine) do yourself a favor and don't take that one off by mistake. Added an additional headache that nobody needs, lol. Also, if the screw at the bottom that was missing is actually there, just drill an access hole through the plastic base to access the screw.
Thanks for posting. I read your post and almost did the same thing since the other pump connected on the other side of the pump housing looks very similar. DIY folks, make sure the pump you are removing looks exactly like the new replacement pump.
Thank you for this video. Simple and straightforward replacement. The original pump lasted 13 years, which I thought was impressive for a family of four.
How did you get off the 3 bolts holding the pump assembly onto the frame doing it this way?
@@nathanflanery2285 Exactly as shown in the video.
7:03 @@nathanflanery2285
For the record I am NOT considered handy. My drain pump stopped working Monday. Found your video and ordered replacement pump for 20 on amazon. Put it in and it worked!!!!! Thank you so much!!!!! 🙏
Glad I could help
Had did you get pump unloose
I just read the comment about safety and not being under the machine and potentially getting crushed. Since the weight is highly biased towards the rear and you would be working from the front, the center of gravity is rear aligned. Basically, even if the very worst happened and the front of the machine fell fully upon you, you're not getting crushed, there is just not enough weight on you. Remember that even with the machine resting directly on your skull it is still tilted towards the rear with the weight away from you. This way is the absolute best I've seen and I'm doing the job as soon as the part arrives. This is so much easier and faster than taking the whole front of the machine apart. Huge thanks for taking the time to put this to video and share it. YOU ROCK!
What a time to be alive, vids like these are what TH-cam is truly about. Saved me SO MUCH time and effort, thank you 🙏🏾 I got into a “fun project” from the wife and I’ve replaced damn near everything on this LG washer. I said next time I need to disassemble it, to the scrap heap, but 7mins? Yeah okay I’ll invest that much.. gets to live another day because of you. BUT NEXT TIME 💥😅
Thank you for the enthusiastic comment
Thank you, your video helped and put me on the right track to fix my parents washing machine. My dad was a bit discouraged but we saved the day!
You are welcome. Thank you for tip 🙏🏼😊
THANK YOU THANK YOU THANK YOU. Every other video about this on TH-cam had you disassembling the entire front of the washing machine. It took me less than 30 minutes and that includes disconnecting and reconnecting everything.
You are welcome!
Thanks! This saved me so much time and so much headache.
you are welcome , thank you for the tip 🙏
Best procedure on TH-cam. Thank you so much. It avoided me to dismantle half of the washer. A quick tip: Since the procedure requires to tilt the washer, I used the "LG Shipping Bolt Assembly" to secure the tub. These bolts were installed when I received the brand new washer.
Thank you so much for the tip. You stand out. I am happy to have helped
Your video was perfect for us to understand. We got the pump switched around and I can happily wash all my laundry now!!!! Thank you for your instructions!!!
you are welcome
Thanks for this! I see other people doing SOOO much extra work to do this simple fix. 15 mins and I had it done.
You're welcome!
Thanks! You make it look easier than it was for me but I couldn't have done it without you!
Glad I could help!
It worked!!! I highly recommend this method of replacing the drain pump. I have an LG WM2050C washing machine. It wasn’t draining, it was making that growling noise. I checked the filter, it was clean. Watched a few videos and then ordered the part, cost me under $30. I was NOT looking forward to taking the top off, then the door, etc. I had to do all that when the dryer rollers needed to be replaced - not fun. Then I found this video and WOW. My washer and dryer were stacked, so we had to remove the dryer, put it aside, then tilted the washer back. We didn’t have enough room to lay it on it’s back so we let it rest on a bucket that we propped against the wall behind the washer. It then took less than 15 minutes to change the pump! It’s working great, no leaks, we’ve already done four loads of laundry since yesterday 😊. THANK YOU FOR POSTING THIS VIDEO!!
I am glad the video helped. Thank you for taking the time to Comment Mike. God bless
This video perfectly explained the growling sound and OE code if you let it run till it beeps. He advised to install from bottom which worked great if you have someone to help tilt. Really did take only about 20 minutes.
This is the one. I watched over eight different videos in preparation for replacing my drain pump and all of them except this one say to take off the entire front of your washing machine. You don’t have to do that. I fixed the problem in twenty minutes this way and I want to assure anyone else, I am not handy. The washing machine works great now. Thank you.
Thanks so much!! I’ve taken the washer apart before to replace the boot seal and the other videos say to take the front off and it looked like a total pain. I found your video and it saved me so much time and money! Thank you again.
You Are welcome
Just leaving a quick review. This guy knows what he’s doing. This was a fairly easy repair save me hundreds of dollars. Thank you so much! God bless!
Thanks 👍
Other videos have the front panel of the machine removed (some models have a small panel at the bottom, mine has one large panel on the entire front) - so, I greatly appreciate you going at this from the bottom and not having to mess with the huge front panel. Most appreciated. Now, to find a drain pump to install.
I like getting parts from partsdr.com. Or at least use them to put your model number in and get the part number. Once you have the correct part number you can shop various suppliers
Thank you for this post. This worked perfectly for me. My washer model is LG WM3370HVA. I ordered part number 4681EA2001T and the washer is now up and running. Two small issues I had were - 1) Dryer is on top as this is a stackable unit. Another TH-camr showed the process of sliding the dryer onto your garbage/recyling bin. With the help of my son this took 5 seconds. Then we just wheeled it to the side and tilted back the washer onto two big buckets to swap out the pumps. 2) Other issue was a screw that was hidden under a metal flange. With some persuasion the pump housing can be slightly shifted to get at the "damn" screw. Thanks for saving me time and money.
You are welcome!
Thank you for this!! I take care of 2 mentally and physically challenged adults that live here full time and it’s hard to get time to fix stuff. This video vs the others was by far the best!! I got the washer working in 45 minutes!! Thank you again!!
Thank you so much. That means a lot to me. God bless you and thank you for caring for others
@@appliancerepairamerican can i access model 41372 like that?
@@MA-vm6jl You will have to look at the schemes for that model and determine the location of the pump and the most efficient way to access it. Some LG washer you can access buy removing the back panel. Some, like the one in this video, can be accessed from the bottom. They intentionally leave an access hole in the bottom of the machine. If you have to remove the front of the machine it is not difficult, it just takes a bit more time.
Now this is how to make a TH-cam video! I’ve had to replace mine several times through the years, but I was always doing it the hard way. Thank you for showing us a much easier way. I always keep a spare pump on hand because these things are so prone to failing. Your video got me back in business much faster. Thank you again.
you are welcome
Took me about an hour which is good for me because I have no skills. Well done.
Thank you
Huge time saver to do it this way, now on my second replacement pump. On my model (wm4270hva) there was another front screw to find and remove, and there's definitely some twisting to it but way easier than taking the whole front off. Also might want to point out that you only want one gasket/ring in case the old one is stuck on the housing.
THAnk you for sharing your experience. and extra Tip$$ 🙏😊
I cannot get that hidden front screw off not even sure how to get to it
@@bansheeyt1105if it’s the one i’m thinking of, use screwdriver to lever the whole pump up and you’ll get to it
did u remove that from the bottom as well? I’m trying to find it but don’t see it
Perfect! Most easy way to change pumps for most of the LG front door machines.
Just to add there is one more screw that holds coin catcher that is in the front hidden underneath the front metal plate. Just. Need to wiggle a bit to take it out the pump assembly. Rest was just a breeze to change the pump.
The machine is working now.👍
Thank you
Thanks! A lot easier than the other videos that take the front off. Also, one of the screws in my pump were stripped, so I just rotated it about 22.5 degrees to the next set of screw holes. Wife's been using the machine all morning, so far, so good. Also FYI mine didn't have the screw in the bottom. It had a little clip built into the white plastic base where the screw in the video was. I just pulled down on it with a little screw driver, and the pump slid out, after removing the two screws in the font.
Thank you so much for the generous tip Mark. Thank you also for contributing your experience to the community with your comment
Man I watched some videos and they want to disassemble everything. Followed your advice and did it in 20 mins. Thanks so much!!!!!!
You are welcome
This was very helpful! $25 part from Amazon and in about an hour my husband and I got this changed out and my washer is back up and running! Thank you!
you are welcome
Many thanks for this video! Very clever way of replacing the pump without unmounting the entire washer. I was able to replace my pump easily thanks to you man!
Thank you for the compliment and taking the time to comment
Great video, saved me a ton of time. Not sure how I got so lucky but yours was the first video I watched and it did the trick. Pump went out last night at 10:00 PM. Watched your video. Ordered replacement pump from Amazon delivered overnight for $24. Part arrived at 7:45AM and was installed by 9:30 AM. Less than 12 hours from failure to success! Trickiest part for me was that the screws holding the pump to the frame (not the pump housing) were not aligned well and I had to stretch and pull and twist to get access to them. Finally got it without breaking anything. I put it back together with more of the screws to the front of the housing as there is room for several there to secure the filter housing portion to the front bracket of the frame. It was all snug and will be easier to get to next time which I hope is a long time from now. Thanks again for the excellent video that saved me a bunch of time and money. Wife’s very happy so that’s a huge bonus!
You are welcome
Today, I purchased the needed pump, installed and then did the diagnostic. Fantastic video. It is like i have a new washing machine. Thank you. You helped my household budget.
You are welcome. If you have not yet subscribed please do.
@@appliancerepairamerican thank you for the reminder. I meant to earlier.
This is, by far, the best video available for this repair. Appreciate it very much!
Thank you
@@appliancerepairamerican Thank YOU! 🙂. Got it done Thursday night. It's a lot easier to take it apart than put it back together. But, we have a washer again! Happy Holidays to you...
@@hmbpnz Happy Holidays to you too 😊
I think I had a slightly different model, this technique was close, but didn’t work exactly as shown
On my machine, there were three bolts that connected a chassis between the pump housing and the bottom of the machine. I pulled out those three bolts and the whole chassis and pump housing all came out in one shot.
Also, the chassis the pump was on is connected via rubber bushings. So you don’t want to screw that chassis to the case of the machine as it would bypass all the dampening from the rubber bushings.
Thanks for video, it got me on the right track.
Thank you for sharing your experience
What an amazing video.
Solid content. Great explanations. Great lighting and angles. Clear instructions.
Just got this done for only the $40 part I found on Amazon. 20-30 minutes all-in with disconnects, install, some cleaning, and reconnects.
10/10 video. Thank you SO much!!!!!
You are welcome
Excellent all the way… great instruction, lighting, and camera. The best DIY I’ve ever used! I’m not super handy and because of your video it only took about 40 mins and works perfect…. Many thanks, keep it up!!
Wow Greg! Thank you so much for the great comment and inspiration. I plan on publishing alot more. Thank you
Same as everyone, so glad that you have posted this video and share such a simple way to change this drain pump. Very clear instructions, thanks!
You are welcome
Thanks for your video!! I knocked out the job in 20 minutes and what took me the must time was pulling the washer out of the area it was in 😊
You are welcome
I wish you would have done every DIY video I’ve suffered through. You have a knack for sharing the right amount of information and you’re as smooth as Barry White. The first pump video I watched wants you to hold the pump while replacing its washing machine. DIY types are taking advantage of the info, including myself, but are not service repair technicians. One and done. Unfortunately you need a Tool Time’s Heidi to launch on YT these days. I’m subscribing to support continued videos. Everyone on here knows it’s not if Shiz will hit the fan; it’s just a matter of when. Great Job!
thank you for the awesome comment and subscribe.
This is absolutely perfect! Getting it from the bottom makes it super easy and fast. Just did it and my washer is working perfectly now!
Our washer was about seven years old when the pump went bad. I was pretty surprised when shopping on Amazon for a new pump there were thousands of reviews across the different sellers. When I got into removing the old pump screws were also missing. Video was great, it guided me well through the process.
Thank you
Thank you! I had the exact same scenario with the screws missing. The video was informative, save me hundreds of dollars and blew my wife’s mind that I can fix her beloved washer. Thanks again!!
You are welcome
Thanks for a very informative video. Did you simply lean the washer backwards against a wall at about a 45 degree angle to work from underneath? It would be helpful to get more information on that.
thanks!
Thank you for subscribing and commenting. Good luck with your washer repair. I am happy that the video was helpful. If you are to lean the machine back make sure to put a support underneath to prevent the machine from falling on you while working on it.
Terrific video!! Maybe not 7 min for me, but an easy 30min job. Thank you!!
the video is 7 min long
Amazing video! My machine was only slightly different, but this saved me so much time and money. Took me longer than 7 minutes, more like and hour total, but I’m including draining a full tub, unstacking my dryer, and cleanup time.
Only snag I ran into happened when I didn’t pay attention to which direction the pump went and which wires went where. But I slowed down your video and found the orientation.
Something worth mentioning is that there is a little “N” and “L” on the casing right under the connectors. N for neutral where the black wire connects and L for live for the red/brown. Additionally, there may be different sizes of screws and it’s good to pay attention where each goes.
you are welcome. thank you for contributing
You are welcome. thank you for contributing
Thank you so much. We put new pump in with few problems Great video!
Best tutorial on TH-cam by simplifying the process! Thank you!
You are welcome, happy to help
Thanks to your video, this single gal just replaced the drain pump all by herself! What took you 7 minutes, took me 2 hours, BUT...I also had to unscrew 16 screws on the pedestal, then tilt the machine back on the pedestal, to get to the bottom. So thankful for finding your video AFTER the ones I watched that woulda had me taking apart the whole daggone machine!!! My washer is working perfectly!!! :)
Congratulations! dont feel so bad ittook me longer than 7 minutes, but the video is 7 minutes long
@@appliancerepairamerican thanks again! :)
I saw a tech come and do this in 10 minutes. this will be this pumps third replacement and a hell of a lot easier than that full disassembly nonsense.
Thank you very much
You are welcome
Best video I found on lg drain pump replacement thank you
You're welcome!
By far the best video I came across. It was way faster and easier. Thank you so much!
Thank you Fernando
What do you brace the machine with when you tilt it back?
@@candycameron6434 I am sorry but i can not advise on that. You should put the machine completely on its back side to remain safe
Finally an easy method! Other videos have you take half the machine apart! This is great.. can't wait to do this way! Thank you!
@@appliancerepairamerican we are getting ready to do this repair. I am glad you mentioned that it is ok to lie the washer on it's back. I was worried about tilting it.
Hello, I have an OE error message even after replacing the water pump. I can hear the pump running but its not pushing the water out. Any suggestion on to what it may be?
yeah pls help
Did you replace the drain pump? There could be a clog in the drain hose, or in the hose from the tub to the drain pump, or your drain hose may be too deep inside inside the stand pipe
Yes there is a clog in the tubing! You can reach it from the back! We just did this
Did it this way instead of the long way. Took it off the pedestal and it wasn't too bad. Thank you brother.
you are welcome
Thank you, thank you, thank you for saving us a few hundred dollars to have our machine serviced. Your video was spot on, quick, and easy to follow.
You are very welcome. Thank you for the compliments
This approach saved me a ton of time! All other methods have you taking the whole front off! Super easy approach. Great video!
Thank you
Super helpful! Appreciate you taking the time. My teenage son and I got it done!
Thank you so much for the tip 🙏🏼 Im glad i could help.
Great video!! This really is the best repair video I have ever seen on TH-cam. Thanks man!!
Wow! DMac, thank you for the outstanding comment. Comments like this give me great confidence to start the day. God bless you and your family
Totally agree with everyone about finally finding someone who shows how to do this without taking the front and top and electronics off. Thank you so much. Just FYI, on my LG WM9000HVA, there were no screws behind the facade, just like the one in this video. I don't think they were missing, just not used in some models. I also had to drill a hole in the plastic on the bottom to get to the 2 screws holding my pump in place. The little hole you used in your video to get to this screw allowed me to see the screws, but not access them both. Just a heads up for others with the same model as me.
If you take the front off you can access the base plate that the pump is mounted on. it has 4 bolts with 4 rubber vibration pads.. If you remove the bolts you can lift the base plate and unscrew the pump from the bottom without drilling a hole. I have never drilled a hole. If i see that i can’t get at the bottom screw I take the front panel off. I have other videos on my channel demonstrating. Glad the Video helped.
I gotta do this tomorrow for the same model wish me luck but I don’t want to drill the hole 😅
@@daddypdizzle now that I look back on it, I could have got the pump out without drilling the hole. I ended up taking out 4 screws, but only 2 of them were really needed (front and back of where the pump attached to the washer frame). Taking out all 4 of the screws made it easier to maneuver the pump out, but it can be done without removing the 2 side screws. I wish I could explain it better...i wish you the best of luck. I also did this while leaving the washer on top of a sidekick washer unit, so I probably made it all harder on myself than it needed to be. I just wanted to leave as much of it in place as possible.
Great video, thank you! My new pump arrives from Amazon tonight, I feel very confident in installing it having watched this. Great work!
you are welcome
Thank you for making this video. I am in South Africa and gosh did this video save me so much money.
You are welcome
Tnx man. Literally took me less than 10 min. I spent more time pulling dryer from top and putting machine on jacks to go from bottom. Front 3 screws are easy to take, some models have bottom bolt or like mine a plastic push in tab. If you are confident washer is secured ( jacks or leaning it like in video) its piece of cake.
Replacing the $25 pump was way easier by going through the bottom of the washer. I had to cut a notch in the metal circle (at the 6 o'clock location just below the face of the coin filter) to access the one screw attached to the pump at this location.. There were holes for two more screws at the 10 o'clock and 2 o'clock locations of the coin filter, but those screws were missing just as in this video. There were also two screws through the bottom of the machine attached to the pump. I had to cut away a small portion of the white plastic grid below the machine to access one of those two screws. The other bottom screw, located just an inch and a half away, was easily accessible. This seems a whole lot easier than removing the entire front face of the machine. Thank you!
Mine was as yours was described as far as screws to remove. Difficult.
When I put mine back together it leaked. Sitting here now wondering if I give it another try. Hav no idea why it’s leaking g. 😢
Thank you for the informative video. Our LG Tromm has 2 of these. Did not discover until I removed the assembly. Randomly picked 1 side to replace since I ordered only 1 pump. With my luck, I probably replaced the wrong one but with your instructions, learned it is a quick repair if I need to order again to replace the 2nd pump. Thanks again.
Replace the pump that is behind the coin trap door
Thanks. That's the 1 I luckily replaced. Seems to work quietly now. Do you know what the other pump is for? Thanks.
This technique worked perfectly. I only spent 30 mins getting it done. Thank you for the video!
You are very welcome Edward. You can leave a tip if you like by pressing the “Thanks” button. Thank you for taking the time to comment 👍
You saved me at least a $100!! It took me about an hour to replace the pump. Thank you very much!
You are welcome. Glad I could help
Beautiful pump replacement for LG, only 7 minutes! 😊 5-stars!
Thanks for the great review!
Thanks, saved me a few hundred for an hours worth of work, most of which was moving things out of the laundry room to give me access to the bottom of the machine!
Glad it helped!
Thank you so much!!!!! I was able to fix my washer all by myself!!!!
Glad I could help!
Thank you so much for your easy to follow instructions. I ran into one problem. When securing the pump back on I somehow pinched the O ring. You guessed it water everywhere on the first test run. Second time around I lubricated the O ring with silicone put it back together and it ran perfectly. Whew! Thanks for including how to run the diagnostic cycle very helpful!
wow, that sounds like an adventure. I am glad I was able to help you. God bless
Such a great tutorial. I was planning to dismantle the whole front but found your tutorial. Mine had only front screws holding the assembly so it was even more simpler and took only 15min. Thanks, saved my Sunday!
You are very welcome. Thank you for the great comment
I've had to take the front off of mine several times. The door seal retainer is a real pain to put back on.
Time and huge money saver. Great DIY tutorial - many thanks to Atlas Appliance Repair.
You are welcome
Thanks for posting this video! Saved me $400!
Glad I could help!
Thank you Atlas Appliance Repair, by far the best video for LG front load Drain pump replacement 💯
Thank you
Great video. Perfect description for an easy fix. Just remember the angle the pump gets screwed on (at an angle, not straight up and down).
Thank you
Thank you so much for this very helpful video that saved us from taking the top and door off of the washing machine. My model is from 2015 and one of the screws to remove the pump was awkwardly behind the metal plate of the drain clean out assembly. To access this screw I used a drill with a metal bit to enlarge a hole in the metal plate. After that it was easy to remove the old pump and install the new one.
You are welcome
This is my second pump replacement on an LG and it literally took me only minutes compared to my last replacement, thank you for the alternate method. Incidentally, it was a dime that seized the impellers of the pump this time.
Thanks for the best video, your instructions were easy to follow and greatly simplified the task. The pump was successfully changed in less than 20 minutes.
You are very welcome
Thanks for this video. Easy out and easy in. This video gave me confidence to do this on my own. Start to finish, it took me 2.5 hours and cost about $30. Much of that time was photographing what I was doing so that I didn't screw things up.
So happy to help
Machine leaks water on the spin cycle, especially with a heavy load. It was suggested I check the water pump and related connections. I was getting ready to remove the front panel (🤦♂️) which is not a fun experience (replaced the front seal in the past). This video made my day!
As a note, I just checked my washer and the three screws attaching the motor to the frame are also missing.
You are welcome. LG is not consistent with their screw placements . leak on spin cycle is interesting. you can observe it with the top lid off to try and see the leak. also many of the LG have a removable back panel where you can observe. sometimes i place two 2x4” piece under each side of the legs to get it up 4” off the floor and observe with a mirror underneath during spin cycle. You can also place a piece of dry cardboard underneath and then get an idea of the location by observing where it gets wet. best of luck
Thanks for the very quick response! I did remove the top and rear panels. No water from above nor on the right side. There does appear to be some water on the left side. Washer sits on a LG pull out drawer, with a pan under that. It appears like it’s coming from the water pump area. If we run the washer on tub clean cycle, no water comes out. If we add clothes to wash, it leaks. But the leak is not a lot. Maybe 1/2 to one cup of water. I’m thinking there may be a worn hose. Will also check out the pump. It’s definitely not the hose on top of the tank which has a zip tie holding it in place.
Thank you so much! Mine was also missing the same screws and they were never there. Last time I replaced the pump I tried to add the front screws but it put things in a bind so I left it as is. My LG was slightly different as far as screw placement. I removed the screws shown and it was still tight but by sticking my head up through the bottom I could see the hidden screws. 4 total, two thru the bottom and others on front and back that video does not show. Still doable without tearing the whole thing apart like I did previously. I don't think my pump is bad but a small Phillips bit fell out when I turned the pump over. Not one of mine so I have no idea where it came from but I think it was stuck in the impeller. New part arrives tomorrow so I'll install anyway.
You are welcome
Thank you for this. I’m not very handy so this was still a bit of a project. But I was able to finish in about an hour. Saved a ton of money on a repairman. Thanks!
You are welcome
Excellent video, good camera angles, good narrative and sumple and easy to follow. I just pulled my pump and it is sitting on its back waiting for the new part.
Thank you for the compliments and taking the time to comment. God bless 😊
Tilting like thay saved so much time vs all these other videos thay take the whole thing apart. Just installed my new oump and everything is working smoothly! Thank you!
you are welcome.
Great video, kudos. My LG had one screw in the front that was essentially inaccessible, I basically had to pry the metal open to get to it to remove the screw holding in the drain pump. It also had 2 that I could access from underneath, however they were not aligned in a way that could be gotten with a screwdriver. I had to basically brute force a drill and apply leverage forcing the pump housing into a more straight position to extract them. It wasn't pretty but this video got me through. They seem to be making them more annoying lol, why have an opening at the bottom and have the screws line up outside the opening.
in this case you may have saved some headaches by removing the front panel. I also have videos showing how to do that. Thank you for sharing your experience
FYI - on my LG there was no bottom screw - pump held in by simple plastic snap fit/detent. Super easy to remove once you take a look and figure it out. Thanks for the excellent video!!!
Yes, some have the release tab on bottom. You are welcome. Enjoy the holidays
I just did this and it works. Very simple, quick and did it in less than half an hour. Thank you
You are welcome
This only took 10 minutes. My ancient washer lives again, thank you!
You're welcome!