Metal Finishing 3 Ways - How I Finished the 4 Facet Drill Grinder

ฝัง
- เผยแพร่เมื่อ 28 เม.ย. 2023
- #shopmadetools #anodizing #powdercoating #metalfinishing
In this episode....
New stickers
Modifying the wheel guard for the grinder
Sandblasting the castings
Powdercoating the castings and sheet parts
Parkerising the steel parts
Anodising the aluminium parts
Check out Acme Machining here www.youtube.com/@acmemachinin...
Check out Bart Harkema Metalworks here / @bartharkemametalworks...
Find the Anodising PH chart here forum.caswellplating.com/foru...
Free downloads for the 4 Facet Drill Grinder here www.dropbox.com/sh/38ahn5tz4q...
You can also download the anodising PH chart as a Word Document, there is a folder of STL, STEP and IGES files for most of the drill grinder parts. - วิทยาศาสตร์และเทคโนโลยี


![[Full Episode] MasterChef Junior Thailand มาสเตอร์เชฟ จูเนียร์ ประเทศไทย Season 3 Episode 5](http://i.ytimg.com/vi/g5wpgeAIzMs/mqdefault.jpg)


I must make a humble apology and admit to a couple of errors in the 2D drawings that I am sharing on my Dropbox folder. There were three parts, the trunnion cam, the trunnion cam bracket and the secondary sector plate which needed to be updated. The trunnion cam was too small in diameter and the cam bracket was incorrectly dimensioned although this part was correct on my finished machine. These changes required a minor tweak in the radius of the secondary sector plate. The errors only became evident when I went to calibrate the trunnion cam and engrave the markings today. However, I have updated the drawings and they are again available for download. If you know of anyone who has already downloaded the drawings, please get them to check for the latest version.
Regards,
Preso
It sounds like your Bin Chickens are like the American Pigeon. Or as a NYC’er calls them, “flying rats” - or so my grandmother called them.
Love the birds. Waiting for our humming birds to come home for the summer.
It seems like every city in the world has pigeons! We have them too but the Ibis are big and powerful birds and they can do a lot of damage in their pursuit of table scraps.
Regards,
Mark
Another great video. I always love the projects you make. Thank You So Much for mentioning my channel. Have a great day, you sure made mine great.
No problems Todd. I hope you pick up some traffic. Meep meep! (That's the roadrunner).
Regards,
Mark
Great video. Many thanks for your time and your efforts to share your knowledge. Sharing the files for free is awesome, and greatly appreciated by most of us in the TH-cam watching community. I look forward to your videos each week. Teachers never really retire. I hope you feel appreciated.
Was wondering if there were actual birds or if you added bird sounds. Interesting. The first bid you showed was beautiful. The second “bin chicken” sounds like our pigeons. Thanks Mark for the video and series.
John, all the bird sounds you hear on the videos are real. Sometimes they can be a bit of a nuisance. The big sulphur crested cockatoos are quite raucous especially if they spot a snake or a goanna (big lizard). They will call in reinforcements and screech incessantly until the reptile moves on.
Regards,
Mark
Fantastic series - Thanks Mark 👍👍😎👍👍
Great looking piece of equipment, the colours really go together well. A few years ago I came across a group of Twitchers (bird watchers) here in Wales, scanning a field with their binoculars. I asked what they were looking at and it turned out to be a Glossy Ibis. A cousin of the bin chicken I guess and a little more attractive. By the way, we do not usually see the Glossy Ibis in UK.
I just checked and we do have glossy ibis in Australia although I have never seen one. They are much prettier than the bin chicken!
Regards,
Mark
Thanks for the video Mark. Also, thanks for featuring my family on your channel too 😂
No problems!
Regards,
Mark
Wow, so much to digest in a single video. Great work, teaching and presentation. Thank you.
I cut foam earplugs in half to plug holes for finishing. Conforms to bores perfectly and is easy to remove. Love your finishing methods!
Oh, it looks like you do the same thing! 16:00
They were some silicone plugs that came with the Eastwood kit. They take the temperature of the oven and you can reuse them. I think they are available on Ebay as well.
Regards,
Mark
What I wouldn't give to have your talent ! Thank you for this.
I love how in the background you can hear the Rainbow Lorikeets having a field day
There are a lot of flowering trees and shrubs which are attracting them at the moment.
Regards,
Mark
It turned out pretty slick mate. Good job.
Beautiful job Preso. I think you should be known as the king of finishing (both kinds of finishing - completing projects, and applying coatings to metal) PS: Great to see the table saw being put to great use like that. 🙂
Thanks Craig. The little bandsaw has it's limitations but it's better than a hacksaw any day.
Regards,
Mark
@@Preso58 no I meant the use the table saw was getting. I think it was being used as a stand for the ultra sonic cleaner or a bucket of water or something 😁
@@CraigsWorkshop Oh, you mean my stand by surface plate/layout table/surface grinder/junk storage area? I once left the glass lid from my crock pot on the cast iron surface and the condensation from whatever I was heating in it left a perfect ellipse of bright orange rust overnight. 😱😱
Regards,
Mark
Thanks, love to see my sticker in the land down under! Thanks for sharing my channel! One day I will build a power hammer ;-). The grinder is a great project! Cheers
Thanks Bart. I am very honoured to have your sticker on my door.
Regards,
Mark
Never seen your videos before but I didn't mind the length. That said, I always watch at 2x speed, so a 20ish minute video is right in the sweet spot for me.
I saw a you tuber test the difference in using simple green versis pine saw as a cleaning agent in a ultrasonic cleaner, the pine saw won and I think it was a cheep knock off brand from dollar general store here in the US. It is worth a test because it is about 1/3 the price of simple green. Good luck in testing for yourself. Also Thanks, I enjoy your content.
Thank you Mark for a very interesting overview of your finishing processes. You have such a “neat” set up. 👏👏👍😀
Well done, Preso 😊. That's one slick lookin" grinder 👍😁👍
Good morning Mark. I enjoy your videos so much. I learn a lot and want to make some of your projects for myself. Being a beginner machinist, some will be challenging for me but will be fun to do.
Thanks for sharing.
My aim is to encourage people to make things and to learn from the experience. Way better than watching soap operas or "Reality" TV in my view!
Regards,
Mark
Absolutely enjoyed the series on this build. The build looks amazing with all the finishing techniques used. I’m surprised that with the teaching qualities you still have that a nearby TAFE or Men’s Shed haven’t requested you to join. By the way, thank you for providing the build plans as it will be greatly appreciated amongst the machining community and myself. Cheers.
I used to be a member of our local woodworking club but like all clubs, the minute you turn up, you get asked to go on a committee, get handed a book of raffle tickets or you get a job. I ended up editing the club newsletter for about two years before I gave it away to do my own thing.
Regards,
Mark
Hi Mark, excellent video and a great tool. Nothing wrong with the length of the video..I was hooked all the way through.
I remember those Ibis birds down at Darling Harbour as you walk through Tumalong Park. They were everywhere as well as the Flying Foxes.
Regards
Kevin
Thanks Kevin. The ibis are just a bunch of scroungers but the flying foxes stink and they make a racket all day and night. Still, they are part of the ecology and they are essential pollinators of native trees and flowers. Gotta learn to live with them or move somewhere else!
Regards,
Mark
Wow! Great! I'll you know the trick of filling the center hole of a bearing with grease and driving a close fitting rod in, to push out the bearing. Thanks always enjoy.
Jerry, I have seen that done but this bearing race was fitted into a recess in a through hole. If you are dealing with a blind hole the grease will push the bearing out.
Regards,
Mark
Now I have a use for my Quorn castings set, you never know😊 thanks for the series, it has been very interesting. Ray.
What a great job. Excellent video series. Thanks.
Excellent work once again. Thank you.
Thanks for the ornithology lesson!
Beware the bin chickens!
Regards,
Mark
Don’t apologise for the long series - it’s been great. One improvement if I may.? 3D print some end caps for the alloy extrusion. Thanks for sharing the file too. Looking forward to your next project whatever it is.
Good idea! Will do.
Regards,
Mark
Gday Preso, the finished machine looks bloody awesome, really nice job mate, cheers
Thanks Matty. Now, to sharpen all my drill bits!
Regards,
Mark
You have done some very nice finishing there Mark. It is good to see the different finishing techniques for the different materials. The machine looks awesome, well done.
Thanks Jon, powder coating is my favourite process. Anodising is still hard. Just when I think I have the workflow figured out I will have some spectacular failures.
Regards,
Mark
Well done Mark , great job beautifully finished.
Absolutely outstanding machine. The powder coat and anodizing just makes the project. Enjoyed the series.
Woahh... Amazing finishes Mark.. The grinder looks very professional !
Fantastic series.
Looks better than Factory.
That is a great video. Thanks for showing how much can be done at home.
Thanks. Most of the processes I can carry out at home are not inherently expensive but you need to store a lot of consumables and basic equipment. Some of the gear, like the power supply and immersion heater I use for anodising and parkerising can also be used for metal plating. Like most workshop activities, it's all about how much space you have. Usually, never enough!
Regards,
Mark
Thanks for the video keep on keeping on.
awesome finish . And as always thanks for the lessons machining, finishing, and nature.
Great looking machine. I use Caswell dyes, blue is my favorite color and it’s the only color that I currently have in my home shop. I would like to get a powder coating kit but it will have to wait a while.
Beautiful work sir.
WOW, great video work, and communication skills. Tool looks great. Thanks for your time.
Thanks for watching!
Regards,
Mark
Very nice machine!!!
Thanks for another amazing video.
G'day Mark, Beautiful results, those finishes look great..as does the wheel guard. Thanks for sharing the process!
Going over to visit those channels...Cheers
ATB....Dean
Thanks Dean. Powder coat is my go to finish for most parts. The range of colours and textures that are available is worth the initial setup costs. Plus, it's quick. No waiting around for paint to harden up.
Regards,
Mark
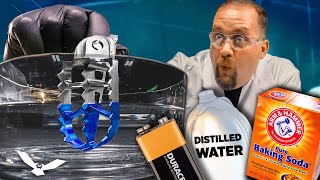
Good Day Mark. Amazing build and I find the finishing very satisfying . Question.....Do you use deionized or distilled water on the final rinse and heated baths for the two processes? I really appreciate your labor and knowledge in sharing these videos!
Mark, I do make up the parkerising bath with distilled water and I also use it for the anodising dyes. However we are on tank water and I have checked the PH and it's dead on 7. We also don't have any chlorine or fluoride in our water so it's OK to use it as rinse water or water for swilling parts. I used to rinse parts with a spray bottle of distilled water (because I saw someone do it on a TH-cam video) but the volume of water is important to remove all traces of cleaners and acids. Anodising is not very forgiving if you carry over cleaners and electrolytes to the dye. I did a part today and got a bit lazy and didn't rinse it thoroughly enough and there were light patches around a fixing hole where the electrolyte was still leaching out. In the trade, they use very large vats of recirculating water called swill tanks. The usually rinse three times starting with the most used water and then the last tank will have the cleanest water.
Regards,
Mark
Great use for the quorn t&c set up . I use for tool post grinder ! Great job as usual
Thanks Mark for a most informative and interesting video
great information on the anodizing process I will be revisiting this video I'm sure
Mark, this has been a great series! One question though: when you use the Simple Green to clean parts, do you use it as a concentrate or do you dilute it a certain amount?
Bob, I do dilute it about 4:1 water to concentrate. It works great and much quicker than scrubbing parts by hand with a toothbrush and Ajax like I used to . You do have to rinse it really well though as the film is quite tenuous.
Regards,
Mark
I think anodizing is a complex mthode, but the finish really pops.
Yes, it's the process that gives me the most grief. I have powdercoats that look almost identical but they don't produce the hard surface that anodising does.
Regards,
Mark
@ 2:32 ABF got the drugs, you only get the stickers.😃😃😁
Nice
Interesting series, thank you as always. One thing that puzzles me is why you disliked the Quorn. I have one which I use to, amongst other things sharpen drill bits. I also disliked it and would use my Kennet cutter grinder which is much simpler to set up instead. Inspired by your video I have revisited the Quorn and I now find it lot easier to use after sharpening about 50 twist drill bits which seemed to develop the required muscle memory. It will be interesting to compare the time to sharpen a bit from scratch on both machines.
I disliked the Quorn because it was difficult to read the angular scales and some of the locks were not really secure enough. I made mine with the split clamp design but later I realised that you could use the split cotter design like George Thomas used on the universal pillar tool. They lock much tighter with much less effort and the brass cotters can be replaced if they wear out. The tilting bracket on my Quorn was always problematic and I think the design was partly to blame. I did use it and managed to sharpen a few milling cutters but I found that without good light it was hard to see what I was doing. Where I had it was in a dark corner of the workshop and I had to move it to a well lit bench each time I wanted to use it. And it was heavy! Still, the workhead design and grinding spindle were excellent. I still have the rest of the machine and maybe one day I will do something about the graduated scales now that I have better ways of doing those things.
Regards,
Mark
I understand what you say. I had similar problems, but was lucky in that I acquired mine part machined and whoever had made the scales had done a fantastic job. Mine used to live under the workbench and it was a pain to get it out and set up. I solved that problem by buildings a high level workbench that I use for all the machines that I need to be close to, the spindle on the Quorn is now at eye level, It made a huge difference.
Excellent video and beautiful workmanship! Thanks Mark! I realise that this is a "rule of thumb guestimate" and purely academic but how much extra life do you feel you've added to the drill grinder with your work?
I guess it's more about aesthetics. I do have an issue with rust on steel parts in my workshop. Mainly due to our humid climate but also because my workshop is not well insulated. The andoised parts are more wear resistant but none of the parts are subject to high wear anyway. In terms of life cycle, it would be the corrosion on the steel parts that would eventually cause something to fail or bind up on this machine.
Regards,
Mark
The real question is...... did the fly anodize? lol Great work Mark that is a great piece of kit!
I am just surprised it hadn't been dissolved by the acid!
Regards,
Mark
Awesome build! I really loved the lime green paint. I was hoping you were going to keep it.
Me too!
I know but powder coat is so much more durable. The green paint is the same colour that I used on my lathe, my drill press, my jeweller's rolls and a few other machines. I wish that I could get the exact same colour in a powder coat as I really like the colour. Evidently, powder coat manufacturers use a RAL standard for colour definition but I don't know what the original paint colour was. I think I just bought a stock industrial paint and have since lost the original label.
Regards,
Mark
@@Preso58 Don't they have color matching where you can send them paint chips?
Dig the birds, young man.
hi Mark , I'm also building a Quorn, I'm glad to see what i can do if it doesn't work, thank you
In the original book by Professor Chaddock, he mentions that the Quorn work head is ideal as a tool post grinder as used in the lathe. I made a tool post the same diameter as the main column and I can fit it in place of my regular lathe toolpost. I think you need to have a reasonable size lathe though to make it work.
Regards,
Mark
I saw a while back there was a push to have the Bin Chicken as the mascot for the Brisbane Olympics All jokes aside, that project looks awesome, and came out very nicely indeed. I must do something about getting some stickers made and send you one 👍
Yes, that was a great joke when the bin chicken was nominated. Up close, they are a bit creepy though.
Regards,
Mark
@@Preso58 They certainly took a few whacks with the Fugly stick at some stage
What a fantastic way to do parts absolutely amazing
Mark I noticed the finish on your box you made and if I may ask how do you get the burn marks off after cutting them with the laser
I know a few bogans too mate
I leave the pins a few millimetres too long and then sand them off after gluing up the carcase. You still get a little burning around the edges of the sockets but it cleans up quite nicely.
Regards,
Mark
21:15 is where the parkerising starts
I have some parts that need powder coated, unfortunately I don't have an oven big enough. Ahh if only....
Pretty birds :)
I have seen some DIY ovens made from filing cabinets, and some people make use of a 900mm wide domestic oven lying on it's side for the extra height. I may one day make a bigger oven but space in my workshop is always at a premium.
Regards,
Mark
@@Preso58 Thanks. I'll look into that.
Do you have an aviary in the workshop Mark? Or is it just the local wildlire?
The grinder is looking really good, here's hoping it works as well.
We are just fortunate that we have a lot of native bushland around our house. My wife is also planting out our one hectare block with thousands of native plants to attract the native birds and small mammals. Just recently we have had a pheasant coucal take up residence in our yard. It's always nice to see new species making their home here.
Regards,
Mark
Cameo by the superior multi-tool, the Gerber MP-600. I've had mine 23 years, through various and sundry adventures and misadventures in all parts of the world, and still it's going strong with daily use. I've not been able to find an example of the other multi-tool brand which can say the same.
Oh! I'd been meaning to mention: I did manage to get the Hurricane engine articles from AME (and even most of a year's subscription) before they shut their doors. Thanks so much for that tip all those years ago!
and one more thing - here on the East Coast of North America, our equivalent nuisance coastal bird is the Herring Gull, just one species that gets lumped into the common term "Seagull". I did recently see a white ibis when I was traveling in Florida last month; they don't have anywhere near the numbers here that they do in your part of the world.
Cheers, and thanks again for all the knowledge.
I do love my Gerber. I wore it to work every day and it was always handy and the kids loved it when I flicked it open.
Mine came with the little pouch of extension screw driver bits. I also take it with me when we travel overseas. I once forgot that I had it in my backpack when I went to board a flight in Paris. The security guy noted that it had a blade and I was given the choice of surrendering it or sending it back home via FedEx. Both options were out of the question so I paid to have another bag checked in and it rode home that way.
Regards,
Mark
When you filed the aluminium sheet at 11.22 it was like finger nails on a chalkboard 😂.
Surprised you didn't use aircraft aluminium rivets to attach it for a neater finish - you can get countersunk ones - compressed or peened over.
Totally off topic Mark but have just begun to melt and pour some aluminium. Watched your core making video recently very interesting. My struggle is making decent green sand. I have tried sand and bentonite in kitty litter ,mixing in cement mixer, grinding kitty litter in blender, wetting clay then adding to sand in mixer, but still cant seem to get it right😅. Couldnt see a video on here fir green sand , any advice it is very frustrating, tia.
For my latest batch of greensand I used 60kg of "play sand" from Bunnings (our local Australian hardware chain). I dried the sand in the sun and then sieved it through a fine kitchen strainer. This removed the bigger grains and some organic matter like small bits of bark and junk. I bought a 20Kg bag of pure bentonite clay from a rural supplier. It is used for sealing leaks in earth dams and also as a feed supplement for horses. I ground up the bentonite in an old kitchen blender until it was the consistency of cornflour. You can google the correct ratio of clay to sand but I think I used about 15% clay. The most important thing is to "mull" the sand/clay mixture. The process of mulling binds the clay to each grain of sand. This happens naturally after using the greensand several times in the mould making process but for a brand new batch of sand you need to grind the sand and the clay together. One way of doing it is to tip the mixture onto a plastic tarpaulin and then fold the tarp over a couple of times and the drive your car over it repeatedly. Rake the sand over a couple of times and then drive the car over it again. Alternatively, you can make a proper sand muller and just process it that way. Just mixing it in a cement mixer doesn't really bind the clay to the sand grains, or at least, it's not as effective as proper mulling.
Having said that, my first attempts at making greensand were sort of successful, even though I did everything wrong. I used beach sand which has a high salt content and it was rather coarse. It is also pure silica sand and doesn't contain any natural binders. I did use the correct bentonite clay though.
Kitty litter has a lot of additives to make it clump and sometimes it has deodorants in it which might affect the quality of your greensand. Ask around if you have any "horsey" friends and they may be able to direct you to a supply of good bentonite.
Regards, Mark
where did you get the scotchbright wheel. Here in Wait Awhile nobody seems to stock them any more
I bought mine on Ebay. I think Aliexpress sells them too. The original Schothbrite wheels from the USA are hideously expensive. There are some no name brands that hold up just as well. Mine is years old and it is still close to 90% of it's original size. www.ebay.com.au/itm/364133529452?hash=item54c80cb76c:g:N8kAAOSwNU5j3fNf&amdata=enc%3AAQAIAAAAwG72piwBCAM6JmmHzLQfmpo8uW%2BUhFYHxPwwYlu%2Farn2HsaxVZLov1DS4hdD5QdOIsEior%2FC2qcszh6%2F8oj%2FvJfuNiYhzULSN3%2Bw5EI11vtVhAC%2FcgQw9FC6%2FaIP7nHqkNn8aKzsmgQwPbo5RGM1eYlC%2Fd65YLYZFV6vrXs7LgPn1wqoMlDJT8vWFFWo%2Fb5ulsabh174%2Fx0Idfb2oAK1MsvhMfQQJWERdQ7F55UfaMV%2FPus34cyA8Nols6GBK5RDpQ%3D%3D%7Ctkp%3ABk9SR9r4vZ_6YQ
Is powder coating such a good idea for steel? I was under the impression it can trap moisture and start corrosion from the inside.
I haven't had any issues with rust under powder coat. If you do the preparation properly and warm the parts prior to adding the powder it seems to be fine.
Regards,
Mark
ABF sticker should go on the door too.
It all seems a bit "big brother" to me.
Regards,
Mark
I had a parcel opened by border force. They didnt tape it up very well.
Im getting quite interested in how would using a pressure cooker affect the parker process... It would allow for higher temperatures without boiling... Im talking about proper high pressure cookers, industry grade, like the autoclave vessels... It would not allow for boiling, as the pressure and boiling point are related, so you could cook the parts at say 120 celsius or more... Im not sure if it would do anything either beneficial or detrimental to the desired result, but if the solution is temperature stable at those points, more heat is practically a guarantee of higher level of reactivity for almost all substances... Hell, heat up steel enough and it starts reacting with oxygen from air, and this being a chemical process akin to oxidation, it surely would be affected somehow by the increase in temp, without boiling, as that would not just evaporate water, but result in bubbles and vapor coverage of parts, which i assume would negatively affect the finish(as in splotchy)...
All the best and warmest regards,
Steuss
I must say that I am don't know a lot about how the parker phosphate process works or how the heat affects the chemistry. I do know that the bath is mainly phosphoric acid and that iron is used as the depositing layer. You can rejuvenate the solution by dissolving steel wool in it. I think the temperature of the bath accelerates the process so I guess if you can heat it under pressure it will be quicker. Most of the parts take on the black surface layer in just a few minutes depending on the type of steel or iron being used. The big round washer reacted the most vigorously and I had a couple of hex headed bolts that were made of a leaded steel that were quite slow to react. It's an interesting process and the biggest benefit for me is the corrosion resistance.
Regards,
Mark
@@Preso58 Yeah, i get it, i am not really considering the heat as an accelerant of the reaction, rather as a catalyst to a stronger reaction, just as hot acid or molten salt will devour anything with ferocity and will etch metals very deeply in a short time, as compared to regular temp. media, so am i thinking that it may result in a deeper layer that will be like rust pitting in a sense, deeper in the surface, yet unlike rust, a stable form that wont have problems chipping off due to thickness... Not only that, but if that is so, one could make a part slightly oversize, a thou, let it cook, develop deep layer of phosphate layer, kinda like case hardening, and then grind/lap that phosphate back to spec dimensions and with lapping, give it a very nice finish, as the surface would be taken down, kinda like a diamond smooths over a grinding stone... Still leaves a rough surface, but much nicer to touch and to the eye... Especially as this surface will still get the oil(lapping will give you the idea of how it will look, as it is an oil lubricated process)... Speaking of which, why dont you ever consider japanning of parts? ``Hand tool rescue`` has a few nice recipes for it, and i find jap. finish to be most durable and easy to work with... Especially with smaller parts... I wanted to coat my whole large lathe with japanning black, but drying that would take immense time(that i could have afforded, as she still is in repairs and not running, so she could have very well been drying even until today... But its a huge machine to japan coat.)...
Kindest regards,
Steuss
What is the chemical formula of the Sodium bisulfate?
What is the concentration you used?
Are there signs of too hogh or too low concentration?
The chemical formula of Sodium bisulfate is NaHSO4. It is often referred to as the half salt of Sulphuric acid. It is a bit like Sulphuric but in a weaker form. I found the information in this article www.observationsblog.com/sciencetechnologyexperiments/anodizing-and-dying-aluminum-without-battery-acid
The mixing concentration is mentioned in the article. I am still running the original bath that I mixed up about 5 years ago and apart from topping up with some demineralised water to account for evaporation it is still clean and clear and it works perfectly. I don't think the concentration is too critical. The water/acid mix is just an electrolyte to allow the current to flow between the work and the cathodes.
Regards,
Mark
Did you use Pablo Escobar white for the powder coating first coat? I saw tat but I wasn't sure it was what I actually needed...lol
They should name a powder coat colour after Pablo! I only recently watched "Narcos". What a story.
Regards,
Mark
did you make your sheet metal rollers?
Yes, many years ago. It is a design by George Thomas. He was a prolific contributor to the Model Engineer magazine and he published the design in that magazine. I just found a PDF of the original article www.nickbaines.me.uk/BendingRolls.pdf
You do need to make or source some small spur gears for the drive but the rest of the machine is fairly easy to make.
Regards,
Mark
@@Preso58 really appreciate the reply. I am leaning towards the path of making my own, as i do not want junk. Will look into it.
Did you tape over your "fricken lazer", what's the story on that ?
John 🇨🇦
I did! It was actually a bit of a nuisance. It is so bright that it's hard to see the line you want to cut to. The saw was originally for cutting wood only and I think that it may have been better on that material. On polished or bright surfaces it's not good. I may end up just fitting a decent LED light instead.
Regards,
Mark
If a white ibis stole my french fries I'd laugh. I guess they're like pigeons are to us in the US.
The café owners don't laugh much when they smash plates and knock over glass ware. They are big powerful birds. Having said that, we were having a barbecue outside one day and a kookaburra flew down and snatched a sausage out of my nephews hand. One minute he had his lunch and the next it was up in a tree!
Regards,
Mark
@@Preso58 I've heard that drunken white ibises (ibie?) are an unruly bunch. Probably the reason they're not allowed in civilized establishments. ;)
AUZZIE TRASH PANDAS FLY!!!
Think the next project needs to be a shotgun...
i bet the bin chickens taste like chicken
Everything tastes like chicken! 😁
Regards,
Mark