6 Ways to Connect 3D Prints!

ฝัง
- เผยแพร่เมื่อ 28 เม.ย. 2024
- 6 Ways to Connect your 3D printed parts together! Let's put them all to the test!
Thanks to @Elegoo Official for Sponsoring today's video ➜
Elegoo Neptune 2s ➜ amzn.to/3Iv5hcV
Elegoo Saturn ➜ geni.us/ABTdtjm
Elegoo Mars 3 ➜ amzn.to/3CQqkTN
Elegoo Mercury X Bundle ➜ shrsl.com/33ha6
Elegoo Neptune 2 ➜ geni.us/2MWuj
Elegoo Mars 2 Pro ➜ geni.us/erkc
Elegoo Mars ➜ geni.us/GGUV82l
Elegoo Wash & Cure Station ➜ geni.us/hgyLGW
Elegoo ABS Like Resin ➜ geni.us/Lb9kl
Elegoo Washable Grey Resin ➜ geni.us/Ufg4
MY PATREON / My Resin 3D Printer Settings ➜ / unclejessy
Make your own Resin 3D Printing Timelapses with Resinlapse ➜
resinlapse.bigcartel.com/prod...
MY ETSY SHOP ➜
www.etsy.com/shop/UncleJessy4...
Plastic Welding Gun ➜
amzn.to/3EGeuhr
Try out 3D Gloop for yourself ➜
10% off your order with code UNCLEJESSY (doesn't work on kits)
www.3dgloop.com/?ref=unclejessy
________________________________________________
Interested in other resin 3D Printers?
Peopoly Phenom ➜
www.matterhackers.com/store/l...
Epax X10 ➜
epax3d.com/products/epax-E10?...
Elegoo Mars ➜ amzn.to/2xvAJVr
Anycubic Mono X ➜ geni.us/dmQqQ
________________________________________________
Some Additional Items you will want to consider for Resin 3D Printing ➜
Full List - www.amazon.com/shop/unclejessy
Disposable Gloves - amzn.to/2Xjaxfo
Plastic Spatula - amzn.to/2Ijrhuy
Metal Spatula - amzn.to/2XgiHoS
Isopropyl (IPA) - amzn.to/2KoTsdY
Pickle Container - amzn.to/2KkWsrH
Funnel - amzn.to/2IjrrCa
Paint Filters - amzn.to/2XcpK1V
________________________________________________
Interested in getting a 3D Printer? Here are some that I use ➜
Ender 3 amzn.to/2GcCECB
CR-10 amzn.to/2Id9o1T
CR-10 S4 amzn.to/2UgWMbL
TinyMachines3D.com
www.tinymachines3d.com/?rfsn=...
________________________________________________
My PATREON ➜ / unclejessy
Buy Me a Coffee ➜ www.buymeacoffee.com/UncleJessy
_______________________________________________
Gear I'm Using ➜ www.amazon.com/shop/unclejessy
________________________________________________
Twitter ➜ / unclejessy4real
Instagram ➜ / unclejessy4real
Facebook ➜ / unclejessy4real
TH-cam ➜ / unclejessy
________________________________________________
Thanks for watching!
TimeStamps
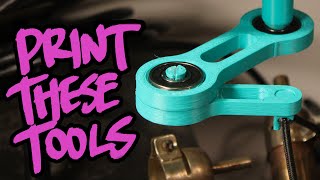
00:00 6 Ways to Connect your 3D Prints
01:02 Super Glue
02:55 UV Resin
04:44 3D Printing Pen
07:11 Wood burner / Soldering Iron
09:00 3D Gloop
11:04 Plastic Welding Gun
14:12 Sponsor
14:53 Best Options
16:10 Wrapup
#3DPrinting #3DPrintingTips #3DWelding - วิทยาศาสตร์และเทคโนโลยี


Soooo what did I miss and what do you prefer using for your projects?
I primarily use PLA for 3D printing along with miscellaneous electronics for robotics.
You didn't include my suggestion about the Lego Technic pins. In essence it's similar to furniture pegs to assemble stuff together.
With the plastic burning gun couldn't you snip the excess of with some of the clippers you get with the printer? Would get closer then those big ones on the kit
5 minute epoxy that I buy from the Dollar Store works really well for gluing pieces together. I always keep well stocked up on it.
You forgot five minute epoxy. I work with ornaments and what I normally would do is drill a whole out and add the wire into those holes and neural / rough the parts with some sand paper so the glue has something to bind to, then use five minute epoxy.
I came from a woodworking background. Joinery such as dovetails, rabbets, dados and biscuits are intended to increase the surface area for the glue. Even a mitre cut increases the gluing surface over a butt joint. Some joints such as dovetails may not even require glue. Physical orientation of the load will also improve the strength of a joint (I'm sure that will inspire some 420 jokes haha). Egypt is full of stone constructions where stone blocks use alternating corner "laps" dramatically improving the integrity of the corners. The end use of each joint should be considered not just from a bonding perspective. There's my 2 bits! Thanks Jessy.
These are all wonderful suggestions. But I can't help but wonder how applicable all the joints would have under certain situations. I'm exploring snap joints to join parts together solely for the mechanical advantage that can be imparted directly into the print.
It is interesting to see how little communication there is between plastic and wood. I love both but see very little of the old knowledge coming over. I also see an awful lot of 3d printed stuff that should just be a piece of scrap wood and a few holes.
When it comes to structural parts, I usually take a page out of the tig welding books: Leave a chamfered edge between two joining pieces (basically a trench for new plastic to sit in), hold a length of filament to it and use a soldering iron to melt the filament into the trench. I could probably get similar results with a 3D pen, but I like the control you get with the soldering iron where you can focus the melting on the printed part moreso than the added filament. And the second tip I guess is to err on the side of too much added plastic, rather than not enough; sanding down a thick weld is worth it if I know I got good penetration into the parts.
I got a rework station instead of just an iron and let me tell you, the rework air gun with a 3D pen works wonders
No need to all of that, I post a reply to what exactly (chemically) melt it and when the two parts or more bonded together they will be way stronger than print itself.
@@agonymobile i'd rather just breathe melted plastic than aerosol plastic and that stuff
Both are bad for lungs,
Resin is even more as well
So for sure dont use it inside. 😉
I bought my first printer based on your recommendations. Saved up for almost 6 months for the *Neptune 2S* and for someone who has never built a printer, seen a printer in real life, and has limited hand movement/strength, it took less than 2 hours with a break till I was printing the chibi-like monk. Test print came out perfectly. After using it for a while I have only needed to level it once after set up due to repeated failures and I realized I just needed to up the temp by 10.
I was worried about building the machine due to the small wires and belts, but it all went together perfectly. I would HIGHLY recommend this printer setup to anyone.
A combination of super glue, E6000, and my 3d pen has never let me down. And I can confirm that a cheap 3D pen is a god sent when your edges warped.
See my reply, its chlor....
My favorite way to weld plastic is friction welding. Just stick a piece of 3mm filament in a Dremel and use it like a stick welder! It's pretty easy to do, doesn't require special tools(besides a rotary tool), and works pretty well, since it mixes the molten plastic of the two parts.
I do this too and sometimes the weld is stronger than the part itself if done correctly. You can also use a smaller collet in the Dremel to use regular 1.75 filament. Medium speed and a flex shaft and you can really precisely stick weld parts just like metal. And because you can use the same material you print with it's simpler than buying multiple special adhesives. Practice and you can get an almost perfect finish, done correctly on corners you even get a bit of a bead that almost makes it look like a metal weld. Just please wear glasses and a mask because you are sending tons of particles in the air during the process. Oh and yes, an electric drill can be set up for this as well.
With the inserts/pegs for extra strength I would have printed them perpendicular to the force that is going to be applied.
So for example instead of printing them standing up so it would split along the layer lines print them flat down so any sideways force from flexing cant split as easily.
As a side note, my experience has been that CA accelerant will make the glue more brittle. I love the stuff for figures to save time but for strength I get better results without it.
See my reply, its more stronger, and also remove surface stress so no more cracks appears after while.
@@agonymobile See my reply, its more stronger, and also remove surface stress so no more cracks appears after While.
You missed the first trick I learned which is friction welding with a Dremel, you just add a small piece of the filament to the Dremel and push gently. There are some videos around here. It works great but it's also a little destructive of the finish like with the wood burner but it does work really well too
I actually first saw this in a Make Magazine several years ago.
I needed this, I just bought a Mono X and am 2 days in after a year with my photon s. Now I will be doing much bigger prints and need ways to attach big models together. Love watching your stuff and I just subscribed.
Harbor Freight's kit is really nice. I use it all the time on ATV fenders and really anything else broken plastic. I use the hot staples too. Got a $25 set off Amazon and the replacement staples are really inexpensive. Also, after you get the staple in as far as you want, twist it just slightly and you can pull it out without waiting for it to cool. Another benefit of that is it wedges itself into the plastic.
With a temperature-controlled wood burner and a variety of tips, you can really get quite precise welds. You can also add material into a weld from the spool or from failed prints that may be sitting around.
Honestly.
Welding Gun + 3D Gloop, probably the best possible solution.
Nice to see 3D Gloop can also be used as a print smoothener.
3D Gloop has "Glue Gloop" that comes in a tube and is a little thicker. It's good for more precise application. Since it's a little thicker is dries *slightly* slower, which is my only issue with 3D Gloop..it's dries a little too quickly. You only have a couple seconds to reposition a part before it starts bonding. Regardless, 3D Gloop has been my go-to for the last few years. You definitely want good ventilation when using it though.
Ventilate ventilate ventilate!! That's not even slightly kidding. It seems a lot of people aren't reading the SDS for that stuff as it contains some basic neurotoxin chemicals. It's some nasty stuff to inhale. Beyond ventilate really it's a good idea to wear a VOC respirator.
@@secretagb are you able to put a print that use’s it on your head? Example; a helmet using it to bond parts.
3D Gloop was a game changer for me… so easy to work with and it works so well!
I know it’s something you can’t control or did on purpose but the fact that only some of your eyelashes are gray on your left eye looks soooo cool makes you look like ethier video game boss that creates robots or the playable hero that would have a mechanical arm looks sick
Haha thanks!! Turning into a super villain 😬🤘
I like using JB Weld SuperWeld - it's a cyanoacrylate adhesive, and forms a great bond between PLA parts very quickly. The only thing I noticed is it can leave a white residue on dark materials, so I started using painter's tape to mask it off and ensure I only get the areas I need to.
IF we use super glue, the gel variant is SO MUCH NICER than the runny variant. Gloop is LIFE!
For the 3D-Pen welding, you should have put (big) chamfers on the seam-edges, so you get a double v-groove. This would increase stability and also, solve the “gung” problem.
I tried "soldering" with the pla and a wood burner, and it actually worked pretty well on a faceplate I was working on.
Just being pedantic here, but I’m pretty sure the word “weld” doesn’t mean what you think it means. Welding is typically a process whereby two or more pieces of material are heated to the point of melting (locally) so the material can intermingle and join the two pieces into a single part. Filler material is often used to add volume and account for any gaps between the two pieces being joined.
Most of the methods described in the first half of this video are forms of glueing. Not welding. Glueing, or adhesively bonding, is a process whereby a third material is introduced between the pieces to be joined, and adheres to the substrate, creating a bond between the parts. The CA glue and UV resin are clearly being used as glues here. The 3D printing pen could theoretically be used to weld parts together if you got enough heat into the substrate material to melt it, but that clearly wasn’t happening, so this is arguably just using it as a hot melt adhesive.
I know it can be silly to get caught up in terminology. And I’m not an engineer, so I can’t claim to be an authority on the subject. But I’m a father of four, who has repaired hundreds of broken plastic toys. I’ve found that selecting the correct bonding method for the job is critical. And understanding exactly how each method works is a key part of selecting the right one. You need to understand the nature of the base material, the nature of the bonding material, and the process requirements (surface prep, geometry, temperature, clamping, cure times, etc). Most important is practice and experience.
So, yeah. Not all forms of bonding should be called welding. There are huge differences between welding, glueing, mechanically fastening, soldering, brazing, etc. and it’s worth getting familiar with them.
The plastic welding gun and curvy staples is how they repair bumpers and body panels on cars. If your part needs a crazy solid, if ugly join is it 100% the way to go, and you also fill in the holes with a 3d printed pen or other filer and sand it down.
I have used the plastic welding kit you have, and it's GREAT!!!! The trick to using the staples, is to clip them with the clippers, and then use a grinding stone on a Dremel to grind them down slightly below the surface. You can then fill in the small void with spot putty.
for the staples, grip them with a pair of pliars and bend them back and forth the upright section snaps off easy and you are left with only what is in the part. nice and clean.
One thing I've seen before that seams like a good idea is using PVC pipes. On a key sword there was a pipe in the handle for a while lot of extra strength
I used a soldering iron and some steel mesh to fix my trucks door handle, works like a charm! Just lay the mesh where you want to weld and push it in with the iron (you can also add plastic if so desired). The finish isn't the most visually pleasing, but it is very strong
I love that you showed off welding with a 3D pen, as that is an option many people often forget, however you really have to work on your welds :P
For long parts you can design in a hole and put a threaded rod in.
it's used in printed firearm design fairly often.
Literally the best Method
I find the compination of friction welding and head welding work realy great
melting a metal mesh into the plastic works really well
This video came out at just the perfect time for me! I just printed a boba fett helmet and I’m plastic welding those parts together
3:31 I am glad I had some shaded glasses handy and put them on when I was watching the video when you used the UV light. Otherwise, the light would have hurt my eyes.
omg i needed to learn this, thank you
In my experience when it's possible, superglued printed threads are a pretty good balance between looks and function
"smooothing staples" is a fun typo that you made and I love it
This video helped a lot, thanks!
great video i needed such info plus the DUNDER MIFFLIN shirt put a smile on my face :D
If you have PLA, I use 3d Gloop and steel dowel pins, and then brush the Gloop over the joins so they weld together
Thanks for the video.👍
I like how you did a strength test on all these
Another great video!! We only need the slightest reason to buy another gadget / tool :) I was looking at the hot staple gun too !! I've used PVC cement previously and found that to be pretty strong 💪
Hey! We know that Gloop! stuff! 🙃 Awesome video! Love all of the methods you explored here. Great stuff! 😊
Can't find this on Amazon, do you have a direct link to the company website?
you can solvent weld pla with weld on 3. less mess than the goop, and is as clean as super glue
I love the wood burning technique! I've used it before, I'll take scrap supports and use them over the part that needs to be bonded and melt it over or fill gaps with melted material, I found the only issue is if you use it around thinner walls, it will warp them, possibly in a way that you didn't intend.
The staple legs should have notches very near the wobbly end, so they should break off very well with a little effort. I have no issues with the staple ends anyway
You could also add tabs and slots to the project. You can do it in any 3d printing app but there is one that is only design to add slots and tabs for combining pieces.
when you use the plastic welder, use high Q flush cutters, and use your rotary tool to grind down the small barbs left sticking up.
OK... I bought some of the gloop and used your discount code. Thanks!
I want to try a mix of 3 for a project I'm working on. Use 3d gloves for the large flat middle, staple the outside and then use the soldering gun like a welder and melt filament into the areas the staples are in to fill it
I think 3DGloop AND the heated stampler for large parts is perfect. Stamps goes on the inside where it wont be seen ofc, like inside a helmet for example. That would create an insane bond to your parts and your layers might be more likely to separate than the weld itself. Small parts like you said wont need much more than superglue. I made a few cosplays in eva foam and found hot glue was a quick way to assemple parts, doing a large flat hot glued area on the inside for support(especially for locking down straps. Actually ripped a strap and not the glued area one time). Smaller parts are harder to break off because of the lack of leverage, so super glue is great in that area.
Edit: Yes, I overbuild my parts. I would never want anything to break while on a con.
try prepping the parts before attempting to weld. if you look at traditional welding techniques it may give you ideas. here's what I got so far;
1. design parts with 45 degree chamfer on edges you intend to weld together
2. Tack weld in a few locations until part holds itself together (using wood burner or the tip of 3d pen)
3. confirm dimensions
4. weld the root with wood burner
5. use 3d pen to weld the rest until its even with parent material. kind like a mig welder
you could also add recesses to either add other 3d printed plastic tabs(kinda like the purple ones you're using) or spots to add the plastic welding staples and then using the pend to add material over top of that.
Thanks for the video Uncle Jessy very informative. I've found Super Glue Brand from Dollar Tree the two packs with the little bottles (with a little sanding to the PLA) to bond much stronger then other brands like Loctite/Gorilla Glue etc...where if I've dropped prints it would break elsewhere before it broke at the super glued seam in most cases.
Hi thanks for the really nice video
yesterday i used the soldering iron method plus drywall fiberglass tape ! Melting the fiber glass in to and around the sim all the way after i have glue the 2 pieces with super glue.
iam gluing parts of a helmet by the way so i used the soldering on the inner side as a support.
Always been happy with super glue, will use a soldering iron for bigger stuff if I have a way to do so that won't destroy the appearance, just starting to experiment with gloop.
The 3D-Gloob Stuff is amazing.
The only thing I have to say is that you printed all parts in one direction.
Maybe if you print the outer parts from button to top and the inner parts from left to right - that should give more strength.
Great job ob the video
Also, ever thought about the wood burner or soldering iron and physically using FILAMENT and "welding" like you're welding metal, but with filament..? I did it, comes out pretty good in terms of the bond for sure. It's kind of a combo between the 3d pen and the wood burner together
If you want to use the 3D pen you could model a "V" shaped groove on the back side and fill it up with the 3D pen from behind. Maybe use a combination of super glue for the seam at the front and 3D pen from the back.
Side tip for using super glue, keep baking soda on hand, and it will INSTANTLY cure it and at the same time make it a bit tougher... Far from indestructible, but a good bit stronger than plain superglue.
Then you can layer it with more glue, then a sprinkling of more baking soda, clean off the excess, and repeat as necessary to build it up as much as you need it.
From there you can sand and file it to shape, also good for filling some gaps and rebuilding a little bit of a broken-off (or missing) piece so long as you keep in mind it's still just super glue.
For Pla I use dicholomethane/ methylene chloride .. it solvent welds the surface and is very thin allowing for capillary suction between parts
Green Stuff (kneadable two part epoxy) and Milliput (similar product, but has a bit of rubbery play when it cures) are both perfect for every PLA joining situation. Though 3D Gloop may be more cost effective in bulk.
CNC kitchen should do a more scientific investigation on this topic
What I do is use a hot glue gun and melt a plastic joint with filament, you can make a smooth joint that way, (kind of like plastic welding) and then I apply super glue to the inside and outside and repeat for the other side of the seam, very strong especially with extra layers of glue and plastic!
Not sure if anyone mentioned this before but there is a way to friction weld pieces using a dremel rotating the filament against the two pieces. It doesn't penetrate much into the pieces but its the same material and if you sand it doesn't look too bad
For me i use a combination of super glue and baking soda, it makes a sort of platicy thing between the two parts and it's pretty strong and sandable.
Cover the staples with the 3d pen using the same filament. Sand down flush. Typically all my jobs can be handled with super glue and some 3D printed joinery on the part so I haven't branched out into other adhesive method. 3D gloop looks like something that would be nice on hand though.
How about Weld-on 3, 4, or 16? It's like paint thinner and will weld the two PLA pieces together. Weld-on #3 is watery and sets in a few seconds, #4 is a little thicker and sets in 30 seconds or so, and #16 is a thick consistency that sets in like 5 minutes.
I honestly thought having those "3d printed biscuits" would actually give some support. my go to for things actually holding is epoxy 😆. For broken prints I'd drill and epoxy dowel in. Can also use wire on tiny parts.
Another idea might be testing some sort of locking connector to 3d print or interlocking parts.
I like using my prime lines with soldering iron i save them an use them as welding rods especially on the outside were the seam will be seen the thin prime lines melt into the seam nicely without a lot of mess
Acrylic # 16 is the best I've found. Its a acrylic based glue.
The tip on the plastic welder is to make the plastic flat again, it will work fine on front facing surfaces.
Thank You for the video. In my current project I can't use "biscuits" as you did in your video. I was planning on using and 2 part epoxy, 3d pen and wood burner to seal my PETG parts before I saw this video. How is the "PET Gloop" better for PETG than the PLA version? How is it different from PVC glue?
you should have tried adding baking soda to the superglue part. Baking soda increases the glue strength of superglue massively. For example powder one side with baking soda and add a bigger amount of superglue on the other side then fuse them together.
neat stuff, kind of stunned that the staple melting tool didn't come with a proper flush cutter, just a run of the mill wire cutter which is NOT flush. Weird choice on their part. Neat video.
This is why I typically print in ABS (ASA in the future) so I can solvent weld with acetone. The gloop is a great product for doing that in other materials, but costs more of course. I will have to get some of that for pla and petg!
You should try friction welding with spare filament in a Dremel.
As a carpenter, I'm confident that you can just bend the end of the staple back and forth and it will break under the surface.
Ive done this in an extreme case i have taken a strand of filament cut it to length and lightly glue it to the two pieces that you at trying to connect, then with something like the flat wood burner go over the filament inside the seam and melt it like your ironing clothes. Similar to the 3d pen and wood burner, but a bit cleaner, because you dont have to move plastic around the area to fill in the seam.
My issue with the uv resin is that the uv isn't going to get on the inside parts, only on the outer edge of the seam. IMO a two part epoxy would be better there, with maybe using the uv resin to fill in seams so it looks like a solid piece instead of 2 parts(like you mentioned).
Today i tested out using resin in a syringe to glue minis to a base :-) this worked really good. no more expensive glue :-)
I think we also need to talk about what might work for resin base printing not just PLA or extrusion based printing
Devcon plastic welder. It's a 2part epoxy and I always use it.
I think when you want to use a 3d pen to "weld" two peaces togetter, you should first make a V groove, just like when you do electrical welding.
I would say that I usually use super glue on sanded parts (super glue works best when the gap it fill is the thinest, sanding reduces the ripples and increases contact surface).
Also I tried all kind of solvents on PLA at my school's chemistry lab, and only two works well with PLA :
di-chloro-Methane (a molecule of methane which two hydrogen are replaced by chlorine)
di-chloro-ethane (his older brother, not one carbon with hydrogen and chlorine, but two carbons linked same as the difference between methanol and ethanol).
The diy youtuber valera perinski, who makes really good videos on his homemade tools, always uses dichloroethane
Gloop, CA, and E6000 depending on the project needs. Also worth noting that CA comes in different viscosities.
I see a lot of people are mentioning epoxy. Epoxy has a much higher tensile strength than super glues. Super glue is good when there's zero gap between components. Epoxy is if you have gaps or want to build up a seam. Ever seen a hammer with a fiberglass handle? It's epoxy holding that handle in there. I've also found JB Weld to work great on many types of plastics. The Quick obviously dries much faster. I've also glued two pieces together using Gorilla Super Glue, which is my normal go-to, and followed up by working a bead of epoxy around the outer seams for extra strength.
3D Goop is the way to go!
Seen auto body guys use the weld gun and thought this would make a great option for combining 3d pieces together
Amazing
Acetone. Acetone will melt the surface of the pla making it sticky. Put on both parts where glueing then join them together. Let dry. The plastic will fuse together as 1 peace. Plz show it off one day. I have told a few ppl and they tried it and liked the out come. U are number 1 in my book for 3d printers. I've watched hours upon hours of ur videos. May have missed a few lol. But I'd like to see the man who got me into 3d printing use a method I recommended. Bro that be cool.
Is that gloop similar to what you use on PVC piping for plumbing? Seeing that brush in the cap totally reminds me of that stuff.
Pretty sure it is a similar principle. The gloop starts to chemically melt the plastic and allows the melted plastic from both parts to mix together before the chemical evaporates off, leaving solid plastic behind.
I think it has less toxic chemicals in it
With decorative pla I like to use a gel superglue. It's cheap,avaliable everywhere and just works. If it needs to handle stress I like to design a joint of some kind of joint in the model and using superglue after.
E6000 works pretty well if you need a flexible joint or in some prints it can actually be removable which is really nice.
I recently printed an square cutouts pattern and literally hammered the pieces together (like in, using an actual hammer). :)
Update: Hi Jessy, they do make Break Away staples that break under the surface. Also that iron attachment is used to weld screen into the plastic (for hole repair) Cheers!
I came to type this! you don't cut the staples you break them! :)
Bummed you didn't try acetone. I've had a lot of luck bonding small PLA parts together with it.
using resin to join is a bit hard because the UV doesn't have much chance to get in between the seam. some slits to pour resin into like stitches might cure and hold better.
What about solvent welding ABS? Acetone works great for that.
For a 3d pen you probably need a bevel on the plastic for it to bond to so it can fill reinforce it better.
hi! i'm planning on joining 2 3D prints which are made of a fluorescent PLA to (try to) make a huge piece of a sword blade, the full print will result in about 160cm, the issue is that i don't want to have the printing "corners" in plain sight since i'd love to have the smoothest glues up blade possible, in some places i can try to hide the joints under some paint since the blade has some embroidery on it, will 3d gloop make a "perfect" join? any advice?
thanks in advance!
link to that UV flashlight? 3:50
U can also use the tip of 3d pen like that soldering iron or wood burner
Damn your prints are smooth from the print bed ... i have a Prusa MK2S (Upgraded to 2.5) and have issues since years ... warping, shifting, stringing, rattling, ... put so many time and money in this machine and saw never a result like your prints in the beginning of the video. I think its time for a new one.