Hide 3D print layer lines with Baby Powder and UV resin

ฝัง
- เผยแพร่เมื่อ 1 พ.ค. 2024
- Showing the simple process of using UV cure resin and baby powder to cover a 3D print to remove layer lines.
I also have a Etsy store with some 3D print files but mostly svg files for lasers.
If that's something you may be interested it check it out
daverigdesign.etsy.com
New video comparing Resin to Resin with Baby Powder added here: • What hides 3D Print La...
Paint mixer: daverigdesign.etsy.com/ca/lis...
If you would like to support my videos or get early access before they go live on TH-cam and files I’m able to share from my builds, check out my Patreon.
/ daverigdesign
Visit my amazon store for a list of products I've used in builds
amzn.to/3vvFOP2
Items used in this build:
6mm plywood:
Amazon.com = amzn.to/44VNuGf
Amazon.ca = amzn.to/3PKp9iv
Resin Used:
Amazon.com = amzn.to/46jWXsc
Amazon.ca = amzn.to/3PsTfFA
Paint used:
Blue:
Amazon.com = amzn.to/3RuUWoL
Amazon.ca = amzn.to/3rifNRB
Metallic Silver:
Amazon.com = amzn.to/3RngHa2
Amazon.ca = amzn.to/48pcbhm
AirBrush:
Amazon.com = amzn.to/3LDQmAQ
Amazon.ca = amzn.to/48xI5s8
UV lights:
Amazon.com = amzn.to/3PuNeIq
Amazon.ca = amzn.to/3PWIo8F
Motor for UV turntable
Amazon.com = amzn.to/3RuHTUk
Amazon.ca = amzn.to/3RyDGPm
Starbond CA glue:
Amazon.com = amzn.to/3EOI1X4
Amazon.ca = amzn.to/3PNMTCj
SandPaper: amzn.to/3uh4W9B
Popsicle sticks: amzn.to/32RjIZp
Clear Coat: amzn.to/3J0vW1h
3D Printable Sanding Block:
daverigdesign.etsy.com/ca/lis...
Music by Epidemic sound: share.epidemicsound.com/kj1acc
Tracks used:
- ManiaMaster
- Someone New (Instrumental)
- The Kill (Instrumental)
- Young Again (Instrumental) - แนวปฏิบัติและการใช้ชีวิต


I am impressed by your dedication to that glove.
the little glove that could
This comment became more and more epic the longer I watched. Bravo.gif
we'va all been there...
When the glove started to rip I was going to replace it, but then though it would be funny to let it progressively deteriorate through the video and see if anyone noticed :)
Hmmm, on the other hand..
Tbh if you put a little time into sanding the print before using the resin, there's no need to use baby powder at all. This is the exact process I use for making pokeballs..print, sand, paint on resin, sand again. It takes no more than a couple thin coats of resin to get the print completely smooth - with no b powder - smooth enough infact to be able to then chrome paint the pokeball to a mirror finish that can resemble electroplating.
ya, normally I would sand the print 1st but wanted to test a worst case. Thickening the resin seemed to make it easier to spread and run less then straight resin. I probably could have stopped after 3 coats but was trying to use up the remaining resin.
What paint brand are you using for that chrome effect and do you have any examples?
I mixed metallic silver paint with the blue to get the effect.
I added amazon links to the paint I used in the description
I’ll add one more thing you can do….use card scrapers or heavy utility blades to scrape the print shaving it. It’s a serious game changer. I use the sand, scrape, resin, repeat and get an incredibly smooth print. One last thing…that resin likes to pool in corners or lines, so have a clean sponge or qtips ready to clear any that collects in the lines and corners.
Scraping could be tough on a curved surface but would be good on flats.
Spot on with it pooling in corners, Qtips is a good idea. Would have worked better then the toothpick I was using.
Great idea. I have used corn starch to thicken resin for filling seams between printed parts but never thought of using it with the 3D resin. For a smoother paint finish try using a guide coat of either black or red primer over the grey. Just a light dusting of the 2nd color, don't need to cover. Any low spots will stay the guide coat color as you sand, and stick out like a sore thumb. High spots will burn through the guide color on the first pass. It is an old body shop trick that has been around for years.
Excellent suggestion. I do this when doing body work or larger projects.
I like to use something high contrast from what I'm working on. Last time I used it on a black car I used neon green, it was what I had near by and stood out extremely well.
Doesn't corn starch make the coating sensitive to moisture?
Wouldn't talcum work better?
It’s encases in resin and then painted so shouldn’t be a issue
You do a very thin coat of the second color immediately after the first color is dry?
@@ImmortalReaverthere are many ways to do "guide coats".
What you use depends on the project, but the most common is to use a grey "high fill, filler" primer (little thicker build than regular primer, and is made to be easy sanding and to be applied thicker) over the whole project, in 2 or 3 heavy coats. Then apply the cheapest flat black paint you can find. Then just mist it all over the project (doesn't have to have complete coverage, just speckled). Let that dry really well, then start sanding (with a block) till all the black specks are gone. If you are sanding to long in one place, but the black speckled aren't being touched, the you have a low spot. If you think that not to low, you might be able to do 2 or 3 more coats of the high fill primer in just that spot. If it's really low, add more resin or bondo or whatever. Then do the high fill primer over that and then the black speckles. Sand it again till all the black speckles are gone. If you didn't burn through all of layers of primer that you layed down, and everything is 1 color, then you can apply your top coat of paint, 2 or 3 coats. If you get good coverage, then add 2 coats of clear coat. Bingo!
Other forms of guide coat is a very fine black powder made by 3m or other companies. It works great too, but is more expensive.
In the 70's we would cover our RC airplanes with silk. We would find unscented baby powder & mix it with butyrate dope (basically a plasticized lacquer) to make a primer sealer that hid the silk weave. Worked great! Talc is often the filler in plastic body filler too.
i need you to have videos of this
The important thing was that I had an onion on my belt, which was the style at the time. They didn't have any white onions, because of the war. The only thing you could get was those big yellow ones...
That one glove by the end 😂 "I'm tired boss."
ya... Once the glove started tearing I was going to replace it but then though I would be funny to just keep in on and let it fall apart and see if anyone notice it deteriorating as the video went on :)
No click bait title - Check.
Straight to the main topic, no drawn out intro - Check.
Badass 80's vaporwave soundtrack - Check.
This video is a certified banger.
Yeah, it's just baby powder and resin. And sanding. and paint. and clear coat. and more sanding and more coat, just for good measure. not click bait at all!
well, after the the 1st 3 coats and sanding you could probably stop there depending on the surface finish you are going for. If it's a matte finish that will be weathered that's all the work needed.
If you want a super smooth high gloss finish, you need to put in the work.
Humanity agrees, but The Algorithm will have none of this!!!
Yeah bro the synthwave hooked me right in for the ride!
I was going to whinge about the soundtrack, but you convinced me otherwise 😊
Just a reminder to everyone regarding safety - use proper mask when dry sanding UV resin👍🏼👍🏼
Was hoping someone would say it. UV resin is not something to take lightly.
👍
But take the mask off as soon as you're done? Wouldn't UV resin particles still be all over your work station unless you're literally in a clean room?
@rylanyoung2018 When working with resin or any craft, even with mask, the room should be well ventilated. Also, just don't remove the mask right away until everything (work table) is cleaned up? That's usually how it works.
@@rylanyoung2018 I strongly recommend you do your “dry” sanding outside, garage or like..
So I did some research: talcum powder is around 26 microns for median particle size. Corn starch is around 2mm. I understand the health concerns around talcum powder, so I thought: what's a similar, but easy to obtain powder that's around that size? Apparently arrowroot powder is around 27 microns, but it's almost twice the cost of cornstarch. I mean cornstarch is cheap, so it's not like break-the-bank more expensive, but it would be interesting to see if a finer particle size would be better or worse.
As for everyone saying "just sand" the point of the video is to smooth a print without sanding. We definitely need fewer microplastics in the world, although I realize a hobby like 3D printing is at odds with that statement. Still, it's a cool solution and I would love to see more like it!
The powder is already pretty fine, don't think going any finer would give noticeable results. Possibly the thicker you make the mix the more it will matter.
I wondered if just getting bulk cornstarch from a baking store would also work, it should, but not sure if it would be as fine or if the cost would be more/less since it is good grade.
The bottle of baby powder was $4 I think, by far the cheapest component in the process :)
I've never tried this, but I'd imagine going smaller may not give much more noticeable results. Seems like its purpose is too thicken the resin a bit so it can hold inside of the gaps you're trying to fill, rather than just pouring out.
Also, corn starch particle size is definitely not 2mm lol. I'd guess its not far off from talcum, but not sure.
Where did you get those numbers from? 2mm would be huge, like a rice grain! According to Wikipedia, corn starch is 2 to 55 microns, so in the same ballpark.
@@GRBtutorials the "mm" was probably a typo. justinlee probably meant 2µm (or micron), and your Wiki search seems to confirm the scale.
Hmmm, industrial-grade diamond powder is available in particular sizes down to 0.1 micron - and it's not as expensive as you might think.
🤔
Hmm… probably not a good idea, regardless. 😅
Interesting, basically the same idea as the filler primer but for deeper fills. I think it would probably work best to alternate sanding and filling going progressively finer grit and thinner coats respectively.
Also for the detail work you want to preserve, I think filling it with some putty would be worth a try. Though then you need to be careful not to encase it in your filler coats
You're not gonna mention how you FINESSED that male/female connection point. That slow-mo hookup had me deadddd. hahaha. Thanks for the video brother, very informative.
Absolutely incredible. I love how many ideas this video gave me. Not only smoothing the surface but also your diy UV curing chamber and the absolute dedication, down to the last bit of the glove. I do the same.
Well done!
That airbrush slowmo was downright ZESTY lol
Excellent work brother, and excellent soundtrack 👌
Thanks, can’t have a 80’s themed soundtrack without a slomo sequence :)
You could probably avoid the detail lines getting filled by prefilling them with latex or some other masking medium prior to painting on the resin.
The issue with that though is avoiding sealing it under the resin when you paint over it
@@SUPERMAR10312 An exacto will cut through resin easily if you're silly enough to cure it before removing it pre UV curing.
@@SUPERMAR10312 you would have to use something that hardens and can be removed before going into the cure chamber
Thanks for the ideas, and a process! So far I've been doing (for years) practicals, where the second or third prototype meets the design goal and gets put into use. But it's a different story for things that are also supposed to be "pretty." More to learn, and you've helped! And thanks for wearing gloves when working with resin!
Thanks. Most of my prints are functional. I only do pretty now and then or I would end up with too many projects cluttering my house. :)
nice work! If you add leveling thinner to your paint, it won't dry as fast, giving it time to level out, and you also won't need to spray as much paint. You'll get a much thinner, more even coat all around with less imperfections.
This is incredible! Definitely going to use these techniques. If you wanted to preserve the detail, you could fill in the grooves with tape, and then apply the primer/paint after taking the tape out
Hahaha, riight! You will spend whole day doing this. That's just not practical.
The surface finish is gorgeous, and best of all, it's dirt cheap and easy, I love it. Not too fond of how it handles details, though, but this is going to make some projects a lot easier.
Turned out great. The "proper" finishing process for clear coating is to coat, sand, coat, sand until happy - and then bring the paint back up with a polishing compound from the sanded state, not apply another layer and letting it sit. Granted, this turned out great but a polishing compound on the sanded-matte clear coat works wonders. Between the final wetsanding and then the polishing compound you get basically zero "orange peel". In fact going over the final result here with some compound and a polisher would probably still make it better.
Great info here. I had not heard about the last step of polishing directly from matte. A lot of the DIY videos were doing a final clear layer, THEN polishing. What you said makes a lot more sense.
Stopped by for 3D tips and tricks
Stayed for the blacklight-rave-spinning-mushroom montages 😁
Seriously, the final results are amazing!
Looks really good. As mentioned in other comments, there are a few different processes that can achieve the same result. The filling method does have limitations when it comes to fine detail such a textures on a figurine for example whete it will smooth out the detail. Best to just go the slow, finer print method in this case.
One other small thing. I like the idea behind the paint shaker but paint needs agitation to mix, not a centrifuge which actually separates the solids from the liquid. Great idea but needs tweak somehow. Keep up the great content!
Because the paint shaker isn't perfectly balanced its not just rotational mixing but also vibration.
I saw the idea on Tested with Adam Savage where he was showing off a similar product you can buy on amazon
th-cam.com/video/sSH1jS9FMcQ/w-d-xo.html
He states right in the video that this would be good for large flat surfaces like helmets.
one that moves as a piston and rotating slowly?
@@emrageI have a sawzall attachment for mixing can spray paint. Super effective.
Can you do a drop test on this from say 4-5ft? Just curious how the resin will hold up in a drop if it'll spider crack on the surface of the print or be relatively durable
Update: New video comparing Resin to Resin with Baby Powder added here: th-cam.com/video/UFRbTg37Td8/w-d-xo.html
Some people asked for still images to get a better look at the surface finish so I put a few image over on the community page
www.youtube.com/@DaveRigDesign/community
I also put some pictures of the red dome from the glazing putty video so you can compare the difference.
To take a look and comment back here :)
Thanks for the straightforward video ! That's great to watch :)
PS : airbrushing with a smartwatch, you sir are confident in your skills I see !
@DaveRigDesign So is the corn starch just a thickener for the resin, so it can be painted on and not run off?
Exactly
@@DaveRigDesign thanks. Makes me wonder what other thickeners would work.
It seems there are products made for this. Glass Microspheres or glass bubbles seems to be a product used to thicken resin in boat building.
Interesting technique. I've used bondo in the past and it turned out great, but I think using resin would be faster and require less sanding. Have to remember this one. Even though I don't have a resin printer, I might have to pick up some resin to try this out. Thanks.
I've got a old, languishing PLA project that this would be a perfect application for. Thank you!
The smoothing process was great to see!
The acrylic ink solution for painting is the icing on the cake. Great not having to deal with enamel and thinner fumes to get that rich metallic finish
The fumes from acrylic spray cans are far worse than enamel
@@janeblogs324 Who said anything about spray cans? Did you watch the video? He's spraying acrylic ink through an airbrush.
What you're talking about is the propellent in what are referred to as 'rattle cans.'
@@WorldWide3133 the propellant isn't a concern, the thinner is. You can thin acrylic with water but decent paint aka automotive acrylic uses petroleum based thinners which are even harsher than acetone
@@janeblogs324 "automotive acrylic," which also is not being used. Have fun out there!
Great video that shows the process perfectly. Thanks for taking the time.
The painting needs a little bit of practice with proper techniques and you'll be set! Some tips I've learned from auto-body pro friends that help prevent runs and get a smoother finish:
-Always start and stop your sprays off on the object
-Never use the "wiggly" method to coat the part
-Move in a straight line with smooth consistent speed (remembering to start and stop each line OFF of the part)
Watch a couple videos on how cars are painted and you'll see what I mean.
I love that this stays close to the original color
The nicest thing about this process is that even tho i don't have the fancy set up that you have i can purchase a 3d print from someone else and add the cornstarch and resin mixture myself after the fact to clean it up
Great vid. Next time try Micro Balloons instead of baby powder. Sands much easier. If you like the color of the plastic, the resin can be sanded and buffed just like car paint. I've been coating my FDM prints for a while now, just to make them water proof.
I had never heard of micro balloons until this post. So cool!
That was very interesting. I have used nail varnish UV cured resin in the past with very nice results (it's way cheaper), but I never thought to add a "bulker" like baby powder. Another thing I will try out at some point. Nice work.
Thanks :)
Holy cow! That's a neat little trick, It came out damn near perfect 👌🏻
Thanks for sharing this technique! I’d love to see how you would modify it for a detailed 28mm figure.
If you're going to be using filler primer and wet sanding and all this post processing anyways, how is this better than just using spot putty on the rough parts to begin with?
Speed mostly, and the speed scales with the surface area you are covering.
I have a video here doing the same thing with putty th-cam.com/video/xxdjFREJpKs/w-d-xo.html
It works well also but takes longer to apply and you have to wait hrs for it to dry between coats.
But putty would be better on smaller areas and around details you want to preserve.
I’ve seen the acetone and bondo method method many times but after it melted my plastic cup I used I was like this isn’t gonna be something I can do consistently or easily lol
This right here! This is amazing! One of the best smoothing print methods I’ve seen! Thank you! Definitely gonna be trying this out thank you! ❤
Ya, not a fan of working with acetone for those reasons. Too aggressive :)
@@DaveRigDesign now I’m looking into building a curing box lol seriously though this is gonna change everything! Super excited about getting super smooth finishes! Would a small Cue-tip be fine when working with smaller projects? I make keychains with my printer and I’ve never been happy with my surface quality
Qtip should be fine. Once you get the resin on the print it will try to level out.
@@DaveRigDesign thanks!
I found someone made up a product which works exactly as what you did here. It's called UV putty, which is a liquid mixed with fine powders that solidifies with a UV torch. It works extremely well for my project, however they do have the downside of being brittle. I currently am using superPP abs-like tough resin and would be glad to try your method to make my own uv putty, and see how resin changes the toughness.
Is there a specific brand of UV putty you can recommend?
Most UV printing resins are also fairly brittle, make sure to get one of the tougher/flexible ones on the market if that's what you're looking for.
On the other hand- a harder (and therefore usually more brittle) surface will be more scratch-resistant and easier to give a high shine polish.
@@joshcarter-com I bought one from taobao and I am not sure if you can access the link. However as the comment mentioned below you, they will be quite brittle.
@@jelteklaswijnja4055 Yep. The one I mentioned was quite brittle, yet the super pp ones are quite strong and flexible, so gonna try to make putty with that
Would have loved to seen it painted directly after a light sanding from the resin application. I know filler paint and wet sanding alone can get to the smooth level shown but really was invested in seeing where the resin alone got us as a community.
Was really hoping this was a brush on and cure solution that would not require sanding. That being said the outcome was nice and I suppose it may have been less sanding than would be needed otherwise. Thanks for sharing.
if it doesn't have any details like the hexagons, you might be able warm up the resin and pour it over. Exposing it after it settles could give you a very smooth finish with no sanding.
That UV box is cool.
Nice! I've tried just raw resin coating but never considered adding a thickener! Will certainly be trying this.
I love it.
The sound track makes me feel like I'm watching an '80s build montage.
Great technique!
For the recessed, relief areas, the hexes could be printed separately and then glued in later to preserve the detail. I understand that this is just a demonstration piece, but the method could be applied to other things.
Just something to add to this method for finer detail that would not be possible otherwise.
Or you could just fill them with latex or some other masking medium prior to painting on the resin & scrape it out after.
@@drakocarrionI had that thought too but then if you cure the resin you will probably seal it in and if you don't cure the resin it's going to be a big mess. It might be possible on some parts and maybe half curing the resin and doing it might work but I think it's going to depend a lot on the details of the peice.
@@MrDuranis A masking material would be visible under the resin, cured or not. You'd just need an exacto to scrape it out with.
I’m too lazy to do this, but that looks amazing!
It is said, that he intends to be buried in many years with that one blue glove. He loved it so very much.
WAT!? Game changer! I love this and wish I'd thought about it before printing some of the stuff I have before painting... but now I know, and knowing is half the battle. THANK YOU!
Thank you for giving me the excuse to never print < 0.2mm again
Nice video, great explanation of the process. Turn the music down, though. It's way too loud compared to your speech.
I just watched this and have to say great idea for filling the layer lines etc, I like that you explained everything you did well in the video as sometimes some people don’t and I find myself with questions but not this time lol
I do have a suggestion for you to help with painting your prints especially dome objects like the in the video and that’s a simple lazy Susan. It really does make spaying domes, tanks and spheres so much easier when you can just spin the item around smoothly, I find holding some round objects annoying when trying to lay paint smooth
I feel refreshed and relaxed after watching this! I love the finish!
We need that _TOTALY TUBULAR 80s SOUNDTRACK!_
fr
I understand that you wanted a rough surface to see how this works and I thank you for sharing the steps you used. So many haters, it’s crazy. You sure got a wonderful surface when you finished.
If I hadn't watched the whole process, I would swear that was made with polyurethane like a bowling ball. Great work!
great to see this is still going around i suggested this idea over fare few years ago on my facebook groups to fdm users its a great way to use up the last of the uv resin from bottles and gives you loads of working time then cure. i was very disappointed with the 2 part xtc resin for smoothing prints as it always started to cure before you finished and found that using printer resin was a way better option though i never used baby powder great video. wish i had done one back in the day just though back then that everyone else would have thought of the same idea :)
Thanks for sharing that technique! I'd definitely suggest a respirator for this.
Yup, if your in a confined space or doing a big project should defiantly wear a respirator.
Thank you for recommending.
@@DaveRigDesignI too defiantly wear respirators 🫂
Try fumed silica instead of talc, it's an excellent epoxy thickener. You should be careful to use a respirator when working with it, but the same goes for talc.
He said it was corn starch at the beginning, also visible on the bottle. Although I was under the impression that baby powder was always just talc.
Ah, ok. In that case, definite benefit not having to worry about it.
@@halkihaxx5 Baby powder has a small amount of talc. If you want pure talc, you can get the powder pool players use. I use it as a release powder for sand casting.
Thank you so much for this. What a great solution. I use baby powder and paint for stcco and frosting in miniature, but would have never thought to use it in resin.
I've seen something similar where instead of baby powder and resin, they used acetone and wood filler. Obviously, acetone isn't good for all materials, but on PLA it had the same effect. Since I haven't ventured into resin printing and don't have a UV cure setup, I'll stick my crude finishing methods. Excellent video, BTW.
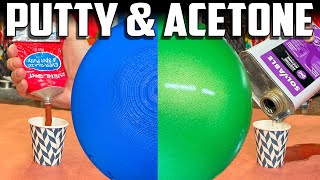
Thanks. I just posted a video about using acetone and glazing putty
th-cam.com/video/CZsUXY_Qxwo/w-d-xo.html
Might want to be careful with the first from the resin. I'm sure some types are bad if inhaled. Wet sanding should minimise the risk from the dust.
If the resin is fully cured its not more harmfuld than wooddust isnt it?
@@soacker25 not sure how bad wood dust is, but resin dust isn't good in the lungs.
No dust is “good” for your lungs, but the dust kicked into the air had sanding is negligible unless you throw it around and resin is inert once cured. If you want bad try cutting MDF on a table saw :)
You can bring the clearcoat to a smooth mirror finish by wet sanding and then using polishing wax (like turtle wax) and a sponge/power drill adapter. The drill makes the polishing super efficient and the sponge would conform to the sphere nicely.
Yup, I did think about that but I didn’t want to take it that far and they video wasn’t really about finishing the paint.
It would have been super shiny though :)
It makes sense that a technique that I have used countless times in my career in aviation for structural repair finishing would have made its way into the 3d printing space. The materials are very similar in use but obviously distinctly different in nature of strength and resilience. We would use Hysol 9396 and microscopic glass beads to achieve a perfectly smooth finish on some repairs or to fill small non-structural dents and holes. Granted, that stuff is WAY more hazardous to your health. Microscopic glass beads are NOT your friend and fly through the air like talcum powder. I was always so conscious of it even when wearing a shop aron, gloves, and respirator.
Thanks for sharing , looks incredible results.
Thanks, glad you liked the video. 🙏
Reminder: Epoxy resin is toxic and allergenic. ALWAYS use gloves when handling it, on both hands. A prime example of why would be in this video when mixing it (without gloves) and some of the resin spilled. Cool result though.
yup, you don't want to get it on yourself, it can be messy.
I've heard both arguments though. Wear gloves so you don't contact it, but then you can get it on your hands and not realize it and spread it around, or don't wear gloves and you know as soon as you contact it and you can wash it off.
I work with food where gloves are optional due to the fact you can touch something and not realize it with gloves on. I work the same way with resin. Large amounts of resin gloves are required. Smaller amounts of resin. Gloves if I wanna or just ensure I wash my hands afterwards.
right, some common sense also needs to be applied. If you work with resin in large volumes every day you should take all the necessary precautions. If you use it once and are careful not to slop it everywhere you will be fine. Amount of exposure needs to be factored in
This can't be stated enough, ESPECIALLY in the 3D printing community!
It baffles me how people are so casual about it. That is, it is understandable in a way though... it is simple lack of knowledge and the sheer amount of BAD examples on TH-cam, even from reputable channels!!
Out of the hundreds of videos I've seen about working with resin, 3D printing related, only a tiny handful state the health dangers and proper protection every time.
In all other videos it is 'free for all' (because they just copy what the see on other channels).
And then you get people like that one comment above who suggest airbrushing resin... I mean.... WTF!
Common sense isn't common.
Or just print it in ABS with an adaptive layer height followed by acetone vapor polish for a few mins. Done right, no resolution lost, while getting a glossy finish, that also strengthens the layer adhesion. No worries of UV degradation(UV resin degrades over time) either. Much cheaper than UV resin. Just some 💭
Could, but if you are printing big you need a big heated chamber to print ABS reliably. Also once painted Resin degradation isn't a issue as its protected. PLA is the much easier option to use. Vapor smoothing get more difficult the bigger the print also.
This process is definitely better for large scale prints and less optimal for small scale things.
I don't think I would try it of anything smaller than the print I tested with.
@@DaveRigDesign Yes, you are spot on. Printing ABS without a heated chamber is tough, but with printers like Qidi X Max3, should not be an issue. Also the Acetone chamber needs to be custom designed(simple paper towel dip will not work well, apart from taking too much time). For smaller parts, Sanding or Sand blasting, followed by UV resin coat(clear 2 part epoxy? might work as well), is the way to go, except for the effort involved.
Any tips on ABS vapor smoothing chamber design?
I haven't tried it as I don't do much work with ABS, but it seems @aware2action may have some suggestions :)
@@jonathandavis3754 All you need to know is the boiling point of Acetone. Ensure the vessel is made of conductive material and temperature controlled precisely. Have the lid to be isolated from the vessel, but have a lot of specific heat capacity, so that it keeps cooling vapor to maintain concentration. Also have some risers not to let part float in Acetone. Dose a tiny amount few ml, time it, tune accordingly. The idea is to build enough concentration, but not too much, otherwise too much softening and loss of detail. Duration is also critical. Making a recyclable chamber is possible, but advanced. Also use PPE while using the setup, and no open flame or sparks in the vicinity. Better be safe than sorry. That said, it should be fairly easy to modify some off the shelf cookware to achieve the results😉, if not dealing with large objects.
Thanks for sharing. I will definitely adopt this into my workflow!
I like that uv curing oven, I have been playing around with uv resin and made my own oven out of an opaque box some foil and a 40 watt uv light.
I think you can avoid all that sanding at the end if the print is sanded a bit before adding the resin.
After priming the amount of sanding depends on the paint finish you want.
If you are using a matte finish you don't need to same as much or after sanding the 1st primer coat.
But if you want a high gloss mirror finish it is required. I didn't even take it far enough as you can see the orange peeling in the clear coat still. More wet sanding and clear coats then buffing after the final sanding is needed for a smooth mirror finish
After having sanded PLA as well as sanding resin... I can confidently say sanding PLA is ass. I'll never so so again if I can avoid it.🥴
Your airbrush technique needs refining.
You should start spraying away from the piece and at steady speed sweep across the piece.
Starting the spray directly on the piece risks throwing globs of paint on the initial burst.
To get better lacker finishes its worth doing a mist coat wait a moment until tacky and then applying a wet coat. The mist coat will provide something for the wet coat to adhere and will assist in avoiding runs. Keep the wet cut fairly thin, again wait briefly and apply a second. Done right you wont need any sanding.
I got a similar smoothnes, but by using fewer steps.
Using SPACKLE, pressing it into layer lines, and gently rubbing off excess, then lightly sanding once fully dry.
I then use a matte spray coating, matte acrylic paint, and finally finish it off with whatever clear coating finish I like.
Usually using Watco satin or glass based on the objects desired finish.
So to recap
1) Spackle
2) while spackle is drying, gently rub it
3) once spackle is dry gently sand it
4) paint with a matt paint until fully covered (usually 2-3 coats is enough)
5) Spray finish and you're done.
man I don't care about 3d printing but that was an absolute joy to watch, great job!
Thank you very much :)
Interesting video, but 457% too much music. Thanks for posting this!
Hell yeah dude! love the UV curing chamber. looks like you made the whole thing.
Thanks, Ya made it a while back. Top is just foam core with a tin foil lining. Base is simple wood box and motor to turn the platform. Then UV LED light strips
Wow. Thanks for the tips! The post looks amazing.
I appreciate you showing it at multiple angles at every step
filming is the hardest part of the process :)
This music makes literally watching paint dry epic.
Nice result! I particularly enjoyed the progression of your blue glove falling apart 😂
This looks awesome, I’m excited to try it out!
If I'd have known of this technique while printing some cosplay items off... I WOULD ABSOLUTELY HAVE USED THIS!!!
So many hours of sanding, correcting and lacquering coulda been saved!!!
I did this to a rough little rock I found and it is super smooth and glossy now! 😁
That print sure got a lot of love, great job!
Thanks, the more love it gets the shinier it is :)
I don’t use 3d printers. Never will need this. Loved every minute.
A lot of steps but the result is undeniably great!
Fantastic idea! Has anyone else pointed out that Bondo itself is basically 2-part epoxy thickened with talc?
Never heard of corn starch as baby powder, it is always powdered talc where I am. Would it work just the same?
Great tutorial! Very smooth surface!
Ok the sax solo with the airbrush was a sick choice!
Love the 80's BG music, kepet my heart pumping throughout
🤟
Its so well made i get the urge to munch into it
Once we have the best solution to recycle plastic waste in prints and redo filament for not too expensive, this method and final paint sounds like such a great solution to reuse waste!
That UV light curing shot goes well with the music. :D
I was thinking of making a helmet at one point but wasn’t sure how to hide those 3D print lines. Glad I found this.
I’m working on a helmet for my next video so tune in if you want to see how it turns out :)
With all of the time it takes to post process this it just makes more sense to print at a higher resolution to minimize the layer lines and not have to do nearly as much post processing.
Ya, most people think that cuz they are just looking at the dome test object.
What happened when you print a helmet or other large cosplay pieces where decreasing the layer height adds days of print time and you still need to post process after that.
Great job! The glove is what breaks my heart, you're so attached to it.
Your 3d printed resin cure station is top notch
Thanks. I have a video on my channel where I build a bigger one for curing helmets and such.
I always guide coat parts after priming. It's just a dust of black over the primer. It shows any low spots, lines or where you haven't sanded enough.
Thanks for sharing this technique. I wonder whether more progressive sanding and a thick primer (ie. Rust-Oleum 260510 Automotive 2-in-1 Filler & Sandable Primer) would have achieved similar results without the resin/powder combination at all. I will probably try it both ways and compare the results. Thank you!
It will but you will be spending so much more time starting with a low grit sand + primer. I have done two masks now, both PLA, one was done the way mentioned previously and the other with resin.
I spent roughly 3 weeks sanding, filling, sanding, filling just to get a result I wasn't really stoked about. Resin got better results than primer and sanding in about 3 hours. This method is amazing, I've done 2 helmets since. Just make sure you wear a mask and are in a properly ventilated area.
@@0XxZachAttackxX0 thanks for confirming. I will definitely give this method a try.
After printing transparent resin items I sand back slightly and apply a coat of resin and use an air compressor to blow off any excess resin to ensure all the detail remains. I cure with out cleaning or wiping of any kind and get a glass like finish. It takes longer to cure but the finish is worth it!
hi, how long should you cure resin parts under UV light for ? I've heard too long can make them brittle
A lot of people are saying "Just Sand It", but they seem to miss the point of not sanding it. To name a few downsides, sanding can becime messy, time-intensive for larger prints, labor intensive (again, for larger prints) etc. I'm pretty lazy when it comes to post processing my personal prints, so seeing this process which effectively removes layer lines and seals the print is nice, all without having to sand it.
For large prints this is the way to go, much faster and easier sanding.
I have another video using putty to hide layer lines
th-cam.com/video/xxdjFREJpKs/w-d-xo.html
It's a similar process and better for small prints or with areas with details because you can control where it is applied better. But I think using both processes is the best approach. Resin for large plain areas and putty around detailed areas.
but this process does require sanding?
Never get into woodworking, my friend 😅
everything requires some sanding if you want a smooth finish, it's just how much :)
Using putty you have more control where it goes because it's not a liquid, but it talks longer to apply and is more work. Good for small areas going around detail you don't want to cover but not great for big areas.
ALso you have to wait for it to dry where the resin cures instantly with UV light
I build a table out of a oak cookie slab and resin infill. Try sanding oak end grain if you want to know the horrors of sanding :)
Tbh that would've made an adorable mushroom lol. Looks great!
Just did this today after watching your video, it worked excellently! Huge thanks, I've been fussing with how to best print something, but have a solution now.
Awesome! Glad I could help :)
You dont even need babypowder, i use Uv resin on every 3d Print for decades. looks incredible smooth