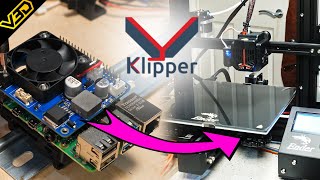
Install a buck converter on YOUR 3D printer for the raspberry pi

ฝัง
- เผยแพร่เมื่อ 20 พ.ค. 2024
- Today I wanted to go over how to install a buck converter on your 3D printer so it can power your raspberry pi! I am doing this on my Ender 3 but it can be done on any printer and I plan to install a buck converter on any printer I run a raspberry pi on. A special thanks goes out to ABOX for supplying the raspberry pi for this video, check them out in the link below.
ABOX Raspberry pi kit:
amzn.to/2B1Rbzp
Ender 3 Printer
Amazon: amzn.to/2NVml3r
Gearbest: www.gearbest.com/3d-printers-...
Buck Converter:
amzn.to/2DEB4KK
Solder Paste:
amzn.to/2Dz5Zbt
Solder Heads:
amzn.to/2DAEfTE
Tip Cleaner:
amzn.to/2qK8u1S
Small Solder:
amzn.to/2T7B36v
Soldering Station:
amzn.to/2Fll1mV
Helping Hands:
amzn.to/2DCt90B
Wire Stripper:
amzn.to/2Q1UMpL
Pi Case:
www.thingiverse.com/thing:307...
Social Media Links:
Instagram: @georgesgadgets
Twitter: @Georges_Gadgets
Facebook: @GeorgesGadgets3D
TubeBuddy Helps me manage my videos:
www.tubebuddy.com/GeorgesGadgets
The music I use :
player.epidemicsound.com/
Affiliate Links to support the channel:
www.amazon.com/?tag=georgesga... - วิทยาศาสตร์และเทคโนโลยี


How many printers do you have and you can't afford black wire? They are called eye connectors, Nitt Witt.
Thanks dad.
David this is my dad lol he is just joking. :)
Oh shit. For real? My bad. Thought "thanks dad" was just a clever comeback. Lol Sorry George's...
Comment deleted.
It’s all good David, I do sincerely appreciate you would come to my defense.
He has been a bully to me my whole life though I don’t think it is going to stop now ;)
of all the tutorials i've seen i think yours is very helpful especially with the video *for a beginner like me* Thank you so much!
Thank you so much :) I am glad you liked it!
Nice. Now I know what a buck converter is. (I had no idea what I had on hand, so thanks!)
Great video quality too.
Thanks for the video, considering doing something similar and maybe adding a shelly to also power it off and on independently.
How has this held up for you?
I tried running line from the other terminals on the psu, adjusted all voltages was working fine all read correctly. It was until connected to the printer the buck blew. I used a 3v-40v buck converter which are working great for my fans, hot end and electronics. When i ran a second line was fine and working until the psu got connected to the printer and seemed to blow the bucks regulator. The psu outputs a max of 15amps which could be the killer for it.
What gauge wire did you use (anyone) from the buck converter to the raspberry pi? (P.S. I'm thinking of soldering to the pads underneath the micro usb plug.)
what size eye connectors does the meanwell psu use
you look REALLY good.
good vid too.
Nice, thanks for sharing 😀👍
I have had no problems powering the rasp. Pi via the i/o 5V thou
Well Asger maybe my smart friend isn’t so smart! I’ll have to experiment with my other pis to see if I can replicate what he is talking about
What Gauge of wire did you use? Thanks
Cool video! I didn’t realize so much went into adding the Pi to your printer. And I thoroughly enjoyed the “Abox” joke :D
Thanks Brad, you could just plug it into the wall but I had to over engineer it a bit
Can i use this bucker converter to power my rpi4?
my micro usb cable has only two cables inside. they are blue and white - can i still use them to power and which color is positive? thank you in advance!
The link doesn't work
Thanks for this, I am doing a build on my ender 3v2 to add an 80mm PSU fan and dual 4010 MB fans. While I am doing that I thought "what if I added a USB power for my GoPro clone camera that lives on the printer as part of my ah-hoc video monitor system"? And since the 80mm fans are 12v and have to be stepped down and the buck converters came in a 3 pack, things looked good, So I wanted to see if anyone had done this and looks like I can either run the usb -c at 12 v or add a second Buck to drop it to 5v. Have read that USB-C ports can be configured with 5V 1.5A and 3A for up to 15W of power. Thank you for the proof of concept in this video. Great work.
The thingiverse 3D printed case URL is DOA. Can you re-link it? Thank you.
Hello can someone send me a link for the raspberry case file please
@Georges Gadgets Did you scale your case or did it just fit? Do you use Raspberry Pi 3 B?
I did not scale the case, I did have to pry it open a little to get it in there though. I went with the 3+
... if you just attach 5v input to one of the 5v rails on the GPIO, it's not going to run through the power supply properly, and you will have issues.... this isn't a safety mechanism, its that the raspi isn't designed to be idiot proof. notice all the little chips right around the power port on the raspi? that's a power supply. it takes the 5v in and acts essentially like those buck converters there, steping the power down to what is needed by the various and sundry chips in the raspi (notably 3.3v and 1v)... putting power through these chips doesn't always work backwards because of the presence of transistors, which limit flow selectively, and diodes, which limit flow in one direction but not the other...
I am the idiot, does that mean those 5v rails are for output only?
I bought a dozen buck converters on Amazon. I wired one into my power supply and adjusted the output down to 5 volts just like the video says. It was so much fun I decided to make one for my brother who just bought an Ender 3 pro for his kid.. I hooked it up and just before I could adjust the output the capacitor on the input side exploded. I got another one and wired it up too. When I hooked it up the input capacitor exploded again.
You must set your power supply to the voltage of whatever youre going to hook up to afterwards. The output is dependant on the input voltage. Its also vital to ensure you do not hook this up to ac, or in reverse dc. Both can cause severe damage to the capacitors.
Are you soldering just the black and red wires from the usb and cutting the green and white down (out of the way)?
Yes exactly :)
This is great, George! Super advanced. Am I right that this is your most recent video...from two months ago?
Yeah I know I’m slacking cause of the move!
i miss this
I miss you
oh lord, okay, people: buy a USB fixed buck converter. 5.1 is probably still too low. when you test like that there is no voltage drop, which will be present when there is current draw. they make buck converters that output USB standard power, and they're designed to deal with that drop. they're available on amazon and basically the same price. has wires on one end that go to the power supply and a USB port on the other. want to get really fancy, they make ones that actually go to MicroUSB and USB C to power your pi directly off the converter
thank you, will be adding that to my shopping list
Basically it should be better to set the buck converter to 5.2 - 5.3 V output. That's (as far as I know) the maximum of the USB specification and you always loose power on the connections. This way, even if the 5.3 V reach the Raspberry Pi you prevent undervoltage.
Thanks for the tip!
I tried to hook up a buck converter to the power supply and I blew up the buck converter and something flew and damaged my monitor
You've got a buck as sweet as raspberry pie
Dangit matt...you cant compete with dad for best comment ;)
@@GeorgesGadgets Not much of a competition, if you know what I'm sayin.
Maybe I'm just stupid but half way through and I'm still not sure what to do. on to the next- not taking chances
Good video, but 360p? What year is it?
Thanks Matt....I uploaded this as 4K I have no idea why it’s only at 360p
@@GeorgesGadgets You must have fixed something because it is giving me HD options now. :)
Thank goodness! I appreciate the heads up, I just googled it and found a solution.
I miss you :(
-Alex
I miss you too bb
Octo print... would make a good video :)
I need to get on it, what would you like to get out of a video about octo print?
@@GeorgesGadgetsoctoprint Timelapse, photos compiled to make the Timelapse. Photo taken by head hitting that stop button. Can’t remember the name of it new to all this. Also would be nice to see how others stop layer-shift from happening after it hits that stop button.
Hi! I have this case to my pi. Please send to my STL.
I'm just gonna mark this as one of a few videos that will not play on mobile today... Something funky is going on...
Dang that’s sad to hear :(
What other videos are you having problems with?
@@GeorgesGadgets Sanladerer's E3D factory tour and a Tested video. Im guessing it's my phone. They play fine on my PC.
David Urdahl that e3d video was so good. I want the tool changer so bad
@@GeorgesGadgets I couldn't take my eyes off that dude's hair... Lol
mate, no more videos?
I am back Raphael! Sorry for disappearing
no more videos mate? :(
IM BACK!
how to get cold solder joints 101
3:18 I immediately stop the video as soon as he said "circle thingy majigs"
🤨
🕶🤏