
ฝัง
- เผยแพร่เมื่อ 27 ส.ค. 2018
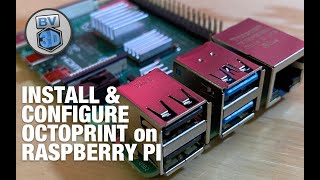
- In this video, I'll teach you how to install, configure, and use OctoPrint (AKA OctoPi) with your Raspberry Pi, allowing you to control your 3D printer and print things remotely!
---
● Full guide + parts list/links:
howchoo.com/g/y2rhnzm3odz/con...
● What you'll need (direct links to Amazon):
Raspberry Pi 3 Model B+: amzn.to/2QyrIUB
- OR -
Raspberry Pi 4: amzn.to/2v4chfS
Raspberry Pi camera: amzn.to/2D61RO2
Raspberry Pi camera extension cable, 610mm: amzn.to/2ImBHKj
Short mini USB to USB cable: amzn.to/2IjmcD7
MicroSD card, 32GB: amzn.to/2D5a7Or
MicroSD card reader: amzn.to/2Kk0Lod
Raspberry Pi power supply: amzn.to/2MhRVbt
(Optional) XT60 cable used to power my Pi from my Ender 3: howchoo.com/shop/product/xt60...
● NEW! Add a touchscreen to OctoPrint:
• How to Add an OctoPrin...
● Power your Raspberry Pi using your 3D printer's PSU:
howchoo.com/g/zjm0zjnlndq/how...
● Creality Ender 3 Review:
howchoo.com/g/ytbizjaxzjk/cre...
● Using the Ender 3 with OctoPrint (+ Thingiverse models and parts):
howchoo.com/g/ntg5yzg1odk/usi...
● Using the Ender 3 V2 with OctoPrint (+ Thingiverse models and parts):
howchoo.com/octoprint/ender-3...
● Like what we do? Buy us a coffee or beer and support great content!
howchoo.com/donate
● Theme song:
"Microchip" by Jason Farnham from the TH-cam Audio Library.
● Affiliate link/advertising notice:
I am a participant in the Amazon Services LLC Associates Program, an affiliate advertising program designed to provide a means for sites to earn advertising fees by advertising and linking to AMAZON Sites. When you click on an Amazon link above and buy something through Amazon, Amazon may give me a small commission. - วิทยาศาสตร์และเทคโนโลยี


Your posture is immaculate
Haha thanks!
Easily the best guide for OctoPrint installation, Thank You. I watched 3 other guides before this and not a single one even mentioned the USB cable or plugging it into the 3D Printer. Thank you for laying out the hardware and requirements beforehand everyone else mentioned the Pi, Camera and SD Card.. that was pretty much it.
No problem! I’m really glad it was helpful :)
I agree with ^ . No other guide explains how you physically attach the pi to the printer, incredibly. Thank you for making this video, it helped me get my printer up and running!
Thank you for this in depth, yet very simple tutorial. I've really wanted to start using OctoPrint on my Ender 5, but I have no prior experience with coding or raspberry pi. I just ordered a pi and camera - looking forward to trying to set it up thanks to your video 😁😁
I'm glad it was helpful! Let me know if you run into any issues.
Thanks very much for the well articulated and professional video! I'm new to 3D and I ended up building a Raspberry Pi box for my Mega-S and it works wonderfully thanks to this video. Thanks for all your insight! Very informative. I have subscribed.
Glad you enjoyed it!
Just got my octoprint up and running. Thanks for the in-depth tutorial, man. You're awesome
Reid T No problem! You’re awesome :) Thanks for watching
You prolly dont give a damn but does anybody know of a tool to get back into an instagram account?
I was stupid lost my login password. I appreciate any tricks you can give me.
@Connor Korbin instablaster =)
@Kameron Bryant Thanks so much for your reply. I got to the site through google and im waiting for the hacking stuff atm.
Takes quite some time so I will get back to you later with my results.
@Kameron Bryant It did the trick and I finally got access to my account again. I am so happy!
Thanks so much you saved my ass :D
Very nicely done. Can’t wait to try it out when my RPi3B+ arrives.
thank you so much for doing this guide and such a great job of it as well !!!
No problem. Glad you liked it! :) Stay tuned for much more very soon
that was very comprehensive! thank you for taking the time to make this video
Very helpful video. Gave me a good idea of how to use octaprint. Thanks!
Thank you, After several attempts this one helped.
Yooo whats up Zach.
I just bought my Ender 3 last week. This is a great tutorial that I'll be trying out tonight thanks to Amazon's same-day delivery. This is also the first video I've watched from you and I'm looking forward to seeing the other 3D printing/Ender 3 vids!
Same, I got an ender 5 and even tho I respect his comment on safety my goal is to buy a smoke alarm and jerry rig it into shutting my whole room off or something like that
Best tutorial for setting up RP4 for your 3D printer. Thanks
thank you for this. Very straight forward and comprehensive.
Very nice video, it has exactly all the info I've wanted! Thank you!
Glad you enjoyed it!
very well done video! Thank-you. I appreciated the lesson and like your step-by-step methodology.
I am using Windows, so special thanks thumbs up for going in detail and explaining both operating systems and that detailed information that big-name YT geeks forget to mention.
Great video. Gave me all the answers I was seeking.
This is great video totally demystifying the process thanks
Nice video! Thanks for making it. If you thread the camera cable through the slot in the case cover first, you can plug it into the port a little easier than trying to manipulate it through the cover's slot.
awesome video! definitely going to build this for my ender 5. slightly unrelated question. do you have a video or information on how you made the lighted Howchoo logo sign? I would very much like to build something like that.
Yep, I do actually! So for the letters, I just extruded an SVG of each letter to make the 3D-printable models and then made each hollow. For the LEDs, controller, and programming, I used the same approach as in my other guide here: howchoo.com/project/othjmwu4mju/my-led-disco-ball-music-festival-totem -- The approach in that guide is the same, except that I used a flat individually-addressable LED strip (also from Adafruit) rather than the "Christmas tree" styled LEDs shown in that guide.
Fantastic guide. Thank you!
Great video. BTW, screen resolution was a bit low so it's hard to see you screen text etc. Anyway, my main Question: How would you compare this to Repetier ? I'm thinking of migrating to Octopi because Cura is more powerful as a standalone application. However I like the integration of Repetier. Any thoughts ?
Nice video ... lots of helpful information. Still not sure I'm ready to tackle this project, as the further you got into it, the more difficult it started to seem... like rattling off connect with ssh to someone that's never done that or heard of it got mind boggling for me ! never even saw a raspberry pi, so it was all new to me. for the cost of this project, I don't know why it's not offered as an option on printers.
Your video does an amazing job explaining everything. Thank you so much. Keep up the good work!
Thanks for the video. Just one note. It would be much more better if you remove video of your self and put a full screen of things you presenting. The thing is when we watch it on the mobile we can't see too much details. Thank you for your work.
Thanks for the feedback! I’ll do that next time :)
Straight to the point, thank you
what should be " the maximum speed/feedrate of the individual axes and whether their control should be inverted or not." for Creality CR-10S?? and serialport, baudrate settings for cr-10s?
thanks it helped me really fast setup
Learned so much from your video! THANK YOU!
Legend, nice tutorial!
Thanks! :) I‘ll be creating a lot more soon!
This is a great video and excellently presented. Please don’t tell me I’ve found you too late and you’re no longer making content? 😢 I look forward to watching all your videos anyway but you’re descriptions of the process and your way of instructing is good enough that even I can understand it and follow it (and that’s no mean feat!! Trust me!! 😂 )
looks like his last video was 3yrsd ago :(
Great job. I subscribed and gave a thumbs up and will order from Amazon thru. Good talent deserves the rewards. I'm 60 years old and my vision is corrected to 15/20. I have a 27" 4k monitor. I could not read the inserts in the video. So please take this as just a little hint. Get your mug off the video, calm the background color, use a bigger font on the inserts, and keep up the good work!
Will do for the next one, thanks John!
Great video. Very thorough.
Great video, thank you for the instruction.
Hi Zak, I'm interested in this, is there any instructions to connect this system to Artillery SW X1 v4? Thanks
.. extremely helpful - thx a lot!
This is great little video I have everything except the long camera cable but I have the short cable. Not many video show how it’s done simple this is very clear Instructions. Question u put octoprint on your raspberry or your computer.
Thanks! Per the video, you install OctoPrint on the Pi, not your computer.
Excelent guide man!!!
Thanks!
Thank goodness someone already came up with a way to do this. It is even better that I have the same 3d printer.
Glad I could help! I also wrote a guide specifically for using OctoPrint on the Ender 3, should be useful to you if you have the same printer :) howchoo.com/g/ntg5yzg1odk/using-octoprint-with-the-creality-ender-3-3d-printer
Thnx ! for the clear explanation !
No problem!
Which case did you use for the buck converter. Can you please provide a link.
great video, my raspberry pi and camera are on the way from amazon right now
Sweet! Post here if you run into any issues and I'll do my best to help you out.
4:43 they're called T-Nuts... :-)
Great vid, thanks... will be doing this after Xmas...
Haha yeah I learned that after publishing this. And no problem! Have fun with it :)
They are actually hammer nuts. For some reason people in the 3d print world mistakenly call them t-nuts. T-nuts are a nut usually used in woodworking.
Thanks so much for a great tutorial. Looking for this and it will help a lot on my upgrade. However, I plan to upgrade first my ender 3 board to the silent board which suppose to have thermal runaway activated. Does that mean I can skip the firmware update and hondirectly to pi? Is it the same process with the CR 10 S?
No problem! So I definitely recommend the silent board upgrade; the firmware version that it ships with *should* have thermal runaway enabled. I actually just wrote a guide for this: howchoo.com/g/ntmwy2u4owu/ender-3-board-upgrade
Where are your follow up videos? Should show raspberry video of it printing. Also waiting for other installation you mentioned to show completed job and benefits output. Thanks a million. Newbie here.
Thank you so much for you excellent help!!!
No problem!
@@Howchoo do you have the video about doing it remotely up yet?
Jack Wall No video yet, but I did write this guide about it: howchoo.com/g/mgnmnjg5ywz/how-to-access-octoprint-over-the-internet-from-anywhere-using-octoprint-anywhere
I'd really like to have this record the time lapse and loop it continuously after the print is don on a smaller screen attached to the printer. Maybe even continuously show a timelapse up to the latest layer while it's printing.
very helpful - nice and speedy :-)
@Howchoo Could I use a USB webcam into the raspberry pi instead of a raspberry pi camera? thanks
Awesome tutorial.
Glad you liked it!
These instuctions are good and will get it up and running. I was unable to get Octoprint to print as good as printing directly off an SD card plugged into the printer. I tried for over 30 days, got help from numerous forums and TH-cam videos. I finally gave up and just went back to printing from SD card, I still have the webcam just watching the prints, but no control. My printer is an Artillery Sidewinder X1, My Raspberry is a 4 with 8Gb.
Is it possible to just set up everything minus the camera and go back and add the camera at a later date? I don't have the camera or the flex cable but have the rest.
very helpful thanks
Great tutorial. I'm making good progress but have hit a bit of a 'bump' trying to print the arm to mount the Pi camera to the gantry. My Ender 3 Pro seems to struggle around the mounting holes for the camera mount despite me doing 0.12mm layer height at a speed of 50mm/s. Do you have any tips to offer in terms of printing those parts please?
Sorry I missed this! Is the issue that the arm and camera housing mount (i.e. the hinged portion) are very tightly bound when you put them together? I had this issue as well-this isn't a printing issue, but a design one. There's 0 tolerance between the two parts. I just carefuly cleaned it up and removed a small amount of material using a hobby knife so things would fit together better. Hope this helps!
how would i go about adding a display screen
I just did a video on that! th-cam.com/video/6OP2c-GQFu4/w-d-xo.html
Great video. Easy to follow. I am running into a problem when I try to ssh. It is saying "Could not resolve hostname octopi.local: No such host is known". Any advice?
What’s the SSH command you’re running?
Hello, thank you for your video. I am wondering though, do I install the latest raspberry pi 4? is it compatible? If not, which model would you advise? Thank you foer your time
The Raspberry Pi 4 will work great-check out the linked guide in the video description for a few notes on using the 4.
This is a great video, very clear and easy to follow for a newbie like me. Would you still recommend the Raspberry Pi 3 Model B+? Or would it be better to start with a 4? If so, could you provide a link?
There isn't much that needs the extra power of the Pi 4. I'd stick with the cheaper 3 B+ for now.
Willverges is correct-the Pi 4 is overkill for this. You can use it if you want; you'll just need to use a different case and cable. This is mentioned in the print guide: howchoo.com/g/y2rhnzm3odz/control-your-3d-printer-with-octoprint-and-raspberry-pi
Thanks mate for the great video! everything worked purrrfect!! is it somehow possible to enter the octopi surface without being logged in to the same wifi? i want to access octopi while being outside :)
Yep! I wrote a separate guide on this: howchoo.com/g/mgnmnjg5ywz/how-to-access-octoprint-over-the-internet-from-anywhere-using-octoprint-anywhere
The OctoPrint Anywhere developer is moving this project over to a new one called "The Spaghetti Detective"-I'll update that guide soon with more info on this.
Does this work with the Ender 3 Pro? I assume the setup would be the same just with a micro USB instead of a mini
I need some help. Following your setup guid on running power from my pro to pi. But I can’t find a usb c cable that has two power cables inside. So you know of any
The video is very usefull, but i didn't see and read what windows display.
If is it possible to magnify windows with rasp command.
Thanks
Great video. 😀
Can Octo print be used for a Laser Printer or a CNC Machine ?
If not - is there an alternative that can be used with a raspberry pi ?
Thanks.
what is the application called that he used for the part where he did the file with the wifi?
HI, Great video, Thanks... It's possible to have the *stl from the RPI Camera please??
Thank you and nice sunday
Best,
Can you tell me in the beginning of your video you see your letters with RGB LED colors how did you make that or can I find a link of the alphabet.
Thank you
I used Neopixel LEDs for illumination, similar to this guide I wrote: howchoo.com/project/othjmwu4mju/my-led-disco-ball-music-festival-totem
For the letters, that’s the Howchoo logo. I split up each letter and extruded it, made it hollow, and added a hanger. So there’s no alphabet per se
Love this!
awesome thanks!!
I always wanted to know howchoo do this.
Superb step by step tutorial. Just waiting for my kit to arrive and I'll be building this onto my E3P. Thank you. I have liked and subscribed.
Great! Hope you have fun with it :)
@@Howchoo The kit has arrived and I have begun building it. Some things have changed with the Octopi install since your video but that has not posed a problem so far. I am just wiring the buck into the PSU now. One thing that occured to me, the Raspi being a Linux system needs to be shutdown before being powered off to prevent corruption. This could be a problem if you just turn your printer off. What's your take on this?
12:57 USB mini is a stronger connection, micro cables tend to end up bending in the vertical if care isn't taken when plugging them in. One of the reasons USB-C is a bit bigger.
Very true. Thanks for the info!
great!!! thank you!!!
will this option work on a Trony x5sa pro?
Will this be good with the pi4 b 8gb with a m.2 argon case?
Hi do you have the links to each of the parts that need printed?
Yep! The list is in the full guide (linked in the video description)
Will these instructions work with a Creality CR-10?
Awesome video! Question, has anyone had any luck adding more than one computer to this type of set up?
You mean more than 1 printer?
Thanks for the detailed guide...
I have Raspberry pi 2 model b v1.1
Can I use with the Raspberry pi USB WIFI dongle and it's will work ???
Absolutely!
@@Howchoo thanks
Is there a way of pushing files over the network for auto-printing? I'd like to control a bunch of items using a RP using Ruby, such as stepping motors, etc. More robotic than anything, but also inclusion of 3DP control.
There’s an OctoPrint GPIO plugin you can use for controlling steppers and stuff using your Pi - as for pushing files, do you mean pushing STLs and having it auto-slice and print them, or pushing gcode files? The latter is already supported by OctoPrint natively
This (well done) video was almost 2 years ago. What is the newest version of the hardware available??? (not printer version, but Octo... hardware & software.
You can now use the Raspberry Pi 4, but otherwise the hardware and software steps are the same :) See the full guide in the video description for a few Pi 4 notes
This video is very clear but I'm looking for few troubleshooting options as well. I.e., I'm trying to Octoprint to Creality CP-01. Octoprint is shown in the web browser as in the video but the 'Connect' button doesn't result in establishing a connection. Need help.
So the CP-01 isn't explicitly listed as supported by OctoPrint: github.com/foosel/OctoPrint/wiki/Supported-Printers
This doesn't mean it DOESN'T work, but it does mean you'll need to do some research to figure out the settings. Have you searched around to see if anyone has used OctoPrint with the CP-01 before?
Is there a video on how you made that howchoo sign? Wasn't able to find it
Hey! I didn’t make a video on that one, but I did write a guide on how the electronics work: howchoo.com/project/othjmwu4mju/my-led-disco-ball-music-festival-totem
This is the exact same concept as my totem build. For the letters themselves, I created vector images for each letter, imported them into Fusion 360, extruded each letter, and added a hanging tab. Then I did the electronics the same as my totem project and added a small battery.
I hope that’s helpful.
Hello, I did the buck converter add on and I measure with my multimeter with 5 v and still getting undervoltage warning, I stepped it up to 5.22 and still getting the undervoltage warning, how much can it go up? I want the warning to dissapear
Where did you get that screwdriver?
Besides the camera functions. Are there really any real advantages sacrificing a rPi3 instead of slicing on Cura and dropping on the printer?....
I mean is there any advantage on Octoprinter over the native software that a printer has? (Ender 3 user).
I also find it more convenient to be able to drop files onto the printer from my desk or couch rather than needing to fiddle with an SD card and use the Ender 3’s subpar interface. There are also a bunch of plugins you can install, as well as being able to view stats on your printer and the print status. The camera is a huge plus as well. Also, it’s cool ;)
Noob question, but do i have to leave my printer on power all the time to controle is, like leave it on. Now after it is done i have a on off button which i turn off, i own a Anet A6 and there is now way i can have my printer in stby mode.
Clear video you made, very understandable.👌
If the Pi is powered by your printer, you’ll need it to be on so it can continue to power your printer. If you power the Pi separately, you could log into OctoPrint but without the printer being on you couldn’t do anything anyways ;) Does that make sense?
@@Howchoo is it possible to control a relay wich than powers the printer with the rasperry pi?
@@fabian899 Absolutely. Check out this guide and video on controlling a relay using your Pi: howchoo.com/g/m2qwmte5nzk/how-to-use-a-relay-with-a-raspberry-pi
is it possible to do the octopi and a TFT35 E3 V3.0
Other than watching your prints with the camera and stopping them if something goes wrong, I don't understand why I would want this. I could see using this if there was a way to remove the previous print from the printer. Then you could print something else. What am I missing can you explain ?
Great Video. Have you tried using Octoprint with a USB webcam? Would the setup be any different, other than the physical mounts? Curious if I could save ~$20 by using an old logitech 720p webcam I have laying around.
I have not - I know the Pi itself supports USB webcams but you’ll have to Google whether or not OctoPrint does. I assume it would; that would be quite handy
@@Howchoo Following up- I gave it a try and all I had to do was plug it in. No drivers or mods needed!
thank you
i want to replace the original melzi creality v1.1.3 ender 3 board that has the input voltage 24v and the mk10 hot end with mainboard mks gen l v1.0 plus tft 2.8 touch screen and titan aero 1.75mm 24v, is this possible ?
-on my creality mainboard at ''fans, hot bed, nozzle '' write 12v, but i measure that and i was expected to be 24 but it was 12 v both -so my nozzle theoretical is 24, but it has 12 volts on the mainboard, that is a problem? if i will buy the titan aero hot end what voltage do i have to buy it ? -the melzi mainboard from creality has a ''atmega1284p microproccesor'',but the mks gen l has ''32-bit STM32 microprocessor'' -is that a problem if mks gen l has a 32-bits microprocessor? i mean if it has bore bits that the atmega. Can it burn ? -is the melzi mainboard has theoretica 3* 12 v blocks but in reality 3* 24 volts what voltage need the mks gen l board to have ? if it has 12 volts the al that 3 components to wich need 24 v is going to be any problem ? -that 3 component ''fans, hot end, hot bed '' are in reality 24 volts, the matter if on that mainboard is 12 or 24 volts ?
Would this work for the neptune 2?
So how would I set this up so I can monitor my Ender 5 printing using my mobile phone? Also if something goes wrong I can stop the printer?
Thanks
Set up OctoPrint normally (using this guide) and you can access it from your phone over your local network. To access it away from home, use OctoPrint Anywhere: howchoo.com/g/mgnmnjg5ywz/how-to-access-octoprint-over-the-internet-from-anywhere-using-octoprint-anywhere
"it's only like 35 dollars"
me: *looks at date.*
When Octoprint is recording time-lapse videos, does it save it to the SD card inserted, or can it save it to a folder on your PC?
It saves the time lapse to the Pi itself; then, you can download the video to your computer from the Time Lapse tab :)
Thanks!
When will you do the step-down converter video?
Totally forgot about that one-I added it to my video list :) I have a few other videos I'm working on currently, but soon I'll be releasing a video every week (rather than monthly). Keep an eye out!
Do you have to install additional software on the Raspberry Pi first
You need to install OctoPrint of course
Hi can we use temperature sensor, humidity sensor, load cell, in 3d printer and use them using raspberry Pi, to run our 3d printer. Is it possible???can we attach them in our 3d printer?
Can I use raspberry Pi 4 instead of raspberry Pi 3b+
I can't connect to my Aquila PRO.
I've been testing with 2 different types of cables, I tried the tape on the 5V
I'm not sure what to do.