If no one has commented it yet, the hose clamps are actually the same style as PEX. You can use a sharkbite crimp pex tool. I happened to have one in my plumbing box and it worked FANTASTIC.
Thank you very much for this video. I don't regularly work on my vehicles but your video gave me confidence to tackle this project. It took me all day but I got it done. The part numbers, the torque specs, and the tips to make things easier (zip ties to support the axle, the prybar to remove the inner cv, and just push the axle in to seat it) all worked for me. You rock.
Hey Michael, great to hear our video gave you the confidence to tackle this job and that it turned out well for you. Thanks for taking the time to share your success story. We appreciate it. Happy Wrenching!
Great, very helpful video! 3 notes from just doing an axle swap on one side of my Tacoma: 1. I opted to not drain the diff as the oil in there is pretty new. jacking up the side I was working on only resulted in only a little oil coming out when the axle was removed and didn't make any more of a mess than coming out the drain plug. I only needed to add 7 oz of new oil when done and didn't have to remove the drain plug or replace that crush washer. 2. the tire on the ground trick works well for removing the axle nut too if you're doing this job on your own 3. I'm not sure why you were able to just pull the axle out after disconnecting it, but mine wouldn't fit between the sway bar end links and the spring, so I ended up having to remove the end link and drop the sway bar bracket to get enough clearance.
Yeah, you can certainly avoid draining your front diff by jacking up one side at a time. I'm glad the tire trick worked for you. We try to remember options in our videos for people who are working solo. With some models, your Tacoma being one of them, the sway bar end link does get in the way of pulling the CV axle out. We actually have not worked on Tacomas very much.
I always go to your videos when contemplating tackling a job and you’ve helped me without fail! The self-satisfaction of doing myself rather than paying some mechanic is priceless! QUESTION: It’s been like 4 yrs since you did this job and I’m curious on how it held up?? Thanks!
Sean's boots are holding up fine. He did get some leakage at the CV shaft connection (Boot Stretch side), but he tightened the clamp and all is good. Great to know our videos are helping you do your own work. That is our goal.
@@TimmyTheToolman That’s enough validation for me, gonna order those boot kits today. Gathering parts to refresh front steering components, control arms, old man emu shocks, etc. Have ~ 3” lift.
@TimmyTheToolman I was getting ready to ask the same thing. I finally getting/got another Toyota truck so went down a rabbit hole of mods & found this. Very interesting.
I remember the service manual for toy 87 hilux saying that if you clean the joint really clean with a solvent it will dry it out, so its good to pack/work some new grease directly into the joint before squirting the rest into the boot-so its lubed a bit before the stuff squirted into the boot has a chance to work its way into the joint as you drive. Also, if you clean with diesel or an oil based parts cleaner, it wont dry out the joint as much while cleaning it.
Yeah, packing some grease into the joint isn't a bad idea. But, with centrifugal force, as soon as the joint starts spinning, the grease will be quickly dispersed throughout the joint. So, in my opinion, it's not a huge concern to just pack all the grease into the boot. Thanks for the comment.
These are great videos and very helpful. Exercise caution when prying the CV axle out against the driver's side differential case. The lip that surrounds the dust seal is soft and deforms easily. A slide hammer equipped with a CV puller such as the OEM 27058 got my resistant driver's side axle out and didn't damage the case. But, on the passenger side, that puller wouldn't fit between the dust seal and housing. We used an impact hammer against a lobe of the CV axle and it popped out with only slight damage to the axle.
L Turner Glad you like the video. You are correct that you have to watch that you don't bend that dust seal when prying the CV axle out of the differential. The prying method works but it's sometimes frustrating and I've also used the technique of just getting on the lip of the inner joint with a pry bar and knocking it loose with a hammer. Thanks for sharing that specialty tool option.
Another fine Vid Timmy and Sean. Thanks for giving me the confidence to do my own Reboot and stretch. The job turned out perfect. I also siliconed the 4 edges of my boots to help keep them water tight hopefully. Viewers, Pls send these guys a Super Thanks $1 to keep these Vids coming. Russ in Minnesota
Dang russel! Thanks for the tip! That’s nice of you. These boots still haven’t ripped but where the “stretched” part was started to leak out a bit, next time we will FIPG that end. - Sean
Hey Russell, great to hear the Reboot went well and thanks for the support of our channel. Money isn't our main motivator though. Money helps but our favorite form of payment is hearing from people like yourself that our videos have helped them out. That's what motivates us to keep making videos. So, thanks for taking the time to comment. Happy Wrenching!
Awesome work as always, Tim and Sean. Learning so much from your videos. My wife always asks "are you watching another 4Runner repair video?" Gotta say I'm practically rolling on the floor laughing at 45:10 - those shoes and the awesome shoe laces, Sean!? Love it. I'm going to break out some cardboard when I get home and revive my old break dancing moves. You guys are awesome!
Tim: can’t thank you enough for the video. Just had to do this to my 97 after the outer boot was torn in a front end collision. I bought the big box auto parts generic boot kit and ended up doing it all over again with the factory parts. I would have been clueless without the information you shared in this video. Well done sir! 🍻
Did this job last weekend. Alternatively, instead of taking the lower balljoint and tie rods apart at the joints, I simply took the 4 bolts that hold the balljoint to the knuckle off. This allows free motion of the knuckle just as if you had taken both the balljoint and the tie rod off loose. Unfortunately I purchased a new NAPA maxdrive axle. When I got it back together I now have a hell of a vibration. Will be doing a reboot to the OEM axle and swapping the NAPA part out this next weekend.
Yeah Andrew, the way you did it is fine. I decided I liked breaking free the tie rod and LBJ connections over removing the 4 balljoint bolts because re-torquing those 4 bolts might cause some fatigue to them. People have been known to have a balljoint bolt shear off. Also, lots of guys like me use loctite on those balljoint bolts so leaving them alone and not having to re-loctite them is another reason. That's weird you have a vibration from the Napa CV axles. I didn't know the balancing of these axles was such a big deal. I wonder if you just got a bad set, like the shafts are slighting bent or something else is way off. These axles aren't balanced like a driveshaft is. Make sure you got your wheels torqued down properly. Usually a bad vibration in the front end is due to wheel balancing.
Just did this mod over the weekend on both sides. did all-new suspension front and rear with Oldman emu, jba uppers. did the starter as well, since it was apart and easier to get at. also replaced lower control arm bushings with some Whiteline. for the life of me, I could not fit two of the washers in passenger side forward one. hopefully, the alignment shop can get em in lol. last weekend was welding both front and rear coastal bumpers with dual swingouts..cant wait to relax and just enjoy some BC backcountry. thanks for the tips Tim. all your videos were a major help
Great video! Just one tip it's always a good ideal to run some tape around the races as you knock the fixture off the shaft. Fortunately, the races did not fall off or else you would have had a bunch of needle bearings on the floor. Keep the videos coming.
I've had that happen on a Tacoma CV shaft. Why those races were able to pop off the Tacoma axle but not the 4runner axle is interesting. So yeah, it can happen and finding all the needle bearings is a pain in the butt.
Thanks Timmy. Been watching this a few times prepping to do my 02 Taco. And the bearing hubs too. So helpful! Any way, a tip on those axle nuts or spacer nuts, instead of using the brakes just use a vertical stop to turn into, on one of the lug studs. A 2x4 cut works great. Place it vertical from the floor to a stud.
Thanks for the tip. Somebody else mentioned this as well a while back. My only concern is putting all that force on the lug nut stud but I guess they are pretty tough and won't bend.
I'm pretty sure that it is the original factory boot. This is great. Your covering a major component of the 3rd gen. Some of the CV Joints on these 3rd gen can really be upgraded to superstock with lifetime replacement if they break! This awesome, thank you Tim.👍
FYI. If your truck has manual hubs, not only is hubside of axle different, the tripod attaches differently. There is no outer C-clip. There is an inner c-clip like the one that pops into the diff. It's a pain to get the tripod off. Easiest way I found was remove clip below the tripod, hammer tripod deeper on shaft to expose internal clip, then pry clip off. Then tripod will come off. Also, the three bearings do come off easily, dropping the needles all over the floor, so be careful. Thanks for your video, it still helped me a lot.
Yep, you're right, the manual hub axles are different and I believe all the 1st Gen Tacoma axles, even the ones for ADD are the same way. I learned there were two c-clips for the Tacoma axles when I was helping a friend reboot his and also learned that the roller over the needle bearings can come off, because it did on us and we were searching for needle bearings on the ground. Fun Times. Glad our video helped you out.
Thanks for the reply. I did side #2 today in about 1/3 the time. I carefully wrapped the tripod in a piece of duct tape to hold bearings together, then set it in the freezer to contract. Then when I put it back on, I used a 1 1/6" socket over the end to bang it over the internal clip. Went on easily. Hardest part of this job for me was getting axle back into the diff. It's a nightmare until everything is lined up just right, then it pops right in. Love your videos, thanks!
@@andrewm.4168 Good job getting it all done. Yep, popping the axle into the differential can be a test of patience. Glad you like the videos Sean and I are making. Happy Wrenching!
Excellent Job. Even though manual says you need to match mark, it is not needed, I have done dozens and it works very well. Use knipex ear clamp cost only 19 dollar which is much better. Also use universal ear clamp one with knipex it works well as well. Thanks again.
Hey Timmy. Just followed your video and did this yesterday. Instead of using different aftermarket clamps I switched the small clamps. So small for inner I used for the outer and the small for the outer I used for the inner. You have to tweak the clamps a bit but it works. I hope it lasts!
@@russellwilkins5424 That's cool. I believe you're the first to give us a Super Thanks. We do however have a tip jar link that many have used to give us a donation. The link is on our home page on the right side of the screen under the image of me. It's next to the links to our Facebook and Instagram pages. By the way, I didn't let you know about the tip jar link expecting a donation. I just wanted to point out that was another way people have shown their appreciation of our videos.
Mushroomed the CV axle pounding it back in with a regular old mallet. Guess I finally got an excuse to buy a brass one. Luckily it's just a cheap $45 Cardone CV !
@@1upgreenshroon That's a bummer that happened. Next time try using a long pry bar like we show in the video to pop the CV axle back in the differential. But yeah, a brass hammer is a nice addition to your tool arsenal.
@@TimmyTheToolman Thanks for the tip. I'll try that on the other side. I was eventually able to get the CV started by pushing it in with my hands and swearing a lot. After it was started a plastic deadblow hammer got it the rest of the way.
I just did mine today using this split boot. Worked like a charm and is the way to go if your axel is still good. My shop wanted $700 to replace the whole axel and, after buying a couple of tools I managed to keep the cost well under $80. I cannot stress out enough how important is to preserve the lip of the original boot that goes towards the transmission in place. Cut out the old boot around the edge without removing the original strap. Once the old boot is out, then cut out the old strap away (ask me how I know). That end of the axel is oddly shaped and you need the original boot’s end because it matches the contour of the part and will give you a nice flat round shape to slide in your new boot into. If you don’t use it, the grease will leak out and water will get inside. IT IS VERY CRITICAL not to install the split boot directly to the axel end side.
Thanks for the how to. Just finished mine. My tripod would not come off. I had to beat on it for an hour or so. But everything else went smooth.👍 Almost forgot. I used a old pair of bull nose plyers to pinch the clamps.
Thanks for your vids, they are very helpful. Why not use stainless hose clamps for the boots? A tip for getting the axle nut on off without a helper on the brakes is to brace the hub using the studs against a bar or even 2x4 vertical to the ground.
No worries, but actually you are right like I mentioned in my response to your original comment. I haven't seen this possibility with 4runner axles but Tacomas are different and your suggestion of taping them is a smart one.
Kartek offroad sells Porsche screw type SS boot clamps with the sides knurled away from the boots. They are great, and I have installed them on 2 of my Toyota’s and have had them on for years. You just have to take the old ones down to match them up as I don’t have the part #s. Also when installing make sure they don’t contact the lower shock when rotated.
OEM toyota boot bands work well, as what is mentioned in video. In a toyota forum some one suggested marine 304 stainless smooth band clamps worm type, I tried them ON Lexus & Toyota boots and have had success with them staying on tight. McMaster-Carr of Santa Fe Springs has them PN 5574K24 and 5574K16 much better than local parts stores.
About getting the CV back into the diff: just as a confirmation of how you shoved it back in, essentially. There's a video of a CV replacement on a FJ cruiser, and demonstrated as a Trailside repair. They did the same thing. They just popped it in by shoving it a couple times. I have a 4th gen 4runner, which is the same front end as that, and really similar to this one here. Last time I did a CV swap I banged it back in with a BFH and a cold chisel as a drift. It was very stubborn. I'll try the shove in method next. I've got to re boot my OEM cv's soon and do the swap. I'm glad I didn't turn the originals in for a core refund.
Sometimes the CV axles pop in easy and other times not. I like using a long pry bar that you can get onto the lip of the inner joint and then strike with a hammer to pop it in. If I have somebody helping me, I have them hold the axle parallel with the ground for a straight insertion. With the outside joint drooping towards the ground, that will make it harder to pop in. If I'm by myself, I will use some bailing wire tie up and support the outside end of the shaft parallel with the ground and then grab my pry bar and hammer to knock it in. Also, the factory service manual does state if you have the open side of the c-clip facing downward, it can help with the insertion. Happy Wrenching!
If they end up working out well for you, please get back to us and let us know and maybe provide us a link. I'll add it to the video description for others to consider as an option. Thanks!
Timmy The Toolman - here is the link to stainless zip ties: www.amazon.com/gp/product/B072WC1MXT/ref=ppx_yo_dt_b_search_asin_title?ie=UTF8&psc=1 They worked well and so far so good with about 5k miles on them.
Tim, there's a tool for those metal clamps. It's similar to the tool you used on the zip ties and works the same way, but it allows you to bend the end to lock it in place before you hammer down the tabs.
Yeah, I have the tool you're talking about but it's for a different style clamp that the Toyota kits don't come with. The Toyota clamps are a crimp style and the fold over style. The type of clamp you're referring to is the zip tie style. I bought that tool thinking I'd need it but it ended up the Toyota clamps were different.
@@TimmyTheToolman Yea, I've used the fold over style many times and hate them. The crimp style that you show at the end from Moog are far superior. I have to do my boots when I get back to the shop and wanted to catch up in a couple weeks. Been retired for many years. Thanks for the video.
I'm not sure if anyone has mention this but I've read that you were suppose to use different clamps so the boots wont budge & slide. Im not sure which clamps exactly though. Great video nonetheless! I'm gonna tackle this job in a few weeks myself.
Setting the proper cv lengths by adjusting the inner housing and tripod depth before you crimp the clamps tight is critical. The allows the air pressure to equalize so there isn’t a vacuum. This was causing the CVs to pop out while driving can be detrimental for vehicles with automatic hubs. Measure the count length before dissembling to reference.
You can also equalize the pressure once the CV axle is on the rig by simply getting a small flat blade screwdriver driver between the boot and and shaft and giving the screwdriver a twist. This will let air in or out to equalize the pressure in the boot.
@Timmy The Toolman Hand crimps used for PEX would probably work well for those clamps, better than buying the crap ones. I will be getting to that point soon and will use mine to see. Another benefit if you buy the PEX crimpers.....now you can do your own PEX plumbing.
Great tip about the grease around the C clip and the position of the clip opening being down, which I applied to my 99 sienna. A jack stand worked nicely to help hold the axle level while I "pushed" it in at the axle housing flange with a length of 2" X 3" and a small sledge hammer. In the video I noticed fluid dripping from the differential seal after the CV axle was inserted fully. Mine does the same until I push it 1/16" more against the differential. I can pull the axle out 1/16" where it will stop coming out and start leaking. Once I push it forward again, it stops leaking. Has it been your experience that once everything else has been assembled and snugged up the 1/16" movement and leaking does not occur? Was that the way it worked out for Sean? Did the leaking stop for him once everything was reassembled? BTW, I did replace the seal. Cheers and thanks for the super helpful videos!
There's a little cavity near the seal where gear oil can pool. When you insert the axle, some gear oil might spill out and drip making you think you have a leak. Wipe it off clean and then keep an eye on it. You might see another drip or two but then it should stop. If you continue to produce a drip, then you know the seal has been compromised by the removal and reinstallation of the CV axle and you'll need to replace the seal.
that axle grease looks SO good smothered all over the LCAs, bumper stops and sway bar links, some even made it to the rack boot bellows when i found the axle boots had shredded on both sides of my rig during a recent simple oil n' filter change... I thought i had a major engine oil leak LOL, but then I saw the shredded boots on the inboard side, musta been like that for over 1000 miles until i found it like that ... hopefully those factory yota axles can still be rebooted, i only drove in the rain on a few occasions with them ripped wide open
There's probably a bunch of grit inside the joints if you drove it with ripped boots in the rain. I'd clean up the joints with brake cleaner before rebooting them.
@@TimmyTheToolman the boot shredded right near the middle of the shaft at the small clamp 9:36 so hopefully gravity played a roll in not letting any water or foreign substance go up to where the joints are at
Hello Tim. How did that boot extension mod hold up? I know it’s been awhile since you posted this video, i was wondering how’s the result after time has passed. My boot got tore up after 1 day after i lifted it 2”. I bought the reboot kit and thinking of doing the same thing u did on your video
Thank you for responding to this persons question! I have a 3 inch lifted fj and it is shredding boots. We found a set of oem axle shafts for 150$ and i plan to reboot them using this method! This is why i love youtube!! So much help!!
Hey Timmy, appreciate the detail in the video and all of the provided information. I have watched a couple other videos on this same job and they have removed the 4 bolts holding the LBJ to the spindle instead of using a puller for the outer tie rod and LBJ to free the CV axle. What are your thoughts on using that method (removing the 4 LBJ bolts) over the one you used in the video?
You can certainly remove the 4 bolts of the balljoint instead of breaking free the outer tie rod and lower control arm connections to the lower ball joint. We use loctite on the 4 balljoint bolts and after they are installed I don't like messing with them if I can help it. I'm very familiar with using pullers so I can get both of those connections disconnected pretty quickly. Another thing is the difference in how easy it is to get things realigned. I know I can easily align the tie rod and lower control arm to the balljoint but aligning the 4 balljoint bolts back up to the steering knuckle will be a bit more of a test of patience to get them in correctly and not cross-threaded.
Try removing just the outer Cvj after the boot gets torn. It's a nightmare. Many guys actually fail to and just replace the complete axle which cost an arm and leg where from Toyota. Basically what happens is that the Cvj splines get corroded and seizes onto the axle shaft. End up having to destroy the old Cvj to remove it. Wd40 and heat left overnight helps. When mine broke free, the snap ring inside actually was crushed in pieces lol. Had to use a 6 pound hammer on the vice to knock it free
WenzEnuf do you live in a rusty area? It’s nice to be able to actually work on our trucks here in California without anything being to seized or corroded.
WenzEnuf if the boot has been torn for years, then it’s probably best to replace it. If sand and dirt get in there it could mess things out if it has been running dry with no grease for years
Hi timmy&sean, I have leak where cv axle connects to differential…would this likely be a seal issue that’s inside differential where cv axle connects? or is there something else? There is no leak at boot.
Yes, if it's gear oil, it's the differential seal, that seals the CV axle to the diff. I have two videos for you. The first one shows the complete job but the second video introduces another tool that makes the seal insertion to the proper depth super easy. th-cam.com/video/mh1BK5--KrU/w-d-xo.html th-cam.com/video/Q-RO52NtP1A/w-d-xo.html
@@TimmyTheToolman tools and parts ordered check, watch videos several times check, will be attempting job in a couple of days when I’m off…my biggest challenge is fighting seized bolts and nuts…already had to use the heat and chisel technique to free differential plugs…fun times…once again thanks for the awesome videos…I’ll comment again once job is complete…the wits end tool was out of stock so tap tap tappa roo
@@TimmyTheToolmanfinished the job and no leaks, so pumped. Got some new tools, life is good. Tip: I bought the same sleeve kit as you b/c the wits end tool was out of stock. Then discovered the largest adapter from my trailer bearing and seal kit fit perfectly in the sleeve and I was able to strike the handle and drive in the seal.
doing my right now. my oem axle nuts are 35mm they are in great shape.. my new NAPA axles come with what appears to be 37mm or maybe even 38mm nuts.. i dont really wanna buy a new socket just for those.. think its okay to reuse the 35mm nut? it threads on perfect to the new axles as well, so i dont see any harm.. thanks, amazing videos as always.
Hey Evan, yes, you could use your 35mm nut on the Napa axle. As long as it threads on smoothly like you said, you're good to go. Sorry for the late response. I just saw your question. Hope you got the job done with no issues.
Hey Tim, loved the video! In 2021, I'm still rocking the 1996 OEM axles. As I prepare for a 3in lift, both boots are either leaking or slinging grease. Is rebooting still the best option or would it be preferable to go aftermarket axles?
I would reboot and do the boot stretch mod for the inner joint. They do make aftermarket extended boots that are made of silicone that people have used with success so that's another option.
You can usually tell by the type of clamps used to secure the boots onto the CV axle. If they look like the ones we used in the video, it's an OEM axle. You can sometimes easily tell just by looking at the shaft because some aftermarket ones look different.
@@TimmyTheToolman an OEM (new or re-manufactured) should have a Toyota stamp on them or no? perhaps just a sticker that can flake off? ... so i had to recently buy one brand new OEM from Toyota dealer (no re-man available) for the Taco for about 300$ on the BFCM 48% per cent off sale. MSRP is 600$ ... I had ordered a boot kit over a month ago and those are on several month backOrder 8^( ... still waiting on delivery for that sucker!
@@TimmyTheToolman 600$ is the MSRP on a new Yota axle for a Gen1 Tacoma/Gen3 T4R (if they are the same)... I paid 300$ from the online parts dept of Lewis Toyota of Topeka KS during the recent holiday parts sale... they are close enough (2hr drive) that i can wheel it south to pick up genuine parts if necessary or they ship no-extra-charge if order is over 75$ ... it is one heck of a deal on parts!
You can stick a 2x4 that's long enough to hit the ground through the wheel studs to keep the hub from spinning when torquing spacers - not sure if it would work for the axle nut though.
Hey Mario, the ziptie held but we didn't have it on there for too long. We replaced the ziptie with a metal clamp that we made from the universal kit I supplied a link to in the video description. I did find another option but never tried it. They make stainless steel cable ties. I found them in the electrical isle at a Home Depot. They were made by the company Commercial Electric and I thought they would be a good option instead of messing with that awkward universal kit I bought. Here's a link: www.homedepot.com/p/Commercial-Electric-11-in-Stainless-Steel-Tie-10-Pack-MLG-300ST-10/203531940 I thought that over time, the plastic ziptie might break so I figured some type of metal clamp would be better.
That's what I was thinking as well. I did buy some stainless steel cable ties at Home Depot in the electrical section of the store thinking they would be much easier to use than that DIY CV band clamp kit I bought from Moog but I haven't had a chance to try them out yet.
@efil4kizum It is suggested they get replaced, but it's not listed as a non-reusable bolt by Toyota. It's just that people have seen bolt failures, and that's why it's become a thing to replace them.
Yes, you can just remove the 4 balljoint bolts. The reason why we chose to do it the way we did is we don't like messing the balljoint bolts once they've been installed if we can help it. We use loctite on the threads and don't want to re-stress the bolts by torquing them again. Some people have reported having the bolts snap and we're trying to prevent that from happening to us. So, it's basically personal preference.
Great job. I wonder what is purpose of indexing axle and tripod? They do suggest to put indexing marks in other service manuals (I have Camry) but is mystery for me why? Does this have anything to do with balancing? Excellent tutorials btw. Just ignore chair experts, Toyota engineers knows very well why that procedure is necessary.
Another great video be doing my own axel next week question for Sean was wondering what springs are you running since you have that ARB bumper thanks guys
The CV joint boot kit comes with the grease, correct? And each kit only supplies one side (so one would need to order two?) Thanks Tim, your videos are far and away the best T4R maintenance info on the planet!
Yes, the kits come with the grease and one kit is good for one axle so you would need to order two kits for two axles. Glad you're finding our videos helpful Nick. Thanks for the kind words and Happy Wrenching!
Hi Tim, thanks for all your videos. My LBJ failed and the CV axle fell out. There's a yellow grease inside (the one in the bottle in your video). I believe it's polyurea. Do you know if there's a way to just buy the grease? Thanks!
Tim , thanks for the time and effort your vids are too notch. May I ask , I'm doing my 4th gen 4runner. Do I simply order the reboot kit and just stretch the boot over the lower piece. Thank you sir
@underdogontheappalachiantr9646 You can do the boot stretch mod like we showed, but you can also order an aftermarket silicone inner boot that is meant to attach further down the shaft and resists tearing. ORS (Offroad Solutions) sells an aftermarket silicone boot.
For Sean, it's holding up pretty good. Because the inside part of the boot was never meant to clamp on a skinnier part of the CV shaft, some grease can sneak out if you don't have it clamped tight enough. Some people have reported the boot tearing prematurely. When you buy a reboot kit, you get both boots so it's worth a try. If it tears, you can always get an aftermarket longer silicone boot meant to clamp around the skinnier part of the shaft. Off Road Solutions sells a boot for this application. www.offroadsolutions.com/products/high-angle-inner-cv-boot/
@@maw230230 No problem. Good to hear our videos are helping you out. Good luck with the reboot. Have plenty of paper towels and rags on hand. It's quite the messy job.
Good tutorial. As to taping the spline before the boots go on, it's to prevent cuts & micro-cuts from the spline knife-edges which can create leakage pathways (when you slide the boot over the splines) even before the project is done. I'm sure the zip-tie is OK for now, but my LC is 22 years old - do you think the zip tie will last 20 years? (Example: The greatest failure point of solar PV systems is zip-ties degrading from exposure to sunlight.) Also, it seems that the general approach is to bathe/pack the berings in the grease & not just the boot. The grease will eventually get into the berings, but better to have them encased in grease from the start. Thanks for the ride-along. Now I wanna do mine!
Yeah, we understood why they suggested the taping, but those splines on the axle shaft aren't sharp in the least bit, so the FSM suggestion is overkill. It would be better to use a metal style clamp instead of the plastic zip tie. After shooting the video, we swapped out the zip ties using a universal CV boot clamp kit. We link that kit under the "Helpful Tools" heading in the video description. Your comment about the greasing of the joint has been made by several people before you and I'll give the same response that I gave them. Once the CV axle starts spinning, the grease will be quickly dispersed throughout the joint and boot area. For anyone worried about excessive wear during the first few revolutions of the joint, you could put a little grease on the moving parts before packing the rest inside the boot. But, do the grease packing in the way you see fit.
39:18 - These are interference rings and meant to be just like that. If you REALLY beat the shit out of a front axle the shafts will pop out, otherwise they hold very well... For those boot rings the best pliers are the ones that plumbers use for PEX and sprinkler pipe, it's the exact same type of crimp...
Thanks Tim, I'll start on this tomorrow. My boot ripped at the same location as your buddy's truck and I noticed he has 1" diff drop kit installed just like I have, I suspect that's why the fins ripped towards the end instead of the middle. I never worked with those clamps before, can I tighten with regular pliers or is a pair of CV boot clamp pliers a must have?
Hi there, I followed step by step on this video and the other on how to replace the CV axle seal (2004 Tacoma 4x4). I just wanted to say FUCKEN THANK YOU!! And I even double checked your torque and part numbers and they are correct. Looking forward to doing more work on my rig using your videos. Thanks!!
Thank you for the demonstration, there is hardly any material on these older trucks. I'm going to try and get this done on my 1995 2nd gen. I'm assuming the process should be similar. Do you know of anyone who has done it on a 2nd gen successfully? Great work out there, specially for a government worker.
The process will be very similar. There are some minor differences between CV axles. One is the way the tripod is affixed to the shaft. Sometimes there's one c-clip above and below. You have to first release the one underneath and slide it down the shaft a little so you can push the tripod down to expose a second one on the top. The 1st Gen Tacoma axles are like that. I guarantee many people have rebooted 2nd Gen CV axles. Good luck with thr job.
Hey Tim! Awesome video! Just finished my boot mod and was curious if you guys had any issues with the zip tie down the line? Did it leak at all or has it held up? Thanks!
Hey Jesse, we ended up swapping out the zip tie for a metal clamp. In the video description there's a link for a Universal Boot Clamp Kit in the "Tools" section that would work well for making a custom size clamp for that inner connection.
@25:47 i think I would have squeezed as much of the black grease I could into the bearing, then the rest into the boot, that way the bearing isn’t running dry for any length of time.
You could do that but as soon as that cv axle starts spinning, the grease will be quickly dispersed throughout the joint and no excessive wear or damage will occur. There's actually guys who brag that they have been running on CV axles with torn boots for thousands and thousands of miles that have no grease left in them. So, I'm confident the CV joints can handle the few seconds it would take the grease to disperse once they get spinning.
Timmy The Toolman - thats really good news. I also have aftermarket axles on my FJ that I want to replace with some used OEM. I was a little concerned about the bearings on used parts, but considering your remark, it gives me much confidence to move forward. I guess the combination of quality components and quality lubricant goes a long way.
Hey Tim, thank you sooo much for the videos we all really appreciate it, keep up the good work. I have a quick question, my boot is torn on my CV I don't think it has been torn very long so I am hoping to save the axle and just reboot it. you mentioned that Sean was on aftermarket axles, I assume this is so he can keep driving the truck and do the reboot repair whenever is clever? I plan on doing something similar as my truck is my daily driver. do you recommend this? I guess you would end up doing the work twice but I need to truck for work, and the second wouldn't take very long after already doing it haha. Thanks again.
Having a set of extra CV axles is a good idea especially if you 4wheel. Another idea is to try to find a wrecked rig at a PickNPull that you can grab a set of OEM axles from, reboot those, and then put those on your rig. Then you can reboot your original axles whenever and those can be your trail spares. OEM axles are superior to most aftermarket brands. You can tell by looking at the clamps whether they are OEM or not. Take a look at yours so you know what to look for and then search online for Picknpulls in your area to see if any of them have some 3rd Gen 4runners on their lot. Ideally, you'll find one that hasn't been there that long so it won't already be majorly stripped down and the axles are gone.
I think you're talking about not using a puller to disconnect the lower balljoint from the lower control arm and rather removing the "4" not 2 balljoint bolts. If this is what you meant, you're right. You could do it that way.
@@TimmyTheToolman I saw this method in another video and decided to give it a try. For me it was a lot easier just to remove those 4 bolts than messing with the puller. Unfortunately I had already bough the puller set to do it your way 🤣 will use it some other time. Other than that, loved every tip you gave on this vid. Thanks Tim!
@@marxccc Yeah, different strokes for different folks. I don't like messing with the lower balljoint bolts, because I use loctite on them and don't want to pull them out, and clean off the threads so I can reapply loctite to them. I also don't like re-torquing them because there have been reports of bolts failing.
Did you also index that last axle housing, or just the rollers to the shaft? I think you index all three pieces together. Be interested if you're weeping out of those strapped ends as that factory grease is very runny. They make a screw type clamp that has rounded off edges that won't cut into the boots, and they seal up better for wheeling.
We kept the tripod, shaft and tripod housing all in alignment. We got rid of the zip ties and went with a DIY CV clamp kit that ended up getting a tight squeeze on the shaft. Do you have a link to those screw-down clamps you mentioned. Maybe I'll buy some.
As always love your vids. but have found that aftermarket silicone boots last far longer and stand up to road debris and acidic conditions more than even OEM Toyota rubber boots at least in my So Cal desert environment.
Toyota makes one of the best cv axles much better than aftermarket. No wonder you want to put the original ones back in. My question is do they sell just the bearings so you could rebuild the entire axle if the bearing is shot?
I just changed my valve cover gaskets and your other video was very helpful. This is another great video. I'm sure I'll be doing this job before very long too. Sean's 4Runner looks like it has some very nice aftermarket upgrades. I'd be interested in knowing what he has done. How much lift did he put in and what did he have to do to make the lift work right. I see the front diff drop and the CV boot stretch mod is a good idea. What had to be done in back. I believe the reason for limiting the front diff drop to about 1 inch is because it changes the front u-joint angle quite a bit. What kind of roof rack is that? Thanks again.
Glad our videos are helping you out. Here's Sean's build thread on www.Toyota-4runner.org. You'll be able to see all the mods he's done. www.toyota-4runner.org/3rd-gen-t4rs/163299-infamousrnrs-2002-limited-bu-ld-thread.html
Hey Timmy, you have a great video that is very informative thank you. I don't have any question regarding the CV joint installation EXCEPT that one regarding the wheel spacer because some comments from outside say it's not recommended that could create an unsafe issue but I've been dreaming to have that to make my truck look more aggressive. Can you advise please thank you.
There are many who use wheel spacers with no ill effects. But, supposedly, adding wheel spacers can change the forces applied to your wheel bearings that the engineers who built the vehicle didn't intend on. Instead of trying to explain to you what's happening when you add wheel spacers, check out this video from "Engineering Explained". th-cam.com/video/hWijfooeSyU/w-d-xo.html He does a great job explaining what happens when you add wheel spacers to your vehicle.
Don't know if you're talking about the little toy plastic hammer or the little toy claw hammer. I have much bigger hammers but the hammers that are on the top of my box are the small ones. I think I will break out the big boys the next time.
Hey Tim I love your videos it’s like a talking Owners Manuel for a 4Runner. Was wondering if that had helped the issue at all and how long it has lasted. Just lifted me 02 4Runner with 104k and I hear a popping noise when I turn. I believe this is the issue
Yes it has helped a lot but what we would do different since grease has snuck from the smaller boot portion where the stretch mod is located is add a little FIPG to seal that end. Otherwise the boots have not ripped, they just leaked past the portion where the stretch mod is located.
Are there any cv axles that just come with the extended boot? I'm the one that had the catastrophic ball joint failure and figured while I had it apart I may as well give it a small lift. Or do they all come with standard boots?
Some of the more expensive options come with extended boots. Here's an example: www.cvjreman.com/product-tag/9168/ If you want to go totally ridiculous, check these out: www.rcvperformance.com/ultimate-ifs-cv-axle-set-for-toyota-tacoma-95-5-04-and-4runner-95-02.html
It has held up. The one thing is some grease can eventually squeak by the inner connection because that boot was never intended to be clamped on the narrower part of the shaft. Sean and others have found they needed to clamp down the connection a bit tighter to stop grease from seeping out. But, no tears.
We haven't done a reboot with silicone boots but we've worked on somebody's rig who was running them. I think this is the video you were looking for: th-cam.com/video/w_gPiDvh9v4/w-d-xo.html
And what do you think happens when that joints starting spinning and spinning really fast when you're driving down the road. Could it be that the grease populates the whole boot and joint area because it's being slung around? Yep, that's exactly what happens. It doesn't matter where the grease is placed because after the joint gets moving, it's distributed everywhere. Everyone who has experienced a torn boot knows this because the grease gets slung out all over their undercarriage. It doesn't magically stay in and around the joint.
@@TimmyTheToolman all I was saying is the joint is a good place to start with the grease. Most people put the grease in the joint first and the remainder in the boot, I've done dozens like that. Do it however you want.
@@quickturn66 Yeah, your way is totally fine. I just don't think it makes much of a difference either way. The grease is not so tacky that's it's not going to immediately be distributed throughout the joint in a matter of seconds once the CV axle gets spinning fast. I was just copying what I saw a respected professional mechanic that has his own TH-cam channel did when he made his own video on this subject. It seemed perfectly fine to me to just squeeze the grease into the boot so that's what I did.
Hello Tim, always having a good time watching and learning from your videos. Looks like Moog 3401 crimp boot clamp set is no longer in the market. Do you have other brand/kind that you could recommend. Greetings from the midwest.
Hey Tim a few questions 1.) I went to my Toyota Dealer and they gave me 2 new CVs, but they are Duralast Gold CVs not OEM. Is this common for dealers to do this? 2.) My OEM CVs are fine it is my inner CV boots that got tears in them shortly after I lifted my 4runner. I didn't want to deal with taking them apart and rebuilding them as I am new to all of this and don't want to mess anything up, plus it would take more time. That is why I went and bought new ones. My truck has 160.000 miles on it now, but now I am wondering if I should rethink this and just get a boot kit and fix them up even though they have a decent amount of use. 3.) Would I have to go get another alignment after this? I got one right after the lift and have only about 1000 miles driven since the the lift was installed. I really hope I don't have to fork out more money for that again. Always appreciate your videos! Thanks!
That's interesting that a Toyota dealer is selling non-oem CV axles. I don't think that is common. But, maybe OEM CVs are in short supply. If it were me, I'd buy the boot kit, and keep my OEM axles.
Hey Timmy, I have a 2.5 lift on my 3rd gen and was wondering if I buy the Napa extended cv axle would I still have to do the boot stretch mod? Because if that’s the case then I’ll just mod my oem one.
You couldn't do it like we did it but I imagine somebody could probably come up with some Macgyver way. I think it would be a pain in the butt though. I would just pull the axles.


If no one has commented it yet, the hose clamps are actually the same style as PEX. You can use a sharkbite crimp pex tool. I happened to have one in my plumbing box and it worked FANTASTIC.
That's great information. Thanks for sharing.
Thank you very much for this video. I don't regularly work on my vehicles but your video gave me confidence to tackle this project. It took me all day but I got it done. The part numbers, the torque specs, and the tips to make things easier (zip ties to support the axle, the prybar to remove the inner cv, and just push the axle in to seat it) all worked for me. You rock.
Hey Michael, great to hear our video gave you the confidence to tackle this job and that it turned out well for you. Thanks for taking the time to share your success story. We appreciate it. Happy Wrenching!
Great, very helpful video! 3 notes from just doing an axle swap on one side of my Tacoma:
1. I opted to not drain the diff as the oil in there is pretty new. jacking up the side I was working on only resulted in only a little oil coming out when the axle was removed and didn't make any more of a mess than coming out the drain plug. I only needed to add 7 oz of new oil when done and didn't have to remove the drain plug or replace that crush washer.
2. the tire on the ground trick works well for removing the axle nut too if you're doing this job on your own
3. I'm not sure why you were able to just pull the axle out after disconnecting it, but mine wouldn't fit between the sway bar end links and the spring, so I ended up having to remove the end link and drop the sway bar bracket to get enough clearance.
Yeah, you can certainly avoid draining your front diff by jacking up one side at a time.
I'm glad the tire trick worked for you. We try to remember options in our videos for people who are working solo.
With some models, your Tacoma being one of them, the sway bar end link does get in the way of pulling the CV axle out. We actually have not worked on Tacomas very much.
I always go to your videos when contemplating tackling a job and you’ve helped me without fail! The self-satisfaction of doing myself rather than paying some mechanic is priceless! QUESTION: It’s been like 4 yrs since you did this job and I’m curious on how it held up?? Thanks!
6 years ago (couldn’t edit my post)
Sean's boots are holding up fine. He did get some leakage at the CV shaft connection (Boot Stretch side), but he tightened the clamp and all is good.
Great to know our videos are helping you do your own work. That is our goal.
@@TimmyTheToolman That’s enough validation for me, gonna order those boot kits today. Gathering parts to refresh front steering components, control arms, old man emu shocks, etc. Have ~ 3” lift.
@@jamessnyder9050 Good luck with all the work. Happy Wrenching!
@TimmyTheToolman I was getting ready to ask the same thing.
I finally getting/got another Toyota truck so went down a rabbit hole of mods & found this.
Very interesting.
I remember the service manual for toy 87 hilux saying that if you clean the joint really clean with a solvent it will dry it out, so its good to pack/work some new grease directly into the joint before squirting the rest into the boot-so its lubed a bit before the stuff squirted into the boot has a chance to work its way into the joint as you drive. Also, if you clean with diesel or an oil based parts cleaner, it wont dry out the joint as much while cleaning it.
Yeah, packing some grease into the joint isn't a bad idea. But, with centrifugal force, as soon as the joint starts spinning, the grease will be quickly dispersed throughout the joint. So, in my opinion, it's not a huge concern to just pack all the grease into the boot. Thanks for the comment.
These are great videos and very helpful. Exercise caution when prying the CV axle out against the driver's side differential case. The lip that surrounds the dust seal is soft and deforms easily. A slide hammer equipped with a CV puller such as the OEM 27058 got my resistant driver's side axle out and didn't damage the case. But, on the passenger side, that puller wouldn't fit between the dust seal and housing. We used an impact hammer against a lobe of the CV axle and it popped out with only slight damage to the axle.
L Turner Glad you like the video. You are correct that you have to watch that you don't bend that dust seal when prying the CV axle out of the differential. The prying method works but it's sometimes frustrating and I've also used the technique of just getting on the lip of the inner joint with a pry bar and knocking it loose with a hammer. Thanks for sharing that specialty tool option.
Another fine Vid Timmy and Sean. Thanks for giving me the confidence to do my own Reboot and stretch. The job turned out perfect. I also siliconed the 4 edges of my boots to help keep them water tight hopefully. Viewers, Pls send these guys a Super Thanks $1 to keep these Vids coming. Russ in Minnesota
Dang russel! Thanks for the tip! That’s nice of you. These boots still haven’t ripped but where the “stretched” part was started to leak out a bit, next time we will FIPG that end.
- Sean
Hey Russell, great to hear the Reboot went well and thanks for the support of our channel. Money isn't our main motivator though. Money helps but our favorite form of payment is hearing from people like yourself that our videos have helped them out. That's what motivates us to keep making videos. So, thanks for taking the time to comment. Happy Wrenching!
@@TimmyTheToolman Sean you Rock dude
Great detailed video without too much unnecessary talk. Well Done!
Thanks. We're glad you like the video. Thanks for taking the time to comment.
Awesome work as always, Tim and Sean. Learning so much from your videos. My wife always asks "are you watching another 4Runner repair video?"
Gotta say I'm practically rolling on the floor laughing at 45:10 - those shoes and the awesome shoe laces, Sean!? Love it. I'm going to break out some cardboard when I get home and revive my old break dancing moves. You guys are awesome!
Glad you're finding our videos helpful. Sean does like his old school shoe styling. Thanks for the comment and Happy Wrenching!
Tim: can’t thank you enough for the video. Just had to do this to my 97 after the outer boot was torn in a front end collision. I bought the big box auto parts generic boot kit and ended up doing it all over again with the factory parts. I would have been clueless without the information you shared in this video. Well done sir! 🍻
You're very welcome Frank. Glad our video helped you out. We appreciate you taking the to comment. Happy Wrenching!
Did this job last weekend. Alternatively, instead of taking the lower balljoint and tie rods apart at the joints, I simply took the 4 bolts that hold the balljoint to the knuckle off. This allows free motion of the knuckle just as if you had taken both the balljoint and the tie rod off loose.
Unfortunately I purchased a new NAPA maxdrive axle. When I got it back together I now have a hell of a vibration. Will be doing a reboot to the OEM axle and swapping the NAPA part out this next weekend.
Yeah Andrew, the way you did it is fine. I decided I liked breaking free the tie rod and LBJ connections over removing the 4 balljoint bolts because re-torquing those 4 bolts might cause some fatigue to them. People have been known to have a balljoint bolt shear off. Also, lots of guys like me use loctite on those balljoint bolts so leaving them alone and not having to re-loctite them is another reason.
That's weird you have a vibration from the Napa CV axles. I didn't know the balancing of these axles was such a big deal. I wonder if you just got a bad set, like the shafts are slighting bent or something else is way off. These axles aren't balanced like a driveshaft is. Make sure you got your wheels torqued down properly. Usually a bad vibration in the front end is due to wheel balancing.
Tim, you're a damn hero. Appreciate your effort so much. Actually using your vid on rear 3rd member removal now, but you're a legend my friend.
Thanks. We appreciate your kind words. Hope the job went smooth for you. Happy Wrenching!
Just did this mod over the weekend on both sides. did all-new suspension front and rear with Oldman emu, jba uppers. did the starter as well, since it was apart and easier to get at. also replaced lower control arm bushings with some Whiteline. for the life of me, I could not fit two of the washers in passenger side forward one. hopefully, the alignment shop can get em in lol. last weekend was welding both front and rear coastal bumpers with dual swingouts..cant wait to relax and just enjoy some BC backcountry. thanks for the tips Tim. all your videos were a major help
Good job getting all that work done. Glad our videos are helping you out. You're very welcome and Happy Wrenching!
Great video! Just one tip it's always a good ideal to run some tape around the races as you knock the fixture off the shaft. Fortunately, the races did not fall off or else you would have had a bunch of needle bearings on the floor. Keep the videos coming.
I've had that happen on a Tacoma CV shaft. Why those races were able to pop off the Tacoma axle but not the 4runner axle is interesting. So yeah, it can happen and finding all the needle bearings is a pain in the butt.
Great video Tim. Job went like clockwork. Extremely confident taking it on because of your tutorial! Thanks!
Thanks John. It's great to know our video helped give you the confidence to tackle it. You're very welcome.
Thanks Timmy. Been watching this a few times prepping to do my 02 Taco. And the bearing hubs too. So helpful!
Any way, a tip on those axle nuts or spacer nuts, instead of using the brakes just use a vertical stop to turn into, on one of the lug studs. A 2x4 cut works great. Place it vertical from the floor to a stud.
Thanks for the tip. Somebody else mentioned this as well a while back. My only concern is putting all that force on the lug nut stud but I guess they are pretty tough and won't bend.
I'm pretty sure that it is the original factory boot. This is great. Your covering a major component of the 3rd gen. Some of the CV Joints on these 3rd gen can really be upgraded to superstock with lifetime replacement if they break! This awesome, thank you Tim.👍
We're glad you like the video and you're very welcome.
FYI. If your truck has manual hubs, not only is hubside of axle different, the tripod attaches differently. There is no outer C-clip. There is an inner c-clip like the one that pops into the diff. It's a pain to get the tripod off. Easiest way I found was remove clip below the tripod, hammer tripod deeper on shaft to expose internal clip, then pry clip off. Then tripod will come off. Also, the three bearings do come off easily, dropping the needles all over the floor, so be careful. Thanks for your video, it still helped me a lot.
Yep, you're right, the manual hub axles are different and I believe all the 1st Gen Tacoma axles, even the ones for ADD are the same way. I learned there were two c-clips for the Tacoma axles when I was helping a friend reboot his and also learned that the roller over the needle bearings can come off, because it did on us and we were searching for needle bearings on the ground. Fun Times. Glad our video helped you out.
Thanks for the reply. I did side #2 today in about 1/3 the time. I carefully wrapped the tripod in a piece of duct tape to hold bearings together, then set it in the freezer to contract. Then when I put it back on, I used a 1 1/6" socket over the end to bang it over the internal clip. Went on easily. Hardest part of this job for me was getting axle back into the diff. It's a nightmare until everything is lined up just right, then it pops right in. Love your videos, thanks!
@@andrewm.4168 Good job getting it all done. Yep, popping the axle into the differential can be a test of patience. Glad you like the videos Sean and I are making. Happy Wrenching!
Ended up using a 3 prong puller to get the tripod off, you all got lucky with the brass drift!
Weird. I wonder why it was so stuck on there.
@@TimmyTheToolman might be the original one from 20yrs ago haha
@@ever2gut1 Probably is but it still shouldn't be that hard to get off. Oh well, you got it done, and that's what counts.
@@TimmyTheToolman yeah I am still surprised, now to finish the job!
Great video Tim. Now I gotta save my OEM’s. I was thinking of buying a new axle complete.
Edgar Rangel you could buy an OEM axle and use your ripped boot CV’s as a core charge. Or pay the core and have an extra axle on hand
Excellent Job. Even though manual says you need to match mark, it is not needed, I have done dozens and it works very well. Use knipex ear clamp cost only 19 dollar which is much better. Also use universal ear clamp one with knipex it works well as well. Thanks again.
Thanks. Glad you like the video. I do now own a set of ear clamp pliers as well. They do work pretty good.
Hey Timmy. Just followed your video and did this yesterday. Instead of using different aftermarket clamps I switched the small clamps. So small for inner I used for the outer and the small for the outer I used for the inner. You have to tweak the clamps a bit but it works. I hope it lasts!
Thanks for sharing this technique. Hopefully it lasts until the next time you have to reboot.
Thanks!
I've never heard of a Super Thanks. Is this something new from TH-cam? Thanks for the donation Russell.
@@TimmyTheToolman Not sure, I wanted to say thanks for the Vid and TH-cam said I could give a super thanks for $1 I clicked Yes, sure
@@russellwilkins5424 That's cool. I believe you're the first to give us a Super Thanks. We do however have a tip jar link that many have used to give us a donation. The link is on our home page on the right side of the screen under the image of me. It's next to the links to our Facebook and Instagram pages. By the way, I didn't let you know about the tip jar link expecting a donation. I just wanted to point out that was another way people have shown their appreciation of our videos.
Wow, best video I've seen on this so far. Thanks!
Thanks for the compliment and you're very welcome. Good luck with the reboot.
It may have been commented on but you can also use the tool for pex plumbing clamps to tighten the outboard clamps. I did and it worked perfectly.
We hadn't heard that. Good to know.
Thanks for taking the time to make this and sharing the knowledge. Suuuper helpful. Gonna be replacing the cv's on my 1st genTundra this afternoon.
You're welcome Scott. Glad you found our video helpful and good luck with the job. Happy Wrenching!
Mushroomed the CV axle pounding it back in with a regular old mallet. Guess I finally got an excuse to buy a brass one. Luckily it's just a cheap $45 Cardone CV !
@@1upgreenshroon That's a bummer that happened. Next time try using a long pry bar like we show in the video to pop the CV axle back in the differential. But yeah, a brass hammer is a nice addition to your tool arsenal.
@@TimmyTheToolman Thanks for the tip. I'll try that on the other side. I was eventually able to get the CV started by pushing it in with my hands and swearing a lot. After it was started a plastic deadblow hammer got it the rest of the way.
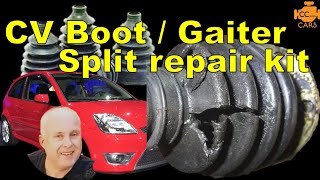
I just did mine today using this split boot. Worked like a charm and is the way to go if your axel is still good. My shop wanted $700 to replace the whole axel and, after buying a couple of tools I managed to keep the cost well under $80. I cannot stress out enough how important is to preserve the lip of the original boot that goes towards the transmission in place. Cut out the old boot around the edge without removing the original strap. Once the old boot is out, then cut out the old strap away (ask me how I know). That end of the axel is oddly shaped and you need the original boot’s end because it matches the contour of the part and will give you a nice flat round shape to slide in your new boot into. If you don’t use it, the grease will leak out and water will get inside. IT IS VERY CRITICAL not to install the split boot directly to the axel end side.
Never tried the split boot. I wonder what sort of longevity they have.
this is a bot!!!!!!!!!!!!!!1
Thanks for the how to. Just finished mine. My tripod would not come off. I had to beat on it for an hour or so. But everything else went smooth.👍
Almost forgot. I used a old pair of bull nose plyers to pinch the clamps.
You're welcome and great job getting the job done.
Thanks for your vids, they are very helpful.
Why not use stainless hose clamps for the boots?
A tip for getting the axle nut on off without a helper on the brakes is to brace the hub using the studs against a bar or even 2x4 vertical to the ground.
People have used regular screw down hose clamps with success. Thanks for sharing the tip for getting the axle nut off without a helper.
Tim, I misspoke I was confusing those needle bearings with those on a universal joint. I should have never question your expertise☺.
No worries, but actually you are right like I mentioned in my response to your original comment. I haven't seen this possibility with 4runner axles but Tacomas are different and your suggestion of taping them is a smart one.
Kartek offroad sells Porsche screw type SS boot clamps with the sides knurled away from the boots. They are great, and I have installed them on 2 of my Toyota’s and have had them on for years. You just have to take the old ones down to match them up as I don’t have the part #s. Also when installing make sure they don’t contact the lower shock when rotated.
Thanks for sharing this.
OEM toyota boot bands work well, as what is mentioned in video. In a toyota forum some one suggested marine 304 stainless smooth band clamps worm type, I tried them ON Lexus & Toyota boots and have had success with them staying on tight. McMaster-Carr of Santa Fe Springs has them PN 5574K24 and 5574K16 much better than local parts stores.
Thanks for sharing that.
About getting the CV back into the diff: just as a confirmation of how you shoved it back in, essentially. There's a video of a CV replacement on a FJ cruiser, and demonstrated as a Trailside repair. They did the same thing. They just popped it in by shoving it a couple times. I have a 4th gen 4runner, which is the same front end as that, and really similar to this one here. Last time I did a CV swap I banged it back in with a BFH and a cold chisel as a drift. It was very stubborn. I'll try the shove in method next. I've got to re boot my OEM cv's soon and do the swap. I'm glad I didn't turn the originals in for a core refund.
Sometimes the CV axles pop in easy and other times not. I like using a long pry bar that you can get onto the lip of the inner joint and then strike with a hammer to pop it in. If I have somebody helping me, I have them hold the axle parallel with the ground for a straight insertion. With the outside joint drooping towards the ground, that will make it harder to pop in. If I'm by myself, I will use some bailing wire tie up and support the outside end of the shaft parallel with the ground and then grab my pry bar and hammer to knock it in. Also, the factory service manual does state if you have the open side of the c-clip facing downward, it can help with the insertion. Happy Wrenching!
I always wondered exactly how these CV axles are designed on the inside. Now I know. A little more to them than I originally thought.
I'm glad we could de-mystify it for you.
Yeah man, thanks Timmy!@@TimmyTheToolman
@@howabouthetruth2157 No problem!
@38:20 there are some stainless zip ties that I think will work really well, I will try them on my mod.
If they end up working out well for you, please get back to us and let us know and maybe provide us a link. I'll add it to the video description for others to consider as an option. Thanks!
Timmy The Toolman - here is the link to stainless zip ties: www.amazon.com/gp/product/B072WC1MXT/ref=ppx_yo_dt_b_search_asin_title?ie=UTF8&psc=1
They worked well and so far so good with about 5k miles on them.
Tim, there's a tool for those metal clamps. It's similar to the tool you used on the zip ties and works the same way, but it allows you to bend the end to lock it in place before you hammer down the tabs.
Yeah, I have the tool you're talking about but it's for a different style clamp that the Toyota kits don't come with. The Toyota clamps are a crimp style and the fold over style. The type of clamp you're referring to is the zip tie style. I bought that tool thinking I'd need it but it ended up the Toyota clamps were different.
@@TimmyTheToolman Yea, I've used the fold over style many times and hate them. The crimp style that you show at the end from Moog are far superior. I have to do my boots when I get back to the shop and wanted to catch up in a couple weeks. Been retired for many years. Thanks for the video.
@@timsvids5983 Yeah, you're welcome. Good luck with the rebooting.
Thanks again for another informative video Timmy!!
You're very welcome!
I'm not sure if anyone has mention this but I've read that you were suppose to use different clamps so the boots wont budge & slide.
Im not sure which clamps exactly though. Great video nonetheless!
I'm gonna tackle this job in a few weeks myself.
We did end up making our own inner clamps to get a tighter fit around the shaft for the boot stretch mod.
Setting the proper cv lengths by adjusting the inner housing and tripod depth before you crimp the clamps tight is critical. The allows the air pressure to equalize so there isn’t a vacuum. This was causing the CVs to pop out while driving can be detrimental for vehicles with automatic hubs. Measure the count length before dissembling to reference.
You can also equalize the pressure once the CV axle is on the rig by simply getting a small flat blade screwdriver driver between the boot and and shaft and giving the screwdriver a twist. This will let air in or out to equalize the pressure in the boot.
@Timmy The Toolman Hand crimps used for PEX would probably work well for those clamps, better than buying the crap ones. I will be getting to that point soon and will use mine to see. Another benefit if you buy the PEX crimpers.....now you can do your own PEX plumbing.
Please let us know how the Pex crimpers work out.
@@TimmyTheToolman I will do that for ya.
I've had success over the years using liquid white out to make the match marks...
Yeah, that works well. Thanks for sharing it.
Excellent excellent video Tim as usual.
Thanks! We're glad you like it. Good luck with the job.
great video and great instruction, I am doing this repair right now. I guess it held up alright? No one has asked about that
Yes, it's holding up fine.
Great tip about the grease around the C clip and the position of the clip opening being down, which I applied to my 99 sienna. A jack stand worked nicely to help hold the axle level while I "pushed" it in at the axle housing flange with a length of 2" X 3" and a small sledge hammer.
In the video I noticed fluid dripping from the differential seal after the CV axle was inserted fully. Mine does the same until I push it 1/16" more against the differential. I can pull the axle out 1/16" where it will stop coming out and start leaking. Once I push it forward again, it stops leaking.
Has it been your experience that once everything else has been assembled and snugged up the 1/16" movement and leaking does not occur?
Was that the way it worked out for Sean? Did the leaking stop for him once everything was reassembled?
BTW, I did replace the seal.
Cheers and thanks for the super helpful videos!
There's a little cavity near the seal where gear oil can pool. When you insert the axle, some gear oil might spill out and drip making you think you have a leak. Wipe it off clean and then keep an eye on it. You might see another drip or two but then it should stop. If you continue to produce a drip, then you know the seal has been compromised by the removal and reinstallation of the CV axle and you'll need to replace the seal.
thank you Tim showing how replace boot
You're welcome.
that axle grease looks SO good smothered all over the LCAs, bumper stops and sway bar links, some even made it to the rack boot bellows when i found the axle boots had shredded on both sides of my rig during a recent simple oil n' filter change... I thought i had a major engine oil leak LOL, but then I saw the shredded boots on the inboard side, musta been like that for over 1000 miles until i found it like that ... hopefully those factory yota axles can still be rebooted, i only drove in the rain on a few occasions with them ripped wide open
There's probably a bunch of grit inside the joints if you drove it with ripped boots in the rain. I'd clean up the joints with brake cleaner before rebooting them.
@@TimmyTheToolman the boot shredded right near the middle of the shaft at the small clamp 9:36 so hopefully gravity played a roll in not letting any water or foreign substance go up to where the joints are at
@@efil4kizum Yeah, hopefully the joint isn't full of dirt and debris.
boots are on backOrder until Jan-2o24... what. a. nightmare.
@efil4kizum I bet if you searched other Toyota online sellers, you'll find them immediately.
Again awesome video and in depth in details ... 👍
Thanks for your kind words & taking the time to comment. Happy wrenching.
Hello Tim. How did that boot extension mod hold up? I know it’s been awhile since you posted this video, i was wondering how’s the result after time has passed. My boot got tore up after 1 day after i lifted it 2”. I bought the reboot kit and thinking of doing the same thing u did on your video
The boot stretch mod is holding up well for Sean.
Timmy The Toolman ok Tim thank you
@@eddvale2805 You're welcome.
Thank you for responding to this persons question! I have a 3 inch lifted fj and it is shredding boots. We found a set of oem axle shafts for 150$ and i plan to reboot them using this method! This is why i love youtube!! So much help!!
Hey Timmy, appreciate the detail in the video and all of the provided information. I have watched a couple other videos on this same job and they have removed the 4 bolts holding the LBJ to the spindle instead of using a puller for the outer tie rod and LBJ to free the CV axle. What are your thoughts on using that method (removing the 4 LBJ bolts) over the one you used in the video?
You can certainly remove the 4 bolts of the balljoint instead of breaking free the outer tie rod and lower control arm connections to the lower ball joint. We use loctite on the 4 balljoint bolts and after they are installed I don't like messing with them if I can help it. I'm very familiar with using pullers so I can get both of those connections disconnected pretty quickly. Another thing is the difference in how easy it is to get things realigned. I know I can easily align the tie rod and lower control arm to the balljoint but aligning the 4 balljoint bolts back up to the steering knuckle will be a bit more of a test of patience to get them in correctly and not cross-threaded.
Try removing just the outer Cvj after the boot gets torn. It's a nightmare. Many guys actually fail to and just replace the complete axle which cost an arm and leg where from Toyota. Basically what happens is that the Cvj splines get corroded and seizes onto the axle shaft. End up having to destroy the old Cvj to remove it. Wd40 and heat left overnight helps. When mine broke free, the snap ring inside actually was crushed in pieces lol. Had to use a 6 pound hammer on the vice to knock it free
WenzEnuf do you live in a rusty area? It’s nice to be able to actually work on our trucks here in California without anything being to seized or corroded.
@@TimmyTheToolman for sure. I bought the pickup from a guy who lived right next to the ocean. He also had driven it with that torn booth for yrs
WenzEnuf if the boot has been torn for years, then it’s probably best to replace it. If sand and dirt get in there it could mess things out if it has been running dry with no grease for years
@@TimmyTheToolman yes. Tnx man. I did replace the Cvj.
Hi timmy&sean, I have leak where cv axle connects to differential…would this likely be a seal issue that’s inside differential where cv axle connects? or is there something else? There is no leak at boot.
Yes, if it's gear oil, it's the differential seal, that seals the CV axle to the diff. I have two videos for you. The first one shows the complete job but the second video introduces another tool that makes the seal insertion to the proper depth super easy.
th-cam.com/video/mh1BK5--KrU/w-d-xo.html
th-cam.com/video/Q-RO52NtP1A/w-d-xo.html
@@TimmyTheToolman tools and parts ordered check, watch videos several times check, will be attempting job in a couple of days when I’m off…my biggest challenge is fighting seized bolts and nuts…already had to use the heat and chisel technique to free differential plugs…fun times…once again thanks for the awesome videos…I’ll comment again once job is complete…the wits end tool was out of stock so tap tap tappa roo
@@jj2956 Good luck with the job. Hope it goes relatively smooth for you.
@@TimmyTheToolmanfinished the job and no leaks, so pumped. Got some new tools, life is good.
Tip: I bought the same sleeve kit as you b/c the wits end tool was out of stock. Then discovered the largest adapter from my trailer bearing and seal kit fit perfectly in the sleeve and I was able to strike the handle and drive in the seal.
@@jj2956 Good job!
doing my right now. my oem axle nuts are 35mm they are in great shape.. my new NAPA axles come with what appears to be 37mm or maybe even 38mm nuts.. i dont really wanna buy a new socket just for those.. think its okay to reuse the 35mm nut? it threads on perfect to the new axles as well, so i dont see any harm..
thanks, amazing videos as always.
Hey Evan, yes, you could use your 35mm nut on the Napa axle. As long as it threads on smoothly like you said, you're good to go. Sorry for the late response. I just saw your question. Hope you got the job done with no issues.
@@TimmyTheToolman thanks for the reply Tim, I’m sending you an email real quick if you could check that thank you
@@echosierraenroute Just sent you an email reply.
For the wider more ridgid CV clamps, the OTC 4722 is a good choice of clamp crimpers at a reasonable price.
Thanks for the tool suggestion.
Hey Tim, loved the video! In 2021, I'm still rocking the 1996 OEM axles. As I prepare for a 3in lift, both boots are either leaking or slinging grease. Is rebooting still the best option or would it be preferable to go aftermarket axles?
I would reboot and do the boot stretch mod for the inner joint. They do make aftermarket extended boots that are made of silicone that people have used with success so that's another option.
@@TimmyTheToolman can you link to those aftermarket boots, please?
Is there a way to tell if you've still got the OEM CV axle on the car or if it's already been replaced with an aftermarket? Thanks!
You can usually tell by the type of clamps used to secure the boots onto the CV axle. If they look like the ones we used in the video, it's an OEM axle. You can sometimes easily tell just by looking at the shaft because some aftermarket ones look different.
@@TimmyTheToolman an OEM (new or re-manufactured) should have a Toyota stamp on them or no? perhaps just a sticker that can flake off? ... so i had to recently buy one brand new OEM from Toyota dealer (no re-man available) for the Taco for about 300$ on the BFCM 48% per cent off sale. MSRP is 600$ ... I had ordered a boot kit over a month ago and those are on several month backOrder 8^( ... still waiting on delivery for that sucker!
@efil4kizum It is a sticker, and they fall off. Where do you live that you paid $600 for one CV axle?
@@TimmyTheToolman 600$ is the MSRP on a new Yota axle for a Gen1 Tacoma/Gen3 T4R (if they are the same)... I paid 300$ from the online parts dept of Lewis Toyota of Topeka KS during the recent holiday parts sale... they are close enough (2hr drive) that i can wheel it south to pick up genuine parts if necessary or they ship no-extra-charge if order is over 75$ ... it is one heck of a deal on parts!
@@efil4kizum Gotcha.
You can stick a 2x4 that's long enough to hit the ground through the wheel studs to keep the hub from spinning when torquing spacers - not sure if it would work for the axle nut though.
That's a good trick. Maybe it would work for the axle nut.
Love your vids, keep up the greatness!
Thanks Anthony. We're stoked you like what we're doing.
1.5x playback speed for american speakers, your welcome. also thanks gentleman, beers are on the way.
You're welcome. Thanks for the beers!
@37:50 Did the ziptie hold? Getting ready to rebuild my oem, wondering if I should do this mod. Thanks!
Hey Mario, the ziptie held but we didn't have it on there for too long. We replaced the ziptie with a metal clamp that we made from the universal kit I supplied a link to in the video description. I did find another option but never tried it. They make stainless steel cable ties. I found them in the electrical isle at a Home Depot. They were made by the company Commercial Electric and I thought they would be a good option instead of messing with that awkward universal kit I bought. Here's a link: www.homedepot.com/p/Commercial-Electric-11-in-Stainless-Steel-Tie-10-Pack-MLG-300ST-10/203531940
I thought that over time, the plastic ziptie might break so I figured some type of metal clamp would be better.
Cool that it held long enough to fix it right. For long term I imagine the zip tie would crack and become bridle in a short amount of time.
That's what I was thinking as well. I did buy some stainless steel cable ties at Home Depot in the electrical section of the store thinking they would be much easier to use than that DIY CV band clamp kit I bought from Moog but I haven't had a chance to try them out yet.
I checked the link there for cable ties, thank you. They look useful. Why not just use stainless hose clamps?
do you have to pull the lower ball joint or can you take off two bolts holding it to spindle
You can disconnect the bolts that hold the balljoint to the spindle. There's usually more than one way to complete a job.
@@TimmyTheToolman those bolts would need to be replaced with NEW oem bolts as in they are non-reusable parts once torqued down and stressed?
@efil4kizum It is suggested they get replaced, but it's not listed as a non-reusable bolt by Toyota. It's just that people have seen bolt failures, and that's why it's become a thing to replace them.
@@TimmyTheToolman Any nail that does not come with a spare part does not need to be replaced unless it is damaged.
@@فارسالتميمي-ع7غ I think the translation wasn't perfect because I'm not sure what your comment means.
why did you undo the LBJ and the tie rod? Can't you just unbolt the 4 bolts on the bottom of the LBJ and swing the spindle out?
Yes, you can just remove the 4 balljoint bolts. The reason why we chose to do it the way we did is we don't like messing the balljoint bolts once they've been installed if we can help it. We use loctite on the threads and don't want to re-stress the bolts by torquing them again. Some people have reported having the bolts snap and we're trying to prevent that from happening to us. So, it's basically personal preference.
Great job. I wonder what is purpose of indexing axle and tripod? They do suggest to put indexing marks in other service manuals (I have Camry) but is mystery for me why? Does this have anything to do with balancing?
Excellent tutorials btw. Just ignore chair experts, Toyota engineers knows very well why that procedure is necessary.
I actually don't think it's necessary to get the tripod back in the same spot on the shaft. Why the engineers suggest it, I don't know.
Another great video be doing my own axel next week question for Sean was wondering what springs are you running since you have that ARB bumper thanks guys
I opted for the 650lb spring when I ordered the coilovers from toytec.
The CV joint boot kit comes with the grease, correct? And each kit only supplies one side (so one would need to order two?) Thanks Tim, your videos are far and away the best T4R maintenance info on the planet!
Yes, the kits come with the grease and one kit is good for one axle so you would need to order two kits for two axles. Glad you're finding our videos helpful Nick. Thanks for the kind words and Happy Wrenching!
Hi Tim, thanks for all your videos. My LBJ failed and the CV axle fell out. There's a yellow grease inside (the one in the bottle in your video). I believe it's polyurea. Do you know if there's a way to just buy the grease? Thanks!
You're welcome. I'm not sure you can source just the grease. I've never tried.
Tim , thanks for the time and effort your vids are too notch. May I ask , I'm doing my 4th gen 4runner. Do I simply order the reboot kit and just stretch the boot over the lower piece. Thank you sir
@underdogontheappalachiantr9646 You can do the boot stretch mod like we showed, but you can also order an aftermarket silicone inner boot that is meant to attach further down the shaft and resists tearing. ORS (Offroad Solutions) sells an aftermarket silicone boot.
How's the stretched boot mod holding up after 6ish years, and is it worth doing it?
For Sean, it's holding up pretty good. Because the inside part of the boot was never meant to clamp on a skinnier part of the CV shaft, some grease can sneak out if you don't have it clamped tight enough. Some people have reported the boot tearing prematurely. When you buy a reboot kit, you get both boots so it's worth a try. If it tears, you can always get an aftermarket longer silicone boot meant to clamp around the skinnier part of the shaft. Off Road Solutions sells a boot for this application. www.offroadsolutions.com/products/high-angle-inner-cv-boot/
@@TimmyTheToolman cool, thanks
@@howtodoit1779 No problem
One question for minute 12:31 - is there a snap ring there that needs to come off?
Yes, there is.
@@TimmyTheToolman OK, I just wasn't completely sure from the video 😁.
Jokes aside you are a 3rd gen owner's salvation!
@@maw230230 No problem. Good to hear our videos are helping you out. Good luck with the reboot. Have plenty of paper towels and rags on hand. It's quite the messy job.
Good tutorial. As to taping the spline before the boots go on, it's to prevent cuts & micro-cuts from the spline knife-edges which can create leakage pathways (when you slide the boot over the splines) even before the project is done. I'm sure the zip-tie is OK for now, but my LC is 22 years old - do you think the zip tie will last 20 years? (Example: The greatest failure point of solar PV systems is zip-ties degrading from exposure to sunlight.) Also, it seems that the general approach is to bathe/pack the berings in the grease & not just the boot. The grease will eventually get into the berings, but better to have them encased in grease from the start. Thanks for the ride-along. Now I wanna do mine!
Yeah, we understood why they suggested the taping, but those splines on the axle shaft aren't sharp in the least bit, so the FSM suggestion is overkill.
It would be better to use a metal style clamp instead of the plastic zip tie. After shooting the video, we swapped out the zip ties using a universal CV boot clamp kit. We link that kit under the "Helpful Tools" heading in the video description.
Your comment about the greasing of the joint has been made by several people before you and I'll give the same response that I gave them. Once the CV axle starts spinning, the grease will be quickly dispersed throughout the joint and boot area. For anyone worried about excessive wear during the first few revolutions of the joint, you could put a little grease on the moving parts before packing the rest inside the boot. But, do the grease packing in the way you see fit.
39:18 - These are interference rings and meant to be just like that. If you REALLY beat the shit out of a front axle the shafts will pop out, otherwise they hold very well... For those boot rings the best pliers are the ones that plumbers use for PEX and sprinkler pipe, it's the exact same type of crimp...
Good to know. Thanks for the info.
Thanks Tim, I'll start on this tomorrow. My boot ripped at the same location as your buddy's truck and I noticed he has 1" diff drop kit installed just like I have, I suspect that's why the fins ripped towards the end instead of the middle. I never worked with those clamps before, can I tighten with regular pliers or is a pair of CV boot clamp pliers a must have?
The CV boot clamp pliers are sort of a must-have. You'll struggle with regular pliers. Good luck with the job.
Hi there, I followed step by step on this video and the other on how to replace the CV axle seal (2004 Tacoma 4x4). I just wanted to say FUCKEN THANK YOU!! And I even double checked your torque and part numbers and they are correct. Looking forward to doing more work on my rig using your videos. Thanks!!
You're Fucken Welcome! We're happy to know our video helped you out.
Do you think the regular hose clamps with the tightening hex nut/flat head could do the job of holding the boot mod?
@@1t4ch1uch14 Yeah, I think it would work.
Great vid! Is there a Toyota part number for the CV tripod itself? Or a size that I for a replacement? Thanks!
I don't know if you could just buy the tripod. That might be a question for your local Toyota dealer.
Hello Tim, great video. Very informative. Can you tell me what type of bench vise you have?
Glad you like the video. Here's the bench vise I have: amzn.to/2ofa4LD
I have the 6" model.
Thank you for the demonstration, there is hardly any material on these older trucks. I'm going to try and get this done on my 1995 2nd gen. I'm assuming the process should be similar. Do you know of anyone who has done it on a 2nd gen successfully? Great work out there, specially for a government worker.
The process will be very similar. There are some minor differences between CV axles. One is the way the tripod is affixed to the shaft. Sometimes there's one c-clip above and below. You have to first release the one underneath and slide it down the shaft a little so you can push the tripod down to expose a second one on the top. The 1st Gen Tacoma axles are like that. I guarantee many people have rebooted 2nd Gen CV axles. Good luck with thr job.
@@TimmyTheToolman Awesome! Thanks for the tips bud. Keep up the excellent work.
@@H.A.. You're welcome and we will keep it up.
Hey Tim! Awesome video!
Just finished my boot mod and was curious if you guys had any issues with the zip tie down the line? Did it leak at all or has it held up?
Thanks!
Hey Jesse, we ended up swapping out the zip tie for a metal clamp. In the video description there's a link for a Universal Boot Clamp Kit in the "Tools" section that would work well for making a custom size clamp for that inner connection.
@@TimmyTheToolman Perfect! thank you sir!
@@jessevielleux7889 You're welcome Jesse.
Great videos!
Thank you for the video. Is it better plastic or rubber boot? Rubber boot is a chepaer then a plastic boot.
There's two different materials for the boots. The inner boot is rubber. The outer is plastic.
Perfect video!..thanks
You're welcome Ray. We're glad you like the video.
Awesome detailed video! Is there a difference between driver side and passenger side CV’s?
No, both CV shafts are the same. Glad you like the video.
@25:47 i think I would have squeezed as much of the black grease I could into the bearing, then the rest into the boot, that way the bearing isn’t running dry for any length of time.
You could do that but as soon as that cv axle starts spinning, the grease will be quickly dispersed throughout the joint and no excessive wear or damage will occur. There's actually guys who brag that they have been running on CV axles with torn boots for thousands and thousands of miles that have no grease left in them. So, I'm confident the CV joints can handle the few seconds it would take the grease to disperse once they get spinning.
Timmy The Toolman - thats really good news. I also have aftermarket axles on my FJ that I want to replace with some used OEM. I was a little concerned about the bearings on used parts, but considering your remark, it gives me much confidence to move forward. I guess the combination of quality components and quality lubricant goes a long way.
Hey Tim, thank you sooo much for the videos we all really appreciate it, keep up the good work. I have a quick question, my boot is torn on my CV I don't think it has been torn very long so I am hoping to save the axle and just reboot it. you mentioned that Sean was on aftermarket axles, I assume this is so he can keep driving the truck and do the reboot repair whenever is clever? I plan on doing something similar as my truck is my daily driver. do you recommend this? I guess you would end up doing the work twice but I need to truck for work, and the second wouldn't take very long after already doing it haha. Thanks again.
Having a set of extra CV axles is a good idea especially if you 4wheel. Another idea is to try to find a wrecked rig at a PickNPull that you can grab a set of OEM axles from, reboot those, and then put those on your rig. Then you can reboot your original axles whenever and those can be your trail spares. OEM axles are superior to most aftermarket brands. You can tell by looking at the clamps whether they are OEM or not. Take a look at yours so you know what to look for and then search online for Picknpulls in your area to see if any of them have some 3rd Gen 4runners on their lot. Ideally, you'll find one that hasn't been there that long so it won't already be majorly stripped down and the axles are gone.
OEMs also usually have Toyota stamped
I have a doner truck and an extra set of axles. Are you suggesting that when wheeling I pack an extra axle and tools to replace on trail?
FYI, you don't need to disconnect the LBJ. You could have just removed the two bolts holding on the LBJ bracket.
I think you're talking about not using a puller to disconnect the lower balljoint from the lower control arm and rather removing the "4" not 2 balljoint bolts. If this is what you meant, you're right. You could do it that way.
@@TimmyTheToolman I saw this method in another video and decided to give it a try. For me it was a lot easier just to remove those 4 bolts than messing with the puller. Unfortunately I had already bough the puller set to do it your way 🤣 will use it some other time. Other than that, loved every tip you gave on this vid. Thanks Tim!
@@marxccc Yeah, different strokes for different folks. I don't like messing with the lower balljoint bolts, because I use loctite on them and don't want to pull them out, and clean off the threads so I can reapply loctite to them. I also don't like re-torquing them because there have been reports of bolts failing.
Did you also index that last axle housing, or just the rollers to the shaft? I think you index all three pieces together. Be interested if you're weeping out of those strapped ends as that factory grease is very runny. They make a screw type clamp that has rounded off edges that won't cut into the boots, and they seal up better for wheeling.
We kept the tripod, shaft and tripod housing all in alignment. We got rid of the zip ties and went with a DIY CV clamp kit that ended up getting a tight squeeze on the shaft. Do you have a link to those screw-down clamps you mentioned. Maybe I'll buy some.
As always love your vids. but have found that aftermarket silicone boots last far longer and stand up to road debris and acidic conditions more than even OEM Toyota rubber boots at least in my So Cal desert environment.
Yeah, nothing wrong with silicone boots. Sean is still running the OEM boots we stretched in this video.
Toyota makes one of the best cv axles much better than aftermarket. No wonder you want to put the original ones back in. My question is do they sell just the bearings so you could rebuild the entire axle if the bearing is shot?
I don't know if Toyota sells individual parts for the CV axles. Your local Toyota dealer parts department would know.
I just changed my valve cover gaskets and your other video was very helpful. This is another great video. I'm sure I'll be doing this job before very long too. Sean's 4Runner looks like it has some very nice aftermarket upgrades. I'd be interested in knowing what he has done. How much lift did he put in and what did he have to do to make the lift work right. I see the front diff drop and the CV boot stretch mod is a good idea. What had to be done in back. I believe the reason for limiting the front diff drop to about 1 inch is because it changes the front u-joint angle quite a bit. What kind of roof rack is that? Thanks again.
Glad our videos are helping you out. Here's Sean's build thread on www.Toyota-4runner.org. You'll be able to see all the mods he's done.
www.toyota-4runner.org/3rd-gen-t4rs/163299-infamousrnrs-2002-limited-bu-ld-thread.html
Hey Timmy, you have a great video that is very informative thank you. I don't have any question regarding the CV joint installation EXCEPT that one regarding the wheel spacer because some comments from outside say it's not recommended that could create an unsafe issue but I've been dreaming to have that to make my truck look more aggressive. Can you advise please thank you.
There are many who use wheel spacers with no ill effects. But, supposedly, adding wheel spacers can change the forces applied to your wheel bearings that the engineers who built the vehicle didn't intend on. Instead of trying to explain to you what's happening when you add wheel spacers, check out this video from "Engineering Explained". th-cam.com/video/hWijfooeSyU/w-d-xo.html He does a great job explaining what happens when you add wheel spacers to your vehicle.
Very informative!!!
We're happy to know you found our video informative. Good luck!
lol this is a toy hammer to pull off the cv axle, great video a Tim
Don't know if you're talking about the little toy plastic hammer or the little toy claw hammer. I have much bigger hammers but the hammers that are on the top of my box are the small ones. I think I will break out the big boys the next time.
Hey Tim I love your videos it’s like a talking Owners Manuel for a 4Runner. Was wondering if that had helped the issue at all and how long it has lasted. Just lifted me 02 4Runner with 104k and I hear a popping noise when I turn. I believe this is the issue
Yes it has helped a lot but what we would do different since grease has snuck from the smaller boot portion where the stretch mod is located is add a little FIPG to seal that end. Otherwise the boots have not ripped, they just leaked past the portion where the stretch mod is located.
Are there any cv axles that just come with the extended boot? I'm the one that had the catastrophic ball joint failure and figured while I had it apart I may as well give it a small lift. Or do they all come with standard boots?
Some of the more expensive options come with extended boots. Here's an example: www.cvjreman.com/product-tag/9168/
If you want to go totally ridiculous, check these out: www.rcvperformance.com/ultimate-ifs-cv-axle-set-for-toyota-tacoma-95-5-04-and-4runner-95-02.html
Looking for update on the stretch step. To see if it worked I have to do two.
It has held up. The one thing is some grease can eventually squeak by the inner connection because that boot was never intended to be clamped on the narrower part of the shaft. Sean and others have found they needed to clamp down the connection a bit tighter to stop grease from seeping out. But, no tears.
@@TimmyTheToolman Thank you. It is my project this week along with re-gearing.
@@oldterm6978 You're welcome. Good luck with the job.
What happened to the red inner silicone cv boots? I thought I’ve seen a video of you working on it, now I can’t find it.
We haven't done a reboot with silicone boots but we've worked on somebody's rig who was running them. I think this is the video you were looking for: th-cam.com/video/w_gPiDvh9v4/w-d-xo.html
The grease is for the for the joint not the boot , you fill the joint first and put the remainder in the boot.
And what do you think happens when that joints starting spinning and spinning really fast when you're driving down the road. Could it be that the grease populates the whole boot and joint area because it's being slung around? Yep, that's exactly what happens. It doesn't matter where the grease is placed because after the joint gets moving, it's distributed everywhere. Everyone who has experienced a torn boot knows this because the grease gets slung out all over their undercarriage. It doesn't magically stay in and around the joint.
@@TimmyTheToolman all I was saying is the joint is a good place to start with the grease. Most people put the grease in the joint first and the remainder in the boot, I've done dozens like that. Do it however you want.
@@quickturn66 Yeah, your way is totally fine. I just don't think it makes much of a difference either way. The grease is not so tacky that's it's not going to immediately be distributed throughout the joint in a matter of seconds once the CV axle gets spinning fast. I was just copying what I saw a respected professional mechanic that has his own TH-cam channel did when he made his own video on this subject. It seemed perfectly fine to me to just squeeze the grease into the boot so that's what I did.
Hello Tim, always having a good time watching and learning from your videos. Looks like Moog 3401 crimp boot clamp set is no longer in the market. Do you have other brand/kind that you could recommend.
Greetings from the midwest.
This is the kit I now recommend: amzn.to/33fVpOJ
Hey Tim a few questions
1.) I went to my Toyota Dealer and they gave me 2 new CVs, but they are Duralast Gold CVs not OEM. Is this common for dealers to do this?
2.) My OEM CVs are fine it is my inner CV boots that got tears in them shortly after I lifted my 4runner. I didn't want to deal with taking them apart and rebuilding them as I am new to all of this and don't want to mess anything up, plus it would take more time. That is why I went and bought new ones. My truck has 160.000 miles on it now, but now I am wondering if I should rethink this and just get a boot kit and fix them up even though they have a decent amount of use.
3.) Would I have to go get another alignment after this? I got one right after the lift and have only about 1000 miles driven since the the lift was installed. I really hope I don't have to fork out more money for that again.
Always appreciate your videos! Thanks!
That's interesting that a Toyota dealer is selling non-oem CV axles. I don't think that is common. But, maybe OEM CVs are in short supply.
If it were me, I'd buy the boot kit, and keep my OEM axles.
Hey Timmy, I have a 2.5 lift on my 3rd gen and was wondering if I buy the Napa extended cv axle would I still have to do the boot stretch mod? Because if that’s the case then I’ll just mod my oem one.
I have no experience with the Napa extended CV axles. This question might be better asked on a Toyota forum or Toyota Facebook page. Good luck!
Tim, great video. Was wondering if there is any way of stretching the boot without removing the axle?
You couldn't do it like we did it but I imagine somebody could probably come up with some Macgyver way. I think it would be a pain in the butt though. I would just pull the axles.