That feeling when you're randomly watching a TH-cam video and see one the designs you uploaded to Printables being made. In this case the Parts Bins Inserts for HatchBox Spools. Makes me happy when people find my designs useful. And thanks for linking it in the description. Need to come up with some more designs to give away. 🙂
@@The3DPrintingZone I want to watch: Unlock Crazy Cool 3D Prints by BREAKING These 4 Rules! The video sounds fun, but it is private???? If you can't let me see it can you explain the result in the image? Can I see it on another platform?
You're the first person I've seen that talks about the inner>outer>inner>infill order in OrcaSlicer. I find it leads to significantly better surface quality/better looking prints, without compromising the structural integrity of the part. If you're using 3 or more walls on your prints, I highly recommend using the setting. I use it on all of my prints.
I would love more videos like this! I LOVE that you were able to cover multiple slicers and what the setting is called in each. I can't tell you how many times I've seen videos based on Prusaslicer and I have to guess or look up what Cura calls that setting. When I was new to this, it took me a good while to realize that permeters and walls were in fact the same settings in these slicers. You really second guess yourself when you're unsure about what you're doing. The traffic sign with the logos and name of the setting is a really great way to show that, A super understandable and easy to acknowledge format. Sometimes, I struggle to absorb information about slicers when I'm not familiar with the setting name in the moment.
A note regarding Number 2 (Wall Print Order) - Printing the outside wall first can have some benefits but one thing to look out for is overhangs, if you are printing a steep overhang angle without supports, and the outer wall is printed before the inner wall it often has nothing to adhere to and will simply drop causing messy overhangs. If the inner wall is printed first the outer wall that is overhanging further has something to "grab".
Absolutely! But as is covered in a number of vids, if you're using Orca or Bambu Slicers the general best setting is Inner/Outer/Inner. Gives the best of both worlds.
Have you tested this or are you just saying this? From my experience and everyone I've seen who is showing real world results the exact opposite is true.
Same, If you have some steep overhangs it's common thinking/sense to add supports. Unless you don't know and rushed it print slower as it can benifit it too.
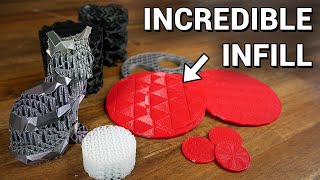
Yep grid infill lays down infill line right on top of each other like walls, which is very strong, but quick travel moves over hit can cause collision if layer height isn’t perfect or Z hop is off.
External perimeters first seems to make quite a difference in dimensional stability and overall print quality, so much so that I've changed my defaults. However, a quick word of warning: be sure to evaluate your model for overhangs if you're going to use that setting. Running external first on a model that has even moderately aggressive overhangs can fail since the external perimeter will essentially be floating in mid-air without the internal perimeter (that builds off of the previous structure) to adhere to.
Here's a quick summary of the settings: 1. Detect Thin Walls - Prevent walls not being printed due to walls being too thin. 2. Wall Printing Order (inner wall first) - Reduces shrinkadge to keep parts size accurate as possible. 3. Horizontal Expansion (Cura) or XY Size Compensation (Prusa Slicer) +-0.1 - 0.2 is a good starting point to make things fit. 4. Horizontal Hole Expansion (Cura) or XY Hole Compentsation (Prusa Slicer) +-0.1 - 0.2 is a good starting point to make things fit. 5. Z Hop (Cura) or Lift Z (Prusa Slicer) - Moves nozel up whilst travelling to avoid nozel to part collisions. 6. Retraction - Helps prevent oozing. 7. Nozel Temperature - Adjust depending on print speed, observing print quality. 8. Speed - Not too fast for silk filaments, too fast makes them matt. 9. Infill Pattern - More infill for stronger prints, less for simple prints. Enjoy :)
Thanks for this. I came just to see the tip on silk and I fast-forwarded through the common tips I already knew. I managed to skip what he said about the silk, but you summarized it perfectly.
Yup, outer wall first -> better dimensional accuracy. Inner wall first: better for overhangs. Some slicers (like Orca) also have Inner/Outer/Inner which seems to be the best overall compromise (ref.: see Orca slicer tool tip on wall ordering)
Great video, it really helped me a lot as i am new in the 3d printing field and struggle with printing spheres especially in fuzzy mode enabled. I am aware that in this case, the sphere being cut it should not be a problem, but i am struggling to print the sphere as a whole because even though the sphere looks printable in the slicer as the sphere has a small flat bottom surface the outer layers with the fuzzy skin seem not be able to stick to the printed object even though the overhand seems not to bad and the issues occur only on the lower part of the sphere, not on the upper part(where it comes together again) can you maybe suggest how to change or adjust the slicer settings in my particular case? for now i tried printing with 0,3mm layerhight as my object to print is pretty large. thank you!
@@The3DPrintingZone Its not really a sphere per se what i am struggling with. I have designed a rectangular block with a completely rounded top, while the bottom has less pronounced rounding to improve printability and reduce overhangs. The cross-sectional area at the base is smaller than further up, so it gets wider-think of a conical cross-section that widens toward the top. Now, I have applied a fuzzy skin to the design using the default settings. When I view the model in Prusa Slicer, I notice that between the first and second layer (where the fuzzy skin begins), the second layer is significantly wider, making it unable to adhere to the first layer. In the slicer, this layer is displayed as bridge infill, and there are two loops extending beyond the first layer. Additionally, the fuzzy skin follows, meaning the second layer is essentially three loops wider than the first. I hope my explanation makes some sense. Is there a way to prevent this bridge infill from being so wide? The CAD design has a relatively small radius-smaller than the legs of the dog in your video-so I don’t think the CAD design is the issue. I hope my explanation is somewhat understandable, and I’d greatly appreciate any advice you could give me. Thank you!
New printer and/or filament also start with a temp tower, orcaslicer has it built in under calibration prints. You was temps high enough for your print speed but low enough so you don’t speed days trying to get the perfect retraction settings. I have found for retraction start with the lowest distance for your setup like 0.5 for direct drive or 3mm for Bowden and play around with speeds and wipe settings first. If you can get it down to fine hair/fuzzy with speed, then slowly increase distance until gone. For silk PLA or PETG the stringing will almost never be perfect/gone, because of temps.
Just a note for Prusa/Bambu/Orca slicer users (possible cura also). Detect thin walls will not be selectable if you are using 'Arachne' wall settings in your slicer profile.
I've found that 'print thin walls' still has an effect in Cura despite it using arachne, it seems to ignore fine details in the x/y when the option is left unchecked.
**That being said,** but if you already use the Arachne engine then you are going to get much better quality thin walls AND thin-thick wall transitions anyway so if your slicer supports Arachne, DO NOT disable it JUST TO activate "detect thin walls" if you have another reason to choose the legacy perimeter engine, sure, go for it, arachne is not better in _every_ case, but in the overwhelming majority of use cases, thin walls are going to turn out better with Arachne
I find detect thin walls just causes me problems. For whatever reason it causes under extrusion at seams among other issues. They all went away when I turned the setting off (prusa and super slicer).
I wanted to ask a question. Quite a few of us with Bambu are having issues with pin holes when printing signs face down on PEI textured plates. We have tried a lot of settings like Arachne infil overlap and flow etc but as of yet seem to have failed to totally fix this issue, would you have any advice on the setting to tweak I may try outer inner today to see if it fixes it great video subscribed
Yea its an issue for sure, may be possible to lower your z offset just the finest amount, or bite the bullet and go for a different smoother plate, Lots of the Patterned PEY or PEO or carbon fiber plates are physcially smoother then the textured PEI, but still give you an interesting finish.
More settings to look at are: - Print 2 or 3 infill layers at the same time saves a lot of time. Say your layer height is mall e.g. 0,08mm you can print 3x infill layers which add up to 0,24mm thus only traveling once for 3 layers - Thicker extrusions for infill, similar to the first point - Thicker extrusion width, you can extrude 0,8mm with a 0,4mm nozzle easily. This is basically my course profile for strong parts like boxes etc, this way I only print one wall of 0,8mm instead of 2x walls and save a lot of time and I don´t have to swap nozzles, you basically don´t even need a 0,6mm or 0,8mm nozzle at all, but it helps with filled filaments like GF or CF filled. - Shrinkage compensation. This is like XY compensation important on prints larger than say 50mm because material shrinks and this needs to be accounted for if you want a 200mm part to fit with some other parts. 1% shrinkae on a 200mm part is a deviation of 2mm
Something I would love to see looked at in depth is the various reasons, and solutions, for why walls separate or delaminate. I've recently run into this, mainly with TPU, but I've had it wil PLA and PETG as well and I just cannot seem to narrow down a direct cause. I've adjusted speed, temp, wall thickness, number of walls, wall printing order, flow rates...you name it but it just won't go away. It happens with any nozzle size and brand new nozzles as well. It also seems to be somewhat random where some walls bond fine but others not so much. Imagine a tube 30mm OD and 24mm ID with 3mm thick walls. With a 0.6mm nozzle that SHOULD be easy with 5 walls but with 5 walls they are clearly separate and not adhered together. If I increase the wall thickness at all, say to 0.65mm, then I only get 4 walls and the problem is worse. If I drop it down to 0.55mm thick walls I still just get 5 walls and they don't bond either. I'm baffled.
@@Enjoymentboy Yea i noticed it when I switched over to the .6 on another printer but then when I just went to klipper on my cr10 I forgot how I fixed it . Tried upping line, flow ,temp nothing worked so I was like whatever. Did pressure advance today and it's looking better then my .4 print cornering wise with sane detail and now better corners lol
@@sierraecho884 Thanks. I did manage to resolve it with an M502 command with pronterface. I went over the outout from before and after and never saw anything that stood out but after the M502 everything returned to normal. I only had to re-enter my e-steps and PID values manually so it turned into a rather easy solution.
Grid and cubic infills are interference infills, and the crossing of lines by the nozzle can knock small parts over. Cubic specifically is like a closed cell infill, though it seems to use less filament. Gyroid is open cell, so the part can have heavy infill but still be completely filled with resin or whatever else, even sand, and it's generally the strongest infill. Interestingly gyroid is the quietest infill to print on my older, noisy Prusa Mk2.
Hello. Great tips in your video. I would also be interested in the video "Unlock Crazy Cool 3D Prints by BREAKING These 4 Rules!", but unfortunately it is private. Is that intentional? Best regards
Retraction doesn't pull filament out of the nozzle. It reduces the pressure inside the hotend which in turn reduces the likelihood oozing. Retraction is a somewhat complex consideration that really shouldn't just be played with like this. If you're having oozing, you should be printing retraction tuning towers, not randomly screwing with settings like this.
@@joescalon541 what irritates me is that this guy has so many people following his page and gives crappy advice on something as basic and important as retraction. Retraction is one of those things that you don't want to just hunt and peck for the right setting. With a retraction tower, you can dial in your retraction within an hour. But if you do what this guy suggests, you'll spend all day and probably still not get it right.
Assuming your pressure advance is calibrated right, any further retraction does pull the filament back into the nozzle, and because the nozzle orifice is so much smaller than the filament diameter, even a tiny amount of retraction will get it all the way out of the narrow orifice. If you're retracting so much to get it out of the nozzle entirely though, that's a problem.
Prusa, Super, and Orca all have the ability to do walls or infill first. It’s not a Bambu only thing. All of them can do different Z-hops as well. Basically Bambu forked PrusaSlicer, which long ago was a fork of Slic3r, and then went around ripping off the entire rest of the open source community and then closed sourced their software without properly attributing who and where they ripped it. They’ve done this multiple times and as recent as 4 days ago. So if Bambu has it, I can almost bet Prusa, Super, or Orca Slicer has the same settings somewhere.
the relationship between infill % and strength is super overrated. The thickness of the outer wall has a much greater influence on strength then infill. if you want robust prints, make the outer wall 2-3 mm thick. you can have your infill at 15% and this will be much stronger then 0.8mm walls with 70% i fill. stefan from cnc kitchen made a really in depth video about this and the results may be surprising to sum
I use all of them, and most of the other settings also, like support roof density different layer heights, extrusion widths and many more on all my prints. That´s because i started printing years ago, and you had to know and use all that stuff or your prints looked bad or failed, with the NEW bambu generation, that knowledge seems to fade away in the future 😞 it was a hobby for enthusiast, becoming mainstream


That feeling when you're randomly watching a TH-cam video and see one the designs you uploaded to Printables being made. In this case the Parts Bins Inserts for HatchBox Spools. Makes me happy when people find my designs useful. And thanks for linking it in the description. Need to come up with some more designs to give away. 🙂
Those HatchBox Spool bins are awesome! We actually featured them in a previous video, 5 CLEVER Ways to Use Your Old Filament Spools.
@@The3DPrintingZone I want to watch: Unlock Crazy Cool 3D Prints by BREAKING These 4 Rules! The video sounds fun, but it is private???? If you can't let me see it can you explain the result in the image? Can I see it on another platform?
You're the first person I've seen that talks about the inner>outer>inner>infill order in OrcaSlicer. I find it leads to significantly better surface quality/better looking prints, without compromising the structural integrity of the part. If you're using 3 or more walls on your prints, I highly recommend using the setting. I use it on all of my prints.
I would love more videos like this!
I LOVE that you were able to cover multiple slicers and what the setting is called in each. I can't tell you how many times I've seen videos based on Prusaslicer and I have to guess or look up what Cura calls that setting. When I was new to this, it took me a good while to realize that permeters and walls were in fact the same settings in these slicers. You really second guess yourself when you're unsure about what you're doing.
The traffic sign with the logos and name of the setting is a really great way to show that, A super understandable and easy to acknowledge format.
Sometimes, I struggle to absorb information about slicers when I'm not familiar with the setting name in the moment.
A note regarding Number 2 (Wall Print Order) - Printing the outside wall first can have some benefits but one thing to look out for is overhangs, if you are printing a steep overhang angle without supports, and the outer wall is printed before the inner wall it often has nothing to adhere to and will simply drop causing messy overhangs. If the inner wall is printed first the outer wall that is overhanging further has something to "grab".
Absolutely! But as is covered in a number of vids, if you're using Orca or Bambu Slicers the general best setting is Inner/Outer/Inner. Gives the best of both worlds.
Have you tested this or are you just saying this?
From my experience and everyone I've seen who is showing real world results the exact opposite is true.
Same, If you have some steep overhangs it's common thinking/sense to add supports. Unless you don't know and rushed it print slower as it can benifit it too.
Thank you, I sometimes look at the dozens of settings that I don't understand and wonder what they do. It's nice to get some explanation.
I just love he shows but simply explains what things causes what action without too much jargon.
You got my like and sub good sir👍🏻
dont use grid infill or other intersecting infills on smaller parts if possible. they can cause the part to be knocked over by the nozzle.
Yep grid infill lays down infill line right on top of each other like walls, which is very strong, but quick travel moves over hit can cause collision if layer height isn’t perfect or Z hop is off.
That's what z-hop is for
@@mrcraftyg8134z-hop can cause other issue, there is a video about it ;)
@@mrcraftyg8134 yea, good luck with that.
For flat surfaces such as signs or something similar, its just fine to get a smooth top surface
Great job explaining thank you!
This is very valuable considering there's not many videos that addresses so many things at once in a simple way
Very informative. Thank you for educating me.
External perimeters first seems to make quite a difference in dimensional stability and overall print quality, so much so that I've changed my defaults. However, a quick word of warning: be sure to evaluate your model for overhangs if you're going to use that setting. Running external first on a model that has even moderately aggressive overhangs can fail since the external perimeter will essentially be floating in mid-air without the internal perimeter (that builds off of the previous structure) to adhere to.
Thank you a lot! This will be helpful to keep in mind
Super helpful video for a beginner like myself!
Here's a quick summary of the settings:
1. Detect Thin Walls - Prevent walls not being printed due to walls being too thin.
2. Wall Printing Order (inner wall first) - Reduces shrinkadge to keep parts size accurate as possible.
3. Horizontal Expansion (Cura) or XY Size Compensation (Prusa Slicer) +-0.1 - 0.2 is a good starting point to make things fit.
4. Horizontal Hole Expansion (Cura) or XY Hole Compentsation (Prusa Slicer) +-0.1 - 0.2 is a good starting point to make things fit.
5. Z Hop (Cura) or Lift Z (Prusa Slicer) - Moves nozel up whilst travelling to avoid nozel to part collisions.
6. Retraction - Helps prevent oozing.
7. Nozel Temperature - Adjust depending on print speed, observing print quality.
8. Speed - Not too fast for silk filaments, too fast makes them matt.
9. Infill Pattern - More infill for stronger prints, less for simple prints.
Enjoy :)
I believe your summary of #2 is backwards. His recommendation is outer wall first, moving inward.
Thanks for this. I came just to see the tip on silk and I fast-forwarded through the common tips I already knew. I managed to skip what he said about the silk, but you summarized it perfectly.
Agree, he said outer walls first.@@mainetomass99
Yup, outer wall first -> better dimensional accuracy. Inner wall first: better for overhangs. Some slicers (like Orca) also have Inner/Outer/Inner which seems to be the best overall compromise (ref.: see Orca slicer tool tip on wall ordering)
Just getting back into 3D printing, with a new Bambu X-1 Carbon Combo on the way. Very informative video! Subscribed!
Thank you for watching and subscribing! Glad to have you here!
Your first tip (thin walls) was something much needed today! Thanks.
I liked your video--very concise and informative! Great job!
Great video, it really helped me a lot as i am new in the 3d printing field and struggle with printing spheres especially in fuzzy mode enabled. I am aware that in this case, the sphere being cut it should not be a problem, but i am struggling to print the sphere as a whole because even though the sphere looks printable in the slicer as the sphere has a small flat bottom surface the outer layers with the fuzzy skin seem not be able to stick to the printed object even though the overhand seems not to bad and the issues occur only on the lower part of the sphere, not on the upper part(where it comes together again) can you maybe suggest how to change or adjust the slicer settings in my particular case? for now i tried printing with 0,3mm layerhight as my object to print is pretty large. thank you!
Hi, do you have the option to split the sphere in half then connect them after it’s printed? Printing a sphere in one go is pretty difficult.
@@The3DPrintingZone Its not really a sphere per se what i am struggling with. I have designed a rectangular block with a completely rounded top, while the bottom has less pronounced rounding to improve printability and reduce overhangs. The cross-sectional area at the base is smaller than further up, so it gets wider-think of a conical cross-section that widens toward the top.
Now, I have applied a fuzzy skin to the design using the default settings. When I view the model in Prusa Slicer, I notice that between the first and second layer (where the fuzzy skin begins), the second layer is significantly wider, making it unable to adhere to the first layer. In the slicer, this layer is displayed as bridge infill, and there are two loops extending beyond the first layer. Additionally, the fuzzy skin follows, meaning the second layer is essentially three loops wider than the first.
I hope my explanation makes some sense. Is there a way to prevent this bridge infill from being so wide? The CAD design has a relatively small radius-smaller than the legs of the dog in your video-so I don’t think the CAD design is the issue. I hope my explanation is somewhat understandable, and I’d greatly appreciate any advice you could give me. Thank you!
Great video! I already started to print and doing my own tests but this is a perfect starter video!
Awesome, glad you found this helpful!
New printer and/or filament also start with a temp tower, orcaslicer has it built in under calibration prints. You was temps high enough for your print speed but low enough so you don’t speed days trying to get the perfect retraction settings.
I have found for retraction start with the lowest distance for your setup like 0.5 for direct drive or 3mm for Bowden and play around with speeds and wipe settings first. If you can get it down to fine hair/fuzzy with speed, then slowly increase distance until gone. For silk PLA or PETG the stringing will almost never be perfect/gone, because of temps.
I want to make non porous parts. Please, suggest the slicer settings for Prusa MK4.
Saving this video, its a masterpiece!
hey, como se llama tu corte de pelo?
te queda genial
Nice video, thank you. Commenting for the algorithm.
Just a note for Prusa/Bambu/Orca slicer users (possible cura also). Detect thin walls will not be selectable if you are using 'Arachne' wall settings in your slicer profile.
In that case it's not needed. Arachne makes it obsolete. You get correct printing of thin walls automatically with Arachne.
I've found that 'print thin walls' still has an effect in Cura despite it using arachne, it seems to ignore fine details in the x/y when the option is left unchecked.
**That being said,**
but if you already use the Arachne engine then you are going to get much better quality thin walls AND thin-thick wall transitions anyway
so if your slicer supports Arachne, DO NOT disable it JUST TO activate "detect thin walls"
if you have another reason to choose the legacy perimeter engine, sure, go for it, arachne is not better in _every_ case, but in the overwhelming majority of use cases, thin walls are going to turn out better with Arachne
Great vid. New sub and looking for more. BTW. Z hop also adds a lot of time to large prints.
I was wondering what use printing the outer wall first had.
Good stuff.
Printing outer wall 1st has a drawback when printing overhangs. So by default I print inside out. I print plenty of overhangs. Funnels and cones.
Great vid, thanks
I find detect thin walls just causes me problems. For whatever reason it causes under extrusion at seams among other issues. They all went away when I turned the setting off (prusa and super slicer).
3:04 "Positive values makes the holes bigger", but the labels show the opposite: a negative value (-1.5mm) is shown under bigger holes.
Loved the settings you mentioned! If you havent tried Orca slicer yet, I'd love to hear your thoughts on it and its hidden goodies.
I've been wanting to check it out, thanks for the comment!
Oof, i could watch and listen to him all day.
What is the website you showed that covers the various types of infill?
Those infill types are directly from Ultimaker, and can be found here: support.makerbot.com/s/article/1667411002588
I wanted to ask a question. Quite a few of us with Bambu are having issues with pin holes when printing signs face down on PEI textured plates. We have tried a lot of settings like Arachne infil overlap and flow etc but as of yet seem to have failed to totally fix this issue, would you have any advice on the setting to tweak I may try outer inner today to see if it fixes it great video subscribed
You have to put the printer into Prusa Mode. You will find the option under “Expert settings”.
Yea its an issue for sure, may be possible to lower your z offset just the finest amount, or bite the bullet and go for a different smoother plate, Lots of the Patterned PEY or PEO or carbon fiber plates are physcially smoother then the textured PEI, but still give you an interesting finish.
More settings to look at are:
- Print 2 or 3 infill layers at the same time saves a lot of time. Say your layer height is mall e.g. 0,08mm you can print 3x infill layers which add up to 0,24mm thus only traveling once for 3 layers
- Thicker extrusions for infill, similar to the first point
- Thicker extrusion width, you can extrude 0,8mm with a 0,4mm nozzle easily. This is basically my course profile for strong parts like boxes etc, this way I only print one wall of 0,8mm instead of 2x walls and save a lot of time and I don´t have to swap nozzles, you basically don´t even need a 0,6mm or 0,8mm nozzle at all, but it helps with filled filaments like GF or CF filled.
- Shrinkage compensation. This is like XY compensation important on prints larger than say 50mm because material shrinks and this needs to be accounted for if you want a 200mm part to fit with some other parts. 1% shrinkae on a 200mm part is a deviation of 2mm
So just like the very standard slicer settings you'd play with. Right
What worktable are those on the back bro?
I believe it was something like this: amzn.to/4fcdlyK
@ thanks,
what about orca slicer
Printing inner walls first also helps with the overhangs (so the external walls less likely to fall ;)
Something I would love to see looked at in depth is the various reasons, and solutions, for why walls separate or delaminate. I've recently run into this, mainly with TPU, but I've had it wil PLA and PETG as well and I just cannot seem to narrow down a direct cause. I've adjusted speed, temp, wall thickness, number of walls, wall printing order, flow rates...you name it but it just won't go away. It happens with any nozzle size and brand new nozzles as well. It also seems to be somewhat random where some walls bond fine but others not so much. Imagine a tube 30mm OD and 24mm ID with 3mm thick walls. With a 0.6mm nozzle that SHOULD be easy with 5 walls but with 5 walls they are clearly separate and not adhered together. If I increase the wall thickness at all, say to 0.65mm, then I only get 4 walls and the problem is worse. If I drop it down to 0.55mm thick walls I still just get 5 walls and they don't bond either.
I'm baffled.
i had this issue with my .6mm nozzle.. just did pressure advance and it look purdy now no issue
@@digital0785 Thank you for this suggestion. I'll take a look at it right away. Cheers.
@@Enjoymentboy Yea i noticed it when I switched over to the .6 on another printer but then when I just went to klipper on my cr10 I forgot how I fixed it . Tried upping line, flow ,temp nothing worked so I was like whatever. Did pressure advance today and it's looking better then my .4 print cornering wise with sane detail and now better corners lol
Becasue people "tune" their printer for accuracy and decrease extrusion multiplyer for instance. You donßt have enough overlap.
@@sierraecho884 Thanks. I did manage to resolve it with an M502 command with pronterface. I went over the outout from before and after and never saw anything that stood out but after the M502 everything returned to normal. I only had to re-enter my e-steps and PID values manually so it turned into a rather easy solution.
The slow speed for silk freaked me out because I'm still on Honeymoon with my Bambu and her speed. But I will definitely try it.
The speed thing has definitely been a notable issue with 3D printers of late, just like with other tasks, speed isn't everything
For number one, if you use Arachne as your Perimeter Generator, then Detect Thin Walls will automatically be enabled by default.
for my supports, I don't use walls
I use the basic supports
0 walls
zig zag supports
0.1 for how close it is to top
it also cuts printing time in half
Why grid/gyroid instead of cubic?
Grid and cubic infills are interference infills, and the crossing of lines by the nozzle can knock small parts over. Cubic specifically is like a closed cell infill, though it seems to use less filament. Gyroid is open cell, so the part can have heavy infill but still be completely filled with resin or whatever else, even sand, and it's generally the strongest infill. Interestingly gyroid is the quietest infill to print on my older, noisy Prusa Mk2.
Hello.
Great tips in your video.
I would also be interested in the video "Unlock Crazy Cool 3D Prints by BREAKING These 4 Rules!", but unfortunately it is private.
Is that intentional?
Best regards
Same, looks like he took the video down. Bummer.
Short and to the point for busy teachers. Would love a video highlighting the functional organizational tools in the background of your video.
thx
Subbed to help ya on to 100k.
I think it's a pity that OrcaSlicer not was included
Doesn't it have all the same settings?
newcomers with ender's repeat after me: RETRACTION RETRACTION RETRACTION
Yep, definitely!
i love watching 3D printing videos i don't even have one lol
direct drive printers settings
Your first point is obsolete due to the far superior Arachne algorithm, which is the new standard since Prusaslic3r 2.5 or something
I was going to mention the same thing about the Arachne option, which eliminates the Detect Thin Walls option. At least in Bambu/Orca Slicer
@@retoided Yes, like I said it's in Prusaslic3r nowadays too
Retraction doesn't pull filament out of the nozzle. It reduces the pressure inside the hotend which in turn reduces the likelihood oozing. Retraction is a somewhat complex consideration that really shouldn't just be played with like this. If you're having oozing, you should be printing retraction tuning towers, not randomly screwing with settings like this.
Was going to say that, retraction should not be high enough to actual leave nozzle or clog is likely on direct drive extruders.
@@joescalon541 what irritates me is that this guy has so many people following his page and gives crappy advice on something as basic and important as retraction. Retraction is one of those things that you don't want to just hunt and peck for the right setting. With a retraction tower, you can dial in your retraction within an hour. But if you do what this guy suggests, you'll spend all day and probably still not get it right.
Assuming your pressure advance is calibrated right, any further retraction does pull the filament back into the nozzle, and because the nozzle orifice is so much smaller than the filament diameter, even a tiny amount of retraction will get it all the way out of the narrow orifice. If you're retracting so much to get it out of the nozzle entirely though, that's a problem.
@@preysnerif this guy irritates you then why do you watch him? doesnt make sense to me…
Prusa, Super, and Orca all have the ability to do walls or infill first. It’s not a Bambu only thing.
All of them can do different Z-hops as well.
Basically Bambu forked PrusaSlicer, which long ago was a fork of Slic3r, and then went around ripping off the entire rest of the open source community and then closed sourced their software without properly attributing who and where they ripped it. They’ve done this multiple times and as recent as 4 days ago.
So if Bambu has it, I can almost bet Prusa, Super, or Orca Slicer has the same settings somewhere.
"Detect thin walls" is useless when used with "Arachne" on "perimeter generator" (PrusaSlicer). In fact, it's even better.
Completely agree! I should have included a caveat in this section noting that its not necessary to use with Arachne enabled.
You have a massive neck, I am amazed!
i watched the video, but couldn't listen... i was trying to figure out if the neck is real, swollen or if it is a neck protection or sth. 😅
I always use “reduce neck size” and “make part look less like Toby”
😂😂 Did you call him “Sheffin” from CNC Kitchen? 🤣🤣
the relationship between infill % and strength is super overrated. The thickness of the outer wall has a much greater influence on strength then infill. if you want robust prints, make the outer wall 2-3 mm thick. you can have your infill at 15% and this will be much stronger then 0.8mm walls with 70% i fill. stefan from cnc kitchen made a really in depth video about this and the results may be surprising to sum
Thanks for sharing! I’ll have to check out his video
I use all of them, and most of the other settings also, like support roof density different layer heights, extrusion widths and many more on all my prints. That´s because i started printing years ago, and you had to know and use all that stuff or your prints looked bad or failed, with the NEW bambu generation, that knowledge seems to fade away in the future 😞 it was a hobby for enthusiast, becoming mainstream
I know what you mean
watching this knowing damn well i will never own a 3d printer
Why u so cute tho 🥰
"256x256x256cm³" doesn't make any sense lmao
These are not game changing. I'm sick of clickbait bullshit on TH-cam. Speed, flow, infill? are you kidding me. Those are basic settings.
the only thing i can focus on is bros neck
Absolutely none of these are game changing