The Easiest Way to Screenprint at Home? ft. x-Tool

ฝัง
- เผยแพร่เมื่อ 17 ต.ค. 2024
- If you're interested, you can check out the x-Tool equipment here:
www.xtool.com/...
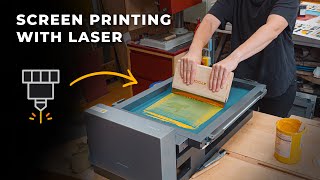
Recently, I set up my silkscreen studio in our rooftop space. I think that this laser engraving approach to screenprinting is one that works really well in small spaces like mine, with less mess and prep time/space needed. I would recommend this to anyone else who is primarily worried about space or the complexity of UV printing but still wants consistent results in their home setup.
Find me here:
Webshop: politecopress.com
IG: / bybelter
Portfolio: kelbelter.com
Patreon: / kellybelter
My next book fair is Unlimited Edition (Seoul Art Book Fair) in November! You can find me and my zines/prints there.
If you want to see more from our studio, my husband Chris makes videos too! You can find him here: / @chrisdacanha


Came to seoul for my solo-exhibiton in March. I wish I knew about your studio.
Would definitely have visited~ :(
Definitely visit us next time!
Would you recommend this for a beginner who has never silkscreened before? Or would there be any other options you would recommend?
I think this is very beginner friendly because everything is already put together for you, so there’s less chance for human error. Minimal setup time and easy to get the hang of. If you want to just get a feel for silkscreen though, sometimes you can order screens with your image burned into them from a studio/online! Then you can just try the printing part before committing to making your own space/investing in more expensive tools.
Loved your video! Thanks for making it. The x-tool system looks intriguing, but your link in the description doesn’t work.
Thanks for letting me know! I just updated the link :-)
from my experience screen printing at home can get frustrating with inconsistency burning screens, waiting around, cleaning up, etc. this seems to solve all of those issues. I just can't believe I'm just now hearing about it.
Thanks for this video. Your technique is very interesting to me. You’re not really flooding the screen first right? And you put just a little pressure on it. I’ve been troubleshooting a bit and struggling a bit with bleeding and too much ink.
Yes! Well, I flood lightly, just enough to keep the screen wet so the ink doesn’t dry out. I don’t put a lot of pressure on it!
This is soooooo helpful!! love everything about this video🫶
❤Thank you for this beautiful video! 🙂❤️Can we de-engrave the screen and reuse any emulsion?
Yes you can! Just remove it as normally and recoat. Then you would let the emulsion harden before engraving it again with the machine!
@@KelBelter Super ! Merci beaucoup !!!😊
Were you able to re-use screens (not re-coat)? Or does removing the screen invite problems with registration?
Yes, you can reuse the same screen after washing it. The set comes with multiple frames, so you can reuse screens without removing them from the frame, making it easier to print in different colors. The registration will stay the same as long as you keep the screen inside the frame. However, if you remove the screen from the frame, it might affect the registration. When putting it back, you'll need to check the alignment. Hope that helps!
@@KelBelter Hmm...not removing from the frame could be costly in the long run, not to mention storage concerns if I have 20+ frames.
Yes, multi-colour jobs will require realignment.
However, for one colour jobs, the ability to remove and reinsert screens into the frame is actually quite handy and space saving.
I can imagine a drawer full of flat screens to be pulled out when an order comes in.
Thanks for your reply. I just stumbled onto your channel and love it. Greetings from Canada.
I agree, I wouldn’t want to keep so many frames! That would definitely take up quite a bit of space. I think if I wanted to reuse the same screens for multi-color prints, I would be ok with registering the frame again, like we do with regular screen printing frames anyway. This takes away from some of the benefit of the system, but maybe not too time-costly if you are printing several items at once.
Or I wonder how effective drawing with sharpie on top of the emulsion could be for marking where to re-insert the screen into the frame? Could be worth testing out, so maybe I can try that and report back :-)
Thanks for watching! Appreciate the question and ideas to experiment with this frame/screen system a bit more.
@@KelBelter Love that idea with the sharpie. It's simple low way to get it close enough and then use the micro-adjustment knobs to fine tune registration.
My bigger challenge has more to do with the laser. It seems a bit overkill method to get simple graphics onto a screen (I know you mentioned experimenting with more complex designs).
One could simply use a Cricut, vinyl and transfer tape if you wanted to avoid fumes, emulsion/exposure etc...
That said, I'm still enamoured by the design aesthetic of the press. It would be perfect for my small home studio (like yours). I'd just have to get a laser engraver too.
Have fun experimenting with it and please do share future tips. Cheers.
When I can't use emulsion for my screen printing, I use my Sillouehte to make a stencil and stick it to my mesh, doesn't work for a lot of prints but is very helpful.
That definitely works too! Fun to find alternative routes sometimes and try to make it fit with a project
Great video! Did you use the waterbased ink that came with the printer or did you plastisol? Do you think you could reuse the screen for a different design with the laser?
Hi! I used some of the water based ink that came with it and some of my own water based/acrylic inks that I had in stock. No plastisol on paper :-)
You can use the screen again if you just reclaim and recoat it as normal! Then you can use the laser again on the same screen.
@@KelBelter Great, thanks for the reply and information!
I really like your videos :) Very inspiring
Thanks so much for watching!
your freckles are so pretty!!!
Haha thank you! ☺️
Greetings from Brasil. ❤