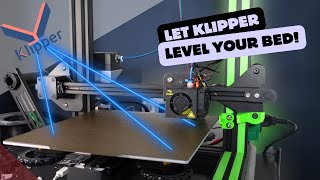
ABL offset guide including new probe Z offset wizard

ฝัง
- เผยแพร่เมื่อ 30 เม.ย. 2024
- ABL (auto bed levelling) is a great solution for a warped bed, allowing perfect first layers on your 3D printer. If you don't dial in the probe to nozzle offset however, your ABL won't function as it should. In this beginner's guide, we go through how to calculate and input your probe X, Y and Z offset. We also try out the new probe Z offset wizard.
Firmware editing for beginners: • Updated Marlin firmwar...
First layer guide video: • Bed levelling for begi...
First layer gcode generator: teachingtechyt.github.io/cali...
Marlin GitHub to download firmware: github.com/MarlinFirmware/Marlin
Buy quality and affordable filament from X3D. Buy 3, get 1 free and a free sample pack with every order: www.x3d.com.au
Get Quality Resins from 3D Printers Online. 5% off storewide for Teaching Tech subscribers [Code: tech5]
3dprintersonline.com.au/
Take a look around and if you like what you see, please subscribe.
Support me on Patreon: / teachingtech


I can't even thank you enough for all the help you have provided with all of your videos. I honestly don't know what I would have done without you and your videos! Thank you so much again and again!
I was going crazy trying to get my unleveled bed calibrated. You sir, are a gift to humanity.
Question for you though. When your Z height was at 2.83 when the nozzle touched the bed, why was the Z offset -1.17?
I believe the z offset wizard expects you to lower the nozzle until it touches the bed and not some paper-thick distance from it. If you look at the values on the wizard at the moment you press "done" and look at the calculated value it puts on the z-offset value, you can see it doesn't account for any thickness added by the paper nor could it since there is no place to tell it how thick the paper you're using is. I think the correct way to use the wizard is to either lower the nozzle until it touches the bed, or do it like you did but then you have to go to the value the wizard put on the z offset and subtract the thickness of the paper. So if it puts -2.25 you change it to -2.45 it the paper is 0.2 mm thick.
AARRRGGHHH OF COURSE!!! Bring this comment to the top.
If this was the case the nozzle would have been moved closer to the bed in the example case, but the nozzle was moved farther from the bed because even with the wizard it was too close. The wizard has some error because each filament will want a diffrent z-offset for best possible results. You could end up both having to move the nozzle closer or farther.
It's also not really possible to tell if a nozzle is just touching the bed or pressing into it with frame flex taking up the extra distance. Essentially resulting in setting the nozzle too low whereas with the paper you can tell immediately on contact.
@@nocare Hi. Referring to my example, the wizard puts -2.25 with the nozzle being at 0.2 mm from the bed but it thinks it is touching it. So you put it at -2.45 because that's where it actually is. Do it like this and after configuration move the z to 0.2 mm then take a 0.2 mm shim and measure it and you'll see it's spot on.
@@xXxGuilhermeB My point is if that was necessary then in the video after the wizard had been run, 'teaching tech' would have moved the nozzle closer to the bed when seeing the results from the test print.
However the nozzle ended up too close and had to be moved even farther away.
My point being getting the exact offset is not the desired result. Getting a good print is.
Your method does not guarantee or even probabilistically improve the chances of a good print result on the test print.
Therefore its unnecessary and likely worse than leaving the paper thickness in. Since the nozzle will likely have to be moved away from the bed.
@xXxGuilhermeB I think you are correct because he was already heating the nozzle and bed so it should be the distance where the nozzle makes contact with the bed. When we use a piece of paper or feeler gauge, it's usually because the nozzle is cold and we are leaving room for expansion of the nozzle when it's heated to temperature.
Thank you very much for covering the Wizard probe as requested, the whole video was very informative and explained other things I didn't know.
Thank you again for help and service you provide, and for the little shout out, much appreciated.
You sir just made me save an amount of time that has no other equal but my gratitude to you. Thank you so much for the clarity of your video. State of the art.
As someone new to auto bed leveling, this video was very, very well made and useful! Thank you so very much for your help in clarifying this process, hopefully I'll be up and running with a BL Touch on my CR-10 S5 soon. Cheers!
I've just started 3d printing a month ago with my stock E3 Pro, and to be honest the first couple of runs I had were really rough for me. Thank you so much for your guides as I've grown really fond of using my printer alot more. Thank you for putting time and effort to teaching Noobs like me to better use my printer.
I love it when people have time to make videos then don't bother making time to answer any of the questions that are asked.
Perfect timing, bl touch just arrived and planning to follow your tutorial for upgrading the Sidewinder X1 to skr v1.4 turbo with RepRap .
This tutorial just helped me solve weeks of troubleshooting. Thanks!
Very nice! I've been using paper along with the nozzle and touch tip to mark dots, connect them, then just measure the distance on the paper. I have unsteady hands so it became my workaround 👍
I just got the geeetech abl, perfect timing:)
I found an easier way to measure nozzle to probe offset.
I just cut one piece of cardboard to the size of the print bed, than secure it to the bed with clips.
Than I manually deployed the probe and slowly moved Z axis until the pin barely touches the cardboard and I marked the exact spot with a pen.
In the next step I retract the probe and slowly moved the Z axis up. Just enough to have the nozzle punching a little mark at the cardboad.
Than I just moved the bed down and got a nice print of 2 points to measure it with the calipers without any hassle.
I hope this helps others. I love your content.
dont bother with rulers, cardboard, graph paper, etc.
you have filament in the nozzle. just extrude a dot on the bed to mark the position of the nozzle, then jog x&y to put the deployed probe right on top of that dot and note the change in x and y. that's your xy offset.
@@suivzmoi Your method was the best! Thanks for the input.
Very clear and well put together guide that I direct others to frequently. However, I always have to preface that they need to account for the thickness of the gauge that they are using to set the offset. I also explain that when the z axis is moved to zero, the nozzle should just be touching the build plate and not pressing on it.
Great video! I'm having issues of the Z Offset for some time now!
Amazing! i installed an SKR Mini E3 V1.2, compile the firmware for the BLTouch and have been using it for months. Never new the Wizard even existed till i saw this video and sure enough, its enabled! Worked like a charm, thanks! Must have done something right when I made it lol
Sweet. I upgraded last week using your instructions, for ender 3 and BL touch. But had "A LOT" of trial and error on the leveling.
One Issue I had was with Safe Homing. I could not get it below what was 0.
Also, I discovered that I had the whole bed so low, it was very level, but so low, that it could not reach. So I raised the screws 2 turn all the way around, and found it was in a workable range.
Tip for measuring:
Lower the nozzle to about 3mm above the bed so you can fit a ruler (or angle square) under the tip; draw a line perpendicular to the edge of the bed; do the same for the tip of the BLTouch. Do this for both X and Y. You can now easily and precisely measure the distance between the lines drawn on the bed.
Tape a piece of paper to the bed. Lower the nozzle all the way into the paper and write down the XY coordinates. Now raise the nozzle back up. It should leave a small dimple in the paper. Use a marker to put a spot on the dimple so it's easier to see. Now move the print head so the probe is directly over the dot. Write down this second set of coordinates.
Now subtract the second set of coords from the first set and it will leave you with your XY probe offset.
@@slickstretch6391 this is after auto homing i assume?
@@all3n1k It wouldnt matter where you did it, as long as you compare the coordinates with nozzle and probe over exactly the same spot. it could be near the edge if you wanted.. It might be convenient if you have an inductive probe to use an object the size of the probe head and mark or drill the center. Those probes are pretty big diameter so its quite hard to eyeball the center of it.
In the end the offset doesnt need to be THAT accurate
the simpliest trick is to usesquared notebooks papers and use the line, thinnier is better
Another great video, and very well explained!
Just got my Ender 3 pro. Your video's helped me alot. thanks
Best video and best explanation related to the probe offset :)
Started following the steps, then realised that I was back a version and this motivated me to upgrade from 2.0.6 to 2.0.7. Once I had done this, I found the process pretty simple.
Definitely an improvement on the struggles that I was having previously with trying to babystep. This process is easy and quick enough that running it when I change nozzle sizes will be a breeze.
Looks to me like it would be easier to set the offset by homing all axis. Your x,y DROs will read 0,0 then use a sharpie to make an x under the tip of the nozzle then jog over until your probe is over the marked x on then read your offsets directly off the x,y DRO on the LCD.
Good video! Especially helpful to show the configuration_adv.h setting required to save the live babystepping. Keep up the videos!
Thanks for sharing, I'm having a lot of issues with the Auto leveling on my tronxy xy2 pro, I think I'll try flashing it to Marlin to try your recommendations, great video!
Excellent coverage Michael. I have a couple to do, this will help a lot. Cheers, JAYTEE
Just did my ender 3 a few hours ago but this is much easier!
Excellent video Michael.
Did this yesterday. Of course the video comes out today
Had trouble with this like 10 hours ago. I'm sad
But you both have the satisfaction of overcoming your hurdles independently :)
OMG dude your the best Ive been compiling marlin for days and finally you advice on how to manually input the offsets fixed my problem marlin wouldn't apply the offset in firmware but the software fix worked!!!
Por fin alguien que explica bien en que consisten los parámetros. Gracias por tu video!!
La página de este tipo es oro puro. Yo estoy aprendiendo mucho y está impresionante todas las herramientas para probar diferentes valores. Superrecomendado.
works perfect on my home rebuild tronxy x3 with Marlin 2.0. After flashing the tronxy firmware i had a lot of issues to get marlin to work gladley there are a lot of yuotube chanels to refer to including al your films about the subject. Thanks for that It works now perfect. Better then the original x3.
This would've video been extremely helpful a few weeks ago. The best thing that I've learned is: if you're nozzle is too far from the build plate when printing, decrease (into the negatives if needed) the nozzle to probe z offset, and increase it if it's too close
So as a general rule, your Z offset should almost always be negative (unless you have a dedicated Z-off switch AND an ABL probe, and even then, depending on how your bed is shaped/warped and how much you've tightened your leveling screws, it may still cause issues). For most people, they disconnect the Z-limit switch and reconnect the ABL probe to it. This means your nozzle will crash into the build surface/bed since the printer doesn't know it's at the top/bottom of the build volume. Not good, since that tends to warp beds.
@@whoofianbrony8804 I am very much trying to work out how to use both. I want end stop for distance, and CrTouch for warping.
Can't find any guide that soecificially let you keep the end stop. Everyone I found says to dusconnect it instead.
I work with industrial robots, and we have pin checks or TCP checks installed. When we have a collision (this is actually not that rare) we can take the worktool to the pin check and adjust accordingly.
Now I can see that having a pin check to travel to would be complicated, printing one should not be.
So for FINE tuning, we could print a pin/pyramid (any pointy object) and then with the wizard drive x-y-z until the probe is just touching the tip of the pin/pyramid.
Marlin would need ti integrate the test print pin/pyramid, however then once you move the bltouch pin to the tip of the pin/pyramid marlin should be able to auto calculate the offset.
Another greats informative video. THANK YOU
Great video, helped me a lot. I had some problems measuring the Y Offest. If you measur the X Offset and the absolute distance between the tip of the Probe (diagonal) and the nozzle you can calculate the y offset with pythagoras: Y Offset = sqrt( X^2 - diagonal distance^2)
Always an excellent video!
I use the klipper paper method with cold bed and nozzle, and adjust while making test prints like yours. Typically my vocano hotend expands 150 microns. Thanks for the video. Finally marlin has this Wizard too.
Yes, I also do PROBE_CALIBRATE with klipper, but I always have to add around 0.2mm in the config file to get good adhesion
I'm still looking to pick a printer to convert full time to Klipper. CR-10 Max is the latest suspect.
You rock! This was awesome! Thank you so much
Sometimes it takes just one person to explain thing clearly and succinctly, this time you did it.
Excellent tutorial and website !
Very helpful!!! Thank you!
I just dial it in during a first layer, I can get it a lot more accurate that way. If you enable babystepping (and maybe something else too) you can change the Z-offset by double clicking the dial while printing. It's very easy and accurate.
Agree. This is how I do it. Level the best I can then I set the Z while it's printing.
I love the bed levelling tool I use that waits above each level adjuster while you fine tune the Z then move on to the next at a button press.
Even with a feeler gauge I got the best results by test printing little squares (just one) because even 0.02 made a difference
Greetings from Australia. This is how I calculate my x and y probe offsets.
I take off my PEI plate and tape a piece of graph paper with mm lines, taking care to get it aligned squarely
Then the PEI plate goes back on the magnetic bed
Then I raise the z axis and lightly touch the tip of the nozzle and the probe with stamp pad ink. Then I lower the nozzle until it just touches the paper, then I deploy the probe.
The raise the z axis and observe the graph paper. With luck there will be two ink spots on the graph paper. Remove it from the printer and with a set square align the top of the square with the nozzle point, keeping within the lines on the graph paper. Slide the square to the left until the right angle side of the square touches the probe point. Measure that distance along the top of the square. If it’s to the left and in front of the nozzle it’s a minus reading. Now for the y probe point. The y offset is the measurement along the left side of the right angle triangle, ie the distance below the x offset line. Once again if this is in front of the nozzle, it’s a minus. Enter these two values in the x and y offsets in the Marlin FW.
And remember. If you change a nozzle or upgrade your hardware, or remove and replace your touch, then you have to do this again. I just installed a Micro Swiss NG direct drive so I recalculated the values.
super helpful!! thank you!!
Without wizard you basically first set your offset to 0 (or default value)
Then you home all axes and move the z-axis to 0mm.
Now you can adjust your offset with real-time change over the 'bed-leveling' menu, and save to eeprom.
So the core function of the wizard is not that 'new', but it is a really good idea!
It combines different steps together to make it as easy as possible for beginners, without having to dial trough every menu
Great information ! Thanks
Thanks you are truly the best!!!!!
Great help. Thanks
I find a piece of old fashioned graph paper works for measuring ABL offset. Drop the nozzle on to a square mart it record where the pin touches and count the squares. Simple
Awesome video thanks
I have never gotten a good z-offset on my printer, I have scratched the hell out of my bed but now I do it differently.
I used a thick piece of card paper, my callipers said 0.3mm thickness.
Heated bed and nozzle to printing temp,
adjusted offset till I could feel a bit of resistance between the nozzle and paper, but could still slide the paper under the nozzle.
added the thickness of the paper to the offset to bring the nozzle lower, if done correctly the nozzle should be touching the bed without the X carriage fowling to one side.
eg. -3.20 - 0.3 = -3.5 Z offset
and then baby step during printing if its too close.
I did this and for the first time had really good layer adhesion to the bed, I am going to do this again with some feeler gauges for more accuracy as I was getting a bit of elephants footing, I could either try compensating for it or try to raise the nozzle a bit more.
Great Video
Thank you very much for the guide! It was really easy to follow and the Z-Offset wizard is a saviour!
Hi Michael, thank you for great content, as a beginner with a Creality 3 V2 I've learnt a great deal from you. I've added the BLTouch, and seems to be OK, still need to double check. My question is on the instructions it mentions adding the code for ABL, G29, where and how?
After doing your X test print the bed doesn't go home, this has changed since adding BLTouch, do I need to added other code.
Thank you again.
I think the live nozzle height adjustment is great. I have an ender 3 pro and am using a 5 by 5 grid. It does slow down the start of a print but I think it is worth it. Do not use an even number.
I find it difficult to observe the "squish" while printing, so to fine tune the Z offset I print a single layer square. Once the print is finished I measure how thick it is with digital calipers, then calculate any adjustment needed to correct the thickness to match the first layer height. For example if I am printing with 0.2mm layer height and I get a thickness of 0.16mm, I then adjust the Z offset by +0.04mm. The next print should be be dead on (within the accuracy limits) the layer height.
brilliant
You could just print a single line plus (+) anywhere on the bed, move the nozzle to the center and measure from the lines.
Great update off the Marlin SW
Great update Michael
Thanks for sharing :-)
Wow i wish i can do this to my Anet a8 plus 👀
Confusing this, confusing that. What a rabbit hole i jumped into! I just wanted to print and have fun. I hope i have clarity and get it right. Smh.
I thought of an easy way to measure the XY offset of probe to nozzle using 1/2 inch foam board. Cut foam to reach under the nozzle and hotend. Square the foam edge to the bed front. Lower Z to press into the foam (COLD HOTEND and BED). The hotend will make an impression. Mark the probe location with pencil or other marking device. Now it is easy to measure the foam markings for XY offset. The foam is soft so lowering Z you will allow both hotend and probe touching the foam. Hope this helps
When you adjust z using baby steps at the end of the video, do you have to add that amount to the probe z offset or does it do it itself when you store the settings?
Thank you for all your useful videos. In my case, I don't have the old Marlin menu anymore. I recently upgraded to the BTT TFT35 V2.0, which doesn't have Marlin emulation mode. Is the z offset wizard strictly limited to the character LCD, or is it actually a GCode command? I could use the TFT with a custom Gcode command in this case.
Edit: It's pretty easy to use the TFT to get the offset configured, actually. You can just jog the Z after homing, get the Z axis value (negative value) once the paper stops slipping, and save that to the EEPROM from the TFT. That works for me!
Great vid. Can I ask how you changed the bed visualiser scale? I can't find anything on the web that will change it from 2mm.
You should add instructions for using M211 S0 to allow moving the printhead below 0.0 in those cases where that's needed.
My method with a BL Touch as they fix some bugs with the wizard:
1. Preheat bed/nozzle, home and move x/y to the center of the build plate.
2. In BL Touch menu, deploy BL Touch.
3. Slowly lower Z until probe is touching the bed, and note the height.
3a. Move nozzle to where probe was, using the known x/y offset values.
4. Slowly lower Z until nozzle is touching the bed, and note the second height.
5. Do math to determine difference from probe end to nozzle end. As noted in video, this number should be negative.
6. Enter this value as Z Probe Offset.
7. Happy first layers.
EDIT: I forgot step 3a. Depending on how warped your bed is, it could make all the difference.
That's a really helpful tip, thanks.
Been doing exactly this for a couple years now. I even add that number to the firmware itself and recompile.
Yeah I also did exactly this. I never understood how measuring mid air with a caliper and my cavemen eyes should be accurate enough.
In my experience it should be 7. Test; 8. Swear; repeat 1 - 8.
just a point to make for (3.). you are supposed to lower Z until the probe is TRIGGERED, not just touching the bed.
Thanks.
can i use probe z-offset without abl? i just want to adjust z after changing nozzle without relevelling the bed, if i use baby stepping it doesnt store the value.
My printer (ender 3 with a bl touch) prints about 1cm above the bed even after I used the z offset wizard. Any ideas why this might be?
Hi, thanksfor all those very helpfull video ! , I have an artillery X2, i'v put a PEI on the glass, do you know how much more degrees I should put to compensate the glass? thank you
Do you have this step guide or point me to one for the CR-10 V3? Thank you.
Hey Michael, wondering if you could do a tutorial on TH3D's newer U.2 firmware? The settings have been moved around and it is more difficult to folllow than the U.1 firmware or any other vanilla marlin firmware. Thanks!
My problem seems to be it will not "not define 0" for the z value in the firmware. After flashing I try to home it and it does x and y but then raises my z 5mm or so and either stops, or tries to find the z limit switch for some reason and crashes into the bed. TH3D does not have a current tutorial or one that is easy to understand vs. The U.1 firmware
Hi Michael, i'm struggling with ABL on my Ender 3. Everythings working almost fine, prints are not that good, but i work on it using your Calibration Guide ... thanks for that! But: I realised, since i have a BLTOUCH and no more Z-Offset-Switch installed, it is possible to manually drive my nozzle into the bed by using the motion-function on my printer. It may be a dumb question, but could i prevent that? Isn't there a safety option in marlin? Just to be clear: I do not intend to drive my nozzle into the bed, but the possibility alone makes me worried. For instance for Z-Offset-Calibration i accidentally used the 10mm-Option to bring my nozzle down and went to far. I searched on google for that problem but didn't find the right marlin function. Would be great if you know the trick. greetings
Question: Doesn't that mean that the z-offset is still a bit higher off because of the paper's height?
Hi I have a question after spending hours setting up, up grading both config files for a BLT in My Ender 3 V2 firmware I now have to wonder with the new firmware up date from Marlin do I now have to sift through all to find what I changed in order to get the firmware to work with the BLT and now with the “new” wizard for the z off set how do I up date my firmware and keep my BLT settings?
If you're having trouble with offsets for ABL, the piezo disc leveling system installed on your hot end eliminates the need for offsets. Just like the CR6SE it uses the nozzle as the probe so no offset needed. Just another way around having to calculate pesky offsets.
I just received such a kit for a future video :)
I've always assumed when you set the Z offset through the wizard, you'd measure to the bed itself. In your video, you measure to a piece of paper. I don't know how they'd know, but this must already be accounted for in Marlin because measuring to paper works. How do they know how thick it is?
I also disable the endstops (M211 S0) before the probing wizard or I wasn't able to get low enough. Just gotta remember to reenable them (M211 S1) when I'm done!
Thanks for the great videos, they've been a huge help!
Because a sheet of standard copy paper is between 4 & 5 thou so using this method you would get it within at least 1 thousands of an inch which is more precise than the printer is
I’ve had nothing but problems with the BL touch with the marlin firmware. I dont use it anymore. I’m going to give it another shot now that they’ve updated the z offset settings.
The mesh values i had got inverted, ive tried redoing everything but it still did not level well. Ther other side is high and the other is squished. Any help?
Do you do the z offset wizard after or before your bed level mesh?
Hi, Micheal, I have just used your G-Code Calibration Tool and am wondering if this can also be used to help dial in my Z-Offset for a BL Touch, I have selected BL Touch in the settings for one version and without for another version as I have 2 Ender 3's one with ABL and one without
Could you make a video on e3d v6 pt100 kit and SKR 1.4?
Will the NOZZLE_TO_PROBE_OFFSET work also for dial gauge? I'm thinking of mounting it in front of the fan. Thank you.
Hi, Can you please do a tutorial on the CALIBRATION_GCODE - hotend offset calibration function in Marlin 2.0
weird, my Z probe offsets in marlin are right, double checked but when I G29 it just homes X and Y then starts to probe from there not moving in to where the probe is at
I have been using my Prusa MK3S since it was released. They have made a lot of upgrades to the fimware. One of my favorites is faster bed leveling. I've restarted my Hypercude Evolution build and it's finally all complete. But one thing that I can't seem to figure out is how to speed up bed leveling. It is so slow. It takes 5 seconds per probe. It does 3 probes at each point, so 15 seconds per point. I don't think the MK3 even takes 1 second per point on the grid. How do I speed this up?
Hello there fellow printermans
For many days now im trying to figure out an issue with bl touch.Z axis moves( like it's trying to level the bed) while i print but it doesnt get it right.In some parts of the bed surface,nozzle prints to low and vice versa.
I tried M48 test,results are okay and the X axis is almost perfectly calibrated. At Cura i use the M29 after M28.Also i tried M420 and there was no difference. Except that i haven't done any changes at Cura's g.code.
My printer is the Ender 3 pro with btt skr V2.0 and i use bl touch smart 3.1. I have tried many marlin versions but the problem remains.
For the love of god help me.
Thanx ❤️
Hello Michael, is there any way how to change approach speeds for ABL?
I have looked around a Marlin setup, but didn´t find, also I have tried to search for M/G code to use it via console - also not able to find. Can you advise please?
There's a nozzle to probe offset? That explains a lot.
😂😂👍
Could you add this to your site as well please? I used your site to recalibrate my 10v2 after upgrading to a microswiss. I now need to do the offset since my Bltouch was moved from the right side to the left.
Another great tutorial, thank you! Do you have any additional recommended resources for Marlin Firmware compiling? I ran through your tutorials for my Ender 5 Pro when I added an SKR Mini, BLTouch and TFT at the same time but I cannot get the firmware to recognize the BLTouch properly. I get errors and warnings every time I boot up the machine.
Download Arduino IDE and open the project with Arduino, press the Verify button and it should compile it :)
Joao Carlos thank you for the suggestion. I have been compiling with VS Code since it is a 32 Bit board.
@@gt2scale I see you have edited your answer to include more info. In fact I use VSCode with the arduino extension for personal projects. I was just suggesting the Arduino IDE because its usually more beginner friendly (and it does work!).
Unfortunately, I dont know how to help you further with specific setup, sorry.
nice but i dont' get the "new feature" . It something we are already doing since the introduction of ABL. The real feature that no one is testing and i can't make it work is the assisted bed leveling/tramming....it should tell you exactly how many turns to give to each bed screws...that's a great idea!
Good morning, I have a problem. When you do the point check on the bed, on the right side, you get out of it, until it stops at the end of the x-axis. Put the points that you put always comes out. I have the probe to the left of the nozzle and to the left it does well, and in front and behind as well. I guess I must have something wrong with Configuration.h but I can't figure out what it is. I appreciate your help in advance.
can you update firmwear for the skr mini e3 1.2 ??
Question: you mention that in newer versions of Marlin there is a probe Z offset wizard. I do not see that in VERSION 020006. I think this is the latest version. What version of Marlin were you using?
I have a great idea for a Probe Offset Wizard (not Z offset) which does not exist!
It would be simple and save using a ruler to measure the distance between the BL/CR touch to nozzle. I don't know why this doesn't exist already, but maybe you could do it...
1: Press go and the printer prints a small bullseye or x, then it moves to the side and lowers the probe down to where it thinks it is set, and if it is not hitting the X;
2: you turn the knob for X and Y and the gantry moves .1 of a mm each click of the knob until you get the probe directly over the X.
Done! Save settings. No need for eyeballing a ruler and you can get the offset 100% Perfect! Any dummy could do it!
Someone needs to do this!
I can't get the Z wizard to work, or I can but it messes up the mesh levelling. Using the stock BTT + BLtouch firmware it all works fine but if I try to build my own firmware with the wizard turned on, when I start the bed levelling it just goes to the middle of the bed does a BL test and then throws an error in Octopi making it disconnect. On the printer itself the menu item to run a bed level seems to have gone. I think I must be missing something in the firmware when it comes to enabling the BLTouch.
after following this guide I have a slight problem. when I run the wizard, the nozzle gets banged into the side of the printing bed when it tries to move to the center. is there some setting in the config that I can edit to make the nozzle move up before moving to center while the wizard is running?