How To Repair Clear Coat LACQUER PEEL | 5 minute fixes | Episode #1

ฝัง
- เผยแพร่เมื่อ 31 ม.ค. 2025
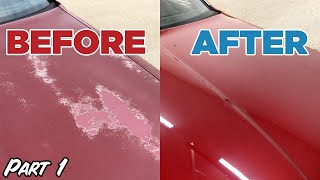
- In this video i show you how i (a small independent car dealer) deals with lacquer peel / flaking clear coat on car bodywork without having to respray the entire panel.
As with most of the repairs i show you, this is a demonstration to highlight that with a little know-how and some basic materials, you can fix the issues on your car yourself and potentially save big £££!
IF YOU HAVE ENJOYED THIS VIDEO AND WANT TO SEE MORE LIKE IT, SUBSCRIBE TODAY!
--
*Bumper scuff repair*:
• How To Repair Scuffed ...
*Faded and damaged paintwork repair using only rattle cans*:
• How To Repair Faded SU...
*Damaged door edges repair*:
• How To Repair Paint DA...
*Trading up from a cheap car to a supercar*:
• CHOP TO THE TOP - EP1 ...
--
Some of the tools, materials and consumables that i use in my videos are available within the links below:
Underseal Gun:
amzn.to/3yF530q
Underbody protection (Stone chip):
amzn.to/3IfvEUO
Plastic Welding tool:
amzn.to/3ORDabi
Silicone Carpet Comb / Dog Hair Remover:
amzn.to/2Wp4Njh
Machine Polisher:
amzn.to/2TL8k9W
Polishing Heads:
amzn.to/3uqTVBO
Maguiars Ultimate Compound:
amzn.to/2TXqrsc
Wet & Dry Sandpaper (240 - 2500g):
amzn.to/2TNifvD
Wet & Dry Sandpaper (Precision - 3000 - 7000g):
amzn.to/2W8MBKF
Panel Wipe (de-greaser):
amzn.to/2TVTrQU
Heat Gun:
amzn.to/3ykFoZC
Sharp Edge Tape:
amzn.to/2wVfdwk
General Masking Tape:
amzn.to/2WbiCC2
Masking Paper & Dispenser:
amzn.to/3aTf8Z2
Microfibre cloths:
amzn.to/33dC2aG
Autoglym Foam Polish Applicator pad:
amzn.to/2IFZi7Z
Meguiars Polish:
amzn.to/2wPxLyj
Clear Lacquer:
amzn.to/38JmXit
Blue Roll / Shop Cloth (For Panel Cleaning):
amzn.to/2WasawQ
Drill Brushes (For Cleaning / Scrubbing):
amzn.to/3ykQz4i
Autosmart APC:
amzn.to/2wY4tNJ
Spray Bottles:
amzn.to/3Pa1O6J
Fabric & Carpet Cleaner:
amzn.to/2TOnXxe
Detailing Brushes:
amzn.to/3IhZcRP
Wet Vacuum:
amzn.to/2W9nN5i
Bluetooth LED Beanie Hat:
amzn.to/38Kz6ni


Simple format presentation no unnecessary yadda yadda clear concise instructions no stupid music overdub 10/10 ..well done a lot of uploaders could learn from you . Subbed ..
Thank you very much and thanks for subscribing!
Very clear video 👍.
What he said
Shadow sun Agreed!
100%
Deafening, irritating, pointless, distracting, banal and puerile music is the cancer of youtube.
I’ve watched about 20 videos on how to repair clear coat and this is by far the most impressive.
The fix is temporary.
@@donproctor4480 how temporary? and what limits this as a fix?
@@caleb6443 any Meat that is melted in is a temporary fix, only a complete repaint is a proper way. But it depends on the clear used and how well the prep was, eventually the melters clear edges will begin to show agin, Howe long, couldn’t tell ya, 3months or the yr
Thanks for the clarification. I understand that. It’s not always economical or possible to do a full clear coat job. I understand this is not a permanent solution. It’s simply to make a minor improvement on a panel before it gets too ugly to look at. Some cars don’t warrant the cost of high level work but benefit from a little titivation.
@@nickdryadlook lacquer in the sun will burn in a few days then he will be where he started
I like how you get straight to the point. Thanks
Thank you! That's exactly what I set out to do with these videos... I too can't stand lots of useless waffle!
@@JohnnyGetsCash top man
interesting points ,if anyone else wants to uncover car spray painting course try Sovallo Auto Painting Fixer (just google it ) ? Ive heard some interesting things about it and my mate got excellent results with it.
LOVE that you mention heating the panel under damp, cold conditions....something I learned the hard way! It makes a HUGE difference with avoiding orange peel & other time-consuming corrections!
Good fix if clear is peeling over old clear. I noticed while you were sanding the liquid never turned red so you never hit the base coat. FYI to anyone that has peeling clear that's down to the basecoat layer you will need to spray more basecoat and blend that out before laying down the new clear.
he didnt even spray basecoat thats why u see the color differnds.
He just replied in a video saying that is actually base coat that he did sand but you must be careful not to sand through the old base coat
It all depends on your luck. In my case, I barely wet-sanded the surface with 1000 grit, and my basecoat came right off, there was nothing left... I had to repaint the whole thing...
@@nikitadmvit depends on the car too, some cars have less base coat then others
@@SMURFF707 you can always use the stuff that is base coat mixed with clear. 1 step I think its called. They will mix it at some of the Advance Auto locations if you give them your vin. That's probably the best thing to do if you are completely through the base coat. I've accidently burned through the clear coat with the polisher before and that works well to fix it.
It took me over one hour to realize why did I like so much this video - there's no annoying music in the background. Thanks for that, and for simple and precise instruction. Great job!
Great job man! Fantastic end result and a "to the point" video without music and unnecessary waffle! Thank you for sharing!
Thanks Neville, I'm glad you enjoyed it!
Agreed very well explained, can’t be sure I’d do that kind of finish though 😂
I love waffles, although. And at all times, even. Cheers
First time I have seen someone deal with lacquer peel properly and get a first class result - many thanks
Now this is how TH-cam video tutorials should be done!! Simple, straight to the point and a job well done. Subscribed. 👍🏻
Followed instructions exactly, burnt through my paint and primer. Red Honda FN2 Type-r, was done on wing mirrors, maybe the fact they are plastic, how thin the paint is on these cars or maybe I just used too much pressure may have been the issue🤷
"Thank you very much"
Brilliant little video... straight forward and properly polite at the end... that's often forgotten or replaced with cocky stupidity.... so thank YOU very much.
What an excellent video. Clear, easy to understand, no music, no loud extroverted presentation. Just good, honest information! Thanks!
Results look amazing, have been doing these kind of jobs for a while now and the way you've explained the process and equipment used is spot on, no messing about straight to the point 5 minute videos are perfect. Will be watching more of your videos liked and subbed keep up the good work it will be no time until your channel grows further👍
Thanks Jimmy!
. Calendar, For 2023
Looks sketchy
Its a old video. But one of the best video i seen on fixing clear coat. Cheers Mate!
Wow, a TH-camr who gets on with a clear, concise how-to without any BS. Congratulations Johnny, this is just what I need to do to my better-half's Alfa. That's if she'll let me near it with the wet & dry! And any recommendations on machine polishers? I feel it's about time to invest in something to help me with some paint correction jobs I should tackle.Cheers, and well done again.
Thanks Andy! I use a Sealey machine polisher and I swear by it! Perfect mix of power with lightweight capabilities. Thank you for your comments and best of luck with your repair!
I agree with all the comments below. While the techniques and results are superb, the straightforward presentation is excellent. As people have said, there is no yacking, no music, just a very clear and concise demonstration. I am definitely subscribing!!
Best clear coat fix I have ever seen
I love this kind of advice and videos, small areas of bodywork that need attention before the problem gets worse. No messing, no stupid music and no bullsh!t - many thanks.
That’s amazing my man! Didn’t expect the final result to be that good. Like a factory finish
Thanks very much! There's no point doing a job if you don't do it right.... Right?!
Yeah... factory finish with a spraycan. This guy can get a job from any bodyshop. 😉
I just wanted to thank you for this video. I followed your steps and was able to fix part of my front bumper. The only thing is I wish I had used better quality clearcoat paint. Thanks again !!!
That’s awesome! I’m glad it helped you out!
Why can't all " how to do it" videos be as clear and uncluttered as this one?
Exactly!
Have you ever watched chrisfix?
@@xarhsath8196 no but I will look! Thanks.
This is exactly what i came to find. Clear, precise video and easy to understand. Perfect content buddy!
Finally the first TH-camr to Show just a small part of clear coat that got damaged and not a hole panel. Thanks! my car has the same small damage spot but on the egde of the driver's door near the window. Do I have to do that last part? Grinding with 1200 sand paper and than polishing it? Like the hole door or can I just do a small part?
Glad you like the video! More often than not, these areas of lacquer damage can be 'spot repaired', saving heaps of time and money! In your case, you needn't sand and polish the whole door, just the damaged area and several inches surrounding it. Don't be afraid to dull the paint around the damaged area as the final polishing stage will shine this up again whilst you are buffing the newly sprayed clear coat. Treat your polishing stage as a blending process almost. Hope that helps!
JohnnyGetsCash you think I can make a small tape box around the 3 inch damaged clear coat and do this process? Thanks
@@JohnnyGetsCash i
@@omarcarranza8973 the reason he goes over by some distance is so it gently fades the sanding so you can't see any harsh lines which would most likely occur if you tape it off and sand to the tape
JohnnyGetsCash le
5 minute fixes"
*Wait 24 hours*
I found this was a really good video, straight to the point, and focused on the problem and solution. I did find it a bit odd on how a good fix would be done in 5 minutes but after watching the video i understood the title was for click bait but leaving you with a great fix in hand, can't ve mad at that
One thing I definitely recommend is to use a rubber sanding block and be cautious with how much pressure you apply. The paint layer underneath the clear is extremely thin and you can easily sand through it even with high grit sandpaper.
Hi Teemo. Usually i would use a block too, however in this instance (on a convex panel with exposed base in the centre) a block would've been harder to control and to avoid the exposed base so that's why i did it freehand. A decent tip all the same for beginners working on larger areas though.
That’s what I just did🥲
@@broom4720 same😭
yeah, me too ;( @@broom4720
Wow!!! Trouble is I've got peeling lacquer on a red Citroen - seems particularly common on them.
Nice job fella, just what i've been looking for. Straight to the point and no over complicated jargon. Well done.👍
Glad to see a Pug being re-loved 🦁
Well, you know what they say...Every pug has its day!
That was perfect. The only thing I would recommend is using the panel whipe and using another cloth to wipe and dry.... but that is nitpicking. Thanks for the video. 😊😊
Pretty impressive. Peeling clear coat looks like crap and stands out. Repair looks great. Good job and something most car nuts could do.Thx
Regular hair dryer will also work, I used to do custom paintjobs on laptop lids and did the same, hair dryer in one hand and clear coat in the other. You're right the best time to do any kind of painting is in bright sunshine too, the UV hardens the clear coat/paint and you get a longer lasting finish.
You can't sand the basecoat without damaging the metallic and affecting the colour, it would show threw the clear coat as a patch
i tried it and it doesn't work... the clear is much thicker and harder than the base coat. Also as you said the colour is different after sanding it. any other ideas on how to fix it
Video: Just five minutes, clear instructions, perfect result. Bravo!
Ah right so THAT'S how it's supposed to turn out. I thought it was a bit odd that I needed a new car after I did mine.
did it ruin your car?
😂😂
🤣
🤣🤣
You are not kidding! I did this the wrong way and the only reason why I am not getting rid of my car is because it is a rare car and I intend to fix it come hell or high water. But my God, this can definitely be done wrong and I learned that the hard way 🤣🤣🤣🤣
Absolute hero, just had a nasty spot on my car, used this method and it worked... Thankfully Florida is hot so the temp etc wasn't a problem
I love how you can see the sky in the reflection
So since this video is old how long did the fix stay? What was the first sign of it failing? Can’t imagine it lasting years but who knows. Gotta be the best video for this fix I’ve seen so far.
Great video! A couple of questions that I think would really help with DIYs:
- when sanding down the affected area to get rid of that raised edge where the laquer has peeled, how do you avoid going through the base coat on the exposed part?
- how long between coats of laquer when you respray?
Thanks!
Hi Neil, thanks for your question. When sanding the raised lip of the clear, in order to protect the exposed base I always use a high grade of paper and make sure it is kept wet at all times. In addition to this I also keep a very, very light pressure on the work piece. With these measures you will be able to feel the lip that you are working on through the paper (generally the work is done through one finger more than the others so it's easy to keep track of what you are sanding). This of course takes practice and it's fair to say that the paper will inevitably touch the exposed base occasionally but providing there is no pressure applied to that area and you endeavour to avoid it / work from outside in where possible that will be your best defence against damaging the base. This takes practice so go at it slowly and gently to begin with!
Re clear coat, this depends on the spraying conditions. Me personally, when I'm applying the first couple of light coats, will give it approximately 2 mins between coats whilst applying gentle heat. When I lay down the 'wet' coats, I give it between 2 and 5 mins depending on how the coats are setting (again this varies depending on ambient temp, moisture, application etc). When I've finished the final clear coat I give it at least 24 hours to fully cure before wet sanding and polishing. Of course if you can leave it longer, that's fine as it'll simply allow it to harden more which is no bad thing.
I hope that helps and gives some clarity. I know it sounds vague, but It's often a case of just trying the job and getting a feel for it, then after a few times it'll be instinctive! Cheers
@@JohnnyGetsCash thanks so much for the detailed reply that is super helpful advice it! I've just been trying to fix some patches of laquer peel on my rear bumper with some help from your guide - my laquer peel is pretty bad though so I've also just touched up the patches with a couple of light coats of base coat as well! Not looking too bad, just waiting for it to dry so I can polish now 🤞🤞
Clearest video I've seen that's in lamens terms. Really good results, this video has left me confident enough to do mine now. Paints perfect, just lacquer peel in a fair few places which is annoying lol
perfect tutorial, whole rear bumper is peeling on my qashqai, at least I know what to do now!!!
Boy really digs his work when he refers to the damaged area as a "Wound"....Keep on Truckin' Fella!
This should be used as a training video for all those irrigating youtubers on how to do it properly
Perhaps also for any do-it-yourself videos of any sort, not just limited to irrigation.
Probably the most straight to the point on how to paint work, Excellent result i am going to attempt on my vehicle asap
That's really useful mate, thanks. Quick, straight to the point and clear.
A 5 min vid to show you how its done, awesome job! Great diy!! Ignore the guys complaining about not being a 5 min fix, im happy to be able to see how it is done, i havea spot that lost its clearcoat on my mr2 and thanks to you i know how and what needs to be done, thanks!
Thanks very much, glad it helped! It's nice to know there are some people who understand the concept of an overview video!
Just a tip be careful to sand the basecolor, sand edges and out. or u may have to put new base in if u sanding thru. Great video anyway
If i try to sand that way with 600 my 2008 nissan Note the base is going away after 2 times i pass it. What he did is impossibile for my car.
If you watch carefully, you see a light red spot where it needed more base.
@@donproctor4480 I've noticed this too. You can see once the camera is on about 45 degrees angle. If you look directly from the top you can't see it...Respect for his job done, however the spot is not completely gone... I guess the light red spot is caused by missing clear coat as clear coats containing UV protection... Without UV protection the sunshine just blend it out the red colour in this area...
I got caught out with damaging the base coat :/ lesson learnt but it happened with the slightest touch.
Very good presentation. Concise with all information given as quickly as possible. Interest therefore retained, and no silly background music.
4:43 that spit polish is best touch.
😂😂😂 Gotta sign your work!
Absolutely amazing thank you I've gotta do a small repair on my car...I wish you were local I'd pay good money for yourself to do the job and I'm not being rude but you look like you know what you are doing and a great job...thank you fella 😊
Now this is how you vlog a work like this !!
Top job mate!!
I've got a red Pug 308 2010 with several spots of peeled laquer. Glad to know you don't need to get a full panel respray!
Amazingly done mate, clear and quick. Love this style
Thanks very much!
Best video I've seen on here.
Started getting stocked up ready to hopefully copy what you do.
I've watched a lot more of your vids and was wondering,,
Do you use primer over filler before top coat and clear??
Keep posting vids, very helpful thank you...
I agree very good in structural video 4:58
I have several areas of clear coat/varnish peeling on my car,that I will be attempting to fix thanks to this video...Thankyou! 👍
That was excellent, well done ! Got a patch on the roof I will repair this way. How do you know when you have applied enough clear ?
Thank you! I'm glad you enjoyed the video and are planning to tackle this job on your car! RE the amount of clear to lay down, start off with a couple of light coats (not quite dust coats, but relatively light). After these coats i'd recommend anything between a further 2 - 3 coats gradually getting heavier. Think of these final coats as 'wet' coats. The clear should look wet and shiny as you apply it - but be very careful not to lay it down too thick or move your hand too slowly as this will cause runs. This can be sorted through proper sanding but the clear will need to harden fully before you can do this (maybe a couple of days if its very thick). Basically you're looking for a few layers, each getting heavier until you finish with a couple of wet coats. In a perfect world the clear will already look shiny once dry, even before sanding / buffing. Best of luck!
@@JohnnyGetsCash Awesome tutorial as for me "TODAY" I was adding a few coats of clear to my front lower chin and was rushing the job and now have some runs and some minor bumps! I guess in my situation is more simpler as all I have to do now is wet sand the bumps and runs to the same level as the rest and just buff if off with a good paint correction right? Thanks for your time!
@@peterwho9380 Hi Peter, thanks for your comment. Yes exactly that! It sounds as if you've just applied a little too much clear and perhaps without the appropriate temperature, but it's not a huge problem. As youve identified, it's now a case of allowing the clear to fully harden before wet flatting to a uniform finish ahead of polishing to a satisfactory gloss. Cheers!
@@mr.opinion6576 when you say clear coat barrier, what do you mean?
@@JohnnyGetsCash Awesome and thanks for taking the time to clarify my issue and confirm what needed to be done, cheers.
I totally agree with some of the other comments, “Straight & To The Point”! I particularly liked how you used the heat gun to keep the clear coat from running. Luckily I have a 2003 Subaru to practice on, before I try it on my Volvo. Living in S Texas next to the ocean, this is a never ending problem. Appreciate the clear instructions. Very good video.👍👍👍
*Best tutorial ever*
Best clear coat video in my books. Great job.
Thanks, highly recommended watching I reckon.
I know this is an older video, but I am so grateful for this because I have a spot on a passenger door about the same size wondering what was necessary for me to take care of it and helped me figure out what process I will take🎉
I don’t understand why body shops say this can’t be done
Because this can’t be done! There is visible transition of new clear coat layer and you will never be able to polish this out. It looks shiny now, wait 7-8 months and it will look like someones cum shot on that bumper. If you are homegamer and drive Peugeot and you don’t care how your car looks like than go ahead😂
Because they do professional work that they guarantee. They could not guarantee this work as it's not really a long term fix.
Unless you re-clair coat it. It's just going to come up in a couple weeks again. And trying to combine two different clear coats is not fun. You start to get gassing and all types of miscoloring at that point. You might as well just repaint the panel. It's not worth for most body shops. Too much of a risk. And in that wet sanding part if you do go past the paint and hit the body you're going to have to repaint that whole panel. It's not worth the money for the risk.
Wish more "how to" videos were as clear and useful as this. Many thanks for your generosity in posting this.
Great video, enhanced by having no stupid background music! 👍
Brilliant straightforward presentation . Just bought red xantia with a little lacquer peel , and I am now confident enough to have a go at it. Thanks very much for sharing this
3:00 you can see that original spot on the color after you put clear. where did it go when watching final results? I mean there is no way this kind of repair will be 100% perfect bcs when you sand that spot where clearcoat has pealed off you basicly sand bare basecoat and especiallly metallic color will show it after you re clear it. only way is blend some color over that sanded basecoat and then put clearcoat over it.
It was still visible, but at least a lot better. All things considered i think it was a good fix considered how quick it was.
what do you mean where did it go? it blends when you polish it.... thats how it works lol
MrDangerous it wont blend 100% perfect
@@Aikaramba12 never said it would be perfect. just said it blends lol
Got er done tho.
never would have thought of the heat gun to speed up solvent removal from the clear coat. Brilliant! Now, if I could do it in 10 minutes, I'd be happy :)
04:31 clouds timelapse on the bonnet is awesome
I wish I had come across this video sooner as it would have saved me much faffing. Even the suppliers of the lacquer knew nothing as to how to apply it. So thank you and well done.
0:29 microfiber cloths on the floor, gotta throw them away!
Nah mate, added grit helps lol
Microfiber are good and soft but they have the qualities of tape everything seems to stick to them very annoying.
Very nice result, for what is basically just a cheap spray can of clear lacquer! 👍
You can still see the spot that peeled originally even through all of the work you did over it to try and blend it in. Maybe it’s just becuase I’m an artist but there is a discoloration spot in the paint still.
A 5min video that delivers it ALL top stuff thanks for posting👍ill be trying it on my car at the weekend🤞
It has to be with a Peugeot car... how the hell all their paint job do that ?
My Peugeot van has done this too. Only 7 years old.
1conu59, the global climate change/ warming/ environmentalists/ green socialists/ commies, control tyrants forced the paint manufactures to eliminate the petroleum solvents from the paint and switch to “waterborne “ paints. This waterborne paint is soft, shit and peels after exposure to the elements.
@@Dixler683 the same climate change that makes a normal engine die because electronics failed ? So you can buy a new car ? :D
Good video! I'm a "have a go" kind of gal, and these are very clear and logical instruction. 👍🏼
It's a 5 min video, but NOT A 5 MIN JOB.... More like 5 hours job....
I knew nothing about bodywork but feel up to doing this with a few notes and taking my time, brilliant!! 10/10
Awesome! Just take your time and approach it methodically and you should be ok!
24 hours plus condensed into five minutes. Genius!
Spot on video with good DIY tips, nice. Especially like the fact that you aren't promoting products. Keep up the fantastic work
Oh geez. Got about 1 1/2 inch sq lacquer that’s peeled after getting to close with jet wash. Need to be brave and try this. !! Great video
thank you mate ! this has made my day ! fibreglas spoiler on my ride has started to bubble and pop so this is definitely a help - thank you
I like that tip on pre heating the panel in cool weather conditions 🤙🏻
Been putting a rear bumper job off for a year now but this has been my go to video for the starting point
One of the few really helpful vids!! Short, compact, all Tools & materials listed, well explained, and you are ready to Go, both thumbs up 👍👍❗
Thank you for the video. Very clear instructions. I'll be fixing my rear bumper with these instructions. Wish me luck!
Subscribed! 6 year in the auto refinishing and I can say a few things but no. Top job hope you're channel grows!
The result you got was definitely worth the effort. Thanks for sharing.
Amazing and simple video with explenation. TH-cam needs more people like you.
Wow, that's seriously impressive. Body shops are just out of my budget for repairs like this. Great finish!
I'm impressed. After watching the video, I think I will give it a go!
I've never said 'wow wee holly molly sunny jim' over a Peugeot before, but you sir made this possible
First vid I've seen from you, subscribed straight after. Top class vid.with no bull, clearly spoken and just the info I was looking for to have a crack at a "hand sized area" of lifting lacquer on the bonnet of my 20 year old jeep. thanks fella!
Thank you!
Excellent video on fixing/blending clear coat. thx for taking the time to inform others. cheers and hello from Canada.
Probably the best tutorial I’ve seen for this. Thumbs up 👍🏽
Thank you!
That was a great video, no over complicating. Worked well for me! Thank you!
Fabulous!!!!!! Starting with 600 is super smart !!!!!!!!!!! Thank you Bill
Going to check this out.
Really hope it works.
Walked out today, after 2 days of very heavy rain, and found TWO large water bubbles on the side of my truck. All because the 20+ year old clear coat had flaked some and now holding rain water.
Still a little bit visible but to get it perfect you would have to repaint it red... What you did made it a millions times better with minimal effort. Great job.
I might give this a go, I blew the clear coat off my front bumper on my rolla, surely if I fail at this I can't screw it up any further, plus I hav plans on giving the car a full professional respray anyway so I figure why not give it a bash.
Great video, super explanation too right to the point, no bs, 👍 🇮🇪
Thanks very much! Best of luck with your repair
I retail minis as my profession and plenty of lacquer peel I’ve sent for paint. I’ve just got a new arrival with a small section on one qtr so going to have a go myself and see how I get on! Will be back to update!
This video was great. Straight to the point, doing a single spot not the entire roof or hood. Thanks Johnny