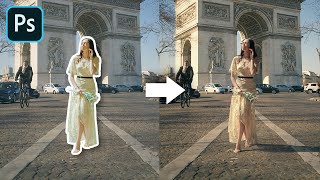
Apply Wallpaper to Walls in Photoshop
ฝัง
- เผยแพร่เมื่อ 21 ก.ย. 2024
- I Guarantee I Can Teach You to Master Photoshop. Learn How: phlearn.com/aa...
View the full post at phlearn.com/app... !
Website: phlearn.com/
Facebook: / phlearn
Twitter: / aknacer
Google+: plus.google.co...
For more tutorials and how to videos check out our extensive Photoshop and photography video channel: / phlearnllc
We cover everything from Photoshop tutorials, photography tutorials, how to videos and more!


Wow, just learned patterns, perspective, select color range, fill selection, and probably a lot more. Thanks a lot!
AAaron the people of my village will sing great songs of you! Thanks to you and everybody who works at phlearn for these great videos.
Thank you Aaron for making this video. It helped a lot when parents are looking at different samples! This way, they could see finished product. I would have been lost w/o your expertise.
Thank you so much for showing us the great videos. But, I've just learned how to edit or combine the photos. Can you make a tutorial how to make an edited photo or manipulation back to original. Thank youuuuuuuuuu!
Wow! You make it look effortlessly! Great tutorial Phlearn!
A good technique to integrate it even more is to load the luminosity of one of the color channels (look at the individual channels and see which one has the most contrast/details and the Ctrl or command click the thumbnail) and use it as an additional layer mask. That way the texture integrates really nicely in your comp
It’s amazing video! The main advantage of it is that you takes actual material instead stock photos in good quality. Thank you, dude!
Brilliant Aaron! I've never thought of creating perspective that way. I have always used the Vanishing Point filter but your method is much easier. Many thanks.
Cool. Thanks so much for your tutorials. Very helpful. And P.S awesome how you smile and talk at the same time. It's great! lol.
I love how you always crack up to your own jokes. Nice tutorial Aaron
fun little classic tutorial but man, the beginning part really makes me uber-grateful for Filter Forge :)
What are the benefits of doing this method compared to vanishing viewpoint?
Dude, just love your ability of teaching + generous nature.
Go get yourself a great girl! Hahaha, I know you want to!
Thanks Aaron, great job as usual. Although your physical statement does not cover the area of spooky ghost models. Those are half-transparent, maybe some grey on the layer mask might do the trick..
Nice, helpful those lines for perspective!!
I'm using more smart objects transforming them with perspective and applying the pattern inside (mostly for more layers inside), and using less Vanishig point..
Hey Scott,
Nice work but you should try to use the offset filter to create seamless textures - much quicker and more accurate. It more or less automates the whole process you went through (minus the touching up of tonality of course ;)
Amazing techniques, Amazing lecture
You're my God! Thank you!
+Phlearn Photoshop and Photography Tutorials Normally I would disallow the royal we, but you're the Photoshop king. So it's cool.
Masha and the bear
Indeed you are awesome! :D I've been learning so much from you!
mmmm!! that was an interresting physics lesson about those things that are over the other things what makes you not see the things under the things.... ahhh!!! I have a headache!! hhhh thanks alot Aaron, you are a great phteacher, and thanks to all the phlearners who works with you :D
Another quick tip - if you uncheck "contiguous" when using the wand tool - it'll select all of those marks at once without having to select them all individually..
(I spend too much time watching photoshop videos)
You are a mad man! Great stuff sir! Keep it up :)
love this tutorial very good i just wish u can use a totally free pictures sources so we can download them for free please, other than that great training very profetional
So glad i subscribe for these vids! keep them up!
Thank you so much, great tutorial
Awesome
Why not use the vanishing point for perspective?
Great tutorial, thanks!
Thank you & I relay like your tutorial.
you should record video in full screen, your cropping make the top panel lost and newbie will not know what menu you click.
that was so awesome ,thank you
Great video! Thanks xD
Phantastic!
thank you so much SIr!
Gr8 tutorial...Teacher.. :)
THAT WAS FUCKIN' AWESOME. I think aside from the Erik Almas interviews - this is my fave.
Alternatively, you could search for "seamless textures" and skip the whole texture editing step where available. Seamless textures are great...
How I can achieve this? 13:41
The upper part doesn't follow when I resize the bottom part
I figured it out, pressing ctrl+shift+alt
His name is Aaron ..not Scott :)
PHHHHHHHHHHHHHHHHHHHHHHHLEARN...
You are too fast but all in all good tutorial