Fix Your Bed Level on Creality Ender 3

ฝัง
- เผยแพร่เมื่อ 16 ม.ค. 2020
- Are the springs on you Creality Ender 3 bed way off?
Is it hard to level the bed?
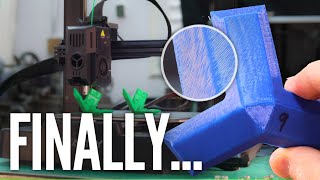
Are the first few layers of your prints kinda rough?
Chuck shows you how fix a very uneven bed on your Creality Ender 3 and improve the quality. He also shows you a few tune-up tips for your 3D Printer as well in this weeks Filament Friday.
White Lithium Grease: amzn.to/2twyBOS
Creality Ender 3:
From Banggood : bit.ly/2wfD5Ia
From : amzn.to/3fSIISy
From MatterHackers: bit.ly/2VVveZW
Creality Official Reseller Comgrow: bit.ly/3hDTvSf
Creality Ender 3 Pro:
From Banggood.com: bit.ly/2DBG0AI
From .com: amzn.to/2QUjRUL
From MatterHackers: bit.ly/2MfPCFT
Creality Official Reseller Comgrow: bit.ly/3hET7CL
Creality Ender 3 Upgrade Package (Extruder, Silent Board & Capricorn Tubing): bit.ly/2MNvmcs
CHEP Cura Profiles:
www.chepclub.com/cura-profile...
CHEP Cube 3D Print: bit.ly/3gH4l9D
CHEP PAWN: bit.ly/3pHYE08
Phil A Ment: www.thingiverse.com/thing:255...
3D Benchy: www.thingiverse.com/thing:763622
Filament Friday Tool Kit:
USA - amzn.to/2N8NuOR
UK - amzn.to/2OP6pNY
Filament Friday Filament:
USA - amzn.to/2rgz3Ma
Creality Ender 3 Parts/Upgrades
-------------------------------------------
X-Axis Tensioner
USA: amzn.to/38BKbYP
Y-Axis Tensioner
USA: amzn.to/2PhOdhi
PTFE, Couplings and Cutting Tool:
amzn.to/2TgzRyP
CHPOWER Metal Extruder:
USA: amzn.to/2rpMJsn
UK: amzn.to/2YpeMUN
Banggood: bit.ly/2YnuwHO
WINSINN Dual Gear:
USA: amzn.to/37fB4eF
UK: amzn.to/36bUKju
Banggood: bit.ly/34YWDzN
EZR Extruder: bit.ly/2rlKCpp
Nozzle Removal Palm Ratchet:
USA: amzn.to/3u6ncm7
Premium Version with Rubber Grip: amzn.to/3qPs3pB
UK: amzn.to/2YnPqXo
Creality Silent Stepper Board: amzn.to/2YPM0Nh
Cap Tubes & Couplings: amzn.to/2Vf8BCf
CR10/Creality Ender 3 Nozzles: amzn.to/2m39K1y
CR10/Ender3 Silicon Heater Block Cover: amzn.to/2PaxJ89
Solder Sleeve Kit: amzn.to/2Pqqngm
Creality Ender 3 Fan Set (24v): amzn.to/38u9aOl
CR-10 Fan Set (12v): amzn.to/2PrcCxK
T-Nuts Kit: amzn.to/2LsQZg8
Screw Kit: amzn.to/2Va8uGK
Temperature Meter Used in Videos: amzn.to/2JpUJOC
Screwdriver set used in Videos: amzn.to/2PbWocM
CHEP Prusa Profiles:
www.chepclub.com/prusaslicer-...
CR-10 V2
From Creality Official Reseller Comgrow: bit.ly/2WwT8gz
From Banggood: www.banggood.com/custlink/G3G...
From
From : amzn.to/2C2naiy
CR-10:
From Creality Official Reseller Comgrow: bit.ly/2PF01uW
From Banggood : bit.ly/2UdMcpc
From : amzn.to/2JDO9oP
CR-10S Pro
From Creality Official Reseller Comgrow: bit.ly/2JGLLh4
From Banggood : bit.ly/2WXWasO
From : amzn.to/2C4MGnw
From Matterhackers: bit.ly/2Kwk3G6
CR10 Mini
From Banggood : bit.ly/2u5XNJk
From .com : amzn.to/2l8B7mX
Creality Ender 3X - Creality Ender 3 plus Glass Bed and 5 Extra Nozzles:
Creality Official Reseller Comgrow: bit.ly/2NguWOD
Creality Ender 5:
.com: amzn.to/2IZaEFy
Banggood.com: bit.ly/2PwwHV7
Creality Official Reseller Comgrow: bit.ly/2L2SweG
Filament Friday Tool Kit: amzn.to/2YhMtea
Filament Friday 3D Printer Starter Kits: bit.ly/2EuojUq
Filament Friday Filament: amzn.to/2rgz3Ma
********* Ender Style Cura Profiles Download Links: *******
Best (0.12) : thangs.com/file/1057729
Good (0.20) : thangs.com/file/1057731
Extra Fast (0.28) : thangs.com/file/1057732
Hyper Fast (0.32) : thangs.com/file/1057733
TPU thangs.com/file/1057734
**** Support the Channel *****************
EBAY USA: ebay.to/1wtxfiU
EBAY UK: ebay.eu/2qdC5iy
EBAY Canada: bit.ly/2qdGRwh
Support the Channel here and Shop at MatterHackers.com and you automatically donate to the channel at no cost to you:
bit.ly/1Ugcijp
Buy thru this link to Slice Engineering for the Best Hot Ends:
bit.ly/3yuyuze
Note:
As an Amazon Associate, I earn from qualifying purchases.
Financial Support through Patreon:
/ elproducts
****************************************************
Filament Friday Sticker:
Send Self Addressed Stamped Envelope to:
Electronic Products
PO Box 251
Milford, MI 48381
****************************************************
Filament Friday Playlist:
goo.gl/yJLNhr
Chuck's Arduino Book:
amzn.to/3tA31JP
Intro animation by Pablo Licari based on Filament Friday Logo by Brian Carter. - วิทยาศาสตร์และเทคโนโลยี


Hey Chuck, just wanted to say your microcontroller books got me into electronics like 20 years ago. Just happen to come across your channel, didn't even know you were making YT content! Great stuff, still inspiring the masses, I see.
Thanks. Glad I could help.
Concise, to the point - not everyone wants to spend 60+ minutes following an adjustment guide. Kudos.
I wish it was only 60 minutes, 4hours and 45 minutes it still won't print😡 I'm starting to lose my mind
Everytime I assume my printer is all good, CHEP comes up with a video and I've to re check my printer 😂
I had a persistent problem getting my Ender 3 bed level. The normal level procedure typically ended up leaving one of my leveling screws falling off. So I completely re-built the frame, using foil shims to make everything completely square. Still had the problem. Built myself a 3-point level system. Still the same problem. I finally came across someone describing a similar problem who discovered their Y axis extrusion was twisted! I put a level on my built plate and moved the Y axis through its whole range, and sure enough the bubble shifted from left-of-center to right-of-center as it moved. I got myself a piece of bare black extrusion and cut/drilled/tapped it appropriately, and finally I have a perfectly level print bed!
So, if the steps in this video still don't work, check that your Y axis rail is flat! If it's not, no amount of adjustment of the surface plane or the rest of the frame will keep the hot end level across the whole build plate. And it doesn't take a whole lot of twist to turn into being several mm off at the edges of your build plate.
Mate, I got an Ender 3 just before xmas, and I was having this exact issue.
Now I come to TH-cam to chill for a bit, and find that you've uploaded a video on how to solve my exact problem not 2 hours previously?
Are you a 3D printing guardian angel or something?
Hey @CHEP
I don't think you mentioned it in this video, but I spent probably an hour tinkering with the left side of the X-axis bar, got it within .4mm of perfection, then put everything back together and adjusted the eccentric bolts to make sure it was tight. It was off by as much as FIVE MM afterward.
I did this probably a dozen times, then finally decided to look at the right side - Lo and behold, two perfectly accessible screws that didn't require any disassembly. I did the same sort of adjustment you showed on the left side, on the right side instead and now it's within .3mm on both sides with the bolts where they should be. It may be worth trying to do the right side, with 0 disassembly, first!
Just thought I'd give you (And anyone else who was struggling) a heads up.
@CHEP I must say, seriously, your content probably (likely) *saves lives!* I can *_-totally-_* imagine someone becoming so depressed, and feeling utterly and irreversibly deficient in the brain pan department, but as hope dwindles away to vapor, and passion begins to slip from our hearts, we remember you! You're one of the few TH-camrs within the broad technical and engineering community that I've got an immediately excellent visual association with, virtually all channels that provide content of a like nature make me incredibly angry, I think watching far less competent and technically skilled individuals trained my brain to associate anger, sadness and super edginess with the _others._ Thanks sir, TLDR; You are *AWESOME!*
For someone that has been wanting a 3D Printer for years but only now is in a position to get one, your videos have been enlightening for sure. I'm almost certain the Ender 3 Pro will be my first printer seeing as there are soooo many resources out there to make it even better than what people say it is in a stock config. Thank you for your part in making things easier for the new people coming into this cool hobby, I really appreciate it.
You sir are a champion! I thought I was going mad with the bed height and the springs being different extenstions. Now I am confident that I can finally dial this in to be perfectly flat and square!!!! So thankful.
I just got my first printer, an ender 3 v2, while it worked right out the box (came bundled with a CR Touch auto tramming probe), your videos have been absolutely amazing for narrowing down all the issues I've had. Thank you for taking the extra time to make these lectures for us hobbyists out here.
Just wanted to say you are my friggin hero man - There's been more than once where I ran into an issue, and if it wasn't for your videos, I just plain wouldn't have found the solution I needed...This was one of them, as you had mentioned the "spring" issue with the bed, which allowed me to know this was what I needed...A total pain to correct, but finally close enough, that I "should" have a flat bed on the Ender 3 pro....Thanks again for your videos!
Finally someone showing how to correctly level the X gantry. I dd this to my CR-10s Pro when setting it up a couple months ago. Well done Chep!
Chuck, Thanks for the timely tip. My Ender3 has performed beautifully on PLA, TPU and PETG but I had issues getting the bed perfectly level. I even bought stronger springs which did help but not exactly what I wanted in bed leveling results.
I performed your tip (it took 4 tries) and got the measurements within less than a half millimeter of each side so I was happy about that. I'll relevel the bed tonight to see if it helped.
Thanks for a great tip.
I took the shortcut/frustration approach. Hold the threaded rod side and gently pull up on the other side to match the bed. Works like a charm!
I haven't used my Ender 3 since the remodel to my apartment. It was fine before then but now I guess from moving it from room to room, the bed is all out of wack. I'm going to do this and hope to get it running soon. Thanks a lot and love your videos.
aw 2 years later this video is so much helpfull, thank you chep 4 your knowledge.
Every time I have a problem that nobody on earth has, you seem to have the answer to it, and I’ve just realised your channel is the only one that has ever helped when I feel like throwing my printer out the window
I am about to throw my Ender 3 out of the window right now. Since I´ve had it it hasn´t printed anything just right. It messes up every single thing and I am unable to level the bed at all. I´ll give it one last chance to redeem itself because of this very video and if that doesn´t help, well... window it is.
Silicone spacers instead of the springs under the bed
Chuck I do like your videos the best part of them it is that you really love what you do and you transmit that in your videos; keep the goob job up !
Great simple straight to the point commentary - I like it! hanks
Thanks much for this video - really helped me find out why I had to crank down so hard on the right-side bed levellers. Great content!
You have helped me out so much this year setting up my Ender 3 Pro I just want to say thank you 🙏
Hey thanks for the tips I will try on my Ender 3 you’ve helped me so much on my printing journey
I had the same thing where those two screws made it extremely difficult to adjust the level of the beam. I ended up drilling a single hole that is maybe 5 inches from the top on the inboard groove, that lines up with one of the screws, and with it on the machine, was able to tighten and loosen it, and got it level that way
Thank you for your help. Literally have been struggling for like a year.
This is a great guide. I'll have to do this adjustment when my ABL sensor comes in. That will take care of any waprage (my bed is warped in the middle) and make the first layer perfect. The ABL sensor I bought is the EZABL.
This video came just in time! I was really scratching my head about why I was having one side tightened way more than the others.
Fixed a long term issue! Thanks!
Perfect timing, I need to do a yearly maintenance cycle on my Ender, I'll put these checks to good use.
Creality should put this video on the sd card with the instruction to assembling. TOP
Thanks, CHuck! You saved my life with my Longer LK4 Pro, which comes to fail after 700 hours of printing. Follow most of your procedures, now I have fine prints! I put a helical spring lock washer with the first bolt of the X carriage bar to avoid a new looseness in it.
Hey Mike, thanks for a great tutorial. I am new to 3D printing and had terrible problems levelling the bed. I suspected the axis was wrong but wasn't sure so it was greaat to get the help. this video solved my problem on the ender 3 pro
Great instructional video! Solved my bed leveling issues...Thank you!!!!
This video was incredibly helpful! Thank you so much!
After I built my printer, I could not get the bed level and ran into the issue you mentioned of the springs on one side being tight. Your instructions on how to adjust the x-axis bar are extremely helpful and I'm finally printing.
This guy really knows his stuff. My Ender 3 v2 was giving me endless problems with bed leveling and first layer issues and this video along with his other one on bed leveling fixed things right up. Thanks for the advice, you took a lot of stress out of the equation of this complex hobby.
Glad to help
@@FilamentFriday I am having same issues as Corey, but following your video, I see I am quite level & square overall, and the base is quite flat. After trying to level 4-5 times, then it seems okay, but then start to print, the clumping, and no laying of filament in areas (usually at the start). I stop , check the level, and it's way off again. At this point I am about ready to chuck it in the trash, and find another brand which does auto-leveling.
The nozzle will lift on the first layer to make room for you plastic. If it clumping then you need better adhesion. Maybe clean the bed with alcohol or soapy water. Sometimes one swipe of glue stick helps.
@@FilamentFriday The bed is literally a new one (the magnetic one), and I have done maybe one print on it. Also the printer stays in the optional insulated enclosure, so I know dust/dirt is not much of an issue. I did have a glass plate to use I got when I ordered it. Prints stopped sticking to it, and I tossed it to the side. Now I cannot find it so I went ahead and ordered a new one. I may also order that BLTouch for it. Thank you kindly for taking the time to respond.
@@FilamentFriday My new glass bed came in, and after 4-5 "leveling" tries, the level is much better, but not quite perfect like yours (also sticking to the glass bed). Looks like I will certainly be ordering the BLTouch kit. Thanks again!
Thanks a lot for all your videos... I really appreciate your work and effort to make this hobby less stressful.... this video solved like 95% of my issues...
I would recommend loosening and squaring the Y-rail also while you're doing all this. One of mine was printing un-square until i did this. And since you undid the side bolts on the lower crossbar, it has the potential to rock fore-aft, possibly introducing a slope in Y-axis so that needs to match level of foot rails/tabletop as well.
Fantastic, man! Thanks for the tips! 😃
Ultimate video bro.
U pointed the solution for all the type of problems and trics 🥳
Thanks a lot🔥
Great video, the ultimate solution anyone will ever need for these enders.
Thanks Chuck!! just did this to mine all good now
CHEP comin in with the informational save again. Love the content, but this one in particular, I watched a couple different videos on that honestly made me rewatch because they made it seem so complicated, that I thought I must have been missing something. As always, Chuck comes in and levels the playing field with a direct, honest, and concise approach, logical explanation, and detailed visual of what he's talking about.
Excellent work, as usual, sir. Proud to be a fan of your channel and your work.
(p.s. I gave up on 3D printing because of issues with the Ender3 Pro, but this video has kind of made me get off the couch and start to tinker with it again)
Don’t quit. It’s too much fun once you get it setup.
@@FilamentFriday I had it running perfectly for about 3 months, was printing some Harry Potter wands from Thinigverse with great detail on them, but suddenly it all went wonky, and the printer would just turn to silly string after a few layers. Guessing I need to square it up. I was just thrown off because it had worked fine for weeks, beautiful CHEP cubes and projects haha, and out of nowhere one day, it turned crazy on me.
Everything I needed to know in one video! Thank you!
Thank you very much, this fixed my uneven spring issue! I was beginning to think this was normal on an Ender 3 haha.
Thanks as always Chep!
Love your videos , always great tips . Thanks
Some really good pointers in here Chuck for not just the Ender but any printer that shares the same working geometry.
Great tips, thank you. One of mine wobbles, so I'll be making this adjustment soon.
as ALWAYS.
an amazing video. ...awesome work. 👏
Great info, solved my problem and the machine is printing great. Thanks a lot!
Really helpful. I've been driving myself crazy with leveling mine, got a glass bed, thought it was warped, turns out the frame just isn't square. I still have the smallest dip on the front of my bed, might use some masking tape or something to bump it up a bit under the bed.
Thank you so much!
This solved my bed leveling problem on my ender 3 max
Happy new year and thanks, great video.
Thank you, sir! My son's bed settings were completely weird, and it was surviving because of BL Touch. I took a measurement of it today, and the far end was 5mm lower than the Z screw end. Took it apart and squared it up. I noted two other things while I was doing this, I made sure I had the three wheels on the Z-screw end set so all three wheels were touching (they were not) and when I assembled it, the far end was not square, so I loosened the two screws that hold the wheel plate on that end, adjusted the eccentric so all three wheels were touching, then tightened the two screws that hold that plate. Now that far end is 0.5mm higher, but that is much better than it was, and the bed settings are much more sensible now.
Thanks for the great video, it was a lot of help.
It is too bad Creality didn't run those two screws on the drive end in an accessible manner. hopefully, I won't have to touch those for a while.
Hi Chuck, really love your videos I’ve been learning a lot from them. I’m having some issues with the extruder and I’m not sure why but I’ll try this first and then keep o trying
Awesome video! I was trying to find someone going over how to adjust the x gantry and this will help a lot. Thanks!
The best explanation.
I'd also check with a trusted spirit level that I wasn't setting this up on a warped table top.
That's a great idea. You'd want your working surface to be as level as can be.
Last year, I had an issue where I would level the bed, and somehow it would immediately become unlevel with any movement. Simply touching the bed made it unlevel. I struggled finding the problem for quite some time. The culprit turned out to be an adjustment for the wheels of the bed. It is out of sight and out of mind. To test this, simply wiggle the bed to side to side. If it moves, you need to adjust that part.
Great vids Chep, your channel is very helpful. Thanks
Thanks for this great Tutorial, why did i find this video just now, not yesterday ;)
Thanks for this.
Drilled one hole in the up right. Left on inside. Lock tight the outer one snug it up. Lower the gantry on something sitting on lower legs. Tightening gantry wheels then tighten the gantry screws
Great vid as always.
This looks like it'd be a good video to check out if you're getting any z-banding too. Those uprights and the gantry caused me some problems on taller prints before I rebuilt them like you did here.
Very nice, I greatly appreciate the helpful information and more if I needed it. I had this exact problem and was stumped at how to fix it, thanks to you I have my springs damn near same tension. (My fix took 1 try lol)Thank you now you are officially my youtube recommendation for others who need help on an ender 3/pro and I think I'm going to soon want my name on that list at the beginning of the video. A+ teacher/3D Printer
3 washers under each spring to add tension. Done.
I put stronger springs in and also removed that strain relief from the lower left spring. another strain relief must be used that does not interfere with bed leveling. The bed level has not changed in weeks.
Another great video I had mine pretty well set up but I might just do a final Chuck check! I have some screw driver type allen keys that make regular use a lot more enjoyable, give them a try. Cheers Steve
Great info. need to tjeck my ENDER 3, i´m having big problems whit my bed leveling. hope this will solve it.
did no one else notice the piercing high pitch noise throughout the whole vid? had to turn volume down and use captions
I noticed that you clamped a square to ensure the Z-axis extrusions were square to the Y-axis base extrusions but didn’t not check that they were square to the lower extrusion that makes the X-axis frame beam. This is one thing that wasn’t covered in your video or three others I’ve seen from other content makers. On my printer while trying to adjust the wheel tension on the Z-axis I noticed that the roller assembly bases were not parallel to gantry extrusion causing a constant twisting force onto the Z-axis roller assemblies. To fix it I had to release the four screws at the top and the four on the bottom of the vertical extrusions, tighten the two screws on the roller carriage close to the power supply and then tighten the eight screws, this alone made my Z-Axis move up and down much better. Then I adjusted the wheel eccentrics and all was well.
Great video. I am glad someone is Showing how to get the printers square and parallel, Instead of using a spirit level, which probably is not very accurate, To set up a 3D printer. This is the kind of information the community needs. If you're printing a tower , and everything is not square, you will probably be printing a leaning tower instead, Even if you are using a auto lleveling sensor.
I use a machinist square to square my printer. Combination squares generally are not normally square. Even the Sterrett combination square is not guaranteed to be Perfectly square. And it needs to be as close as you can get it.
Thanks CHEP,. Excelent vídeo!
Clamp a square to the upright. Nice. Good tip. :)
Thank you Chuck. I was chasing my tail thinking my bed was actually warped! Creality need to up their game in terms of instructions when building these things.
Dude, I'm a 3D printer virgin and you just saved me loads of trouble and hours of headaches within the first 3 minutes of this video. Thanks
thank you for all of your videos
Or thanks for all the hard work you put into the videos I should say
Great tips Chuck, thanks/ .
THANKS!
Thank you SOOO much for this, my ender 3 pro has not printed right since I got it, and this is why.
The Left side prints fine, grips the bed nicely, but the right side is lumpy and reluctant to run smoothly, it even catches on the bumps of the previous layer and jumps over a bit, even tho I level the bed every print. the left front leveling knob has even fallen off mid print twice.. so frustrating.
Now I have some idea where to start to fix it.
Thank you.
Mine is similar, with the back left having to be almost 100% tight, while the bottom right is practically falling off.
@@hexaspark I'll add that to the list of things to do when I get my new bowden tube in. Thanks for the suggestion.
great info thanks!
On my Lotmaxx the screws that hold on the uprights only thread in by 7mm. Anything mechanical like this needs at least 13mm bite especially since the screws are only 5mm. In my case also the threads aren't deep enough in the uprights so you would need get a tap and thread a bit more and some longer screws.
Hi CHEP, there is something wrong with your microphone. There is a pretty loud
high frequency of 16kHz.
This drives me crazy! :D
Is it throughout the video or only sections?
@@FilamentFriday only on the parts where you're behind the desk talking.
There’s a really high pitched noise in the audio and it’s driving me nuts!
i just want to say that the threaded rod dropped like butter for me
I just bought a probe clone, it was tough to install, but worth the money and time.
I had the same gantry sagging issue, after performing the adjustment a couple of times, the sagging kept coming back. I “fixed” it by installing a second z rod kit that I got from TH3D. Now my gantry is level all the time.
philip you legend
Thanks CHEP
This video saved me, I was about to punt kick my printer to the garbage
thank you very much!
My left front knob is very loose I can't adjust further and the nozzle is not close enough. The left back knob is tight and cant go any tighter and needs to so I can level the bed. Would this fix that issue? I dont want to have to take my printer apart if I dont need to.
I've been fine for about a month, but the front left has always been a bit loose. I've monkeyed around with the z-axis switch in the past to help with leveling, but now I cant get that to work
Btw - you have excellent and very easy to understand videos
great video!!
Hey Chuck thanks for the great vid! For some reason mine doesnt move up and down nearly as smoothly/fast as yours does no matter how I adjust the eccentric nuts (theres one on each side for the ender 3 pro) I leveled the frame exactly as you did and everything. Could it be just the white lithium grease?
Thanks
Awesome video, now I have to tear mine down and rebuild it !
I’m feeling the exact same way!
Great videos, great voice (easy to understand), great explanation of everything.
I got a E3 pro, and I'm not kidding but the bed's max height is like 1/4" or so low from the nozzle. Impossible to get it close enough. Now I'll have to grab some spacer-washers from hardware store and put them under springs so I gain that extra space.
Even for Chinese built, it was pretty accurate in most areas, which is why I found this a bit odd.
Lower the Z stop switch.
@@FilamentFriday Thanks for quick reply.
I'll check that tomorrow and see if it has room for lowering.
I didn't think about that.
thank you for your vids, they have helped me a lot. i did a month of study before i bought and set up my printer and because of you cnc kitchen 3d printing nerd makers mark and teaching tech. I have been able to set up my printer to get BEAUTIFUL prints out the gate.
But some of your vids are hard to watch, there is audio noise that just gives me a horrible head ache. IDK if it is the mic, or a print in the background. but im at the :24 mark of the vid and idk if i can finish it.
Only this one?
I don't use white lithium grease anymore because it dry and cause me problem on my printer
now I only use Vaseline and it is the best option that I find
my printer is a Tronxy x5sa and the 2 Z motor are plug together on one plug
so if one of the Z axis force a little bit it skip a step and I have to redo all the leveling step
but since I use Vaseline I never had that problem again .