SHOKY REVIEWS: BANDAI STAR WARS 1/72 Y-WING STARFIGHTER

ฝัง
- เผยแพร่เมื่อ 24 ส.ค. 2017
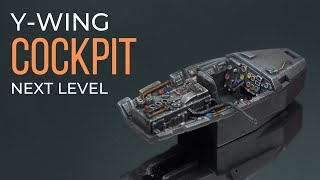
- Wow guys! This kit was nearly the end of me! Once you start doing details its hard to stop as you will see in this review. Another Star Wars ship in the collection!
-----------------------------------------------------------------------------------------------------------
Email: shoky01@gmail.com
check out my facebook page: / shokyreviews
Oh hey, I have an Instagram too: / theshoky01
Also check out my Patreon and become a Patron: / shokyreviews
Thanks to my Patrons:
SteelAngelJohn
Andy Tubbs - บันเทิง


The paint and weathering detail is really beautifully done, fantastic work mate!
I just started building this and I was rather tempted to buy wire and form that for the piping.
You could. May end up being a lot more work.
Hey I just found out about the existence of this things and was planing to get one should I buy one since it would be my first ever model
Nice!!
Thanks!
Poor because there is no glass in the cockpit
It's a choice.
Great paint job Shoky. Very nice.
Finally, someone else notices the "duckness" of the Y-wing's cockpit section!
Yay!
@@THEShoky if you look at the imperial scout trooper (biker scout ) helmet you can see it's based on a motocross style helmet with goggles and if you look very carefully at the front of the vocoder there is a small square peice which is actually half of the engine block from the Tamiya 1/12 scale Yamaha xs 1100 model kit.
Your Montage Music while you're building your model kits reminds me of Dragon Ball Z for some reason 😉
Your Y-wing looks awesome. I like the weathering and details. If its alright can I ask for your list of paints?
Nice work, I’m going to build a second one. Very delicate parts. Pretty sure I didn’t get all the pipes in place. But; an amazing kit. Here hard to handle
I recognize the base piece, not only from behind the trench canon in the original film, but because I used to have the original... foolishly, I sold it 25 years ago for $250.
One of my favorite details of the original filming Y-Wings is the cones on the front of the engine nacelles are from Leggs eggs, plastic eggs that Leggs used to package pantyhose in.
I remember those.
Great Video. And just for a laugh, right when you said ( let get to the building montage a comersal came on and it was a hardware comersal. Lol
Jeff Ward lol. Great!
For me it was a Star Wars commercial
Beautiful
The rear piece of the body is an engine hatch from a Panzerkampfwagen Tiger 1
I wonder if there is some Saturn 5 rocket parts in those engine modules...
Those ridged cylindrical bits..
really nice paint job. a little shocking that for that price, the whole thing was white out of the box.
Thanks.
For using the decals on the cockpit console, I sand off the raised details before applying the decals, or using a photo etch kit instead. I have never been able to apply a decal over cockpit raised details, no matter how much microset and microsol I used.
Yeah. In the future I'll likely just paint. Dont know what possessed them to do it this way.
Looks great, shame you didn't show us how you did what you did :-(
Try the falcon man I'm in month two beware water slides an piping an that y wing turned out really nice that's my next build thanx for the heads up on approximate time to bulid
Yeah I'm still sleeping on the Falcon. I have the Xwing and Bwing to do as well.
@@THEShoky I just finished like 2 x wings one of them is like Poe damerons pulled out bb8 put in an r5 in its place remains landed made it like a red2 squadron Luke's made it in flight comes with trench an two torpedoes that act like they go down into death star its pretty cool,my falcon I over did engine soot looks terrible so I'll have to repaint it.
I've done Poes, i still have the classic to do.
The Milenium Falcon has 1/25th scale semi trailer frames along the front outer sides. The original Battlestar Galactica has Pzkw VI Tiger 1 gun barrel halves on the upper front including the muzzle brake. Many auto frame / engine parts across the Star Wars studio models. Yes, you are right. Upper control arm of a automobile frame (suspension system).
How did you manage to paint the Y-Wing and was some of techniques that you have done in order to do this?
it was a lot of hand painting and using Gundam Markers. As for the weathering it was all done with Tamiya weathering Master kits brushed on.
did you primer this before paint? i just got my first model and idk if i have to primer or not
I did not. all paint and weathering was done on the plastic but if you're gonna truly paint it you should prime it.
Have you built the 1/144 scale version? The details are almost as intricate
No I stick to 1/72
@@THEShoky pity as the 1/144 scale are insanely detailed ok they have stickers not decals but easily painted ,I used to get the 48/72 scale kits until I ran out of room lol but I still occasionally get the larger kits as my ancient eyes can't always see the micro details but your builds are brilliant
This model is very semi-intermediate and even it is considered to be a entry level mode, so my question is how do you cut out the wires and pipings because it is very tricky and you can break it easily?
LINJ638 simply put: very carefully and slowly. A few times I just used a fresh blade and applied only enough pressure to cut. It was tedious but not impossible.
What do you mean by enough pressure? Just gently cut it? that is it? I am not sure if I explain this well enough though. Sorry.
Just out of curiosity, but what colors did you use to paint the body of the Y-Wing? Light Greyish White?
That's the bare plastic.
Oh I could not see. So what colors did you use minus the body Y-Wings?
I just applied a grey, copper, gold, titanium, chrome and silver. Only details are painted or waterside. Other than that it is weathered.
And this is from the markers that you used right?
Nice job!! What size in cm is it?
I have no idea.
Sad that these are alot smaller than the original ERTL kits.
GSI Markers?
Yes
Good build, but for realism, you need to base coat the model and paint the the ship. All the weathering you added looks a bit off with the white and yellow plastic being so bright and pristine.