How to Replace the Rear Brakes on a Volvo C30 S40 V50 C70

ฝัง
- เผยแพร่เมื่อ 13 ต.ค. 2019
- How to replace the rear brakes on a Volvo C30, this tutorial includes both the replace of the pads and rotors. A similar procedure can also be used on the Volvo S40, V50, and C70 models. In order to produce this video, Bosch has been kind enough to provide me with the parts required for this replacement. #volvo #volvoc30 #brakes
OTC Caliper Kit: www.otctools.com/products/dis...
Website: 4diyers.com
Patreon: / 4diyers
Facebook: / 4diyers
Twitter: / 4diyers
Instagram: / 4diyers
Tumblr: / 4diyers
Pintrest: / 4diyers
Tools/Supplies Needed:
-7mm allen socket
-13mm socket
-3/8" and 1/2" drive ratchet
-thread locker
-wire brush
-new pads and rotors
-standard screwdriver
-brake cleaner
-jack and jack stand
-brake caliper piston tool
-hammer
Procedure:
Being that we are working on the rear brakes, we can’t apply the parking brake. This is a manual, make sure the car is in gear and as an added safety caulk the front wheels.
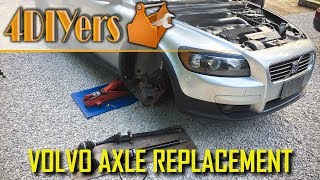
Start by safely elevating one side of the car.
And then remove the wheel.
Place a jack stand under the subframe as a safety.
Remove the spring clip on the caliper. Use a standard screwdriver to pry it from its location, pliers may also help too.
Using the standard screwdriver again, remove the caps for the caliper pins.
Using a 7mm allen socket with a 1/2” drive ratchet, remove the caliper pins, there are two in total.
Ensure those pins aren’t catching on the carrier and then remove the caliper. Tie the caliper up using a bungee cord so there’s no excessive strain on the rubber flex line.
Remove the brake pads from the carrier. They simply just sit in place.
To remove the carrier, it’s held on with two 13mm bolts. Here you’ll need a 3/8” ratchet instead to clear the hub carrier.
Using brake cleaner, wash away brake dust on the dust shield. Inspect the condition of the dust shield and replace it if needed. This is also a great time to inspect the condition of the rear wheel bearings too.
Wash the caliper using a brake cleaner.
Crack the cap on the master cylinder help relieve pressure from compressing the pistons.
These cars have the parking brake mechanism built into the caliper, therefore you’ll need a special tool to push back the pistons instead of just compressing the piston. Bosch has supplied me with their OTC disc brake caliper tool to do this. The piston has two holes, this kit has adapters which lock into those holes, the piston is rotated and you’ll need to compress the piston at the same time.
Using a wire brush, clean up the carrier. The brake pads should sit freely on this, no binding whatsoever. Compared the old and new rotors to ensure they are the same.
A wire brush may be needed to clean the hub to reduce the chance of runout when the rotor is installed, this one is in good condition so there’s no need for that. A lug nut can be used to help hold the rotor into place.
If you leave any oil residue on the rotors, clean them off using brake cleaner. Clean the carrier bolts using a wire brush. Apply a medium grade thread locker. Install the carrier with bolts. The torque specifications for the 13mm are 52 ft-lbs or 70 nm.
Install the out pad, these pads should fit freely into place. For the inner pad, a new spring clip is supplied and will need to be installed on the new pad. It wedges over a thin portion on the pad backer. Then install it into place.
Install the caliper into place, I have also removed the pins as they will be cleaned and have new lubricant applied. Clean the pins using brake cleaner and even a wire brush.
Apply medium grade thread locker to the threads. Apply a light layer of the supplied brake grease to the pins. Install the pins and tighten. The torque specifications for the caliper pins are 26 ft-lbs or 35nm. Install the plastic caps.
Install the new supplied spring retaining clip on the caliper. I found it’s easiest to install it partially into the one hole first, partially into the other and then pull it under the carrier before it’s fully seated. Light taps with a small hammer can help it to place. Reinstall the wheel. The torque specifications for the lug nuts is 80 ft-lbs or 108nm.Now moving onto the opposite side.
Thank you to all those who watch my videos and support my content. Don't forget to subscribe to my channel for future tutorial videos and like my video if you found it helpful. New videos are always being uploaded every week!
© 4DIYers 2013
All Rights Reserved
No part of this video or any of its contents may be reproduced, copied, modified or adapted, without the prior written consent of the author. - ยานยนต์และพาหนะ


Amazon Tool Recommendations: amzn.to/3QrjM8c
Current retailers partnered with me & coupon codes:
eManualOnline website: shrsl.com/3vcz4
Coupon Code: 4DIYERS20 (20% off any order)
ECS Tuning Website: bit.ly/46tMpXP
Auxbeam website: auxbeam.com/?ref=4DIYERS
Coupon code: 4DIYERMR10 (10% off any order)
Teslong website: teslong.com
Coupon code: 4DIYERS (10% off any order)
Lanmodo website: shrsl.com/3vczf
Coupon code: LMD4DIYERS (Save $50 off order)
Auxito website: www.auxito.com/?ref=xR3VZnDW
Coupon code: 4DIYERS (15% off any order)
Headlight Revolution website: www.headlightrevolution.com
Coupon code: 4DIYERS (Free shipping on all US orders)
Well done. I wish all how-to videos were like this
Thank you!
Clear video, instructions and easy to follow. Thank you !!!
Thank you so much!
Now i feel very confident i can do this my self, thanks!
I have a volvo and so far its been a better car than any American car.
Sadly I can't say the same for mine, it was one of the more problematic cars I've owned and a drop in quality compared to my 850 T5.
Thank you sir, excellent video 👍
excellent . well done clear and concise
Many thanks!
Best description
Thank you!
Geat video . Wish all videos were as well explained .
Thank you so much!
Sooo I have a piston kit and I decided not to mess with it and used a c clamp for my front calipers. Got to the back and thought they were seized up so I gave up. Glad to know I’m a moron and I even have the correct tools for the job!
Excellent video with great instructions. So is there enough room (clearance) to install extended studs without removing the hub or making a dent on the dust shield?
If only it was that easy
5 star, A+, 10 out of 10
Thank you so much!
You can also put some brake grease on the caliper bracket where the pad lobes sit
Yeah, without grease or "anti squeak" you would experience terrible noises.
Tool at 2:23 is cool!
The tool kit I used was "Maddox Disc Brake Pad and Caliper Service Tool Kit MF11-1". The attachment labeled 3 fit the back brake caliper for my 2005 S40, manual transmission. If your brake piston is stuck, try a little WD40 just below the rubber then twist the piston clock-wise with channel locks to get it started. Be patient, because the tool looks simple but requires practice and so does installing the new retainer.
Great video, my 13mm bolts are seized on - and ideas?
Hey, great vid.. I appreciate it. I did everything as instructed. My only question is, when depressing the piston - i had a tool, and was able to make it turn and compress until it became pretty easy to turn and seemed to be down. but it never stopped turning.. did i give up too soon? I'm hearing the same rubbing i was hearing before i replaced the rotor that i had attributed to a warped rotor (which i still believe it was). Is it possible that the backing plate is bent and rubbing? I appreciate your help in advance..
Thank you! If I remember correctly, mine did stop turning. As long as the pads and caliper installed easily, then there shouldn't be an issue. The rubbing sound could very well be backing plate, they're fairly easy to bent/deform. Another issue can also be rust or a stone stuck in the plate. An easy way to diagnose that is by jacking up the wheel, then pull the back plate back while rotate the wheel. If it disappears, then that was the issue.
Thanks for sharing. Great video, very clear explanations. Love it that the tightening torques are mentioned. Just one question, we're not supposed to apply some copper grease on the back side of the pads, and on the edges where they slide on the caliper?
Thank you, happy I could help! You can apply grease, but considering that I live in Canada experiencing all forms of weather, the grease tends to attract dirt and road debris. This can cause more problems than good.
@@4DIYers thought something about this video seemed familiar 😅 🇨🇦🍁🇨🇦
I've used a dry grease before for this that didn't have as much issues with dirt 👍 not sure if it's a proper way though
My rear ATE brake discs came with two screws and an extra hole. Whats are these for? My Volvo OEM doesnt have that.
I know that the Volvo discs are made by ATE so they are the same brand.
Great video bud! Very helpful, i was about to do this job but didn't realize i needed anything more than my giant C Clamp 🗜️ to compress the pistons... I guess i go back to Biltema tomorrow (pretty much Finnish Canadian Tire 😁.. I'm Canadian now living in Finland 😅) as they have a great looking set for all vehicles including Volvo/Ford for only 49€
One question about the parking brake adjustment.... When you were pulling the handbrake and pumping the pedal to adjust it do you have the car running at that point? Thanks bud
Thank you so much! I've had a couple people argue with me saying it can be done with a c-clamp. I tried, it's not possible. I try to keep my tool lists limited so people aren't spending money on unnecessary things.
The car can be off when pulling the handbrake and pumping the pedal.
@@4DIYers thanks buddy!
You're very welcome!
What's the tool called for winding back the callipers please
Shouldn’t brake pads have shims on caliper bracket?
Would using c clamp work to compress the caliper?
Nope. As mentioned in the video, the piston works on a threaded mechanism. So it needs to be turned as it's being pushed back in the caliper.
@@4DIYers , Is it the same for a 2011 V50 T5?
Are the fronts also needing to be turned as pushed?
@@mikelow4374 fronts, no
Question: I own a 2008 Volvo C30 Turbo 2.5... I have an Automatic Transmission..so just leave it in Park and emergency brake Off..correct
Yes that is correct.
Does this car have electronic handbrake? Will i need to use the special tool with a old normal manual hand brake?
simple manual hand brake :) yes tool needed
@@MagazinulColectionarului Thank you 👍
Yes it's needed unfortunately.
🇸🇪🇸🇪🇸🇪🇸🇪🇸🇪 Volvo
Judge I see you can ykubhelp me please not a flag that xhtisirna was talking about
do i need to bleed the brakes after this?
these brakes also fit the v40 hatcback
?
No, unless you're removing brake hoses. There's no need to remove them for changing the pads alone.
@@amadejuskubilius1449 not even when i open the resevoir?
Nope. Just make sure you have more brake fluid than a minimum scale on the master cylinder itself.
what fucking year range is this for?
Foul mouth he's only trying to help
A special tool just to replace my brakes? Lol what a load of bs
If you have a better way of pushing back the pistons, please share. It'll help out other viewers.
I ain’t getting mad at you, I just think that Volvo made changing their brakes unnecessarily difficult by needing a ‘special tool’. In many other cases a clamp would get the job done but for some reason Volvo didn’t want to make it that easy. I’ve managed to get it done with a pair of needle nose pliers, but it was a hassle
I definitely don't disagree there, car companies seem to like reinventing the wheel every time. I try to keep my list minimal so people at home can do the job easily without much money. But this new stuff is getting hard to keep up with. Some brands are now switching to a motorized setup where you need a bidirectional scan tool to retract the parking brakes. I'll be forever driving an older vehicle lol.
@@4DIYers yea you could say that again. They want you to keep going into the shop to get your money. But if you want a more descriptive way of how I did it I basically made a makeshift tool using a clamp and the needle nose pliers and pressed down with some elbow grease into those tiny holes while I twisted it. Seemed to do the trick pretty well. Keep up the good content!
Worst part is the stuff isn't built to last anymore. Had a chat with the owner of a dealership a few years back, apparently the new stuff is only intended to last 10yrs. Thanks for the tip, will definitely have to keep it in mind. And thank you for the support too, greatly appreciated!