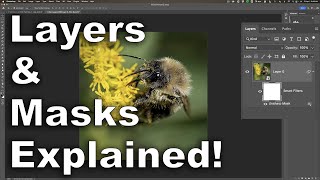
How to Open Images as Layers in Photoshop

ฝัง
- เผยแพร่เมื่อ 2 มิ.ย. 2024
- Learn how to open multiple images as layers in the same Photoshop document, and how to place more images into your document as you need them!
Whether we're compositing images or designing layouts, we often need to load two or more images into the same Photoshop document. And each image needs to appear on its own layer within that document. But that's not how Photoshop works when we open multiple files. Instead, each file opens in its own separate document, forcing us to move the images ourselves from one document to another.
But there is a way to open two or more images at once into the same Photoshop document using a command called Load Layers into Stack. And we can add more files to the document as we need them using a different command known as Place Embedded. In this video, I show you how both of these features work. We also look at a few options in Photoshop's Preferences that make placing images into your document even faster. And at the end of the video, I show you the steps I used to blend my images into a simple double exposure effect.
► Join my Patreon for more videos: / photoshopessentials
► Read the text version: www.photoshopessentials.com/b...
► Get Photoshop here: prf.hn/l/dlXjD2w
► Get the images used in this tutorial:
1. Portrait image: prf.hn/l/0GmwQRY
2. Sunset image: prf.hn/l/dlXjP0N
3. Texture image: prf.hn/l/me41Xzq
► Get the PDFs!
Join PhotoshopEssentials.com to support more videos on this channel and download all of my written tutorials as PDFs!
Learn more: www.photoshopessentials.com/p...
► Now that you know how to load images as layers, here's how to blend images together:
How to blend two images in Photoshop: • How to Blend Two Image...
► Recommended videos:
1. How to move images from one document to another: • Move Images Between Fi...
2. Photoshop's must-know Marquee selection tools: • Photoshop Selection To...
3. How to paste an image into a selection: • How to Paste an Image ...
► Video chapters:
0:00 - Intro
0:35 - How to open multiple images as layers into a document
2:28 - How to place an image into a document
3:28 - Placing smart objects vs pixel layers
4:24 - How to convert a smart object to a layer
5:10 - Photoshop's Preferences for faster image placing
6:20 - How I created the double exposure effect
#photoshoptutorial #photoshop #photoshop_tutorial


*How to BLEND TWO IMAGES In Photoshop:* th-cam.com/video/sWFwGkfQ_0U/w-d-xo.html
*How to MOVE AN IMAGE From One Document Into Another:* th-cam.com/video/sWFwGkfQ_0U/w-d-xo.html
Finally someone smart enough to Fisher Price this enough for me to understand and follow, and do.
😂 ive never seen Fisher Price used as a verb before
Same lol
My thoughts exactly...
Hello Steve, I am new to your channel and you have answered the million dollar question for me in this video. I have spent many hours going through videos telling me to just drag and drop images and everything will be ok and having no luck and no one to help. Finally a Google search brought me to your website and the answer and I thank you so much for stepping through this simple process and allowing us to learn these basics. I look forward to checking out your library of Photoshop videos and learn from you. Take care and thanks so much!!!!
WOW!!! That is the proper way to explain to , not only a beginner, but an 82 year old guy who still loves to learn, Glad to have found you and looking forward to watch all your videos. Thank you.
Great to hear it was helpful. Thank you for watching!
Excellent tutorial, Steve. Miss hearing from you more often. You are still the best at explaining processes ... clear, precise, even tempo. Thank you.
Thanks Frank!
High level demand of academic job done round here!
So appreciate your videos with time stamps and your clear concise teaching. Thank you!
Wow, amazing. I am an absolute beginner in photoshop. You explain and show everything so that I am able to follow. Excellent tutorials. So happy to have found you. Thank you,
I tell my creative and non-creative people this is the channel to follow. Thank you.
Thank you. This was exactly what I needed and short enough to keep my attention.
Nice overview. Very well presented and wonderful that you have provided a link for a printable version. Best tutorial I've seen in awhile.
Excellent Tutorial, thank you. I like the white light effect on the portrait by itself. I'm trying to duplicate that process. Then the other layers have an even more dramatic effect. Very nice
Thank you Steve for a brilliant tutorial, been watching tutorials all day, and plenty of them. Yours are by far the best ones, (I don’t have to keep going back time after time as keep missing what they say) will certainly be following you, brilliant work x
Thank you for sharing! This was diffidently essential for me!
thank you so much for your easy paced and easy to learn video. big big thank you
This explained so much I have been struggling with! Thank you so much!
Thank you so much for the help!
Excellent tutorial, thank you very much.
brilliant.... Thank you so much didn't have to keep stopping and going back too see what they are talking about please don't stop making them please would love to see a video on photoshop on all the pull down menus and what they do in PS thank you again Mark 10/10
Thankyou for a very easy to follow video. I just subscribed!!
Thank you so much, it's very well explained
This is a wonderful tutorial!! 👍
Thank you this helped me a lot!
Starting my Photoshop journey and glad this was the first video I watched! Really excited to learn more
Step by step was really cristal clear😊❤
Great tutorial at a great pace!!
Excellent tutorial. Thank you
This video was a life saver thank you so much man
load files into stack was super helpful!!
Thank you for your sharing,
Clear and comprehensive. Thanks so much
Glad it was helpful. Thank you for watching!
Brilliant. thank you 🌻
This video was really worth my time. I made use of all the content and information shared in it.
I echo what o thers have said. You are the best PS teacher I have found on youtube and there are a lot as you know. I also wish I'd see more of you but what you have here is great. Even the instructions you have on your blog beats the others. Thanks from a relative beginner.
Thank you so much! More videos are on the way.
Thank you so much i highly need this
Amazing... thanks for the quick tip, immediately subscribed.
ThankYou so much sir, it's very useful❤
THANK YOU SO MUCH-YOU ARE MY HERO
Excelente tutorial. Com legendas 👍
Thank you so much. Everything was understandable, will definitely watch more of your videos.
Great to hear it! Thank you so much!
Steve Broooo You are a legend -The sound is clear with full off energy
The explanations is clear thx i may be getting 15 marks in activity due to you......
Excellent video - communicated the important tasks in clear steps with reasoned explanations. Best video in ages.👍
Your way of explaining is very good. The way you describe it without the shortcut key is great
thanks you very much
👍👍👍👍👍👍👍
Wooow at last I found someone who can explain that easily and obviously thanks
Thank you very much! Helps a lot to make animation from PS!
Extremely well done, thankyou!
I hope it was helpful. Thanks for watching!
Very helpful, and clear!
Thanks Kathy, and thank you for watching!
cool tutorial, 100% works, +rep
Many thanks.. so useful!
You're very welcome. Thank you for watching!
Honestly that was one of the most understandable, intuitive tutorial videos I have ever seen.
Great to hear it! Thank you for watching!
very helpful and clear demo! thx :)
You're very welcome. Thank you for watching!
THANK YOU!!
The clearest, most easily understood tutorial about the photoshop subject matter I've heard so far. I tru;y hope you have many nore tutorials I can watch. Thanks for your work!!
Great to hear it! Thank you for watching!
I actually learned something. Your voice was so encouraging. I really appreciate this video. :)
Great to hear it! Thank you for watching!
Nice thanks allot Steve
Edit: this is the first tutorial on Photoshop I ever watched
The best Photoshop Tutorials ever! Thank you.
Thank you so much!
Awesome!
Very good dude
This was SO helpful thank you.
Great to hear it! Thank you for watching!
The greatest Photoshop teacher EVER!!!!! THANK YOU!
Wow, thank you so much!
Many Thanks !!! Loved the lesson.....
You're very welcome. Great to hear it was helpful.
Thank you!
thank you so much you help me alot
I have been trying to learn how to do this for ages. Thank you so much your video was very easy to follow.
Great to hear it! Thank you for watching!
Great Lesson. I love it. Only came across this lesson in August 2022. But it is relevant even today,
Lots of things in Photoshop stay the same over the years. This is one of them. :) Thank you for watching!
Thank you very much 😊😊😊👍👍👍❤️❤️
Good information
Best tutorial ever.
so happy to have found you
Me too! Thanks for watching!
super teaching bro we need teacher like you.🔥😍
Fantastic post. very very useful. thank you.
Glad it was helpful! Thanks for watching!
So good 👍
thanks a lot u saved my day
very nice sir❤
so amazing tutorial !
Thanks! I hope it was helpful.
thanks so much bro. cs 6 was being an ass. the vid helped me with my project!
very helpful man
Great to hear it. Thank you for watching!
just a tip to not go into select and then deselect. Use ctrl + d
great video :) A question, I have multiple photos slighlty moved (cause camera moved) and need to align them. If i open all as layers is there any quick way to save each one with their original file name? I tried also opening all as seperate documents to solve that but need a reference (are there common guides for all open documents or something similar?)
Magic! Thanks!
You're very welcome. Thank you for watching!
Yes I liked it very much. Thank you.
Great to hear it! Thank you for watching!
thanks bruh i need this for my class
you are amazing i don't have word to describe my respect to u
best video for beginner what i ever see :)
Thanks👍👍👍👍👍👍
Subscribed and liked ✨
nice thanks
Enjoyed my lesson as a beginner !!!!
Great to hear it! Thanks for watching!
omg tysmmmmmmmmmm!!!!!!!!!!
► Get all of my Photoshop tutorials as PDFs: photoshopessentials.tv/pdfs
HI everyone, Steve here. In this video, I show you how easy it is to open multiple images as layers into the same Photoshop document (0:35), and how to place more images into the document as you need them (2:28). We learn the difference between placing a smart object vs a normal layer (3:28), and we look at some options in Photoshop's Preferences that make placing images into your document even faster (5:10). And at the end of the video, I show you the steps I used to blend my images into a simple double exposure effect (6:20). If you like this video, please Like, Share and Subscribe! As always, thanks so much for watching!
Plz I have a problem
When I did all of these movements I didn't find any pics although they are existing!
I can found them easily if I choose open photos or any other way expet the one with the scripts, I don't know why?!
Man... you are so helpful.
Great to hear it! Thank you for watching!
Steve with yer lessons and my creativity >u> Im gonna do alota work
Sounds good! :)
Thanks!
You are very welcome! I hope it was helpful.
thank you
Thanks for the video, but could you please tell me how to open a single image as a new layer? This seems like it should be easy but i'm stuck!
Right click the layer and duplicate
Two photos I used to follow this tutorial were different sizes and also a different size to the main background photo. Although the finished effect looks nice - there is a definite edge to each photo. I would like to get rid of this. How would I do that? Thank you so much for your brilliant tutorials.
Thank you
I hope it was helpful. Thank you for watching!
working 👌👌
Thank you so much I use to photoshop for a class in school but forgot hafe it
hi Steve, please explain hot the portrait images been edited to taken, its amazing ?
cool ty
You're very welcome. Thanks for watching!