Solera Replacement Awning Fabric Installation - 2017 Forest River Work and Play TT Toy Hauler

ฝัง
- เผยแพร่เมื่อ 30 ก.ค. 2022
- Click for more info and reviews of this Lippert RV Awnings:
www.etrailer.com/Accessories-...
Check out some similar RV Awnings options:
www.etrailer.com/dept-pg-Acce...
Search for other popular Forest River Work and Play TT Toy Hauler parts and accessories:
www.etrailer.com/vehicle/2017...
www.etrailer.com
Don’t forget to subscribe!
/ etrailertv
Full transcript: www.etrailer.com/tv-install-s...
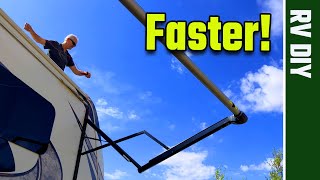
Hey guys, Kevin here with Etrailer and today I'm gonna be showing you how to install the Solera replacement awning fabric here on our 2017 Forest River Work and Play Toy Hauler Travel Trailer. Typically, whenever we have a neighbor coming in saying that they need a new awning fabric, it's because theirs is just so worn. Maybe it's got some tears in it, or it's just so faded it doesn't really provide the same aesthetic that it once used to. With our neighbor today, his need was just because he was already going to replace his arm heads for his awning, with new powered drive heads instead of the old manual crank ones. So he just wanted to go ahead and update the look and switch from his old dark black awning up to a little bit brighter of a gray color. So the Solera replacement awning fabric is made of a heavy duty vinyl that's gonna provide you with a long lifetime of use.
As you can see, ours today is a silver that fades into a white, but it also comes with a large variety of other different colors, as well as different sizes. The installation difficulty of your replacement fabric is going to depend mostly on the size of your roller. If you're replacing a larger roller, you're gonna have a harder time trying to get it off and then putting it back on. But other than that you're really only removing a few screws and just sliding the fabric feed into the new roller and into your extrusion rail. So overall it should be a very simple and easy installation.
It just can change depending on the length of your roller and whether or not you have enough hands to kind of help you maneuver such a large awning roller. As far as installation goes this is a very simple and easy process. You're just going to have to remove your roller tube from your drive in your either head and then remove your awning fabric from your extrusion rail. Now, this can be a little bit challenging depending on the length of your roller tube. So you may want to have a couple extra hands, maybe two or three other people just because with ours today it was a very, very long awning.
So it can be kind of hard to juggle that while trying to get everything exactly where you need it in place. We're gonna have to first remove our roller and then our heads. And to do that, I'm just gonna put our awning out about six inches just to start, just so I have a little bit more room to work with as we're trying to take these off. To remove the roller from our heads, we're gonna have to remove our pin right here. Typically you'll see a cotter pin in here that's just bent around.
Our neighbor apparently has already done some maintenance on theirs and they have a bolt in here. So we're gonna take that off. I've already gone ahead and did the same thing on the other side. And I have somebody over there to help me out because this is just such a long awning. It's gonna be hard to pull this off without dropping one side. So, go ahead and remove this bolt now. It's kind of rusted in place on here, so, you have to beat on it just a bit. So one thing you're gonna wanna do before actually pulling your roller off is secure your arms here. I'm just using some zip ties. I already got some over on the other side, and that's just gonna prevent this from falling down on you once all the tension's removed from the roller. So with an extra set of hands, we're gonna go ahead and pop our roller off of our head right now. Just pull that to the side. You can pull it off. And we can start sliding it, you got it You can push it. Good. Start sliding it down. Anywhere elseYep. I got it. And we are gonna unroll our roller, get all the fabric laid out so that we can get to a point where we can pull it out of the tab that the awning slides into on our roller. So we'll just push this along. So our fabric's actually held in place by two different pieces. We have one strip right here and then one strip right here. We're gonna need to remove our screw so that we can pull this down, out through our cap. We're gonna want to hang onto that 'cause we're gonna put this right back in place. After taking out that screw in our track we're gonna go ahead and just take our cap off as well. And then we can just pop it right off. So if you have that extra set of hands it'd be real nice to just have them down at the other end. That way they can


This tutorial was mint for me. Was kind of difficult to keep the new awning threading on the way in, but that's not related to the video. Needed a few guys on a few ladders to slide off and on again. No cotter pins for me, 2 screws. All in all, this is exactly step by step what needed to be done. Thanks!
That's really awesome to hear. Enjoy the shade!
How long did it take to do
The act of filming always adds a bunch of time to the process, so it's hard for us to say for sure. Our install tech Kevin estimates it would've taken about an hour. Hope that helps!
www.etrailer.com/Accessories-and-Parts/Lippert/LCV000334452.html
Thanks@@etrailer
You're very welcome!
What happens if the wire for the light breaks for the awning?