Every single video I watch I learn something new. After 5 years of graduation I didn't know how to start a simple sketch. Now after watching your videos I'm confident enough to make anything at fusion 360 and keep up with my career. God bless you
I had a hard time getting the sweep to work. I drew the profile, zoomed out with the home, and it wouldn't let me select the face of the edge, just the top and bottom edges of the face of the edge. When I did that, it gave me an error. Turns out that even though I thought I was selecting the mid construction plane, I had not, and my profile sketch wasn't in the right spot. To finally get it to work, I had to click the triangle on the Tray part to open it, click the triangle on Construction to open that, then right click on Plane2 and pick sketch. Then my sketch actually ended up on the midplane. After getting this to work, I was able to select the face of the edge and the sweep worked. Quite frustrating, actually. Figuring this out took longer than doing the rest of the tray. But I finally got it to work. Thanks for the tutorials.
Yep basically click "Plane at angle" and select the left side of the tray and in put angle of 90, (do the same for the right) and once you have two planes on both sides, it's only then that you can use the "Midplane" feature by selecting the two planes that you have made.
Thanks a lot for those videos, I'm trying to become a Product designer, and your videos are my first step toward this goal thanks a lot. Amazing content.
I’m in my 2nd year of using F360, i was using Tinkercad, at first I stumbled around the interface of F360 trying to figure out how to make a simple box, then i started watching TH-cam videos. I’ve learned a lot of different processes. But you explanations are supper easy to follow.
These are so good!! I used to work with solidworks in the past, but it has been a while. The most value I'm getting from these videos are the small little shortcuts that teach me how to use Fusion 360 efficiently, on top of refreshing the concepts of parametric modeling for me.
Fusion360 works alot like Solidworks but more intuitive, the only minus is that it allows for less complex assemblies and simulation. Overall I love user experience I get from it after years of using Solidworks, especially for its pricing!
One thing you do that most teachers dont, is tell us what keys you punch to help us understand exactly what youre doin..much appreciated! ..thank you..subscribed!
I’ve been messing with Fusion for a while now, this answered some really basic issues I’ve had that make drawings take way longer than needed. Awesome video!
Thank you for these videos. With this I've been able to learn a new skill, and I feel like I completely understand the functions and how they work. Well done.
Kevin, I’ve loved following these, been trying to figure out F360 for a while and these bitesize lessons are perfect! Also just found out I have access to an Education Licence so I don’t have to keep deleting them when I reach 10! Looking forward to Day 6! Thanks from UK 👌🏻
This content is simply amazing! thank you very much for sharing it, I've learned Fusion360 by myself, and these videos are such a bump on the learning curve. Kudos to you!!!
Loving the tutorials, I feel like I'm learning so much! I seem to stumble on the midplane construction here: I am missing the red centerline when I go to sketch on the newly made midplane, which results in the L shape floating away from where it should be. Any idea what I might be doing wrong? 🤔
Hi, thanks for all the tutorials, they are awesome! when i do the midplane i do not have a red centerline and when i try to make the one line 3mm (on the L) it shortens in from the wrong direction dropping the whole L down. Any ideas why? Thanks!
A little late, but I think I figured it out. There’s some automatic constraint silliness happening when you start where he does. Just draw the L shape out in space to the left and snap it in afterwards with the coincident constraint when he does. Make sure to start on a grid point or it’ll be difficult to keep right angles. Hope this helps!
Thanks for these videos. I'm a phycisist by education, but I've been wanting to learn how to design tools and equipment. This video series is an excellent resource. Feels like using a rocket to climb the learning curve.
Day 5 and I can see the change of confidence I have when doing this projects! Whenever I am better financially I will subscribe to your patreon for sure! I am really enjoying it!
Wish school was like this when I was going. Very straight to the point, but giving extra explanations on WHY you do something someway. I've been learning a lot from this as I just started venturing into 3d printing. Thank you for the priceless content.
Excellent. I am still having a little trouble manipulating some of the basic interface -- for example, drawing the L-shaped "lip" on the edge took a while. But it is all getting easier as I follow along playing back at 0.75x. One ice cube tray done. THANK YOU!
Dude, this is amazing. I learned so much that I already model something in this day of the tutorial. Thumbs up, keep up with the amazing content. Thank you.
Lover your info and help. Any way you could give a class on designing a wagon wheel. I’ve got a big CNC and some ideas but need to know how to design one. Thanks.
Took a few attempts to manage it from start to finish. I don't save it, I just prefer to start again as that is repetition and learning. Making sure 'Join' is selected is pretty important! Thanks Kevin, another cracking video.
I just "did" the hollow command, but why does it work the way it does? Selecting the outside faces told Fusion to take that away? I was expecting it would hollow out the inside of the block, not cut away the excess? Awesome tutorial by the way. They're all so good, at time of writing I'm at day 7 (skipped five somehow until now) on my second day :) thank you
If you only select a single face, it will hollow out the inside contour. However, if you select multiple faces like we did in this scenario, it will remove the inner and outer contour.
Thank you for teaching us how to do this brother!!! I am taking this training ur doing and am amazed at the turnout of things thanks and keep up the good work!!.
Thanks! These lessons have been awesome. I slow the video down because it’s easier for me to learn, so essentially it sounds like a drunk guy is explaining fusion 360, but I actually care what I hear.
Is it better practice to pattern in the sketch to have everything fully defined? Or on the contrary using the solid pattern avoids cluttering the sketch?
Awesome videos, thank you. I keep finding oddities in how my interface works compared to yours. For example, at 1:50 you select the bottom of the rectangle and move it freely around. When I do that, I can only move it up and down and not side to side. Similarly, if slect the right verticle line, I can only move it side to side. To move it freely around, I have to drag on one of the dimensioned sides (left or upper). Weird.
Hello, i am following your tutorials and did what you said as `using default settings`. It may not be important but i would like to know how you disable plane while on home view. It is really good to look model on completely white surface (mine has grids)
Nice tutorial.. should have explain why you chose that measurement in your next tutorial, it would make a lot of sense to newbie and to everyone who aren’t good with numbers..
I love your videos! A cool addition would be if you could provide a technical drawing from the beginning so we can first try out the modelling ourselves before watching the tutorial
You have defined dimensions for the rectangular to the edge in the sketch. After you have placed a rectangular pattern I see the left and right lips are not the same width. How can you set dimension in this case for the right edge?
Hey there, thanks for the tutorial ! Just a bit confuse on one thing: shouldn't the distance of the Axis 1 of the rectangular pattern be 256, not 255mm ?
when i go to sketch on the mid plane, its offsetting the entire work space and not lining it up in the center like yours, ive followed the steps exactly to the T 3 times now and it still wont work.
@@ProductDesignOnline thanks for doing this sir. You content has been invaluable to me. I used your lessons to create a couple of cad designs and they got me accepted into a master’s degree. Thank you so much
When I create the sketch of the lip, I can’t move it freely. I try to create another sketch of the rectangle or anything, I also can’t move it! How can I fix it?
Shell will trace the entire contour and add the defined thickness. Because we selected all the sides and bottom (and not just a single face) we told the program to trace everything and remove those faces in the process. Contrast that with Day #1 (toy block) where we only selected the bottom face of the block and Shell only hollowed out the bottom.
If I wanted to use another CAD software, do you think the concepts will transfer? I'm not sure about the whole cloud thing and I would rather use open source software too.
Banged out 5 lessons in a few hours. lol don't forget to fillet the underside of the lip, probably adds more machine work (money and time) to the mold in the real world.
Hi, even if the mid plane is not constructed and X-Z plane is used instead to construct the profile, it works. What is the advantage of the midplane here?
Midplane will always stay in the middle (based on your selection of each end). If you change the length of your tray then the midplane automatically updates. The X Y Z (coordinate planes) won't move with other changes.
I'm confused about the shell command on this one. Easy to follow along but where is the 2 mm in thickness at? I mean it just looks like everything but the icecube trays disappeared. Is this leaving a 2 mm thickness to the trays themselves? Sorry...probably a dumb question.
I noticed that when you added the fillet at the corners you just touched the corners. However, when I touch the corners each of the 4 edges gets a fillet too????
I totally don't understand why shell ignored the outer box faces, why didn't it "shell" that as well as the inner cutouts? Anyone else feel like that happened quickly and know why?
When you Shell, the command is going to trace all of the contour (that is not selected) and apply a thickness that you define. In this case, we don't select the top face, so it gets ignored by shell, resulting in the ice cube slots being connected together and the defined 2mm thickness applied along the entire contour.
I am having a hard time trying to round the corners using the fillet tool ...(befire you do the midplane construction)...I am tying th top edge and the bottom edge and the side edge gets rounded but not the corner
@@dougacker8296 Thank you for providing the solution. I, too, was having a difficult time until I zoomed in on the corner and selected the corner edge. Thanks!
Honestly the best fusion tutorials on TH-cam. It took me hours of watching crap videos before I came across these vids. Wish I would’ve found these sooner!!!


Day 5 Resources: productdesignonline.com/d5
Full course on TH-cam: bit.ly/30daysUpdated
(I'll update this playlists as each Day is released)
Every single video I watch I learn something new. After 5 years of graduation I didn't know how to start a simple sketch. Now after watching your videos I'm confident enough to make anything at fusion 360 and keep up with my career. God bless you
I'm curious what school you went to.
@@pattygq the school of rock, no need for cad there
I'd just like to say that I think these training videos are some of the best I have ever watched.
They're excellent!
Thanks for the kind words! :)
Done! I'm doing 2-3 lessons per day, hope I can keep the pace. thanks for the great videos
Thank you so much for amazing videos on learning fusion in 30 day ! I really appreciate it ❤😘
I had a hard time getting the sweep to work. I drew the profile, zoomed out with the home, and it wouldn't let me select the face of the edge, just the top and bottom edges of the face of the edge. When I did that, it gave me an error. Turns out that even though I thought I was selecting the mid construction plane, I had not, and my profile sketch wasn't in the right spot. To finally get it to work, I had to click the triangle on the Tray part to open it, click the triangle on Construction to open that, then right click on Plane2 and pick sketch. Then my sketch actually ended up on the midplane. After getting this to work, I was able to select the face of the edge and the sweep worked. Quite frustrating, actually. Figuring this out took longer than doing the rest of the tray. But I finally got it to work. Thanks for the tutorials.
Yep basically click "Plane at angle" and select the left side of the tray and in put angle of 90, (do the same for the right) and once you have two planes on both sides, it's only then that you can use the "Midplane" feature by selecting the two planes that you have made.
Thanks a lot for those videos, I'm trying to become a Product designer, and your videos are my first step toward this goal thanks a lot. Amazing content.
Thanks for watching and happy learning! :)
I’m in my 2nd year of using F360, i was using Tinkercad, at first I stumbled around the interface of F360 trying to figure out how to make a simple box, then i started watching TH-cam videos. I’ve learned a lot of different processes. But you explanations are supper easy to follow.
Another amazing video for us beginners. Me and my future STEM students thank you!
These are so good!! I used to work with solidworks in the past, but it has been a while. The most value I'm getting from these videos are the small little shortcuts that teach me how to use Fusion 360 efficiently, on top of refreshing the concepts of parametric modeling for me.
Fusion360 works alot like Solidworks but more intuitive, the only minus is that it allows for less complex assemblies and simulation. Overall I love user experience I get from it after years of using Solidworks, especially for its pricing!
One thing you do that most teachers dont, is tell us what keys you punch to help us understand exactly what youre doin..much appreciated! ..thank you..subscribed!
Thanks for watching!
amazing tutorials. I like that its released weekly and not daily. This gives time to absorb and practice the information taught in each video.
I’ve been messing with Fusion for a while now, this answered some really basic issues I’ve had that make drawings take way longer than needed. Awesome video!
I must say that your tutorials are excellent, they are a great tool to learn fusion 360! :D
Oh boy. This video was awesome. The thread feature is so useful! Thanks for teaching us this feature in day 4.
Thank you for these videos. With this I've been able to learn a new skill, and I feel like I completely understand the functions and how they work. Well done.
Kevin, I’ve loved following these, been trying to figure out F360 for a while and these bitesize lessons are perfect! Also just found out I have access to an Education Licence so I don’t have to keep deleting them when I reach 10!
Looking forward to Day 6!
Thanks from UK 👌🏻
This content is simply amazing! thank you very much for sharing it, I've learned Fusion360 by myself, and these videos are such a bump on the learning curve. Kudos to you!!!
Another incredibly helpful video! Thanks so much for taking the time to do this!!
Loving the tutorials, I feel like I'm learning so much! I seem to stumble on the midplane construction here: I am missing the red centerline when I go to sketch on the newly made midplane, which results in the L shape floating away from where it should be. Any idea what I might be doing wrong? 🤔
Thank you, Kevin
Hi, thanks for all the tutorials, they are awesome! when i do the midplane i do not have a red centerline and when i try to make the one line 3mm (on the L) it shortens in from the wrong direction dropping the whole L down. Any ideas why? Thanks!
I am having the same issue right now. If you figure it out please let me know.
A little late, but I think I figured it out. There’s some automatic constraint silliness happening when you start where he does. Just draw the L shape out in space to the left and snap it in afterwards with the coincident constraint when he does. Make sure to start on a grid point or it’ll be difficult to keep right angles. Hope this helps!
@ademolay2000 thanks! I gave up and moved on 😆 but i will have to revisit!
Thanks for these videos. I'm a phycisist by education, but I've been wanting to learn how to design tools and equipment. This video series is an excellent resource. Feels like using a rocket to climb the learning curve.
Glad to hear that. Happy learning! :)
Thank you! Your way of teaching is so easy to understand
it help me alot in 3D printing manufacturing process, thank you so much
Day 5 and I can see the change of confidence I have when doing this projects! Whenever I am better financially I will subscribe to your patreon for sure! I am really enjoying it!
Wish school was like this when I was going. Very straight to the point, but giving extra explanations on WHY you do something someway. I've been learning a lot from this as I just started venturing into 3d printing. Thank you for the priceless content.
Thanks for watching! Happy learning 😁
Excellent video Kevin!.
Thank you, Tony! :)
I have to watch first, then repeat as I follow along pausing often, but I am learning and this is making sense. Thanks.
Excellent. I am still having a little trouble manipulating some of the basic interface -- for example, drawing the L-shaped "lip" on the edge took a while. But it is all getting easier as I follow along playing back at 0.75x. One ice cube tray done. THANK YOU!
Loving this series.
Very useful video. Gracias!
Thanks again for this great video.
Dude, this is amazing. I learned so much that I already model something in this day of the tutorial. Thumbs up, keep up with the amazing content. Thank you.
Thanks! You can find the fully playlist here: th-cam.com/play/PLrZ2zKOtC_-C4rWfapgngoe9o2-ng8ZBr.html
Can you do a video on complex curves and patterns? Like how to add swirl or twist patters to round surfaces that come to a point?
Lover your info and help. Any way you could give a class on designing a wagon wheel. I’ve got a big CNC and some ideas but need to know how to design one. Thanks.
Thank you, I enjoyed creating these models and really appreciate your time for creating these tutorials.
Thank you!
those sweep dimensions are kicking my butt.
Kevin, thanks for doing these videos. I struggled with learning this program for some time before I fpound this. Thanks.
Thanks! Glad to hear you're enjoying the lessons :)
The best product design channel on TH-cam!! Kevin, we are really grateful for your hard-work and dedication! 🎉🎉🎉
Took a few attempts to manage it from start to finish. I don't save it, I just prefer to start again as that is repetition and learning. Making sure 'Join' is selected is pretty important!
Thanks Kevin, another cracking video.
These are super fun to learn!
This course has been great so far. I really appreciate and thank you for your work.
Thank you!!
SHoWWW the big show of fusion 360"!
I just "did" the hollow command, but why does it work the way it does? Selecting the outside faces told Fusion to take that away? I was expecting it would hollow out the inside of the block, not cut away the excess?
Awesome tutorial by the way. They're all so good, at time of writing I'm at day 7 (skipped five somehow until now)
on my second day :) thank you
If you only select a single face, it will hollow out the inside contour. However, if you select multiple faces like we did in this scenario, it will remove the inner and outer contour.
Your videos are filled with pure content and I love the pacing. Not a second wasted on useless drivel.
Thank you for teaching us how to do this brother!!! I am taking this training ur doing and am amazed at the turnout of things thanks and keep up the good work!!.
Thanks! These lessons have been awesome. I slow the video down because it’s easier for me to learn, so essentially it sounds like a drunk guy is explaining fusion 360, but I actually care what I hear.
Thanks for your support! Glad you're enjoying them and learning 😀
Is it better practice to pattern in the sketch to have everything fully defined? Or on the contrary using the solid pattern avoids cluttering the sketch?
Thanks, These videos are a great way to learn the program. And have fun
I just started F360 and I started mashing buttons, ones that looked similar to tinkercad, and I nearly killed my computer. You videos are the best.
More videos of the 30 days series please!
The way you teach is easy to learn👍🏼thank you
Awesome videos, thank you. I keep finding oddities in how my interface works compared to yours. For example, at 1:50 you select the bottom of the rectangle and move it freely around. When I do that, I can only move it up and down and not side to side. Similarly, if slect the right verticle line, I can only move it side to side. To move it freely around, I have to drag on one of the dimensioned sides (left or upper). Weird.
Hello, i am following your tutorials and did what you said as `using default settings`. It may not be important but i would like to know how you disable plane while on home view. It is really good to look model on completely white surface (mine has grids)
gotta say thanks for spending the time to make these tutorials. amazing video as always
Thanks, Luke! Happy learning :)
Nice tutorial.. should have explain why you chose that measurement in your next tutorial, it would make a lot of sense to newbie and to everyone who aren’t good with numbers..
Thank you so much my friend!!! You're awesome
Thank you for sharing! Amazing content.
Thanks!
Thanks for your support, Scott!
thx i m learning english and fusion 360 with ur videos, i love u bro
I love your videos! A cool addition would be if you could provide a technical drawing from the beginning so we can first try out the modelling ourselves before watching the tutorial
Crazy good content, Much obliged for all your efforts
Thanks for the kind words!
Struggled with my fillets on this one but rewatched it and got it right in the end x
You have defined dimensions for the rectangular to the edge in the sketch. After you have placed a rectangular pattern I see the left and right lips are not the same width. How can you set dimension in this case for the right edge?
it is very complecated to make duplicates of the cut outs, only if Fusion had a simple tool to Duplicate to an array, so simple
you did it again. thank you.
Hey there, thanks for the tutorial ! Just a bit confuse on one thing: shouldn't the distance of the Axis 1 of the rectangular pattern be 256, not 255mm ?
still following :)
when i go to sketch on the mid plane, its offsetting the entire work space and not lining it up in the center like yours, ive followed the steps exactly to the T 3 times now and it still wont work.
thanks so much
Day-5 Completed
Love theee videos. I'm a hobbyist just trying to get familiar in f360. What cadence can we expect these to get released at going forward?
In general, releasing one each Friday. Though, may not get this weeks finished with the Holiday :)
@@ProductDesignOnline thanks for doing this sir. You content has been invaluable to me. I used your lessons to create a couple of cad designs and they got me accepted into a master’s degree. Thank you so much
@@1queijocas Congrats!!
Thanks
Thanks for your support! Appreciate it 🙂
@@ProductDesignOnline thank you! Very helpful and concise tutorials 😁
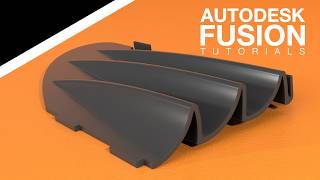
im going to 3d print this tray down to maybe 3 or 4 inches. then im going to make ice cubes.
When I create the sketch of the lip, I can’t move it freely. I try to create another sketch of the rectangle or anything, I also can’t move it! How can I fix it?
Great video! I am having trouble understanding why the shell command hollows out the whole bottom of the tray.
Shell will trace the entire contour and add the defined thickness.
Because we selected all the sides and bottom (and not just a single face) we told the program to trace everything and remove those faces in the process. Contrast that with Day #1 (toy block) where we only selected the bottom face of the block and Shell only hollowed out the bottom.
@@ProductDesignOnline amazing explanation! Thank you!
If I wanted to use another CAD software, do you think the concepts will transfer? I'm not sure about the whole cloud thing and I would rather use open source software too.
All of the core concepts apply to (majority of) parametric CAD programs. If you go with a mesh program then it will be different.
Banged out 5 lessons in a few hours. lol don't forget to fillet the underside of the lip, probably adds more machine work (money and time) to the mold in the real world.
Hi, even if the mid plane is not constructed and X-Z plane is used instead to construct the profile, it works. What is the advantage of the midplane here?
Midplane will always stay in the middle (based on your selection of each end). If you change the length of your tray then the midplane automatically updates. The X Y Z (coordinate planes) won't move with other changes.
When doing the fillet for the sweep how did you select the entire edge at once ?
It should do it automatically (with default settings). If yours is not, make sure the 'chain faces' option is checked in the Sweep dialog.
I'm confused about the shell command on this one. Easy to follow along but where is the 2 mm in thickness at? I mean it just looks like everything but the icecube trays disappeared. Is this leaving a 2 mm thickness to the trays themselves? Sorry...probably a dumb question.
Where is the rest of the month videos?
Really good
Thanks for watching! 😎
I noticed that when you added the fillet at the corners you just touched the corners. However, when I touch the corners each of the 4 edges gets a fillet too????
Nevermind...I just need to more careful with the arrow!
Can someone please explain me the reasin why the "inverted L" was used in the midplance construction?
🤯
What is the excape key?
I totally don't understand why shell ignored the outer box faces, why didn't it "shell" that as well as the inner cutouts? Anyone else feel like that happened quickly and know why?
When you Shell, the command is going to trace all of the contour (that is not selected) and apply a thickness that you define. In this case, we don't select the top face, so it gets ignored by shell, resulting in the ice cube slots being connected together and the defined 2mm thickness applied along the entire contour.
Frustratingly the backward L lip at the end doesn't snap to the tray and I have no idea why
Right. The sketch plane just 'disappears' and I have no idea how to affix the 'sketch' to the non-existent midplane.
I am having a hard time trying to round the corners using the fillet tool ...(befire you do the midplane construction)...I am tying th top edge and the bottom edge and the side edge gets rounded but not the corner
I figured it out ..select the vertical corner edge. It wasn't not clear in the video
@@dougacker8296 Thank you for providing the solution. I, too, was having a difficult time until I zoomed in on the corner and selected the corner edge. Thanks!
i am on the way
day 5
Honestly the best fusion tutorials on TH-cam. It took me hours of watching crap videos before I came across these vids. Wish I would’ve found these sooner!!!
Thanks! I wish you found them sooner too :)
can i make 3d model of chariot in this software
You could!
I have a MacBook and they don't work at all. 90% of the commands do not function.
Hi there. I work solely on MacOS (Macbook and iMac), including all of the recordings being done on my iMac. What commands are you having issues with?
Would love to use this software but can't afford $1000 a year.
Sorry...$545 a year.
You can get it free for personal use, if you're not selling your work.
@@ProductDesignOnline awesome.... how?
@@whanner instructions can be found here: productdesignonline.com/tips-and-tricks/how-to-download-and-install-the-fusion-360-personal-use-license/
@@ProductDesignOnline thanks!
Design flaw. You cannot stack these cube trays without spilling water.
My app crashed and had to restart
Oof brother. I feel the pain.
Thanks!
Thanks for your support, Alex!
Thanks
Thanks for your support! :)