Outstanding video. Your explanation and ability to see every single screw and part was exceptionally well planned out and executed. The tips you offered along the way, such as taking screws out and temporally putting them back so re-installation would be much easier. Even your point on oil for your region, was a great tip! Great job!!!
I love how careful and how particular you are with your bike- fantastic! I’ve got an 03, and it’s nice to see another Vstar that’s getting the love it deserves!👍
Nothing worst watching people damaging something precious. Same here. Once I get my 1100 and get to oil change point I will do same. Looks so easy on this video. Make me also wonder what on earth were they engineers thinking that they not included that already 🤔.
This is the best video I have seen on how to install the relocation kit. Every step is very well explained. I'm a trades college professor and you sir can teach my class any time.
I watched this as I am going to get one of these kits. Mine is an 03. Really like the bike but the oil change is very unhandy. Why they designed it like this is one of those mysteries. Your video is top notch.
Thank you for the thorough video! Barrons says the lines are all torqued properly from factory... Haaaaa! Finger-tight or less for each end of each hose. I'm so thankful you warned everyone about turning the screws!
I thought about getting a ORK for my '07. Just doing my 1st oil change on it now because I just hit a tad over 8,000 miles on it. Because I'm old. I'm not in that big of a hurry to get things done. But I can't wait to long because I might forget where the parts go. Lol. But I still like the video you did with out the ORK. Because I do like to inspect & clean the hard to see & get to parts. My '07 still looks about as good as it did the day it was new & I want to keep it that way. Thank you.
You forgot to mention about that small O-ring at the bottom of the oil filter bracket that usually falls out causing an oil leak and a replacement is not easy to find. I know from experience . But I enjoy your videos , so informative and detailed . Thanks !
Once again, your instructional videos are by far the best I've personally seen. Informative and no nonsense. Other video makers talk too much about irrelevant things. Yours are very professional. Thank you for taking the time to do this.
Absolutely GREAT video. I think the designers of the original oil filter placement were on drugs when they came up with that insane placement. The kit should be OEM and come with the bike. I've been riding for over 55 years and still love the fact that I can learn new things. Your video saved me quite a few headaches and taught me a bunch. ALL THE BEST Young Fella and thank you SO MUCH!!!!👍👍👍😁
Awesome clip, I like you accent and choice of words (technical yet easy to understand) . I also like how you speed the video during repetitive steps like tightening a bolt.
This video came a little to late. Did mine like 2 months before you released this video. Didnt find a good tutorial back then. You have helped me alot with my vstar. Keep up the good work :)
I have see a few of your videos now, and really like the detail you show while you're doing the work. You make it look easy to do. keep up the good work. Now I'm looking for a Yamaha Vstar.
I have this relocation kit installed on my 06 V Star 1100. It’s a must for every V Star owner. I think it’s the first necessary modification for every one of these bikes. Just my honest opinion. I also modified the beauty cover (5 bolt chrome cover) so I could reinstall it over the Barron piece to maintain the stock look.
Retro Tech & Electronics, I traced out an outline of what section I wanted removed from the cover so it would clear the fittings and oil lines. I took it too a local machine shop and for a few bucks they milled out the section I wanted removed. I tried grinding it, but I didn’t like the way it was turning out, the machinist made it look nice and neat. Now with the cover back on it all looks stock.
I'm getting ready to buy me a 2003 Yamaha V-Star 1100 that all ready has an oil relocation system on it Not sure the brand but this helped me to make a decision on the purchase of the Bike
Great video! I do my own maintenance and have been kicking the idea of getting this relocation kit for about 5 years. Finally ordered one today after watching this video. Thank you.
2005 Vstar 1100 here - Got my kit in and installed it. Ran into an issue though. The bolt that came with the kit would not grip the threads at 11:20 in the video. 10:51 bolt worked fine. I used the following OEM bolts to secure the kit - bolt removed in 6:10 placed in location at 11:03, bolt removed in 6:15 placed on bottom 11:20 with the kit copper crush washer. Great tutorial, ended up replacing the copper exhaust gasket while I was at it. Thank you.
Did you end up putting more oil in after you ran the bike? Mine went all the way to the bottom after running it then letting it sit for a good half hour. I found that a little unsettling so I put more in until I got a little under halfway. All in all I put maybe 3.6 quarts in when the manual calls for 3.28. Obviously there’s more to fill up with the kit, just wondering how much you ended up going with. Great videos btw! I’ve had a v star for 3 years now and have watched just about every one you’ve uploaded. Very handy info and you’re very detailed, I really like that.
Un grand merci pour le tuto (ça fait 3 jours que je me bat avec le moteur) A big thank you for the tutorial (I’ve been fighting with the engine for 3 days)
Yamaha being the reputable company that it is, I'm surprised they don't provide a kit for free. I'm also surprised they designed the bike like that in the first place. Thanks for the video just the same.
@@retrotechandelectronics True about the cost. It kinda makes me shy away from the 1100s though. So many people would probably never change the oil if there was any work in it. I've got my eye on a 2008 1100 right now, but how can you tell if they kept up the scheduled maintenance?
Watched alot of your vids for brake bleeding etc.helped me heaps.i have the oil relocation kit too it for about 16 years on bike.mine tends to leak very slightly its not bad but it's annoying me.do u find any leaks on yours where hoses connect to filter and engine section?thanks mate
14:40....not a criticism in any way, before screwing the filter onto the housing I would pre-charge the filter with engine oil to help prevent a dry start. It's just a neat trick I was taught many years ago and I apply that thinking to cars as well.
I did mine on 2008 Yamaha V Star 1100 Custom I have Cobra pipes so only the lower pipe had to be remove my pegs are forward pegs did not haver to touch it I did have to replace the O rings changing the oil now takes as long as it would drain done and easy save me 150 Dollars every time I change my oil now that I do it myself
Great video! I just bought my 1100 Vstar and it already has a similar kit installed. What size is the oil filter??? I’ve been on Vstar groups and everyone says it’s a KN303. I ordered one and it’s smaller than the one I removed and the threaded hole is larger. From the video yours looks similar to the one I removed. Thank you!
I have the same kit it’s a real shame that you can’t just buy replacement O-rings when they were out no you’ve got a buy the whole fucking kit thank you
I'm a designer and fabricator and considering making one of my own. You video is very helpful in demonstrating this kits build and features. Anything about it you'd improve?
Thank you. Have you had any issues with oil leaks ? Ive read some user reviews and some guys are complaining about leaky hoses. Thanks again for sharing this process.
So....... If folks install it without pre tightening the hoses, yeah, there will be problems. The kit comes assembled but not fully tightened. Also if its placed so far away on the mount as to stress the lines I could see an issue there too.
@@retrotechandelectronics I just ordered this exact setup from Royal Distributing in Ontario to be delivered to my house in BC for $377 Canadian including the k&n filter, delivery and taxes. I'm looking forward to installing it now.
@@retrotechandelectronics I did that yesterday, took enough off to have correct fitment, foundnit alot easier to install by making oil filter hoses and removing to install unit less chance of crimping hoses which almost happened, great video best to all
So despite all measures (being extra careful to seat everything, check gaskets, and even apply approved thread locker/sealer, the hose connections leak at both ends. So frustrated! Is this a manufacturer defect? Or am I missing something obvious?
Good Lord, I thought changing the oil filter on my (then) fiance's 1984 Cavalier was awful. Had to take off the passenger side front wheel - nothing compared to this.
@@retrotechandelectronics The swap is easy, GETTING to the alternator is quite another story. "Just follow these 50 easy steps." Like a treasure hunt, but without the thrill of pirates or the glitter of gold. Just lots of time and effort expended unburying the thing. Oh, yes, and THEN the reassembly afterward. 😜
@@retrotechandelectronics okay. For whatever reason it seems to be going in all the way now. Maybe there was a burr or something on it that was preventing it from going all the way before. Thanks. After this I'm putting on some new Cobra aftermarket pipes. Do you think it would be safe to start the bike with no pipes on it at all as I check for leaks or best to put the pipes on check for leaks and if there is take the pipes back off to adjust?
I have a performance relocation kit on my 08 vstar 1100 and I'm trying to find the right oil filter to change the oil but I can't find what kind or size. I want a chrome filter. Can anyone tell me what to look for?
Took me 10 whole seconds to google... www.ebay.com/itm/192164733038?chn=ps&norover=1&mkevt=1&mkrid=711-117182-37290-0&mkcid=2&itemid=192164733038&targetid=1263094003866&device=c&mktype=pla&googleloc=1014986&poi=&campaignid=10454522294&mkgroupid=121089751606&rlsatarget=pla-1263094003866&abcId=2146002&merchantid=6316184&gclid=CjwKCAjw7--KBhAMEiwAxfpkWIA2Jvbh0MlzBXqR9MbyAkJxg6LskBBC97IUNGboaYVNneGIKEy9dBoCSCsQAvD_BwE www.westendmotorsports.com/baron-oil-filter-relocation-kit-for-v-star-1100-99-09-will-work-with-engine-guards/?keyword=&matchtype=&gclid=CjwKCAjw7--KBhAMEiwAxfpkWL48vfdulzXB-4F6svKV2ifoJzYUkLLwvT307DvKhQK-ynl0ldmp7BoC-xsQAvD_BwE www.accessoryinternational.com/product/baron-oil-filter-relocation-kit-v-star-1100.html
Ive been thinking anout buying a vstar 1100. Now that I watched this, I wipp never buy one. Having too take the bike apart to change to oil is unacceptable. If the engineers were not smart enough to design the engine so that isnt necessary, I dont trust they did a better job with anything else. Shameful.
If this was your basis.... we’ll I can’t help you. A little research would reveal that this platform went into more than 1 chassis. The pipes were the limitation, not the engine. SMH.


Outstanding video. Your explanation and ability to see every single screw and part was exceptionally well planned out and executed. The tips you offered along the way, such as taking screws out and temporally putting them back so re-installation would be much easier. Even your point on oil for your region, was a great tip! Great job!!!
I love how careful and how particular you are with your bike- fantastic! I’ve got an 03, and it’s nice to see another Vstar that’s getting the love it deserves!👍
Thank you kindly!
Nothing worst watching people damaging something precious. Same here. Once I get my 1100 and get to oil change point I will do same. Looks so easy on this video. Make me also wonder what on earth were they engineers thinking that they not included that already 🤔.
This is the best VSTAR 1100 oil relocation installation video I have seen on TH-cam.
Thank you sir, I hope it inspires!
This is the best video I have seen on how to install the relocation kit. Every step is very well explained. I'm a trades college professor and you sir can teach my class any time.
Wow, thanks!
I watched this as I am going to get one of these kits. Mine is an 03. Really like the bike but the oil change is very unhandy. Why they designed it like this is one of those mysteries. Your video is top notch.
Glad it helped.... Note the Harley Twincam isnt a much better design...
Excellent and very thorough?
Asking or telling?
Great detailed instructions, great camera angles, great narration....you made it look very easy. Thank you. This is what i call professional work.
Glad it was helpful!
Thank you for the thorough video! Barrons says the lines are all torqued properly from factory... Haaaaa! Finger-tight or less for each end of each hose. I'm so thankful you warned everyone about turning the screws!
Yeah..... always check oil lines...
I thought about getting a ORK for my '07. Just doing my 1st oil change on it now because I just hit a tad over 8,000 miles on it. Because I'm old. I'm not in that big of a hurry to get things done. But I can't wait to long because I might forget where the parts go. Lol. But I still like the video you did with out the ORK. Because I do like to inspect & clean the hard to see & get to parts. My '07 still looks about as good as it did the day it was new & I want to keep it that way. Thank you.
One of the best mod videos I've seen - clear camera angles, good explanations, no nonsense.
Glad it was helpful!
You forgot to mention about that small O-ring at the bottom of the oil filter bracket that usually falls out causing an oil leak and a replacement is not easy to find. I know from experience . But I enjoy your videos , so informative and detailed . Thanks !
Where did you find that o-ring?
Once again, your instructional videos are by far the best I've personally seen. Informative and no nonsense. Other video makers talk too much about irrelevant things. Yours are very professional. Thank you for taking the time to do this.
Glad it was helpful!
Absolutely GREAT video. I think the designers of the original oil filter placement were on drugs when they came up with that insane placement. The kit should be OEM and come with the bike. I've been riding for over 55 years and still love the fact that I can learn new things. Your video saved me quite a few headaches and taught me a bunch. ALL THE BEST Young Fella and thank you SO MUCH!!!!👍👍👍😁
Awesome clip, I like you accent and choice of words (technical yet easy to understand) . I also like how you speed the video during repetitive steps like tightening a bolt.
Thanks, I try to condense by speeding up the repetitious events.
Very well done video, thank you
Glad it was helpful!
This video came a little to late. Did mine like 2 months before you released this video. Didnt find a good tutorial back then. You have helped me alot with my vstar. Keep up the good work :)
Glad I could help!
great video.....clear concise and no fluff...how it should be. I HATE it when guys get all creative and try to be cool or funny.
Ive tried to be cool and funny..... Ive failed, so now i just do the facts.
@@retrotechandelectronics roger that, it's one in the win column!
I have see a few of your videos now, and really like the detail you show while you're doing the work. You make it look easy to do. keep up the good work. Now I'm looking for a Yamaha Vstar.
Thank you very much!
Best instruction video on bikes I have ever watched
I appreciate it. Glad the video was helpful.
Got one ordered for Father’s Day, he loves his v star but hates the oil change.
I’ll be sharing this video when the part arrives
Very cool.
I have this relocation kit installed on my 06 V Star 1100. It’s a must for every V Star owner. I think it’s the first necessary modification for every one of these bikes. Just my honest opinion. I also modified the beauty cover (5 bolt chrome cover) so I could reinstall it over the Barron piece to maintain the stock look.
I'm surprised there wasnt a jig in the kit or mentioned in the manual, for the mod for the original cover.
Retro Tech & Electronics, I traced out an outline of what section I wanted removed from the cover so it would clear the fittings and oil lines. I took it too a local machine shop and for a few bucks they milled out the section I wanted removed. I tried grinding it, but I didn’t like the way it was turning out, the machinist made it look nice and neat. Now with the cover back on it all looks stock.
@@charger19691 do you have a pic?
@@stevewhelan3770, I can get you one, yes.
I'm getting ready to buy me a 2003 Yamaha V-Star 1100 that all ready has an oil relocation system on it
Not sure the brand but this helped me to make a decision on the purchase of the Bike
Glad I could help.
Great video! I do my own maintenance and have been kicking the idea of getting this relocation kit for about 5 years. Finally ordered one today after watching this video. Thank you.
2005 Vstar 1100 here - Got my kit in and installed it. Ran into an issue though. The bolt that came with the kit would not grip the threads at 11:20 in the video. 10:51 bolt worked fine. I used the following OEM bolts to secure the kit - bolt removed in 6:10 placed in location at 11:03, bolt removed in 6:15 placed on bottom 11:20 with the kit copper crush washer. Great tutorial, ended up replacing the copper exhaust gasket while I was at it. Thank you.
Good work on this video and the original without the kit. Now I will know when I get my first V Star, what it takes.
Glad to help.
Don't own this bike model but that was very informative and very thoroughly explained. Useful modification
Did you end up putting more oil in after you ran the bike? Mine went all the way to the bottom after running it then letting it sit for a good half hour. I found that a little unsettling so I put more in until I got a little under halfway. All in all I put maybe 3.6 quarts in when the manual calls for 3.28. Obviously there’s more to fill up with the kit, just wondering how much you ended up going with. Great videos btw! I’ve had a v star for 3 years now and have watched just about every one you’ve uploaded. Very handy info and you’re very detailed, I really like that.
Hey Thank you very much for this video, I just got me a VStar 1100 and need to do just this same thing,.. love your shop floor too !
Glad you enjoyed it. And the floor is 2 part epoxycoat.
I love your videos. I have an 05 you are thorough and meticulous. Keep up the great work. I will follow you as long as I have my bike.
Awesome, thank you!
Un grand merci pour le tuto (ça fait 3 jours que je me bat avec le moteur)
A big thank you for the tutorial (I’ve been fighting with the engine for 3 days)
you're welcome.
Yamaha being the reputable company that it is, I'm surprised they don't provide a kit for free. I'm also surprised they designed the bike like that in the first place. Thanks for the video just the same.
That would be significant cost. I Dont think there was any obstruction in the Virago, but its been a few years.
@@retrotechandelectronics True about the cost. It kinda makes me shy away from the 1100s though. So many people would probably never change the oil if there was any work in it. I've got my eye on a 2008 1100 right now, but how can you tell if they kept up the scheduled maintenance?
You can bet regular schedule WAS NOT kept if filter relocation was not done.
Watched alot of your vids for brake bleeding etc.helped me heaps.i have the oil relocation kit too it for about 16 years on bike.mine tends to leak very slightly its not bad but it's annoying me.do u find any leaks on yours where hoses connect to filter and engine section?thanks mate
You’re welcome.
Great video ! It really helped to understand how the install kit is beneficial. Thanks.
Glad it was helpful!
14:40....not a criticism in any way, before screwing the filter onto the housing I would pre-charge the filter with engine oil to help prevent a dry start. It's just a neat trick I was taught many years ago and I apply that thinking to cars as well.
Yeah but this filter sideways and shallow was good for a teaspoon.... the rest would be on the garage floor when spinning it on.
I did mine on 2008 Yamaha V Star 1100 Custom I have Cobra pipes so only the lower pipe had to be remove my pegs are forward pegs did not haver to touch it I did have to replace the O rings changing the oil now takes as long as it would drain done and easy save me 150 Dollars every time I change my oil now that I do it myself
Very well done. Step by step. I am more confident on installing the oil kit myself.
Remember to check the screw head clearance
Yes Thank you for that tip
What detailing products do you use? Your bike always looks amazing.
Amazing great video I just bought one as my first bike like it your video is a big help on some stuff I plan on doing to my bike
I have a large collection of videos on the 1100
th-cam.com/play/PLK_zQ6_j4TF3RGcIQAnttY1D04cVC22WD.html
Great video! I just bought my 1100 Vstar and it already has a similar kit installed. What size is the oil filter??? I’ve been on Vstar groups and everyone says it’s a KN303. I ordered one and it’s smaller than the one I removed and the threaded hole is larger. From the video yours looks similar to the one I removed. Thank you!
It’s listed in the video description as well as in the video. I don’t understand what you are asking beyond that.
You are among the best. V star 1100 Jedi masters.
May the Regular maintenance schedule be with you.
Lol. You are so informative. I am grateful.
Thank you for your videos. Now that I'm old, I have more time to do the maintenance myself.
Enjoy it. And save a ton of cash.
EXCELLENT instructional video. Thank you brother.
Glad it was helpful!
I have the same kit it’s a real shame that you can’t just buy replacement O-rings when they were out no you’ve got a buy the whole fucking kit thank you
Im sure the standard o rings can be sized on any parts site.
I'm a designer and fabricator and considering making one of my own. You video is very helpful in demonstrating this kits build and features. Anything about it you'd improve?
No major complaints
would new bolts not be better insted of turning them down .. since the rust proofing is gone if turned down right ? .. thx alot for the video
Did not see you do anything with hose fittings did all of that come pre fitted or did you have to fit them all together?
I was thinking about doing this so can add a oil cooler and fan.
Wow!!! It sure would be nice, to have someone like you to work on my Bike...
I barely have the time to work on mine.
Thank you. Have you had any issues with oil leaks ? Ive read some user reviews and some guys are complaining about leaky hoses. Thanks again for sharing this process.
So....... If folks install it without pre tightening the hoses, yeah, there will be problems. The kit comes assembled but not fully tightened. Also if its placed so far away on the mount as to stress the lines I could see an issue there too.
Excellent tutorial! Thank you! :)
You're very welcome!
Very helpful and detailed love it
Glad it was helpful.
Your videos are phenomenal
Thank you.
I like your precise work. Very good !
Thank you very much!
Great video, great info, great tips!!
You’re welcome!
Great video with details that matter. Thank you.
Glad it was helpful!
@@retrotechandelectronics I just ordered this exact setup from Royal Distributing in Ontario to be delivered to my house in BC for $377 Canadian including the k&n filter, delivery and taxes. I'm looking forward to installing it now.
Very Professional, Great Presentation 🇬🇧
Thank you kindly!
I see you have a tach on the Handel bars. Do you have a video of the install of that.?
th-cam.com/video/oUp4rDfyGqQ/w-d-xo.html
great video what do you use for cleaning the chrome?
Maas
best clutch video ever.
I don’t get it.
Great stuff, I'm about to do the same thing on my 1100, thanks mate!
No problem.
Great video! Thank you for the step my step perspective.
Glad it was helpful!
I'm thinking of doing this with my bike (same make and models as yours) but man that's a big chunk of change for it to be more "convenient"
You have to ask what your time is worth
...and ask if you will keep up with scheduled maintenance if it's not done.
@@georgekatsinis5224 If you dont keep up with maintenance on a bike this old every minute you save will cost you an hour down the road.
Enjoyed watching
Thanks!
It is a great video, putting one in today and of course, top bolt I checked too wide at knurl, how did u turn urs to fit, no lathe ty
I guess you can also use a belt sander or a dremel.
@@retrotechandelectronics I did that yesterday, took enough off to have correct fitment, foundnit alot easier to install by making oil filter hoses and removing to install unit less chance of crimping hoses which almost happened, great video best to all
Be good to keep oil temp down also
It could help. Without a thermostat and cooler. Probably not by much. Those are rubber lines wrapped in steel; insulated.
Great video, thanks!
Glad you liked it!
ty gonna buy my buddys at work 3k, glad i watched
congrats.
Very well explained
Glad it was helpful!
Very informative. Thank you
Youre welcome.
So despite all measures (being extra careful to seat everything, check gaskets, and even apply approved thread locker/sealer, the hose connections leak at both ends. So frustrated! Is this a manufacturer defect? Or am I missing something obvious?
Mine had a constant fine misty leak. I went back stock.
Very good video mate. Thanks
You're welcome.
Great Articulation:) Thanks
Thanks for watching!
I bought a Baron kit and couldn't install it. The bracket for my engine guard is in the way of the hoses. Any suggestions?
What's with all the rubber wrist bands? You go to carnivals often?
Yeah, something like that Jim.
very instructional love it
Glad you liked it!
Do you have a video on checking the valves?
Here
Yamaha VSTAR 1100 Valve adjustment - Checking and Adjusting
th-cam.com/video/RbypV3OCz4Q/w-d-xo.html
2 years later, how did this kit do??
No issues, easy oil changes.
After a year what are your thoughts is it worth the investment? I'm buying a 1100 here in a few days and am thinking about doing this to mine.
No regrets.
I actually want to go back to oem. I want to reverse my relocation kit😂
What part # do I need???
Oem is hard, check Yamaha or any Facebook groups.
When service is done you need to check valve adjustment, how do you do that?
Here is the valve adjustment procedure
th-cam.com/video/RbypV3OCz4Q/w-d-xo.html
Very good video!!!
Thank you very much!
I just bought an 06 vstar and did my first oil change on it. Took me 5 minutes to take the exhaust off.... my first time. Just saying
5 minutes.. impressive.
Great job. I have the same bike .
Thanks! 👍
Good Lord, I thought changing the oil filter on my (then) fiance's 1984 Cavalier was awful. Had to take off the passenger side front wheel - nothing compared to this.
Wait till you see the Alternator swap on my Cobalt.
@@retrotechandelectronics The swap is easy, GETTING to the alternator is quite another story. "Just follow these 50 easy steps." Like a treasure hunt, but without the thrill of pirates or the glitter of gold. Just lots of time and effort expended unburying the thing. Oh, yes, and THEN the reassembly afterward. 😜
how in hell this oddities , to speak nice, get in the marked, I bought a relocation kit after I tried my first oil change
youre good man
Those kits will proper filter as the original ?
Yes
thanks
You're welcome!
What do u use to clean the chrome?
Maas
Nice one man
Thank you.
Got as far as putting in the supplied bolt in the bottom hole, but it's bottoming out before it even gets close to being tight. Any thoughts?
Weird , try running the bolt up without the filter kit. Check for burrs on the thread
@@retrotechandelectronics okay. For whatever reason it seems to be going in all the way now. Maybe there was a burr or something on it that was preventing it from going all the way before. Thanks. After this I'm putting on some new Cobra aftermarket pipes. Do you think it would be safe to start the bike with no pipes on it at all as I check for leaks or best to put the pipes on check for leaks and if there is take the pipes back off to adjust?
I have a performance relocation kit on my 08 vstar 1100 and I'm trying to find the right oil filter to change the oil but I can't find what kind or size. I want a chrome filter. Can anyone tell me what to look for?
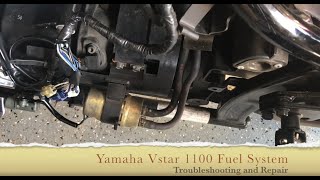
At 1:20 of the video, he shows the filter part #KN 303C K7N filter and the Yamaha equivalent.
Anyone know where I can buy the kit? I can’t find it anywhere
Took me 10 whole seconds to google...
www.ebay.com/itm/192164733038?chn=ps&norover=1&mkevt=1&mkrid=711-117182-37290-0&mkcid=2&itemid=192164733038&targetid=1263094003866&device=c&mktype=pla&googleloc=1014986&poi=&campaignid=10454522294&mkgroupid=121089751606&rlsatarget=pla-1263094003866&abcId=2146002&merchantid=6316184&gclid=CjwKCAjw7--KBhAMEiwAxfpkWIA2Jvbh0MlzBXqR9MbyAkJxg6LskBBC97IUNGboaYVNneGIKEy9dBoCSCsQAvD_BwE
www.westendmotorsports.com/baron-oil-filter-relocation-kit-for-v-star-1100-99-09-will-work-with-engine-guards/?keyword=&matchtype=&gclid=CjwKCAjw7--KBhAMEiwAxfpkWL48vfdulzXB-4F6svKV2ifoJzYUkLLwvT307DvKhQK-ynl0ldmp7BoC-xsQAvD_BwE
www.accessoryinternational.com/product/baron-oil-filter-relocation-kit-v-star-1100.html
what filters do you use after it is installed?
KN-303C or Yamaha 3FV-13440-10-00 they were mentioned in the video
@@retrotechandelectronics many thanks. mine arrived today. Can you do a rear suspension adjustment video? Your style of video is unparalleled.
Lol it takes me no more then 10 mins to change my oil on my Vstar and I have the stock oil system. Waste of $ if you tell me
:)
Holy shit what middle school engineer designed this bike
260$ for the kit when the bike cost 3k total is too much
not all value is in dollars.
You want to come work on my bike please
no.
Ive been thinking anout buying a vstar 1100. Now that I watched this, I wipp never buy one. Having too take the bike apart to change to oil is unacceptable. If the engineers were not smart enough to design the engine so that isnt necessary, I dont trust they did a better job with anything else. Shameful.
If this was your basis.... we’ll I can’t help you. A little research would reveal that this platform went into more than 1 chassis. The pipes were the limitation, not the engine. SMH.
If you think thats fun adjust the valves or do a starter clutch or rebuild carbs, but when they run they run good maintenance on them sucks
great vid. thanks
Glad you liked it!
Great video, I am considering doing this soon
It’s a good upgrade