Installing A New Differential In My Honda S2000!

ฝัง
- เผยแพร่เมื่อ 18 เม.ย. 2017
- How To Remove And Install A Honda S2000 Differential
Ball Joint Removal Tool - amzn.to/2o41OZS
Subscribe for new videos every Wednesday! - goo.gl/VZstk7
PuddyMod Product Info:
PuddyMod Products - goo.gl/h2ryZz
E-mail - PuddyModRacing@Tampabay.rr.com
Product Links:
Ball Joint Removal Tool - amzn.to/2o41OZS
Diff Mount Front (A) - amzn.to/2nCfDCl
Diff Mount Rear (B) - amzn.to/2nC6TMI
Transmission Jack - amzn.to/2nCqdJR
Electric Impact Wrench - amzn.to/2o2o714
Digital Torque Wrench (1/2") - amzn.to/2osmDO1
Digital Torque Wrench (3/8") - amzn.to/2oLzXjS
Paint Pen/Marker - amzn.to/2oWGoB0
Removal/Installation Process:
1. Raise the car up onto jack stands. Remove the rear wheels.
2. Remove the exhaust from the catalytic converter back. Remove the rear suspension stiffener.
3. Remove the differential side of the prop shaft, marking all the joints disconnected.
4. Pull the prop shaft slightly back, and allow it to rest on the shaft protector.
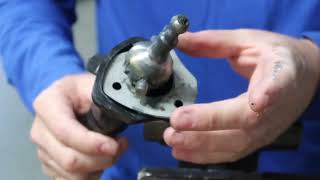
5. Disconnect the lower control arm by removing the lower ball joint.
6. Remove the ABS sensor harness by removing two bolts from the upper arm. Repeat these steps to remove the ball joint and ABS sensor for both sides of the vehicle.
7. Remove the differential joints for each side. There are six mounting bolts and nuts to remove, and then you can remove the joint from the differential. This requires pulling the half shaft away from the differential to clear the internal rod.
8. Remove the EVAP canister cover by removing the single bolt holding it in place.
9. Place a floor jack underneath the differential. A transmission jack is ideal, especially if you’re doing this by yourself, as you want to have a large platform to hold the differential.
11. Starting from the rear of the differential, remove each of the four mounting nuts from the mounting bracket. Then remove the four bolts holding the front mounts in place.
12. Hang the Evap canister out of the way of the differential. There’s a single bolt hold it on, and then a bracket to slip it off and allow it to hang freely.
13. Pull the differential towards the front of the car, which will clear the rear mounting bolts from the mounting bracket. Then lower the differential to the ground using a jack.
14. At this point, I replaced the differential mounts at this point.
15. Fill the differential with the recommended oil.
16. Put the studs into the differential. Mount the front differential bracket onto the new differential. There are four bolts used, each torqued to 47 lb-ft.
17. Using a floor jack, lift the differential back up into the vehicle, and slide it into the rear differential mount. Then install the front mounts; torque to spec.
18. With the front mounting bracket on, there are two nuts and washers that need to be installed and torqued to 47 lb-ft.
19. Replace the EVAP canister, and the single bolt holding it in. Then reinstall the canister cover, tightening the single screw to 7.2 lb-ft.
20. Install the axle half shafts to the differential. Using new hardware, install the twelve nuts and bolts to each side of the differential.
21. For each rear suspension, reinstall the ball joints by torquing the castle nut down to 51 to 58 lb-ft. Slip the cotter pin through the ball joint bolt, and then bend the cotter pin to prevent it from falling out.
22. Reinstall the ABS sensor harness by torquing the two screws to 7.2 lb-ft.
23. Install the prop shaft back to the differential. There are three spacers to be used. The six bolts needs to be torqued to 24 lb-ft.
24. Remount the exhaust, making sure all five hangers are used, and tighten the nuts to the catalytic converter to 25 lb-ft.
25. Finally, install the rear suspension stiffener.
26. Put the wheels back on and lower the car.
Part Numbers:
07MAC-SL00200 - Ball Joint Remover ~ $220.84
50710-S2A-000 - Diff Mount A ~ $36.15 each (qty 2)
50730-S2A-023 - Diff Mount B (Right) ~ $79.97
50740-S2A-023 - Diff Mount B (Left) ~ $79.97
90181-S2A-000 - Axle Bolt (10x26) ~ $2.14 (qty 12)
90002-S10-000 - Axle Nut (10 mm) ~ $1.44 (qty 12)
90182-S2A-000 - Prop Shaft Bolt (8x60) ~ $2.41 (qty 6)
90183-S2A-000 - Prop Shaft Bolt (8x65) ~ $2.41 (qty 6)
90363-SF1-000 - Castle Nut 12 mm ~ $4.59 (qty 2)
94201-30220 - Cotter Pin ~ $0.14 (qty 2)
Engineering Explained is a participant in the Amazon Services LLC Associates Program, an affiliate advertising program designed to provide a means for sites to earn advertising fees by advertising and linking to Amazon.com.
Don't forget to check out my other pages below!
Facebook: / engineeringexplained
Official Website: www.howdoesacarwork.com
Twitter: / jasonfenske13
Instagram: / engineeringexplained
Car Throttle: www.carthrottle.com/user/engi...
EE Extra: / @engineeringexplainede...
NEW VIDEO EVERY WEDNESDAY! - ยานยนต์และพาหนะ


If anyone is planning on doing this to their S2000, I've included a list in the video description of the steps to take. Also has a list of part numbers you'll likely want to order before getting started, as well as some recommended tools. Hope everyone's having a great day! Consider following on Instagram if you like cars, or cats, or cars and cats. Okay, mostly cats... instagram.com/engineeringexplained/
How does it feel to get some grease on your hands instead of marker for a change? Hehehe nice work, I run a 4.44 diff as well and it's fantastic always having power. You didn't say what type of diff you're running, helical/clutch pack.
Torsen diff!
Which are the benefits of doing that? Can you make a comparison video?
Engineering Explained I'm not sure you installed the cutter pins properly. Should you bend the pin around the circumference of the castle nut?
It doesn't matter how it's bent as long as it passes thru the hole and notch, it's only purpose is to stop the nut from backing off.
That was one of the best, most direct, well lit, easy to follow, step by step DIY videos I've ever seen... GREAT job...
Thank you thank you thank you!! Really appreciate the input. I was thinking it might be a little quick, but I think so many DIY's out there stray from the point, and take far too long. You may have to go back and check at points if you're following the video to actually DIY, but I'm not a fan of all the fluff that gets interjected into many DIY's out there.
Charles Lightfoot have you seen ChrisFix?
You were on point with this one Jason. I wish many more would do it just like this.
ricardo rocha Chris fix is very good at car instructional videos.
I will check it out... thanks
this car is so lucky to have such a good owner
Σταυρος Φουρναρακης And vice versa 🙃
Σταυρος Φουρναρακης Πολυ σπανιο να βρω ελληνα εδω !!
afou pleon ola ta kanoume monoi mas
Dimitris Makris haha file des ena kanali me onoma " chrisfixit " polu psagmeno to kopeli . ekei eimai to 90% ths wras m sto youtube
οκ φιλε θα τον τσεκάρωωω !!
This is one of best mechanic parts replacement tutorials I have ever seen if not the best.
Happy to hear it!
I agree, very clear and to the point. Did a good job recording all the details clearly as well. I wish he showed how the drives was after vs before though.
I'm sure he will, with charts and graphs!
So refreshing to have a "How To" video that is nearly 100% "How To" instead of 18 minutes of someone's life story followed by 5 Min of watching oil drain into a pan.
leave it to an engineer to torque every single nut and bolt to spec. haha ;) good stuff
my philosophy of "tight is tight" failed me the other day when I could hear movement in the front of my car and jacked it up to find my front subframe bolts were loose hahaha
I'm imagining Eric The Car Guy watching this shaking his head. Probably used the torque wrench more in this video than he has in the last 8 years :)
i learned to torque until the bolt snaps and then back off a quarter turn.
Why wouldn't you torque to spec?
tight is tight xD
Was that Ms Engineering explained!!?!
It's more like Ms. Biology Explained. She studies big cats!
Oh haha that's so cool ! Love it keep at it guys!
Wouldn't that be Felinology? I'm pretty sure that's the study of cats.
you must be fun at parties...
it's good to see the job being done properly. A shop would never take so much care. The old saying is true. If you know how to do a job then nobody will do a better job than yourself on your own car.
"Have a friend.." Shut up Jason! Thats youre gf!! :)💑
Okay so I don't have many friends... 😂
Engineering Explained What tool set do you have or recommend?
My phone's def's so low… I thought it was his Mom…
how did the new dif feel ?
Red Cyclone's Fury - At 8:17 you can see my toolbox(es). It's those card board boxes on the shelf haha. Not sure I'm the best at recommending tools, but I love the digital torque wrenches I used in this video (links in video description). They are amazing. Beeps when your close, you don't even have to have the readout in view. Long beep when you hit your target. Great product, and it comes with a calibration sheet with the previous calibration details so you know you can trust the readings.
Popularity is WAAAAAY overrated. Like someone said, quality over quantity.
i like how you showed that you ran into some bs during the install. it's never as simple as the diy's state. you always run into something that either means you need to fab up/modify something or just put it back together and try again another day when new tools/parts can be ordered (because of course you're doing this sunday night when no stores are open because the diy said it's a 30 min job)
Hahaha, absolutely how it always goes. The prop-shaft bolts were super frustrating; even removing the exhaust was a pain. Retapping was definitely stressful, because if I screwed up the thread is internal to the frame. Would have to keep retapping larger sizes until I finally made it work. Thankfully with some patience, cutting oil, etc, all went smoothly in the re-tap process.
Every DIY mechanic should have a good tap and die set. My craftsman set is about 20 years old and I can't tell you how many times it's saved me a ton of frustration and money.
i'm just over 20 years old so i can't say that much but yes i do have a set now. but nobody buys every tool they'll ever need at once, and typically you buy new stuff when you need it.
This car looks nearly pristine given its age. Good owner. Working on a 15 year old car in some parts of the country, half the video would be devoted to blowtorches and various medieval implements :-P
Great video and instructions, btw.
Wow, that's an amazing video. The amount of time that must have taken to capture and edit is insane. I just got an AP2. Luckily PuddyDaddy is about 45 minutes from me. I was planning to do this myself, but after watching, I'm going to go have him do it for me. Thanks for taking the time.
That is a great upgrade. Have you felt the difference already? There is a reason this is the best engineering channel on TH-cam today! Always great content!
Love my Puddymod stage 2, have had it for almost 3 years now with no issues, thought I had a issue with my diff when I kept hearing a noise and a weird vibration so I contacted him, at first I told him I was almost positive it was a driveshaft but he said something about the LSD sticking and he had to issue with me sending him my diff and letting him fix it. But I double checked and it ended up being worn out joints in my driveshaft which he rebuilt for me. Really nice guy!
Great diy! Hope to see more like this in the future. Saying what all of the torque specs are is a nice touch, saves me the time having to look it up. Thanks.
Nice Video, very simplified yet straight to the point. Good thing none of the bolts seized up!
Who's the girl that helped you jack the diff?
That's this rad chick that's hung around with me the past 7 years. :)
rumors says if you gift them clothes they will be free
Does she...jack your diff often?
Thanks for including the problem with the stripped threads and how you fixed it! I find the unexpected problem section of how-to videos the best learning experience.
Very thorough. I don't have an S2000, but I appreciate anyone who does such a good job with descriptions and camera angles on a car maintenance video.
Really liked this video. I appreciate the depth you get into for each thing. Not very mechanically inclined yet but im working on it. The thuroughness helps.
8:44 having your gf/wife help you work on your car. Life goals 🙂
Wow so thorough! Nice to see that you're not afraid to undertake a task like this, unlike most automotive TH-camrs.
its awesome to see you actually did the diff install yourself.
Some people know the theory but when it comes down to actually doing it they suck or just leave it to someone else to do the labour.
I appreciate it, thanks! I was hoping to actually do the diff build, but after looking into the process you need some special tools and know-how. Decided to leave that to PuddyMod who's been building these for many years and makes an awesome product. Super smooth, no noise. He did a great job with the set-up.
wow. I'll probably never do this myself, but it was still highly entertaining to watch and learn. please continue making these maintenance guides!
Dude best DIY video! I own a 1998 Honda prelude and it's almost similar with where the parts are which makes it easier watching this video! Nice Honda S2000. Love watching and learning more with your videos !
jason you legend.. I need to show this to my friends back in Greece hahah, they go mad over this sort of thing and they need the extra lesson. Such good work as always man
I'm not a huge Honda fan but I would be more than happy to see more videos like this of you doing work on your S2000. Nice work.
Your videos never cease to deliver invaluable content. Thank you!
Great DIY video again for us S2000 owners. Keep up the great videos. Enjoyed it and now I am thinking about doing the diff myself too.
Great diy, showing the points in a timely matter that doesn't seem to confusing for most people.
really superb demonstration. very professional, I'm sure quite a few people will benefit from this
This video was very helpful, I appreciate your professionalism and super neat 👍🏼
definitely liked the DIY on this. Short video but very detailed, not paced too slowly or too fast.
Top work fella! He's handy with the tools, as well as the whiteboard and marker.
Nice to see an in depth repair/replacement. I'm going to miss stuff like this now that Ed China has quit Wheeler Dealers.
Bring on the supercharger installation!
You have skills in your delivery I'm very proud to see you grow as a TH-camr not just in views or subscribers but your content
Another good video.
I'm enjoying watching you work on your S2000.
Wow one of the most thoughtful auto repair videos I've seen thank you
Nice video. It's good to see someone who goes in depth. So many car youtubers will mention things like differential replacements without going through step by step how to do them. It can be overwhelming for people like me who are trying to learn about cars because they leave so much out, so it's refreshing to see someone who tells you exactly what you need and how to perform each step in the process.
Also, will car reviews be coming back to this channel anytime soon? I really like your reviewing style.
Hey Jason,
I'd say this is the most clear and direct video tutorial that I've ever seen on TH-cam or social media. Btw, shoutout from the Philippines. EK4, DC5, and AP1 owner. Keep the vids coming 👍🏼
Thanks!
Love your videos like this! so in-depth and easy to follow! good work! :)
Great video! Love to see you mix up the whiteboard videos with videos of you working on your own car. Both formats seem to work well.
Funny thing, I just had to do this a month ago and didn't see this video til now. My diff was so bad that I couldn't have mine rebuilt and PuddyMod had to build another one for me. One note though, I didn't have to pull the ball joint. Using a transmission jack allows you to wiggle the diff around so you can get the half shafts apart easier. Also makes installation easier. The biggest issue that led to the most frustration was getting the bolts lose. I wish manufacturers used anti-seize compound when they built the car. I made sure to put anti-seize on ALL the bolts during re-installation.
Finally a video! Its been soooooo long. I think I'm addicted. :)
man, don't we wish everyone was as good teacher and as detailed info as you included.
Very impressive!!! I'm anxious to see the results!!!
Best DIY video I ave ever seen for cars.
Excellent video. Very informative and easy to follow.
Wow, this would be so easy on my Volvo 240 5sp manual. I've changed pretty much every wear and suspension part and it was so easy. I dread getting a newer car because they don't make it easy to fix anymore, good thing she runs like a champ. Also, I'm glad I'm not the only one who torques bolts to spec.
Dam bro that was very well said and descriptive. One of the best DIY vids I've ever seen. Great job!
You have phenomenal videos. Very descriptive. Very well done. Very professional. I say thumbs up sir.👍👌
thanks man , your video's are very educatieve. i enjoy it big time. regards from belgium !
Sick, can't wait to watch a follow up review on your new differential.
Great work and video! Bit more involved than the same job on a 240SX. But the shorter final drive should be really fun, it's something I always wanted to do on my S13.
great video! so simple yet very well explained
Awesome how-to!! The filming is spectacular, it's easy to follow along, and it's so specific in detail! I wish every how-to video on TH-cam was like this. Half the time it's "off camera I completed 15 really complicated steps, but I'm sure you can figure it out."
Filming is such a pain, that's why many of them exclude the hard parts. I did my best to include everything, but admittedly did forget to film the diff getting raised back in. With a transmission jack, it's no issue. Glad you enjoyed the video!
Holy crap, I have a cat that looks just like your cat!
That was a good and informative DIY video, thanks. I hope you will make more of these kind of videos.
man this guy does great videos , i dont even own a S2k just watched this video cus he explains everything so well lol
Thanks for the detailed info on this! great video
Your rear end is purdy! :)
Love Puddymod's work!
ChrisFix is amazing at making videos like this, and I have to say, your video is approaching his level of quality. 9.9/10! Only because 10/10 is reserved for mr. Fix, himself.
Really enjoying these videos! Keep them up! :))
I'm not even going to do this, but it was fun/very informative to watch. The video was very well presented as well :D 10/10!!
Thanks, I appreciate you watching!
Literally just got a call from the mechanics - my engine pump has been faulty for who knows how long, and now there are internal damages =\. Previous own(s) never connected the pump looms so couldn't tell on the dash if oil pressure was right. Sigh...
Hope your s2k is nice and healthy (I bet it is, with you as the owner).
You deserve more subs. Love your videos!
love these s2k videos
Great parts list in the description. Saves people forum hunting.
Jason great video. you are an intelligent young man, it was very nice to see you working on a vehicle. as a mechanic, wasn't sure I would ever see an engineer working on a car... but finally. good job on the install by the way. it would be very interesting to see some comparisons... yeah number 0-60 that sort of stuff. perhaps we can look forward to more of you working on cars.... numbers are good too :)
Wow, very detailed explanations!
Nice video. Enjoy your new diff. I swapped a Ford 8.8 diff into mine as its a dedicated drag car!
Wow all that in 8 minutes and forty three seconds. Greetings from Europe...and thanks Jason.
That's a relatively big job. One of the bigger ones you've done? Excellent video and very clear and concise. Really appreciate having such good content put up.
For me, absolutely. And definitely the biggest for the S2K. Thanks for the kind words!
I don't own an s2000, nor even a RWD car, I will probably never get to use that, but I must say that it was a real pleasure to watch !
Thanks!
I remember 3 years ago when you had >50,000 subscribers. I'm glad too see you at
Great video, I didn't catch it in the video, you mentioned the final drive ratio is altered, what type of differential does the new unit have?
Torsen LSD.
Good for you dude! That's a big job, great work.
i don't have an s2000, i don't think ill ever have an s2000, but this was just so satisfying to watch lol
Well explained and easy to follow. Job well done! :D
This video is a confidence builder💯👏 ty
As a viewer from East Coast Canada I'm pretty jealous about the not-completely-ruined state of all the fasteners under the car. Rust kills our cars out here.
Keep the fun and interesting content coming, thanks!
Great job! I hope you made a test video so we can see the performance improvement between the two rear diffs!
Absolutely!
this was a great video hopefully you can do more like these
now i have to get a sk2 to put ur video to good use haha
that video was strictly mechanics explained :) very well done and shot btw. great job!!!
As I’m sure you know when talking about gear ratios the bigger number (with respect to 1) is a lower ratio.
I had a 250cc Ducati with a five speed transmission that attained its maximum speed in fourth gear. The engine didn’t produce enough power to get full revs in fifth.
Love you videos.
I like the way that every tool used was from harbor freight except the torch(from home depot or lowes) and the torque wrench. I own all the same tools. The socket wrench was from the older style 64 peice 1/4", 3/8" and 1/2" drive set.
the new case is far superior, but all of the sockets are 6 point.
That looks like fun, I always enjoy a good day putting in some work on my car.
Very nice video. Thank for the detailed information.
Great install video!
This video reminded me of a chrisfix video which is good because i love his videos too! Haha love these videos
Loving the attention to detail. :)
"penetrating oil"
oh shut up xDDDDDDD
To save your castellated nut when splitting the ball joint, I was taught to thread it back on upside-down - _very_ _carefully_ so I didn't cross-thread it - until the end of the ball joint was just barely below the nut, then remove as you show. That should keep the force of the splitter on the flat side of the nut where it's strongest. It seems to work well, so long as you have nice, clean threads to start with - but it's a bear to get started if those threads are already a little gnarly.
Looking forward to your driving impressions!
love the install videos
Enjoying the S2000 videos!
Can we have a video explaining how Honda designed the gearshift throws to be so (awesomely) short?
great video,keep them coming
Incredible work ! It must have taken you quite some time to edit and place the camera !! Well done !!
Good work and great video! I hope you do a review of how it performs!
This video must have been a pain to make. Great job! Clear and direct.
I don't know sh*t about automobiles apart from some chemical reactions that got my attention, but when it comes to mechanical stuff i am a zero, still, i could listen to this guy all day, hence my subscription... besides, a guy that tightens each bolt accordingly to specifications is clearly an enthusiast and someone who loves what he does... reminds me of Christian von Koenigsegg, another guy that gets me glued to the screen talking about stuff i don't understand like alternatives to a gearbox lol...
PuddyMod is the only way to go. Great choice
👏👏👏 Just perfect.Now we must see this car in action. 👌
getting hands dirty ! ! it is so cool to see how well you dominate the practice as the theory on your white board !!
i'm glad to see you finally wrenching.