
ฝัง
- เผยแพร่เมื่อ 17 ต.ค. 2019
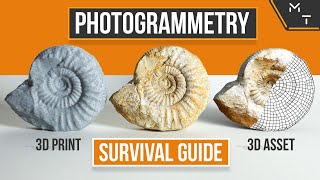
- In this video, I am showing you my experiences with using a turntable for photogrammetry, what worked, what not and what tweaks I had to make to get the perfect result. The software I used for this is Meshroom, which is easy to use and free to download.
*** Thingiverse parts
3D printable turntable: www.thingiverse.com/thing:392...
Edelkrone HeadOne
🛒 bit.ly/headone
Meshroom Software
alicevision.org/#meshroom
"I Print PLA" fan shirts are available NOW at: bit.ly/crosslinkshop
Get 30% off during Black Friday week (ends 2nd of December) using CYBER30 promo code.
THE PRINTERS I USE: kit.co/danielcrosslink/the-3d...
MY MERCH: crosslink.io/shop
BECOME A PATRON: / crosslink
CHAT ON DISCORD: / discord
BUSINESS INQUIRIES ONLY (OR IF YOU WANT TO SEND SOMETHING) - DANIEL@CROSSLINK.IO
FOLLOW ME:
INSTAGRAM - / danielcrosslink
TWITTER - / danielcrosslink
FACEBOOK - / danielcrosslink
WEBSITE: crosslink.io
The Music I use: crosslink.io/es, AMAZING for TH-camrs!
GEAR USED
kit.co/danielcrosslink/my-vid...
Disclaimer: As an Amazon Associate I earn from qualifying purchases. - วิทยาศาสตร์และเทคโนโลยี


Very useful tips!
Like the way that you not only show the final result but rather show us how far you went wrong until it success in the end.
Interesting result. Thanks for doing all the hard work to come up with a good end result!
In Agisoft Photscan you frist make one picture form the turntable without the object. Then you shoot all images from the object. Afterwards you create a mask by using the first image as a background. With almost no effort you can easily mask every single picture to consider only the pixels from the object.
Thats an interesting point, although this seems long winded obviously the setup is done once, I have this example working with 3 cameras inside a photo tent and given the software is free I'm good with it. I need to produce models of around 18,000 items within an automated pipeline, since you've mentioned that I'm gonna take a look at Agisoft!
@@marcfielding2460 agisoft is not free
Hey just wanted to say thanks for making this, I was about half way through your process when i found this finally lol. You just saved me a lotttttttt of time. Im still testing to see if i finally fixed everything but so far its looking good.
Awesome video dude. I work in web and software development but am just now getting into 3d modeling and photogrammetry as a hobby so vids like this are perfect.
It is amazing how the camera customization options can change all the results, I started trying with a smartphone, it was far away of getting a reliable 3d model, that way the best result was a lot of bubbles in the model, then I changed for a homely digital camera with ISO and Focus customization and the result was a very smooth point cloud, I use a manual turn table rotating each 6 degrees and manually takes the shot in 3 different elevations , additionally I use some patterns with scale references to make a real scale model,. Some models works better with mate orange color.
Regards.
It would of been great if you had a multi angle version of the 3d model at the end to show what quality is truly possible with this setup. Food for thought.
FWIW, the object should be sitting on a 'peg' (plugged into the platform) that is smaller than the base of the object. This will not only lift it off of the platform (so that the underside can be photographed, but shadows won't be as much of an issue. It is also easier to 'slice' the object free from the peg than from the platform.
Thanks for the suggestions. Will have to put some more time into this soon :-D
@@Crosslink3D, you are most welcome. Another thing that just occurred to me comes from a tip that I came across concerning greenscreens: if an object is too close to the background, then when light reflects off of the background onto the object, it will tint the object with the colour of the background. This will be less of a problem with a white background, obviously, but it will still lighten the edge of the object, altering the texture. Does that make sense?
i want to share a thought with you guys. Maybe a different color for the background would help? maybe the black and white background drives off the software a bit. The first thing that jumped to my mind was in fact to use a greenscreen-ish background to make a very marked contrast between it and the model.
Absolutely fantastic video very informative thanks
Amazing! Incredible videos! Thank you so much!
I've had similar results. I built a turn-table 3D Scanner with a variable vertical axis (gotta love Thingiverse!). It uses a Raspberry v2.1 camera with an enclosure (using white chloroplast) and OpenScan. I started using a grid background, then checkered. The results were less than good - if usable at all. I then painted the platforms with chalk/matte paint. Still the same bad results. The only decent mesh so far was using duct tape to hold an old tennis ball (and the base white background). It came out great! Even the random puff balls were rendered. Nothing else I've scanned has worked. I'm sure much of it is the PI camera. It's such a learning curve. I'm using 3x vertical axis positions with 60 frames per setting. Thanks for the video, you gave me some information for some new ideas to try. Cheers!
Subbed and really enjoying the Anet A8 upgrade series.
Thank you very much. This is immensely helpful, as I think I am going crazy about trying to make the scanning background invisible. I will try a similar pattern.
Super Video. Sehr informativ. Danke 👍
Thank you so much. Random pattern design is brilliant!
You are so welcome!
Thank you! Awesome tips! I'm going to try green screen on turntable and background then after removing insert flat solid color background and see. If no luck, I will try psychedelic turntable cover like you did. Thanks again, I really appreciate the documentation of this. I've been doing trial and error myself, and it's a lot of work!
Thanks Daniel
Very nice work, that clarify so much for us!
Great to read you liked it! If you have ideas for other topics I should cover, just ask me to make a video about it.
@@Crosslink3D I am trying to make 3D faces with photogrammetry but when people send me the pictures, the programs that I use: Meshroom, Regard3D and Zephyr, can not make the 3d picture, appears a lot of errors. I´ve asked to take a 360º pictures with a good ilumination but I doesn´t work anyway. Do you have any idea? Thank you! Luis
That benchy looked like a perfect shipwreck with possible treasure inside!
You can use the turntable to your advantage so you don't lose camera positions. There are two ways to think about this...get rid of the background by making it featureless or for difficult to handle objects, add features on the turntable so it helps the reconstruction.
Very helpful video, thank you! I want to try this with my high aperture macro lens to digitize tiny objects so the info is appreciated
DId you get some good results yet? I am eager to try out some other programs soon to see the differences in results.
@@Crosslink3D I haven't yet, I got a bit discouraged seeing people have done it with microscopes and focus stacking which will be hard to beat. I do still want to try when I find the time!
How small you talking? 20mm, or 2mm and smaller like an ant? I would like to help
Both of y'all are welcome to take the info from my latest video on my channel and polish up the info contained in it. I made it in a hurry, so the production quality is some what low. I'll link it in a separate comment in case it gets caught in the TH-cam spam filter. this work flow works for meshroom too its just slower is why i didn't demonstrate it here.
th-cam.com/video/dbzO8Qotp08/w-d-xo.html
yeah, everyone has the turntable idea when first using photogrammetry. however, when you study how these systems work you find that they require consistent lighting on the object and tend to benefit greatly from mapping the environment. that's why most require you to arc the camera around and not rotate the object.
That's exactly the point. And most of us made the mistake to hide the turntable whereas it actually is necessary to have a lot of reference points that move compared to the unicolor Background
amazing. such a good talk through!
I've had really good results with taking video instead of pictures and rendering the video into individual frames. From there you can go through them and delete the ones that are blurry and so with pretty minimal effort you've got yourself a large data sample which meshroom really likes :)
Good one to try out! I'm looking into this as well.
Really depends on your camera. Photos will allways be of a lot better quality BUT if you camera has a very good video function it might be a an alternative way. My canon 6D mk2 video function is a joke compared to the photo quality.
Many thanks for sharing - great video!
Great job
Coming late to the party, but I've had some success with CCTags. They're a type of tracking marker that Meshroom supports. They're rotationally invariant and work well at oblique angles. I have four markers printed on regular printer paper at known positions. Then in Meshroom you just tell it the positions of the markers and it does a better job at position estimation, as well as providing orientation and scale information.
Great insights! I’ll give it a try!
Awesome Work Sir 💪👌
Great to read you liked it! If you have ideas for other topics I should cover, just ask me to make a video about it.
Awesome. I can now take a scan of my benchy and 3d print it.
😂 That's actually the best use case I can imagine, hahaha
Very cool topic 💝
Thank you, good video
This is a genius idea
Awesome video. I can't tell you how many times I tried messing with settings to figure this out. Then when googling the problem only finding abstract coding solutions and editing camera sensor data files, etc. Such a waste of time. The camera just needs to fix it's location with a turntable the results are great! Thank you so much :)
Great to hear!
Can you send a link the the patterned base 👍
thanks for your workflow - am trying for the first time. I'm just gonna print a black and white page with each letter of the alphabet in big font for the turntable thanks!
2:23 I had the same problem and I cropped the background. works fine!
my turntable design has some markers, but nowhere near as many features as yours.
excited to see whether this will improve results
Thank you so much for this. I just ordered a light box and I have a turntable that is for a spice rack and it has a raised grid pattern. I'm going to use your method and put some design on the turntable. I didn't realize anything under 300 pictures is a low data set. That's a lot.
You are so welcome!
Daniel - a very Kool Video chap, very helpful. Where did you get that plate cover from ?
Many thanks captain 3D
You are amazing! very helpful video !! Thank you
You are welcome!
Have you tried a multi colored grid with basically four distinct sections? Or you could go even further and make a what amounts to a compass with cardinal points all varying in color. The point being you can align you object up perfectly and also have a perfect grid that maybe the software will be able to use better.
if you add a light, like a LED chain, on the table, that will just gets scanned as well, and you can remove that, in editing software later - - with correct shadows, every detail should be correct, or so - -
Hello, great video. I wanted to ask you... when you used the table with pattern, is it still a must to have a plain black background? Will software manage it with something in the background? Thanks👍
Thank you very much
The other problem you will have here is shadows. The model needs to be lit evenly on all sides because the shadow changes as the model moves around. This confuses the software. So put it in a nice lightbox that lights the model from all sides and gets rid of the shadows.
Guten tag, great video! Where did you get the random background?
Very interesting
Appreciate your work Daniel. That reminds me of my beginnings in photogrammetry back then in 2013. I've been struggling a lot untill finally figured out how to do it properly. Unortunatelly there is a lot of misleading information in your video. If you want to make a video update on this feel free to contact me. I would be happy to help you. So you can spread the knowledge.
Sounds like a great idea. Let's talk about some of your ideas. Can you contact me directly via eMail? daniel@crosslink.io.
Excellent! thank you very much.
Great to read you liked it! If you have ideas for other topics I should cover, just ask me to make a video about it.
nice video !!! i try to record a video of the part you what to scan and then extract the frames is much more faster and you will get a lot of images to work whit
You so should turn the scans into an STL and print it again, and then rescan that and see how many times until it is no longer recognisable as a Benchy.
Like when you photocopy a photocopy. Dude the handouts they used to give us in school were really bad because they would never copy from the source material.
Awesome idea!
The scanned Benchy is perfect for Halloween.
Newbie here. First what a awesome informative video. I have been racking my brain trying to figure out what is wrong with my pictures of a white car body. I tried the turnable method and then I went to outside and walked around with my phone. Been getting nothing to really poor looking meshs. I now have a direction to go. A ? I have. Should I paint the body grey? Since my turntable is manually turned should I be taking more pictures?
My last attempt finished with not errors but I got no image in meshroom. Only the camera cloud with gaps like you were getting.
Thanks again for the great channel.
Had to subscribe and two thumbs up👍👍
Hi
You can try fixing the tripod with camera on the turntable itself then I think there will be no need for black background.
Hello just subbed. I noticed the images of the model boat are crisp and clear. Is this effect primarily down to the lens? I have purchased a Sigma 105mm F2.8 EX DG OS HSM Macro Lens
which hasn't as clear images from a turntable. There is detail lost when the object is no longer facing straight parallel to the camera lens any tips would be greatly appreciated.
Awesome 👍 thanks!
You bet!
finally some 1 who wants to do it this way.
I am curious to know if a motorized turntable would be good for a bigger object like that of a G I Joe Skystriker, or a Cobra Rattler.
you need to add the lights to the turn-table, when it moves the shadow isn't fixed - - mount lights on the turn-table and, make the room dark and, if possible, to the colored image, the black and, white pattern and, give it colors, as well and, more precise shapes, like triangles, square, things with sharp edges - -
Thank you for sharing
Totally correct! The light needs to be stable relative to the object.
so, if i understood correctly, lights should rotate with objects?
My experience with Agisoft has shown that all the hassle can be skipped simply by just moving the camera instead. It allows for a higher quality model too.
Great job! Where can we find the pattern at 08:00?
i thought about putting a camera on a track and having the camera move around a object , but i might try this first now as it seems like this would use up less space
Great to read you liked it! If you have ideas for other topics I should cover, just ask me to make a video about it.
best to keep the camera in the same position. this way the lighting stays consistent.
Could this work for dental impressions to then make grillz on a 3d program or isn’t it precise enough to fit on the teeth afterwards?
When you make a 3d model like this does this software make it into an stl or what software do you use to make an stl.
The random background for the turntable was a great idea! I'd always heard that turntables didn't work for photogrammetry, clearly that's incorrect.
Glad it was helpful!
Meshroom requires movement in the background to work out the telemetry.
I wonder what graph paper on the turntable would do- if it works, you have a built-in size reference. And putting a dowel in the (upside-down) smokestack would get Benchy up high enough for comprehensive photographs, wouldn't it?
I use a dowel for holding up certain parts and it works a treat
Great video: got a question I have a really cheap turntable. Right now I am experimenting with a plate i made from Lego with features. The turntable is battery powered and I actually try to just shot continuously a whole rotation. I figured that out BUT I am not sure I can get a fast shutter. To my question. Can a lot of low aperture photos offset the short focus area? Any thoughts on it?
I am just beginning to try this technique. I have an old figurine that is somewhat shinny and I need to dull that. My question is: How did you trigger your camera when the turn table was rotating. It looked like the meshroom display had very evenly space trigger points. Did the turn table rotate in a stepped fashion and send a trigger to the camera?
Thanks for the video. Trying it now as we speak. Did you change any settings in Meshroom or leave every setting as default ?
For those demos, I left everything on default.
this is such a better solution that kinect!
What if you used vanta black as background and for the turntable
My man- You're a geneus
What software do you use to control your camera?
How did you crop all the images?
I just found this video.. would it help if you put dots onto the turntable for the program to reference from say one every 3cm or so.. in various rows much like you did with the black n white pattern. Also, I think if you raised the item above the platform it would help with getting the bottom of the item better, something like a small dowel with blutack on the top to hold the item and can be used for any item at a later date, which can then be cropped out in the editing process.
thankyou
You're welcome!
2 years late... But try f11 up to f22 when taking images. You will need more light but will remove out of focus areas. If parts are out of focus there are no details for the software to pickup on in those areas
Hi question, I tried with a still camera and a turntable I took 75 photos in a higher position and over 75 in a lower position. In meshroom the cameras are fixed and do not rotate around the object. Do I need to change anything in the software? I used ready-made confiuration.
Have you tried this with a DSLR? and if so does it get better results? I would assume so given DSLR's can capture a lot more detail than a phone camera.
you can use newspaper for table and background
waht is the best photogrammetry software. I am not worry about paid software. please tell me.
Wouldn't it be better for the software if the object was stationary and you moved the camera around it in order to prevent lighting on the object from changing?
Have you considered a green screen approach to using a turntable? I believe there is free software out there for editing green screen photos.
A polarizing filter could help on the camera.
Try using the turntable to turn the camera around the object instead of moving the object itself.
Then instead of wasting detail trying to emulate camera movement, you can instead spend your efforts making the reference background ideal?
Just a thought.
A9 II at 30 FPS JPG would be the best way to scan fast.
Where did you get the random pattern?
You can create it with any paint software that has some filters: physicscomputingblog.com/tag/random-noise/
@@Crosslink3D Hello this link is broken, could you please suggest whre can i get a pattern like yours ?
@@lehnerviktor I know I'm 8 months late but the broken link above mentioned a program called 'imagej' - I was able to install on my manjaro linux sytem but any arch or debian (maybe Windows also) should have. It had 4 steps - 1. Ctrl-N for new image (should give a black canvas if chosen by default). 2. Add noise using Process->Noise->Add Noise 3. Next Step is to increase size of noise using Process->FFT->Bandpass Filter...I chose down to 100 pixels and up to 30 pixels in the form. 4. To get desired image, use Process->Binary->Make Binary
Nice video, but music at the end almost blew my speakers... Would be nice if it wasn't that loud!
Sorry about that
That boat looked like a shark on the first try with the pattern
The software uses the static background to calculate the locations of the shots. I use a similar non-repeating pattern with four distinct quadrants.. Don't use something like a checkerboard, it creates the same problem. There is a 2-part video here th-cam.com/video/ye-C-OOFsX8/w-d-xo.html that talks about the do and donts of photogrammetry. He discusses the background and lighting issues you had. Cheers.
what's the name of that spray?
Chalk spray. It’s also used to mark the soccer fields
@@Crosslink3D Thank you. I'll look for it and try it out.
I'm moderately experienced with 3d printing, but I'm a total beginner when it comes to 3d scanning. I would think the most accurate 'scanning' method would be a sort of 'removal of volume' that uses lasers to measure the distance to the surface of the object as it rotates and then digitally 'sculpt' a 3d model. I would think this would be far more accurate and reliable than merely stitching together an assumed 3d model based purely on a data set of 2d images. Does anyone know if this method exists and does it produce a superior result?
Sorry I'm late to this conversation, you certainly get 3d scanners like that (I attended a demo at the mine) but they would be very expensive.
I think that is called Structured Light Scanning.
This is an automated setup and I also used a random turntable www.thingiverse.com/make:643603
Why not just record it in 4k and somehow export all the frames. Would that work?
It depends on aperture, ISO and shutter speed settings how sharp the individual frames would be. Motion blur is also something to consider. You need a high Fstop like 11+ to make the object in focus for all the depth it has. This could lead to very high ISO settings for video shooting. I had to go to 1/5 of a second to keep the ISO and sensor noise low to make these fotos. Filming is usually done at 1/50 of a second. For less motion blur you would need something like 1/100 or 1/200 of a second at much higher ISO then. But I can give it a try...
@@Crosslink3D I dont have a fancy camera but i do have a gopro. It has a linear mode where it doesn't really have the fish eye view and it can get up to 120fps. I also have a mini turn table thing. It turns pretty slow too.
@@Crosslink3D more light = lower iso
the problem with this metod is that you can´t take details from below because then you dont have any reference on the surroundings
Make a donut shaped turn table with the camera on the donut. the subject where the donut hole is on a stand. Just a idea.
I think that actually exists on Thingiverse...
@@Crosslink3D Seeing your macro scan got me busy, and was able to use my marble turntable I decorate cakes on with a white sheet in the background stretched tight. I had to manually turn the turntable, but keeping all that white in the background it worked perfectly ! no gaps in camera spacing. Thanks for video !
try Regard3D
Just to show how much of a difference this makes, check this out github.com/alicevision/meshroom/issues/283 - I added a link to this video, with about 10 minutes of cereal box cutting and letting the kids loose with colouring pens the results are amazing.
Simple but effective (and creative) idea :-D
Crosslink so we’re actually building a proper booth now using a raspberry pi, arducam board and 4 cameras thanks to you, we have a few ideas which I’ll share back here when we iron out the detail oh and we figured out how to network cluster mushroom the easy way
try to up side benchy... and make a new set o photos, and then will have a full and more correct model
Good idea, will give that a try!