Making of PCBs at home, DIY using inexpenive materials

ฝัง
- เผยแพร่เมื่อ 17 พ.ค. 2012
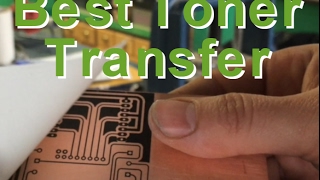
- An easily understandable video demonstration of how to make PCBs(Fabricate) at home with available inexpensive materials using toner transfer method.
Requirements for making PCB are Plain copper coated board,Ferric Chloride,PCB hand drill,Hacksaw blade, Iron box, LASER printer(not inkjet) and Glossy paper [photo paper].
Here Cadsoft Eagle has been used to design board layout,any other CAD tools can also be used.Acetone[nail polish remover] can be used to clean copper surface. Immerse the board for a sufficient time in boiling water for peeling off the paper.While peeling slowly remove the paper from borders don't remove it rapidly since toner might also get removed. If you miss the continuity in the toner mask or if toner gets distorted [path or any small area of design] while peeling off the paper use Permanent marker[like CD maker] to manually draw the path before etching,wash the toner transferred board with plain water and make it dry before drawing with Permanent marker. For fast etching stir the Ferric Chloride solution for every 2 minutes.Air pump agitator[like aquarium air pump] also speeds up the etching process by bubbling through the solution and warm solution can also be used for doing this.
The board made in this video is for object tracking robot using Atmega328p and Xbee Pro. - วิทยาศาสตร์และเทคโนโลยี


![[Full Episode] Hell's Kitchen Thailand EP.11 | 21 เม.ย. 67](http://i.ytimg.com/vi/WA5WOIBaxXM/mqdefault.jpg)
![[실시간] 전철에서 찍힌 기생생물 감염 장면 | 기생수: 더 그레이](http://i.ytimg.com/vi/4nkFvwxGAfA/mqdefault.jpg)

Tip: Use acetone (nail varnish remover) to wipe off the toner. Scrubbing risks damaging fine tracks whereas acetone dissolves the toner.
Yes
GOOF OFF is actually way more effective, and hydrogen peroxide + muriatic acid works better for stripping the unwanted copper.
Be here for your business solution and Idea!
Fortitude Tech is having 3+ years of Industrial experience and specialists who hold expertise in executing various services like PCB Layout Designing and Development, BOM, Gerber file generation, High speeds Digital Designs, High frequency RF Designs, Multi layer PCB design etc.
To know more contact us on-
+91 8769000273
akjarwal.786@gmail.com
@@pcbdesignhub1847 This is a DIY video. People are watching this so they can do it themselves - not order PCB's from you
the only problem with acetone is that you'll get black/grey smudges on the bare board as the toner dissolves.
Thanks for this very clear and short description, devoid of all unnecessary detail. This is one of the best of a number of videos on this subject. Well done.
So awesome. My son and I are just getting into electronics. I never thought about how integrated circuits were made before robots took over the job. When we are more advanced in our knowledge, we are totally making our own integrated circuit!
Good job and great video. I used to do it that way too. I just want to add a little tip that will expedite the process. First, you will need to dip the board in ferric chloride solution made out of hot water, and you need to agitate it. What I did was, that I put a small marker under the container with the board and the solution and gently rocked it. Also I used a lamp on top of the solution and the board so I did not lose heat, so the agitation process is faster. That worked like magic. Good job and good for you.
Thanks! Will give it a try. Nice with the reverb on the narrators voice, almost gave me a dreamy feeling. :) Thumbs up!
Awesome! And like a sucker I almost bought a very expensive kit to do this, glad I saw this video first! Cheers!
me too! :)
this is badass, you deserve more views, this is an amazing thing!!!!!
Great DIY technique for making custom components. Thanks
Thank you for this video! I'm going to use this technique to build a synthesizer!
OK, I'm going to have to try this! That looks very professional!
Very well done and very informative!
great video any suggestion where i can go to read one of these circuit boards i want to understand how to read them
Wow this is a really great simple way of doing a board, Ive always had hit and misses with the timings of photo etching... Either under or over exposing...
Indians rock because they dont need any gloves or ventilated area for such stuffs
??
Yash Lotan Hence the lower mortality.
yes
+mrco74 HAHAHA
i read this and laughed out loud.
(dont touch the FeCl3, 3 seconds later, he is holding a wet, dripping board)
Thank you for such an informative video.
+Vineesh Kumar Welcome Vineesh
Thank you so much...You almost saved my day....
Also remember to neutralised the ferric choloride by putting baking soda before disposing it off.
Can't it be re used couple few times????????
Ivan Paul
hmmm...good suggestion..may be it work but not tried..
Tabrez Shaikh
I saw more videos and they say we can save it for future..i will also try it..
Ivan Paul You can use it again, i have been using the same ferric chloride for a while now, the only difference is that it will get weaker over time
Tabrez Shaikh what is the best photo paper to use and what brand?
Seriously man, very interesting subject..
I didn't realise or known the importance of Electrical & Electronics..
But these are most valuable subjects.
Well done friend.
Impressed. 😊👍🏻👌👏🙏✊🇮🇳
Very clean and clear tutorial bro :) good job :)
we need to get this good man a drill and instruments, bc he deserves it
Very beautifully and clearly explained. Keep it up!!
This is helpful. Thank you for sharing!
Great tutorial, LOVE IT!!!!!!!!!!!!!!!
This is the best than the first one I watched.
Really helpful brother!!!
loved it...will definitely try this. :-)
I had to log in to congratulate you for a job well done. Best video I seen on making boards at home. Excellent!! Thank you for posting. Since you seem to be into electronics, Can you recommend a program that allows me to design circuits and test them before making boards?
Dude, what program does you use for designing it?giving me a new knowledge man.it a perfect time since i need to do some diy project.thanks a lot for the video man.
Everyone seems to be complaining, but I actually really liked your choice of reverb.
nice build and a SUB!!! oh yeah and a thumbs UP!
Hi and thanks for your help
I have a problem with finding the right paper for this project . Do you have a brand or model number of paper you have used that works well. I am using the Iron on method with MG Chemicals Ferric Chloride etch
Wonderful video demonstration, thanks to you.
Good useful video. I got similar results when I tried with some unbranded glossy photo paper. The type of paper used plays a significant role in determining the quality of the PCB. Please tell us what brand of photo paper you used.
Very Nice Work !
Helped a lot for an amateur like me... Thanks many likes :D
Hey brother! before my question. a big cheers to ur video. This work of urs is literally going to save me from finishing my project on time. i have one question, Do you know what is the minimum distance between two consecutive pathways in the pcb for the two tracks to conduct at maximum efficiency? please clarify my doubt thanks
That's a really cool way to make a PCB. Thanks
What density of the paper have you found to be optimal for iron-based layout transfer?
Wow, you do it with such ease :)
Btw, are you sure it's a good idea to get in contact with ferric chloride and cupric chloride?
The first one is proved to cause infertility (in rats), and the second is a bit hazardous.
smarty and too usefull for made own smart home like own LED lighting panel singal (opened outside doors via bluetooth ON/OFF signal), with old digitizer too detect rain can simply on 12V servo closing rear windows and many more. Thanks
nice video, helped me learn to design one
Great video, very helpful :)
this is cool !!!! U helped us so much!!! must be appreciated!!!!!! THNX MAN!
Thanks man!!!!!this was a great help!!!!!
Nice video, thanks for sharing it with us :)
This was a super simple and amazing video. !. Thanks.
Just one area of improvement I want to suggest. You should have added the picture of board in the end after drilling.
Anuradha Sharma hello
nice video bro, i like it its very easy and understandable!
GODBLESSYOU!!!
I apologize for repeating myself. Such a great work with such modest tools. These results almost go against common wisdom. People spend too much on tools nowadays.
awsome video.....good job bro...
Its really easy and fast way to make a PCB. thanks for that.
please tell me which paper you have used for printing the layout on copper clad..?
Wonderful video helped us a lot THANKS !!!
Very good videos on how to make home made pcb
great video
thanks a lot for the information.. great video..
good video - thanks - should make my next project easier.
can the drilling part be done before dipping the pcb into the ferric chloride solution?
is it advisable to use steel scrub? or you can also use sand paper?
thank you very much , really helpful ! ,now , I know how much time , I need to immerse the pcb in the acid .
Awesome video Thank you On way to make my first PCB in years since a graduated..
me too
you make it so simple but so good
Thank You Very Much Pareekshit . You Have Done Really A wonderfull job . Has helped a lot . :-))
thanks. good luck
very well done. And nice music!
Thanks man , wonderful video
Good One!!! Thank you!! :)
You should have used acetone to take the toner off. It's much easier.
It was really awesome!!!! learned a lot from it
IS it really tough or difficult to prepare pcb's
how much cost is involved in it?
just awesome!!
How long does the toner transfer stays before etching bcs it seams traces are not strong if etched few mins after transfer
whats the name of the paper that you used? and that paper has to print through a laser printer?
Informative video #pcbdesign
I like this very much and you have make my work easy
awsome work dude......thumbs up!!!!
do you have to passivate the copper and substrate after etching?
THANKS BRO WORKS GOOD
I SUGGEST YOU TO MAKE YOUR SOLUTION MORE CONCENTRATED......
One of the best video on yutube
Wow .. great video - Thanks
Do you have a link to where I can get the copper plated board. And what type of board is the copper plated on?
good job bro it helped me a lot.......:)
This video is well made. Thank you.
Great Job man.. :). really useful. Thanks.
I am having hard time trying to make my own PCB using the toner transfer method. When I go to iron on the circuit artwork, the photo paper sticks to the iron long before it will stick to the copper clad board. I have sanded, scoured, doused in alcohol and wiped it clean before attempting to transfer. Suggestions?
Well, i couldn't iron it evenly so i kept it under a 100w bulb for 15 min and it worked out great!
Great video! To the point and extremely effective. Thank you!
Thank you. God Jesus bless you!
Bro,what if the board dimensions are greater than the iron? Will it damage the board?
Thanks for the education!!!!! 👍🏼👍🏼👍🏼👍🏼👍🏼👍🏼👍🏼👍🏼👍🏼👍🏼👍🏼👍🏼👍🏼❤️😂
Brilliant!
agree, totally :)
can the toner which remains on the pcb and thereby help reduce the corrosion of copper?
Thanks for uploading.
where can i get copper plate and ferric chloride we can also use magazine paper........
lol...nice video my friend and you sound like Raj Koothrappali :D
+MrOmnos
Very funny...
nice...what kind of software tools use for this making
Good demonstration.
Hey a small doubt are you using single sided or double sided copper sheet??
GOOD JOB I LIKE IT................
Best work dude
awesome pcb manufacturing.
Superr sir god bless you sir
thank u soo much i helps alot!!
Excellent 👍