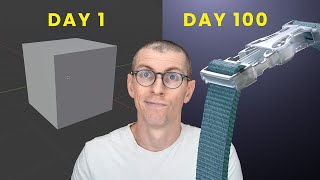
Wait the .STL file for the switches looks nothing like the ones you have in the video. They are so much more boxy/chunky. Did you like scale them down to be flat?
Cool!!! You able to do cool stuff. But need to master the basic a bit more, there are better way to do the same atleast in some areas, but overall its amazing❤
@@Nickel3DIf you do a bevel, and not satisified with the bevel, you don't undo and do the bevel 1 one time, there is a window in the bottom left. If you expand that you can thange parameters. You don't have to move the object up to focus on that object, you can just isolate it, all the other will disappear when you that. Just click / your keyboard You don't delete the face and and fill it again to get that middle edge, you can just use the knife tool and cut. It makes it much faster. You don't have to use 2 mirror modifiers to mirror in both axis, you can do both in the same mirror modifier. So you can save time.


Revisiting this and finally completing my project. Thank you again
Glad you enjoyed!! Send me the result on IG
Thank you so much. This has been long waited tutorials that yet TH-cam did not have until yesterday. Keep up the good work.
Awesome to hear!! I’ve got other videos doing the same stuff, check them out!!
Great tutorial. Thank you. Looking forward to more.
Thanks! New recording in progress 👀
Super Nice Tutorial. Speed is just perfect to follow along.
Thanks! More coming 👀
Another part of the great series, thanks alot!
Thanks, enjoy!!
Great job! I plan on following the rest of your videos on this, they're wonderful!
Much appreciated!! Part 3 on this series is coming 👀
@@Nickel3D ill be here for it! 😊 Thank you so much for these
Perfect!
That's what I write under every video you make! Don't stop!
Thanks!! 🙌🏼
so awesome & greeeeeeaaat .. thank you : )
Glad you enjoyed!! 🤝
Another Blender channel on its way to the moon
Thanks for the tutorial and keep it up!
Thanks!!! More coming 👀
To apply bevel at 30:50 turn off "clamp overlap" in the geometry of bevel modifier. And give very small bevel amount.
Good tip 🤝
Amazing Video! The Attention to details 😍
Thanks!! More coming soon 👀
Thank you man for your effort ❤❤
Absolutely!! Part 2 soon 👀
Thanks for posting, really nice videos!
Thanks man 🙌🏼 next video on Friday!
Awesome Tutorial!!!
Thanks!! More soon 👀
Use sphere mode, with propotional edit mode, it will look better quickly.
Ahhhh good idea!!
Wait the .STL file for the switches looks nothing like the ones you have in the video. They are so much more boxy/chunky. Did you like scale them down to be flat?
Completely forgot that i did that! Yes, I scaled them to fit under the keys. Great catch
Thanks brother
Yessir!!
Love it
Thanks 🙌🏼🙌🏼
Very nice!
Thanks 🙌🏼
Ты крут! Огромное спасибо за ролики!
Thanks!! 🙌🏼
Do you do any commissions or gig work?
Sure do! Usually through LinkedIn, Instagram, or reaching out to clients
amazing work can you guide me where to get the reference images ?
Yes! They are all on my Patreon for free!! Link in description
When are you droping part 2?
ASAP!
Amazing! May I know your computer specifications?
Thanks! I have a 4070Ti graphics card, Ryzen 9 7900X CPU, 32GB of DDR5 RAM, and an ASUS motherboard
you are goated
Appreciated 🙌🏼
subscribed
Awesome!!!
Cool!!! You able to do cool stuff.
But need to master the basic a bit more, there are better way to do the same atleast in some areas, but overall its amazing❤
Awesome thanks! Which areas do you think I could do better?
@@Nickel3DIf you do a bevel, and not satisified with the bevel, you don't undo and do the bevel 1 one time, there is a window in the bottom left. If you expand that you can thange parameters.
You don't have to move the object up to focus on that object, you can just isolate it, all the other will disappear when you that. Just click / your keyboard
You don't delete the face and and fill it again to get that middle edge, you can just use the knife tool and cut. It makes it much faster.
You don't have to use 2 mirror modifiers to mirror in both axis, you can do both in the same mirror modifier. So you can save time.
How can I get the references?
You can download everything for free on my Patreon! Check the video description 🤝
LFG
😤😤