I've had my 2004 325Ci for a couple of weeks now. The steering feels pretty awful, wandering around, tramlining etc... After jacking up the front of the car yesterday I can see that there is a LOT of play in both of these front control arm bushings. Your video has inspired me with the confidence to have a go at replacing them both as soon as it stops raining here. Thank you!! I'm hoping my can of silicone spray will make this a relatively easy task :)
Gotta say man the amount of stuff I've replaced and all your videos have been super helpful straight to the point and you correct if you've done something the hard or wrong way thanks heaps man!
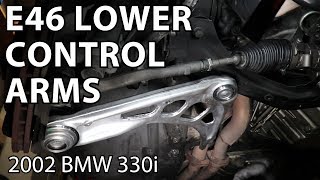
Twisting the control arm bushings really helped getting them off. I tried banging with a mallet for awhile, but that got me nowhere. Thanks for the vids!!
Hey Kid, AWESOME tip with the grease just by luck I had some, spent over an hour with silicone spray and a rubber mallet. Put the silicone grease pushed it on by hand in minutes... you are the man when it comes to "I KNOW A SECRET " THANK YOU!
Those crossmember 'Torque to Yield' bolts are part of an engineered system in the event of a crash or impact. BMW states they are to be replaced if servicing requires removal. My son and I decided we would reuse them only one time on our E46 with careful torquing. We did replace them when we installed a new Crossmember.
Best explanation I have heard thus far for the angle torque on the skid plate bolts has to do with crash specs. Something to do with how the stiffener plate reacts in a collision. Not sure how exactly, but, I haven't heard anything better yet. My M3 has 16 of those bolts and it's the same tightening spec. Great video, keep up the good work. Love your videos!
Also, these 8 bolts are stretch-type and must be replaced. There is also tightening pattern for them, the "skidplate" is structural componenent and without it being installed, car should not sit on the ground.
Yeah the torque a fastener needs has nothing to do with what it's bolting to what, it has to do with the size of the fastener, the hardness, and the number of threads.
I had a terrible time trying to get the old bushings off. I ended up breaking the metal support away from the rubber, then had a heck of a time getting the leftover rubber piece off. Tried WD40, screwdriver, hammer, and cursing, (didn't have a 2 jaw puller) and finally ended up using an angle grinder with a metal cutting disc to cut through the leftover rubber/metal (there is metal molded inside the rubber). Then it came off easily. I did hit the control arm a little bit with the angle grinder, but sanded it down a little to smooth it out. I used dish soap to lube the new bushings and the metal on the control arm, and that worked well. Still a little tricky to line up the new bushing holes with the bolt holes. I didn't remove the wheels, but I wonder if removing them first would have made the installation a little easier without the weight of the wheels. The freakin' skid plate was a pain too, as most things are when you are on your back under a car, and I didn't have my impact driver. All of these jobs seem to take me much longer and are much more of a pain than they seem to be for the 50's Kid... but thanks so much for the many videos. You've saved me thousands over the years, and I've learned a ton.
Hi Jason - thanks for another great video - was certainly envious of how easy you managed to get the new bush onto the control arm - had to rig up a puller tool using 300mm threaded rods to get the bush on sufficiently far to allow it to recess into the guide rings on the chassis - control arm had to to protrude by approx 5mm out of the back of the rubber bush to allow alignment - TRW bushes used. Still an excellent DIY job - steering sharp again.
Hey I just finished watching all the engine rebuild serie in 3 days that you have done and also the Auto transmission rebuild on that beautiful BMW e46. Man! you're a genius.. the way you several times improvised making your own tools Wow!... Thank you so much for doing all this to be honest Im a Bmw e46 fanatic I owed two e46s and i didnt know anything about cars on how to even change the engine oil thanks to you now i Know... and of course I subscribed to your channel!!!! Amazing camera work as well... Im planning to rebuild my M54 engine next year I have big plans for it... Im sorry for the bother but your think you can do a rebuild on a Manual transmission because I've seen some and they look totally different in the inside from the automatics.. But Great job man you earned a subscriber for life! Thanks in advance :)
I did mine at the weekend and let me tell you they weren't that easy in coming off the wishbone, even with penetrating fluid they were a pig! I also replaced mine with a polybush setup as they last much longer and it's an upgrade. Much better feel on the steering and no longer wonders. The standard bushings don't tend to last too long. Some people have reported changing them before a year is up. Good enough reason for me to go the polybush route. :)
psbushings.com/bmw-3-series/ I used the PSB604P found on this website. Very good quality and they were fairly cheap too. I've just checked and they have a distributor in the US too, www.armstrongdistributors.com/collections/bmw?page=2 $44.10 delivered with a lifetime warranty! Can't go wrong :)
thanks for the video! regarding the torque specified by BMW/Haynes/Bentley etc. i like to just look up the torque for my specific fastener in respect to its thread diameter and material grade to make shure its in the ballpark. There are lots of charts out there that tell the torque (usually they are calculated for a µ of 0,14->friction factor and 90% of Rp0,2/Re->the elastic limit of the Steel used) ...i like the fact that you use a (nice) torquewrench...thats not a given on youtube lol =D you seem to do the stuff the right way, keep it up! edit: i looked up the M10 10.9. It would be torqued to 69 Nm when its installed dry. So at 59 Nm you are no where near the platic deformation range. The ones for the skid plate though are a different story. Based on 59Nm+90°+30° iam guessing they strech. At a threadpitch of 1,5mm, 90°+30° would equate to 0,5 mm relative movement . That means compressing of the "plate" and streching of the bolt. As the bolts are 35 mm long and assuming 1,5xD would be the minimum thread engagement there would be 35mm- 1,5x10mm=20mm that are affected by the streching. If we say the "plate" side is equally stiff as the bolt (plate side is normally way stiffer than the bolt side) there is 0,5/2=0,25mm of bolt strech happening which is roughly 1,2%. Total elongation before breakage is 9% for grade 10.9 steel. A simple test would be to compare a used bolt to a new M10 bolt and hold the threads "into" each other. This method works great for Headbolts and rod bolts...
Great vid all around as always. Props. I'm almost certain your bushings were already replaced (as you noticed by the control arm mark). But I just replaced mine with Meyle-HD. The ones that came off had no markings on either side of the mounting flange. The only identifier on the originals is "BMW 67560631" stamped around the bushing flange.
Mechanics keep telling me I need to have the control arm bushings pressed for my e46 318i M43 2000. But it’s the exact set up yours has and I replace them just as you have (old bushings off, new ones with soapy water. Have you had this same advice from mechanics re the need for a machine press?
Windex is better to use than grease. Grease makes the bushings swell and you'll be replacing them in a year. Turner Motorsports actually has a reinforced bushing they sell for like $200
Ha, you really make it look like child's play 😉 I thought it'll be easier to change the complete control arms with the bushings already pressed on... It took me three days, a pickle fork and a 5kg sledgehammer to get the freaking ball joints to separate! They were just insanely stuck. Hit them with penetrating fluid, tried to heat them up with a torch... nothing. Just whacking the crap out of it for a long while was the only thing that helped. Btw, the original bushings are filled with fluid. Mine where actually leaking! Meyle bushings are solid and I have read they are not as good as the Lemfoerders or even Febi-Bilstein. For E36 the Meyle HD are great though.
I don't think that there is that much of a difference actually. AFAIK, Meyle HD are one of the better options for E36. I used that on my E36 convertible, and so far they perform great. I was about to do the same for my E46, but searching around, I found out about the fluid thing, which explained the strange leaks that I was seeing on mine. And Meyle HD for E46 being solid, made me doubt my decision, so I went for fluid filled Lemfoerders, which I think are OEM suppliers in this case. So far the car handles fantastically... well I actually replaced all the bushings in the rear also, including subframe, diff mount, RSMs and rear shocks, so I guess it has no chance but to handle great 😉
The OEM were fluid filled (Lemforder?) units I think. Looks like you're swapping out another set of Meyles. So somebody must have done them before you. Also why they were easy. Getting off original ones with 150k, that was more of an adventure for me. Love these Meyle HD units on mine!
I have a similar experience with OEM bushings, which fit tightly and there's no way to install them by hand.There are special tools made for this purpose, i.e. those made by Koch or MIS. My last set of front bushings was installed on new control arms outside the car and I needed a 4 lbs hammer for this - the 2 lbs hammer did nothing.The reason they recommend to lube with water is that the inner rubber surface of the Lemfoerder bushings sort of binds to the control arms after installation. Oil or other lubricants may prevent this.
The silicone paste was the key--I couldn't get the meyle ones on without it. I tried but cut it out. I do believe the silicone paste will get squeezed out over time and the bushings will be just as tight as they need to be, however soap and water is probably a better thing to use.
One thing I do like about the e46 is it seems to be a bit easier to work on than other cars. I too also found the additional TTY angle odd and just did the same 43 ft. pounds for my reinforcement\skid plate
For anyone having a hell of a time getting these bushings on, another way to make it a bit easier is to run nearly boiling water over the inside of the bushing for about 30 seconds. After pounding with a mallet for 1 hour with silicone grease and not getting far, the hot water did the trick!
Wish my bushes came off like that, had 1 of the bolts snap, tried cutting a line in it to use a screwdriver, that failed so popped to the shop n got an easy out n that failed, then got to real squeaky bum time n had to drill it out n tap the hole, that simple job ended up taking like 6 hrs 😭
For the FCABs on the xi models where you need to press them out of the brackets and press the new ones in, what issues could result from the new bushings being pressed into the brackets without the notches on the bracket and bushing being aligned? I was having intermittent steering wobble before replacing FCABs, and the guy who pressed the new ones into the brackets didn't even try to align them properly and since then I've had consistent steering wobble (I've also replaced practically every other part that could be causing trouble)
I changed my right front, strut, sway link bar and control arm bushing at the same time. Everything went back together except the control arm bushing, I can not get the bushing aligned with the holes. I can get the bushing close but when I let got it swings away. Any tips or advice?
Hey quick question i have a 01 330i e46 and i just replaced the brake pads bc they were slightly worn but mainly bc they were cheap and put better quality for no break dust but now my whole car shakes at around 45-60 im aware my control arm bushing is going bad but i doubt that could cause the vibration
You should check your wheel alignment and balance. Make sure to tighten the wheel nuts in a star pattern for a good, secure fit. Also, check to make sure that your brakes are not warped. That could be another reason for the vibrations.
Hi Kid ,like your videos make me feel I'm in the garage watching how is the job done well done , can you help me up ? I just buy a 2003 330xi and when I break the steering wheel shakes , what do you think it is? The rotors looks almos new Maybe the control arm. Thanks for your time..✌🏻
Ball joints on the control arm or warped brake rotors. Jack the car up and shake the tire around while looking at the suspension until you see what it is moving.
My pre facelift e46 has a tubular brace instead of that aluminum plate. The tubular one definitely seems stronger, not sure why they would change it...
50s Kid: Question: I have a creaking sound from the front when turning only at slow speeds (like pulling out of the driveway or at a stop sign). My car is a 330xi 2004. Do you know what could be causing this? I changed the tie rods and axle already. I thought it may be a bearing...but I'm not sure. When I jacked the car up and turned the wheel, I heard nothing. It's only when under a load. Any suggestions I'd really appreciate it. Thanks 50sKid.
Get a stubby handled 22mm wrench and a 21mm stubby handled wrench that way you can actually get really nice turns or in my case a stubby handled adjustable wrench.....it will save you lots of time and frustration being able to rotate/and get in that tight space with a smaller wrench!!!!
Thank you for the Video. I like all E46 videos that you posted. I am having hard time to slide the new bushing into the control arm. I once replaced it with Meyle HD, but not happy with it, because only last 2 years (
Hey 50's kid - thanks for all these videos! quick question - I removed the bushing using a pull tool. I have sprayed the new bushing with liquid wrench silicone spray and i cannot get the new one on! It slides on a little bit and then the A-Arm pushes out. Any tools or techniques one could use to get this thing to slide on? The bushing i purchased is a URO part - maybe those are a little too tight? Thanks Again!
Just push it up into place and bolt it on--once it's on it can't physically come out because the front is mounted to the subframe. Also, try soapy water instead of silicone spray. Maybe silicone is too slippery.
Thanks for the reply. I think I was unclear in my post. It's not the a-Arm that's moving - it's the bushing - i can get it on about 1/2 way and then it slides off. I'm going to try using the BMW bushing tool. I tried using a ratchet strap but couldn't get the bushing to stay straight.
By now I'm sure you've solved the problem but I had a similar situation. I used liquid dish washing detergent as a lubricant and used my foot to shove the bushing on. Rocking it back and forth slightly helps too. Leg power beats arm power.
hey what brand of bushings did you buy for this replacement? did you use genuine bmw or something else off realoem? i will do this repair soon and am curious which ones are best to buy haha
First of all, you're not supposed to replace ball joints on aluminum arms. The aluminum bore stretches (permanently) when the ball joint is installed at the factory. If you try to install new ball joints the joints won't be completely secure in the arm. You can, of course, replace individual ball joints on E36 and prior vehicles with steel arms, but there's no economic or practical sense in doing that. New arms are cheaper and faster to install. Second, you're not supposed to use any lubricant when reinstalling the LCABs as the inner bore is supposed to be fixed to the control arm. You can use a 409 or Spray Nine type cleaner as a temporary lubricant. Do not use grease or silicone paste lube. FYI, BMW's original liquid was a solvent used to partially "melt" the rubber onto the arm to secure it and the instructions required that the car be back at normal ride height within 20 minutes of installation. That solvent was banned by the EPA so BMW recommended another solvent (which smelled a lot like turpentine) until they realized that was causing premature bushing failure. Now everybody just uses spray on cleaners like 409/Spray Nine.
Jason, I'm confused, these bushings I replaced earlier this year with moog replacements which on the passenger side they failed within a couple thousand km's...... I replaced them again with the control arms the end of july, 2019.... last week I found one of the rubber washers on the ground.... I went under it today, all the rubber washers were off, two slid onto the control arm, the fourth one was just gone... I put the three back to where they belong... what's going on? I haven't been running it with the reinforcement plate.... is that why? Thanks!
Can you give me the part number for the 66mm bushings? I ordered some and got them yesterday but they’re the 60mm style and they are way to tight. They would only go on 1/2 way and I beat them in with a 4 lb sledge and some wood for 3 hours and couldn’t get them in the rest.
I read a lot that is necessary to torque the bolts After the car is on Level ground, otherwise you put the rubber on stress and they have to be replaced again soon. but maybe your Silikon grease will solve this Problem
AndersDog94 when he lifts the tire im the Video by Hand, you can see how its moving; ) so it makes sense, but as i said, the silicon grease will solve it. you can also use soapy water instead of the grease, the repair manual says not to grease it. nevertheless, good Video, thank you, Kid. greetz from germany, manufactures from this vehicle; )
C O. but the rod have 6 corners so the rubber cant turn on it. but if it was a control arm where the bushing a boltet stuck in the angel its in, then it probeally going to hurt the rubber in the long run
C O. I hear that a lot but do you think thats how they do it from the factory? No. They assemble the entire suspension with the engine and tranny on the subframe and then just bolt it all on. I think thats a myth honestly.
rsx123 mine was replaced the wrong way, and broke down 3 month later.after it was replaced again, but the right way, its fine since 2 years ago...its the same when you install a new strut. the bottom Nut has to be tightend on Level ground. but i think if you put grease in it, it doesnt matter.
Are these the bushings that always go bad on an e46? If you look on any E46 MOT history, you're sure to find front control arm bushings listed at some point lmao
Has anyone replaced the whole arm and lollipop bushes before? Every video is someone pushing the lollipop onto an old arm with ease. I however having no luck 5 day car stuck on axel stands as I just can’t press the bushing onto the arm. In or out the car it’s just not happening.
edgar navarro there's a spot on the aluminum subframe brace, it's sits directly under the subframe. It may deform the first couple times you use it but puts pressure right on the front subframe which is good to jack by.
Would you say, that the behaviour, you were hoping to fix, can best be described as "tramlining", as in the car kinda follows longitudinal grooves in the road? On german forums lots of folks have this particular problem, some fixed it by changing their tires to something with narrower linear grooves, like the michelin primacy as opposed to the michelin pilot.
Yeah you can call it tramlining, however I failed to mention that I can definitely feel a little bit of play in the steering wheel at high speeds. I took a look and my steering giubo is still in excellent condition. My conclusion at this point is that there may be a little bit of play in the steering rack and I plan to change it out for another in the future.
Greetings from Germany :-)You have many good repair Videos about the BMW e46 i LIKE i have one :-)how about the Meyle HD???? because they are made complette of rubber....and the most you can buy are filled with flouid.......i read about the Meyle HD their are to hard.....Vibrations on the steering wheel.....
I wish I could get mine off that easy and not only did it suck the first time but I put the damn thing on upside down so now have to take it off again and flip it 🤦🏻♂️
step 1 jack up car step 2 take off skid plates step 3 remove bolts from control arm bushing step 4 GET OUT YOUR '3 JAW PULLER' , its easier to just pull off the entire bushing as one piece, its a $35 dollar tool, dont be a fool get the tool!!! step 5 LAUNDRY DETERGENT , slime it all over the new control arm bushing step 6 slam the new control arm bushing on as hard as you can step 7 hand tighten bolts and control arm back onto car step 8 torque control arm bushings to at least 40 foot pounds GOOD TO GO
Amigo admiro su trabajo Me gustaría que hiciera un video desmontando la caja de dirección de un BMW X3 2.0 modelo 2010 es que quiero desmontar la de mi bmw Muchas gracias
Or Sil-glide (which is what the shop I frequent uses). shop.advanceautoparts.com/p/american-grease-stick-co-sil-glyde-silicone-lubricant-tube-4-oz-sg-4/10607939-p?c3ch=PLA&c3nid=10607939-P&adtype=pla_with_promotion&product_channel=online&store_code=&gclid=Cj0KCQjwyur0BRDcARIsAEt86IC4EZR7yqbg0BxBD_XFpyWLEliXVxoqwA6Qjm9Q4SyZ9V8lx9_nPxUaAi7yEALw_wcB&gclsrc=aw.ds


This guy has the best BMW how to videos on youtube... Thanks..
I love when you give out torque info with Nm.
Greetings from Czech Republic 🥰
maaaaan, that is the easiest control arm bushing to replace, ever. here i am dreading the day i have to do this.
fun fact E36 factory subframe balljoint is a 21mm
cheers for the clear and concise video.
I've had my 2004 325Ci for a couple of weeks now. The steering feels pretty awful, wandering around, tramlining etc... After jacking up the front of the car yesterday I can see that there is a LOT of play in both of these front control arm bushings. Your video has inspired me with the confidence to have a go at replacing them both as soon as it stops raining here. Thank you!! I'm hoping my can of silicone spray will make this a relatively easy task :)
Gotta say man the amount of stuff I've replaced and all your videos have been super helpful straight to the point and you correct if you've done something the hard or wrong way thanks heaps man!
Twisting the control arm bushings really helped getting them off. I tried banging with a mallet for awhile, but that got me nowhere. Thanks for the vids!!
Hey Kid, AWESOME tip with the grease just by luck I had some, spent over an hour with silicone spray and a rubber mallet. Put the silicone grease pushed it on by hand in minutes... you are the man when it comes to "I KNOW A SECRET " THANK YOU!
Just done mine this morning, had a struggle to get them back on shaft, ended up using a small ratchet strap,worked a treat,,
Just did this it was still a pain but I got them on bro thanks for commenting this
After watching this video ..I was able to change my BMW bushing in 35 minutes..this procedure works perfectly.mechanic quotes 4.5 hours 450$
i went to firestone and had them look at mine well long story short they priced it at 699.19 i believe ill be doing this soon lol
@@420420ALLTHETIME I sprayed with silicone spray as in the video pressed out and pressed on by hand
Those crossmember 'Torque to Yield' bolts are part of an engineered system in the event of a crash or impact. BMW states they are to be replaced if servicing requires removal. My son and I decided we would reuse them only one time on our E46 with careful torquing. We did replace them when we installed a new Crossmember.
Best explanation I have heard thus far for the angle torque on the skid plate bolts has to do with crash specs. Something to do with how the stiffener plate reacts in a collision. Not sure how exactly, but, I haven't heard anything better yet. My M3 has 16 of those bolts and it's the same tightening spec. Great video, keep up the good work. Love your videos!
Also, these 8 bolts are stretch-type and must be replaced. There is also tightening pattern for them, the "skidplate" is structural componenent and without it being installed, car should not sit on the ground.
Yeah the torque a fastener needs has nothing to do with what it's bolting to what, it has to do with the size of the fastener, the hardness, and the number of threads.
I had a terrible time trying to get the old bushings off. I ended up breaking the metal support away from the rubber, then had a heck of a time getting the leftover rubber piece off. Tried WD40, screwdriver, hammer, and cursing, (didn't have a 2 jaw puller) and finally ended up using an angle grinder with a metal cutting disc to cut through the leftover rubber/metal (there is metal molded inside the rubber). Then it came off easily. I did hit the control arm a little bit with the angle grinder, but sanded it down a little to smooth it out. I used dish soap to lube the new bushings and the metal on the control arm, and that worked well. Still a little tricky to line up the new bushing holes with the bolt holes. I didn't remove the wheels, but I wonder if removing them first would have made the installation a little easier without the weight of the wheels. The freakin' skid plate was a pain too, as most things are when you are on your back under a car, and I didn't have my impact driver. All of these jobs seem to take me much longer and are much more of a pain than they seem to be for the 50's Kid... but thanks so much for the many videos. You've saved me thousands over the years, and I've learned a ton.
Hi Jason - thanks for another great video - was certainly envious of how easy you managed to get the new bush onto the control arm - had to rig up a puller tool using 300mm threaded rods to get the bush on sufficiently far to allow it to recess into the guide rings on the chassis - control arm had to to protrude by approx 5mm out of the back of the rubber bush to allow alignment - TRW bushes used. Still an excellent DIY job - steering sharp again.
Soapy water or a light layer of silicone paste are the key to getting them on easy.
Hey I just finished watching all the engine rebuild serie in 3 days that you have done and also the Auto transmission rebuild on that beautiful BMW e46. Man! you're a genius.. the way you several times improvised making your own tools Wow!... Thank you so much for doing all this to be honest Im a Bmw e46 fanatic I owed two e46s and i didnt know anything about cars on how to even change the engine oil thanks to you now i Know... and of course I subscribed to your channel!!!! Amazing camera work as well... Im planning to rebuild my M54 engine next year I have big plans for it... Im sorry for the bother but your think you can do a rebuild on a Manual transmission because I've seen some and they look totally different in the inside from the automatics.. But Great job man you earned a subscriber for life! Thanks in advance :)
I've got an automatic to manual swap project that I'm going to do real soon. Thanks for watching!
I did mine at the weekend and let me tell you they weren't that easy in coming off the wishbone, even with penetrating fluid they were a pig! I also replaced mine with a polybush setup as they last much longer and it's an upgrade. Much better feel on the steering and no longer wonders. The standard bushings don't tend to last too long. Some people have reported changing them before a year is up. Good enough reason for me to go the polybush route. :)
I probably should have done the poly bushings.
There's always next time 50sKid, in say about a years time ;) lol
psbushings.com/bmw-3-series/ I used the PSB604P found on this website. Very good quality and they were fairly cheap too. I've just checked and they have a distributor in the US too, www.armstrongdistributors.com/collections/bmw?page=2 $44.10 delivered with a lifetime warranty! Can't go wrong :)
@@50sKidnah - poly’s change the steering and ride characteristics too much for me not to mention the NVH changes.
thanks for the video!
regarding the torque specified by BMW/Haynes/Bentley etc. i like to just look up the torque for my specific fastener in respect to its thread diameter and material grade to make shure its in the ballpark. There are lots of charts out there that tell the torque (usually they are calculated for a µ of 0,14->friction factor and 90% of Rp0,2/Re->the elastic limit of the Steel used)
...i like the fact that you use a (nice) torquewrench...thats not a given on youtube lol =D you seem to do the stuff the right way, keep it up!
edit: i looked up the M10 10.9. It would be torqued to 69 Nm when its installed dry. So at 59 Nm you are no where near the platic deformation range. The ones for the skid plate though are a different story. Based on 59Nm+90°+30° iam guessing they strech. At a threadpitch of 1,5mm, 90°+30° would equate to 0,5 mm relative movement . That means compressing of the "plate" and streching of the bolt. As the bolts are 35 mm long and assuming 1,5xD would be the minimum thread engagement there would be 35mm- 1,5x10mm=20mm that are affected by the streching. If we say the "plate" side is equally stiff as the bolt (plate side is normally way stiffer than the bolt side) there is 0,5/2=0,25mm of bolt strech happening which is roughly 1,2%. Total elongation before breakage is 9% for grade 10.9 steel.
A simple test would be to compare a used bolt to a new M10 bolt and hold the threads "into" each other. This method works great for Headbolts and rod bolts...
I can tell you that the original bolts were not stretched. Thanks for all that interesting info!
Well done, easy to follow, good audio & excellent video. Thanks.
There are ways to get around the stuck caster bushes. You can use a really big water pump plier or the longest prybar you can get.
Great vid all around as always. Props. I'm almost certain your bushings were already replaced (as you noticed by the control arm mark). But I just replaced mine with Meyle-HD. The ones that came off had no markings on either side of the mounting flange. The only identifier on the originals is "BMW 67560631" stamped around the bushing flange.
Replaced the control arms/bushings on my car a couple months ago. Get a pickle fork, makes it so much easier to pop them out.
You read my mind 50's kid. I was thinking about doing these soon. Glad it is so easy.
Mechanics keep telling me I need to have the control arm bushings pressed for my e46 318i M43 2000. But it’s the exact set up yours has and I replace them just as you have (old bushings off, new ones with soapy water. Have you had this same advice from mechanics re the need for a machine press?
Thanks for all your guidance. It saved me lot a money.
Windex is better to use than grease. Grease makes the bushings swell and you'll be replacing them in a year. Turner Motorsports actually has a reinforced bushing they sell for like $200
Ha, you really make it look like child's play 😉
I thought it'll be easier to change the complete control arms with the bushings already pressed on... It took me three days, a pickle fork and a 5kg sledgehammer to get the freaking ball joints to separate! They were just insanely stuck. Hit them with penetrating fluid, tried to heat them up with a torch... nothing. Just whacking the crap out of it for a long while was the only thing that helped.
Btw, the original bushings are filled with fluid. Mine where actually leaking! Meyle bushings are solid and I have read they are not as good as the Lemfoerders or even Febi-Bilstein. For E36 the Meyle HD are great though.
Interesting. I thought the Meyle's were the OEM ones, so I guess I messed that up
I don't think that there is that much of a difference actually. AFAIK, Meyle HD are one of the better options for E36. I used that on my E36 convertible, and so far they perform great. I was about to do the same for my E46, but searching around, I found out about the fluid thing, which explained the strange leaks that I was seeing on mine. And Meyle HD for E46 being solid, made me doubt my decision, so I went for fluid filled Lemfoerders, which I think are OEM suppliers in this case. So far the car handles fantastically... well I actually replaced all the bushings in the rear also, including subframe, diff mount, RSMs and rear shocks, so I guess it has no chance but to handle great 😉
Very nice. I am doing this soon on my 2004 E85 Z4 which is based on the E 46 chassis. Thank you.
well done 50skid
The OEM were fluid filled (Lemforder?) units I think. Looks like you're swapping out another set of Meyles. So somebody must have done them before you. Also why they were easy. Getting off original ones with 150k, that was more of an adventure for me. Love these Meyle HD units on mine!
I have a similar experience with OEM bushings, which fit tightly and there's no way to install them by hand.There are special tools made for this purpose, i.e. those made by Koch or MIS. My last set of front bushings was installed on new control arms outside the car and I needed a 4 lbs hammer for this - the 2 lbs hammer did nothing.The reason they recommend to lube with water is that the inner rubber surface of the Lemfoerder bushings sort of binds to the control arms after installation. Oil or other lubricants may prevent this.
The silicone paste was the key--I couldn't get the meyle ones on without it. I tried but cut it out. I do believe the silicone paste will get squeezed out over time and the bushings will be just as tight as they need to be, however soap and water is probably a better thing to use.
One thing I do like about the e46 is it seems to be a bit easier to work on than other cars. I too also found the additional TTY angle odd and just did the same 43 ft. pounds for my reinforcement\skid plate
It looks like just the second one you did was replaced.
Thanks for the videos dude.
Did mine with a stinking hangover on the ground. Had to crawl out from under the car to puke various times. They did not come off easy either.
For anyone having a hell of a time getting these bushings on, another way to make it a bit easier is to run nearly boiling water over the inside of the bushing for about 30 seconds. After pounding with a mallet for 1 hour with silicone grease and not getting far, the hot water did the trick!
you can use a c clamp to remove the bushings. much cheaper than the two arm puller
I've seen TH-cam videos with people just doing that bushing all on it, s own lots of washing up liquid yo to put back on
Great video, super helpful. Keep up the good work!
My bushing was way harder to put on. I had to take the control arm off and use a ratchet strap to press it on
Dishwashing soap and it would've slid right on.
D S tried it. I think it was made wrong, it ended up failing a couple months later and replaced it again with no issues
nice video again! how come you didn't opt to upgrade to poly bushings, like powerflex. im running them right now and i like them alot
+BarberKid I'm soooo cheap. That is pretty much the explanation. Plus I want to show a normal, non "upgrade" repair video in most cases
Wish my bushes came off like that, had 1 of the bolts snap, tried cutting a line in it to use a screwdriver, that failed so popped to the shop n got an easy out n that failed, then got to real squeaky bum time n had to drill it out n tap the hole, that simple job ended up taking like 6 hrs 😭
For the FCABs on the xi models where you need to press them out of the brackets and press the new ones in, what issues could result from the new bushings being pressed into the brackets without the notches on the bracket and bushing being aligned? I was having intermittent steering wobble before replacing FCABs, and the guy who pressed the new ones into the brackets didn't even try to align them properly and since then I've had consistent steering wobble (I've also replaced practically every other part that could be causing trouble)
I changed my right front, strut, sway link bar and control arm bushing at the same time. Everything went back together except the control arm bushing, I can not get the bushing aligned with the holes. I can get the bushing close but when I let got it swings away. Any tips or advice?
Must be a good sign. I’ve followed you awhile. But I’ve recently just bought a 330xi
Hey quick question i have a 01 330i e46 and i just replaced the brake pads bc they were slightly worn but mainly bc they were cheap and put better quality for no break dust but now my whole car shakes at around 45-60 im aware my control arm bushing is going bad but i doubt that could cause the vibration
You should check your wheel alignment and balance. Make sure to tighten the wheel nuts in a star pattern for a good, secure fit. Also, check to make sure that your brakes are not warped. That could be another reason for the vibrations.
Hi Kid ,like your videos make me feel I'm in the garage watching how is the job done well done , can you help me up ?
I just buy a 2003 330xi and when I break the steering wheel shakes , what do you think it is? The rotors looks almos new
Maybe the control arm. Thanks for your time..✌🏻
Ball joints on the control arm or warped brake rotors. Jack the car up and shake the tire around while looking at the suspension until you see what it is moving.
My pre facelift e46 has a tubular brace instead of that aluminum plate. The tubular one definitely seems stronger, not sure why they would change it...
I totally agree!
You can get a kit with the whole front control arms, ball joints, and bushings, and the bushings are already installed on the control arms.
Do u need to get a alinement after doing just the bushing
50s Kid: Question: I have a creaking sound from the front when turning only at slow speeds (like pulling out of the driveway or at a stop sign). My car is a 330xi 2004. Do you know what could be causing this? I changed the tie rods and axle already. I thought it may be a bearing...but I'm not sure. When I jacked the car up and turned the wheel, I heard nothing. It's only when under a load. Any suggestions I'd really appreciate it. Thanks 50sKid.
Get a stubby handled 22mm wrench and a 21mm stubby handled wrench that way you can actually get really nice turns or in my case a stubby handled adjustable wrench.....it will save you lots of time and frustration being able to rotate/and get in that tight space with a smaller wrench!!!!
Wondering if you could slide the bushing out without taking the skid plate off.
this video helped me a lot thank you 👏👏👍🏻👍🏻👍🏻
Thank you for the Video. I like all E46 videos that you posted.
I am having hard time to slide the new bushing into the control arm.
I once replaced it with Meyle HD, but not happy with it, because only last 2 years (
I have some Meyle HD FCABs that are toast after 30k kms. How depressing. Will be replacing with Whiteline fortunately.
Hey 50's kid - thanks for all these videos! quick question - I removed the bushing using a pull tool. I have sprayed the new bushing with liquid wrench silicone spray and i cannot get the new one on! It slides on a little bit and then the A-Arm pushes out. Any tools or techniques one could use to get this thing to slide on? The bushing i purchased is a URO part - maybe those are a little too tight? Thanks Again!
Just push it up into place and bolt it on--once it's on it can't physically come out because the front is mounted to the subframe. Also, try soapy water instead of silicone spray. Maybe silicone is too slippery.
Thanks for the reply. I think I was unclear in my post. It's not the a-Arm that's moving - it's the bushing - i can get it on about 1/2 way and then it slides off. I'm going to try using the BMW bushing tool. I tried using a ratchet strap but couldn't get the bushing to stay straight.
By now I'm sure you've solved the problem but I had a similar situation. I used liquid dish washing detergent as a lubricant and used my foot to shove the bushing on. Rocking it back and forth slightly helps too. Leg power beats arm power.
Did this today, took about 2 hours lol good vid tho
10.9s are extra brittle? That's the tensile strength of the bolts lol. Which is really strong
The harder the metal, the more brittle it is, actually. But it's just the outside that is hardened.
It is
hey what brand of bushings did you buy for this replacement? did you use genuine bmw or something else off realoem? i will do this repair soon and am curious which ones are best to buy haha
I used meyle for this.
man I've never seen a bushing go in so easy.
bro fr. i tried this earlier today and couldn’t get one of them on. i gave up.
You did not put on rubber rings..
The old sleeve has two rubber rings.
The rings harden the sleeves.
Meyle does not use them but you can install them.
First of all, you're not supposed to replace ball joints on aluminum arms. The aluminum bore stretches (permanently) when the ball joint is installed at the factory. If you try to install new ball joints the joints won't be completely secure in the arm. You can, of course, replace individual ball joints on E36 and prior vehicles with steel arms, but there's no economic or practical sense in doing that. New arms are cheaper and faster to install.
Second, you're not supposed to use any lubricant when reinstalling the LCABs as the inner bore is supposed to be fixed to the control arm. You can use a 409 or Spray Nine type cleaner as a temporary lubricant. Do not use grease or silicone paste lube. FYI, BMW's original liquid was a solvent used to partially "melt" the rubber onto the arm to secure it and the instructions required that the car be back at normal ride height within 20 minutes of installation. That solvent was banned by the EPA so BMW recommended another solvent (which smelled a lot like turpentine) until they realized that was causing premature bushing failure. Now everybody just uses spray on cleaners like 409/Spray Nine.
hmm.... when I installed the bushings they where really tight. is there any repercussions for installing the smaller version?
great demonstration useful
Jason, I'm confused, these bushings I replaced earlier this year with moog replacements which on the passenger side they failed within a couple thousand km's...... I replaced them again with the control arms the end of july, 2019.... last week I found one of the rubber washers on the ground.... I went under it today, all the rubber washers were off, two slid onto the control arm, the fourth one was just gone... I put the three back to where they belong... what's going on? I haven't been running it with the reinforcement plate.... is that why? Thanks!
Can you give me the part number for the 66mm bushings? I ordered some and got them yesterday but they’re the 60mm style and they are way to tight. They would only go on 1/2 way and I beat them in with a 4 lb sledge and some wood for 3 hours and couldn’t get them in the rest.
Do you have the link to buy control arm bushing?
I read a lot that is necessary to torque the bolts After the car is on Level ground, otherwise you put the rubber on stress and they have to be replaced again soon. but maybe your Silikon grease will solve this Problem
C O. makes no sense since its a fixed position.
AndersDog94 when he lifts the tire im the Video by Hand, you can see how its moving; ) so it makes sense, but as i said, the silicon grease will solve it. you can also use soapy water instead of the grease, the repair manual says not to grease it.
nevertheless, good Video, thank you, Kid. greetz from germany, manufactures from this vehicle; )
C O. but the rod have 6 corners so the rubber cant turn on it. but if it was a control arm where the bushing a boltet stuck in the angel its in, then it probeally going to hurt the rubber in the long run
C O. I hear that a lot but do you think thats how they do it from the factory? No. They assemble the entire suspension with the engine and tranny on the subframe and then just bolt it all on.
I think thats a myth honestly.
rsx123 mine was replaced the wrong way, and broke down 3 month later.after it was replaced again, but the right way, its fine since 2 years ago...its the same when you install a new strut. the bottom Nut has to be tightend on Level ground. but i think if you put grease in it, it doesnt matter.
Is it possible to helicoil the thread of the bushing? One of them is damaged. I can not move it with a prybar tough if only one bolt torqued.
wow that was easy great video bro like always.
Just done both side on my e46.
Gotta say they didn't come off as easy as yours.
Omg what a pain in the ass 🤨
Man i sprained my elbow doing my friends car earlier this year. Im dreading having to do my car.
That's funny, my right one had a small gouge in it too. Must be BMW casting cause mine looked OE at 130k.
interesting!
Are these the bushings that always go bad on an e46? If you look on any E46 MOT history, you're sure to find front control arm bushings listed at some point lmao
Yes, these are pretty common failures.
those cars are now ~15 years old, rubber bushing will go bad sooner or later
So can I use the silicone paste? did it ruin them? I want to just slip them on!!!
Ryan Murray the silicone paste is just fine and doesnt hurt anything. Best way to slip them right on, but soapy water works as well
No need for Loctite on the bushing bolts?
Has anyone replaced the whole arm and lollipop bushes before? Every video is someone pushing the lollipop onto an old arm with ease. I however having no luck 5 day car stuck on axel stands as I just can’t press the bushing onto the arm. In or out the car it’s just not happening.
i have a questing? where do you jack up the car from the front? theres a huge debate on the forums for this
edgar navarro there's a spot on the aluminum subframe brace, it's sits directly under the subframe. It may deform the first couple times you use it but puts pressure right on the front subframe which is good to jack by.
Yep it's so stupid that they deform so easily--the earlier 3 series had a superior triangular cross brace that didn't deform like that.
I sprayed mine with penetrating oil & GT85 would not budge :(. Gonna get a set of gear pullers and see how it goes but it was not budging at all.
try a large two jaw puller--if it pulls the housing off but leaves the internal part, you can pull that off with the same puller.
yeah thanks, I got one delivered yesterday. Only thing now is its forcast rain all week :(. wish I had a garage....
Thanks 👍
What was the wobble brutha man?
Legend, thanks for the vid
My CAB is way too tight I can’t slide it on, not even with a mallet
Thanks.
Would you say, that the behaviour, you were hoping to fix, can best be described as "tramlining", as in the car kinda follows longitudinal grooves in the road? On german forums lots of folks have this particular problem, some fixed it by changing their tires to something with narrower linear grooves, like the michelin primacy as opposed to the michelin pilot.
Yeah you can call it tramlining, however I failed to mention that I can definitely feel a little bit of play in the steering wheel at high speeds. I took a look and my steering giubo is still in excellent condition. My conclusion at this point is that there may be a little bit of play in the steering rack and I plan to change it out for another in the future.
Greetings from Germany :-)You have many good repair Videos about the BMW e46 i LIKE i have one :-)how about the Meyle HD???? because they are made complette of rubber....and the most you can buy are filled with flouid.......i read about the Meyle HD their are to hard.....Vibrations on the steering wheel.....
did you need an alignment after?
You don't
Hola 50skid podrias hacer un video limpiando injectores?
Hey so im doing this but the new bushing is such a tight fit and when i get it started, it keeps slipping off the control arm, what should i do?
Pablo Alfaro smash it In with a mallet
I wish I could get mine off that easy and not only did it suck the first time but I put the damn thing on upside down so now have to take it off again and flip it 🤦🏻♂️
I have this exact issue. How difficult was it to take it off again?
step 1 jack up car
step 2 take off skid plates
step 3 remove bolts from control arm bushing
step 4 GET OUT YOUR '3 JAW PULLER' , its easier to just pull off the entire bushing as one piece, its a $35 dollar tool, dont be a fool get the tool!!!
step 5 LAUNDRY DETERGENT , slime it all over the new control arm bushing
step 6 slam the new control arm bushing on as hard as you can
step 7 hand tighten bolts and control arm back onto car
step 8 torque control arm bushings to at least 40 foot pounds
GOOD TO GO
where did you buy the bushings from?
ebay
Amigo admiro su trabajo
Me gustaría que hiciera un video desmontando la caja de dirección de un BMW X3 2.0 modelo 2010 es que quiero desmontar la de mi bmw
Muchas gracias
can you believe some greedy garage locally to me wanted 2 hours labour to change these....theifs.....worst ways 30 mins with a ramp
Yeah mine does want to go on
Hey, ever since I changed my bushing I have been hearing creaking/ cracking noise. Have I installed them wrong ?
I really can't say--it could be some other component that is also bad or you could have installed them wrong--some how
Use bearing grease
Or Sil-glide (which is what the shop I frequent uses). shop.advanceautoparts.com/p/american-grease-stick-co-sil-glyde-silicone-lubricant-tube-4-oz-sg-4/10607939-p?c3ch=PLA&c3nid=10607939-P&adtype=pla_with_promotion&product_channel=online&store_code=&gclid=Cj0KCQjwyur0BRDcARIsAEt86IC4EZR7yqbg0BxBD_XFpyWLEliXVxoqwA6Qjm9Q4SyZ9V8lx9_nPxUaAi7yEALw_wcB&gclsrc=aw.ds
Who cares if the rubber is being replaced about what you spray on it.
I torque this plate with wrench to "gut und tight" Nm 🤣
I know a guy with a 10 ton press
7:28 Cheeky 😏
THE ONES ON AMAZON REPLACMENTS R CHEAP AND WILL NOT LAST !!!!!!!
UPGRADE TO POLYURETHANE BUSHINGS !!!!!
OR GO OEM !!!
BMW is fucked. 13 and 16mm bolts?