Just tried adaptive layers, incredibly shaved 45mins off my print time, quality still good for my projects, (I need 20 parts, so this is a huge time saver for me). Thanks for breaking down the options in the hamburger menu to bite size understandable chunks. It is extremely helpful and much apprenticed. Thanks
Jon, your comment made me hungy. Lol it is nearly lunch time and I know that I used the phrase hamburger but that and bit size really got me craving food now. I am stoked to hear that it is going to be able to save you time on your project. What are you printing??
Reducing the layer hight allows to print overhangs with bigger angle. So with adaptative layer you can increase the "support overhang angle" up to 75°, what reduces the amount of support generated and then reduces the print time. Of course, this depends on the model and the material.
My man, I am a total noob and I was looking for a feature like that! Thank you so much. I don't think you can even print efficiently without adaptive layers. Honestly printing with 0.4 layer height is good enough for almost everything, but sophisticated features of your print. Furthermore I really would like to configure which layers/range of layers need fine resolution and which layers need the speed.
Set your settings to 0.22 and a deviation of only 0.02 that will give you 0.20 to 0.24 I use adaptive all the time sometimes only a deviation of only 0.01. It really helps with rounded top surfaces
You are completely right. That would be a great way to have it essentially only go from .2 and up like I mentioned in the end. Great recommendation thank you.
Personally, my biggest timesavers have either come from 3D Printing at a 0.6mm layer width instead of 0.4 in _combination_ with only using 2 instead of 3 perimeters for the same total layer width but a rough ⅓% perimeters print time reduction and by simply avoiding the use of supports for as much as possible either via designing the print to not be needing them to begin with or by modifying the design to include faster printing custom mesh acting in place of automatically generated supports. Also bumping up the Speeds of many moves can shave off a lot of time.
I am in the middle of a 16 hr print of an Easter Egg while watching your video. I added Adaptive Layers to Cura 4.8 and resliced and it cut the time to 12 hours, amazing. I will print that tomorrow and compare, Thanks for the information.
Ahh so that confirms it then. Simplify does not have this natively build in. I had a few people reach out and I saw mention some years ago but not an actual release.
Great points In Prusaslicer you can adjusted auto or make your one places were to change the layer hights. Love that slicer! Thanks for sharing your knowledge to all of us👍😀
I dont know when but at some point I am going to play around more with it. Maybe if I have more time I can do one slicer video a month and rotate between Cura and PS. Thanks Asger :)
Where this really helps is with a larger base layer height and large objects with areas or detail. I would give it a larger layer range. You can cut some print times in half if you work with a 0.4 nozzle
The way I understand it, is that it works both ways for every layer: decrease time and quality or increase time and quality :) If your model has a lot complex features, it will on average decrease the layer height more often, than increase it. You can tweak it to force what you want, but we must remember, it is not a magical tool. Let's say your goal is only speed and your standard layer height is 0.2. Then, what you should do is to raise the default Height for example to 0.22 and Maximum variation to 0.2. Your height will be always between 0.2 and 0.24. With such parameters, it cannot take more time. Never. Can only be quicker. But as a consequence quality will decrease more or less significantly. Cura provides an overview, which layers will be impacted and how much, to assess if it make sense at all. You can go the way around and decide to put focus on having nice curves in the X-axis. You would just setup layer height to 0.18 with a 0.2 Maximum variation. With such parameters, you will get a layer height between 0.16 and 0.2. In that case, printing time will be increased, but only for "complex" layers.
I set mine to such a setting but set the topography size to 0.2 also. It does 90% of the print at 0.2 but very large and flat surfaces get bumped to 0.24 which speeds things up a bit without losing any visible quality.
Another excellent video that explains a lesser known feature. Thanks for making it clear and easy to understand. I do have one question though... is the micro-spike in your hair a new style or were you having an bad hair day? ;)
It seems a little nonintuitive with some parts and value combinations, but it's really fascinating to play with all of the numbers while viewing the layer thickness. I think this will solve a particular issue I have with a part that is too thin and requiring more, thin layers that slows printing but allowing the rest of the part to be printed even thicker than my default and shave off a ton of time in general. Really cool Cura settings, thanks for sharing!
Great video! Iv been using variable layer height in Prusa Slicer for a while. I couldnt see any real difference in the parts you showed, so not sure if it was the camera, the filament, me just not being very observant, the differences in slicers, or something else, but I can definitely tell when I use it. If it is something I am going to paint or something that looks doesnt matter any, I use variable layer height. If it is something that needs to look great, and I dont plan on painting it, then I just go for a smaller layer height. The differences in layer lines is just visible to me and drives me a little nutty. I do use it regularly, just not often.
Thanks Jon :) How large of a deviation do you typically allow when you use it? Or does it very based on the model for you? Totally, if you are going for looks or at least that is a big factor I can definitely understand wanting even lines and just taking it slow.
@@ModBotArmy Prusa Slicer does things quite a bit differently with their variable layer height. It starts with the profile you are using as a base line, and has a slider that you move to get either more quality or more speed and it adjusts every layer differently based on its geometry. If I am starting with my .2mm layer profile then I could have layers at .32mm or layers at .07mm all in the same print. There is some more manual adjustments that can be done too, but with that your just clicking on a graph of the layer sections to change that specific area to faster or more quality. It is likely I am missing something, but I have never seen any settings like you was talking about with Cura. It is something I probably ought to look more into. It can speed up a print quite a bit, but if it is something you are painting anyway, the differences between layer lines just dosnt matter as they will be covered up.
If you wanted to control range you could just set your medium to the point between your highest and lowest then it won't go below or above whatever point you are looking to limit. A setting on that would be easier but I think this would do the same basic thing
hi I have a creality cr6se and everytime i do a filament change it ,extrudeds an evil blob of doom upon resume on my print .also im using cura slicer. do you have some advice for me
Don't worry about the Cura naysayers, you can't please everyone and regardless of what anyone says Cura is great. While I don't use it much I still appreciate it.
Totally. It usually isnt negative comments just pulling me to cover/use other slicers. I do plan to for certain things but Cura is my daily driver so it does get the most love.
Is there a setting to print the infill layer height at a different resolution then the perimeter. I can see how logistically this would be difficult based on the geometry of the extruder tip. But could be a huge time saver to get high resolution on the outside while reducing print time for infill patterns. And while decreasing infill density is always an option to reduce print time, that sacrifices structural integrity while changing layer height really does not.
I think that the main idea behind the adaptive layer high is not the speed or the quality but the precision. For example if you print 25.5 mm part with 0.2 mm layer hight , you will build it 25.4 or 25.6 . May be with that setting we can build it exactly 25.5.
When you say the first layer is at 0.24mm for the .2 mm print, or does that mean that the nozzle is raised above the bed 0.24mm or is it pushing out more filament because it thinks that it is printing at a .24 layer height.
I've been playing with adaptive layers, and I agree I wish I could set it not to switch back and forth. I've got this part that has one little line of a different layer height and I'm worried that it will show up as a line in the part. It's a decorative part printed in silver silk filament, so the surface finish is very important.
I believe Flash print has a automatic setting for that so it's clicked it to us and it will adjust according to like you explained. However there's not many videos going in depth for Flash print like there is for cura
Cura has improved quite a lot.It’s just a shame it’s not as good as Simplify 3D to set up multiple layer height at different heights with more control. Although manually
Is there a way to print everything but outer walls thicker? Like say .3 vs .2 granted every other outer wall would be printed twice but that would even allow a spiral eliminating half of the layer starts on the outer wall too.
Not as far as I know. I feel like I have seen dual extrusion setups where you can do infill with a larger nozzle and use the finer for the outside to speed things up. But I have not tested myself and am not positive that it is a thing.
is there a way in Cura that I can change the layer height during the print? I would like my print object to be set at .2mm layer height, but the top few layers, I would like it to be printed at .1mm layer height. Is that possible?
So for the rectangle portion, I am not sure if it would have many benefits unless there are curves on the edges. If you do try it please let us know how it interacts with the text.
Is there any way to do this and still have you're parts FEATURES be at the correct height? Can it increase and decrease the NUMBER of layers depending on the layer size locally in the model?
I can definately see the difference. but the real issue here is, does it matter on a piece like this. my answer would be no, it doesnt. if you were printing something that you wanted to look its best, then obviously you would do without the adaptive layers. but for this, you just want it done fast and still be useful, which it is. great video.
I tried adaptive layers a couple years ago and it messed up every print in the same spot of so many prints. It would cause jamming and skipping then under extrusion so i disabled it. For the longest time I thought it was bad Gcode or my printer was messed up but it turns out it was just the adaptive layers causing it. Maybe its better now than it when i last tried it?
is this not all way round? Low res will speed up the print speed and higher resolution will slow down print time? Will low resolution mean less layers, means thicker layers? I'm I correct?
So in Cura when you slice a model go to the preview tab then click on the top where it says color scheme. Underneath that there is a drop down that you can change from line type to line thickness :)
Combined with differing infill density's, strength can be increased in areas where it is required without compromising a high resolution and aesthetic quality across the majority of the part. I wonder if ironing is affected by adaptive layers?
Hmm I wonder how well the ironing would work with adaptive layers. Since it adjusts flow rates based on the top layers I would be curious to know if it can account for multiple top layers
Before I received my printer I watched a video where it was stated that printers can only move 0.08 in Z. Is this true? I’ve been using 0.08, 0.16, 0.24, and 0.32 respectively. I notice that most tubers including you use 0.2 and such. I take it that it works well for you but I have been too wary to try. I guess I could do a comparison. Great adaptive layer vid, will have to give it a go
Hmm, it may be the "magic numbers" that users talk about due to the pitch and thread of the lead screws and the stepper motors ability to turn. There may be some validity to this at least to an extent but it has never been an issue for me. Also with 32 bit boards and the implementation of trincamic drivers with extreme microstepping, I cannot imagine that still being a factor.
Really ModBot, have a look at PrusaSlicer. It's implementation of variable layer height just makes Cura look like a novice. I still love the extra parameters Cura exposes for some stuff and PrusaSlicer does not have, but the paint-on-supports and variable layer height in PrusaSlicer have tipped the balance for me for most prints.
@@ModBotArmy did you ever go back and play with adaptive layers in PS? Did you like the ability to adjust layer heights with their slide bar? Or use paint on supports? Just curious. Thanks!
Unless I'm doing something wrong, ticking adaptive layers, and using any of the 3 examples you used, my print time increases, rather than the expected decrease..
Remember It work both ways for every line: decrease time and quality or increase time and quality :) If your model has a lot complex features, it will on average decrease the layer height more often, than increase it. You can tweak it to force what you want, but remember it is not a magical tool. Let's say your goal is only speed and your standard layer height is 0.2. Then, what you should do is to raise the default Height for example to 0.22 and Maximum variation to 0.2. Your height will be always between 0.2 and 0.24. With such parameters, it cannot take more time. Never. But as a consequence quality will decrease more or less significantly. Cura provides an overview, which layers will be impacted and how much, to assess if it make sense at all. You can go the way around and decide to put focus having nice curves in the X-axis. You would just setup layer height to 0.18 with a 0.2 Maximum variation. With such paramters you will get layer height, between 0.16 and 0.2. In that case, printing time will be increased, but only for "complex" layers.
True that adaptive layers can speed up your prints. However, if you are printing with holes in say a vertical surface or variances in wall thickness it can produce issues. I have a box that has several holes in the sides and adaptive layers actually makes the part look exactly like the preview. Stripes and all. Not great for parts that require smooth surfaces.
Interesting video, adaptive layers, if i understand it could be used for faster print or better quality, but please, everyone that look your videos are not natively english speaking. You speak so quickly that without automatic cc i wouldn’t have understand anything.
This is wrong. A bigger layer height produces a circle rather than an oval. An oval will contact more surface area with the prior layer resulting in greater strength. A bigger nozzle can create more of an oval though if that's what you mean.
I do not know how did you speed up anything there, i print on 1,50 layer , extra fine , without adaptive at all, with 0,6 nozlle, 23 hourst for model, with adaptive, fastest mode from your video is 28 hours and up to 32h print time. so its 30-50% MORE time not speed up. only thing that is, model look smuch finner with adaptive layer.
Only if you're using a .4 nozzle or smaller. I use .8 nozzles for my functional parts and typically print at a .4 layer height and they are very strong. I usually don't go above half the nozzle width if strength is required.
When you say the first layer is at 0.24mm for the .2 mm print, or does that mean that the nozzle is raised above the bed 0.24mm or is it pushing out more filament because it thinks that it is printing at a .24 layer height.
So I set the first layer to a .24 layer height. What I mean is that I have it lay down that height of filament to give a slightly wider base. I can see why you may think I mean nozzle gap but I mean slicer setting for filament amount :)


Just tried adaptive layers, incredibly shaved 45mins off my print time, quality still good for my projects, (I need 20 parts, so this is a huge time saver for me). Thanks for breaking down the options in the hamburger menu to bite size understandable chunks. It is extremely helpful and much apprenticed. Thanks
Jon, your comment made me hungy. Lol it is nearly lunch time and I know that I used the phrase hamburger but that and bit size really got me craving food now. I am stoked to hear that it is going to be able to save you time on your project. What are you printing??
Hey Jon, what is your project, and how did it go? Do you know how much time it saved?
hilarious, i just google searched this setting like 2 hours before this video uploaded. what great timing!
That TH-cam algorithm is so good these days that it makes you wonder if all TH-cam videos are actually just deep fakes now.
@@Guardian_Arias Hahahaha
I read your mind! haha that is funny though. This has been on my list of topics to cover for some months now. Great timing I guess :p
@@ModBotArmy Excellent timing if you ask me! Thanks for the entertaining and enlightening videos man, keep up the great work!
Reducing the layer hight allows to print overhangs with bigger angle. So with adaptative layer you can increase the "support overhang angle" up to 75°, what reduces the amount of support generated and then reduces the print time. Of course, this depends on the model and the material.
Interesting that does make a lot of sense as the steps would not be so large and would allow for a steeper overhang. Thanks for the information!
I'm a recent subscriber and because of you I bought the Biqu B1! Big Fan and first time I'm this early to your channel!
You rock! Thank you for subbing and I am stoked to have you here. How are you liking the B1??
Great video and perfect pace of explanations, thank you!
My man, I am a total noob and I was looking for a feature like that! Thank you so much. I don't think you can even print efficiently without adaptive layers. Honestly printing with 0.4 layer height is good enough for almost everything, but sophisticated features of your print. Furthermore I really would like to configure which layers/range of layers need fine resolution and which layers need the speed.
Set your settings to 0.22 and a deviation of only 0.02 that will give you 0.20 to 0.24
I use adaptive all the time sometimes only a deviation of only 0.01. It really helps with rounded top surfaces
You are completely right. That would be a great way to have it essentially only go from .2 and up like I mentioned in the end. Great recommendation thank you.
you beat me to the setting recommendation and the same is true for below as in .18 with .02 makes the .16 to .20
Ohoh, going to test this right away :) Thanks as usual for exploring these settings and letting us know!
Awesome! Please let us know how it goes.,
Personally, my biggest timesavers have either come from 3D Printing at a 0.6mm layer width instead of 0.4 in _combination_ with only using 2 instead of 3 perimeters for the same total layer width but a rough ⅓% perimeters print time reduction and by simply avoiding the use of supports for as much as possible either via designing the print to not be needing them to begin with or by modifying the design to include faster printing custom mesh acting in place of automatically generated supports. Also bumping up the Speeds of many moves can shave off a lot of time.
This is really cool , I definitely will try this , it would really be a big help since lots of my prints are typically a day at least
Do it! Even if it can shave off a few hours it is a win for large prints.
I am in the middle of a 16 hr print of an Easter Egg while watching your video. I added Adaptive Layers to Cura 4.8 and resliced and it cut the time to 12 hours, amazing. I will print that tomorrow and compare, Thanks for the information.
Was there a difference?
@@ssjronin3972 Yes, the print failed multiple times so I abandoned that slicing method, no idea why it didn't work but I gave up
@@winicuda good to know, thanks for responding!
Thank you for this video! I do use Cura, so this was very helpful!
Woohoo! Happy to hear :)
very useful! I have been doing this manually in S3d, have had great results on speed, but sometimes inconsistent surface finish during shifts
Ahh so that confirms it then. Simplify does not have this natively build in. I had a few people reach out and I saw mention some years ago but not an actual release.
Cura is becoming more popular. I love how the settings are.
Great points
In Prusaslicer you can adjusted auto or make your one places were to change the layer hights. Love that slicer!
Thanks for sharing your knowledge to all of us👍😀
I dont know when but at some point I am going to play around more with it. Maybe if I have more time I can do one slicer video a month and rotate between Cura and PS. Thanks Asger :)
Thanks for your videos they have helped me a lot.
Where this really helps is with a larger base layer height and large objects with areas or detail. I would give it a larger layer range. You can cut some print times in half if you work with a 0.4 nozzle
Super cool bro, definitely gonna try this soon
Awesome! Please let us know how it goes :)
Can't wait to try this out. Thanks
Awesome! Please let me know how it goes.
The way I understand it, is that it works both ways for every layer: decrease time and quality or increase time and quality :) If your model has a lot complex features, it will on average decrease the layer height more often, than increase it. You can tweak it to force what you want, but we must remember, it is not a magical tool.
Let's say your goal is only speed and your standard layer height is 0.2. Then, what you should do is to raise the default Height for example to 0.22 and Maximum variation to 0.2. Your height will be always between 0.2 and 0.24. With such parameters, it cannot take more time. Never. Can only be quicker. But as a consequence quality will decrease more or less significantly. Cura provides an overview, which layers will be impacted and how much, to assess if it make sense at all.
You can go the way around and decide to put focus on having nice curves in the X-axis. You would just setup layer height to 0.18 with a 0.2 Maximum variation. With such parameters, you will get a layer height between 0.16 and 0.2. In that case, printing time will be increased, but only for "complex" layers.
I set mine to such a setting but set the topography size to 0.2 also. It does 90% of the print at 0.2 but very large and flat surfaces get bumped to 0.24 which speeds things up a bit without losing any visible quality.
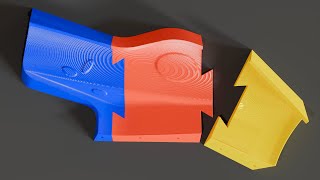
#2 looks the best, the top looks clean and the base looks clean
Thank you for explaining this !
Another excellent video that explains a lesser known feature. Thanks for making it clear and easy to understand. I do have one question though... is the micro-spike in your hair a new style or were you having an bad hair day? ;)
Lmao definitely a bad hair day (Thanks for noticing) :p
It seems a little nonintuitive with some parts and value combinations, but it's really fascinating to play with all of the numbers while viewing the layer thickness.
I think this will solve a particular issue I have with a part that is too thin and requiring more, thin layers that slows printing but allowing the rest of the part to be printed even thicker than my default and shave off a ton of time in general. Really cool Cura settings, thanks for sharing!
Great video. I'm eager to try it.
That's great, but I wish we could manually set the layer heights at any layer range!
Great video! Iv been using variable layer height in Prusa Slicer for a while. I couldnt see any real difference in the parts you showed, so not sure if it was the camera, the filament, me just not being very observant, the differences in slicers, or something else, but I can definitely tell when I use it. If it is something I am going to paint or something that looks doesnt matter any, I use variable layer height. If it is something that needs to look great, and I dont plan on painting it, then I just go for a smaller layer height. The differences in layer lines is just visible to me and drives me a little nutty. I do use it regularly, just not often.
Thanks Jon :) How large of a deviation do you typically allow when you use it? Or does it very based on the model for you? Totally, if you are going for looks or at least that is a big factor I can definitely understand wanting even lines and just taking it slow.
@@ModBotArmy Prusa Slicer does things quite a bit differently with their variable layer height. It starts with the profile you are using as a base line, and has a slider that you move to get either more quality or more speed and it adjusts every layer differently based on its geometry. If I am starting with my .2mm layer profile then I could have layers at .32mm or layers at .07mm all in the same print. There is some more manual adjustments that can be done too, but with that your just clicking on a graph of the layer sections to change that specific area to faster or more quality. It is likely I am missing something, but I have never seen any settings like you was talking about with Cura.
It is something I probably ought to look more into. It can speed up a print quite a bit, but if it is something you are painting anyway, the differences between layer lines just dosnt matter as they will be covered up.
Great video thanks for the tips!@!
My number one slicer CURA.
You and me both :D
I wish there was adaptive print speed in Cura. The combination of adaptive layer height and print speed would solve my most complex 3d model.
Thank you for the Cura videos, I use it via Linux.
Absolutely, thank you for watching!
Thanks for the info
Amazing
If you wanted to control range you could just set your medium to the point between your highest and lowest then it won't go below or above whatever point you are looking to limit. A setting on that would be easier but I think this would do the same basic thing
Just from a glance on the vacuum cleaner tube number one seems to be the most smoothest and number four is a little more noticeable in the layers
It looks to me that #2 looks like the best over all surface quality.
It seems that a few others also feel that #2 seems to look the best.
hi I have a creality cr6se and everytime i do a filament change it ,extrudeds an evil blob of doom upon resume on my print .also im using cura slicer. do you have some advice for me
Don't worry about the Cura naysayers, you can't please everyone and regardless of what anyone says Cura is great. While I don't use it much I still appreciate it.
Totally. It usually isnt negative comments just pulling me to cover/use other slicers. I do plan to for certain things but Cura is my daily driver so it does get the most love.
I would be nice to be able to arbitrarily set the layer height at any location in the print. Like Illustrator gradients.
Is there a setting to print the infill layer height at a different resolution then the perimeter. I can see how logistically this would be difficult based on the geometry of the extruder tip. But could be a huge time saver to get high resolution on the outside while reducing print time for infill patterns. And while decreasing infill density is always an option to reduce print time, that sacrifices structural integrity while changing layer height really does not.
I think that the main idea behind the adaptive layer high is not the speed or the quality but the precision. For example if you print 25.5 mm part with 0.2 mm layer hight , you will build it 25.4 or 25.6 . May be with that setting we can build it exactly 25.5.
How does this impact dimentional accuracy?
Useful. Thanks!
I do big prints that use a few spools of petg I have a .8 nozzle, what settings in adaptive should i try
Do you need to have Volumetric Extrusion turned on for the adaptive layers to work?
Make video for a lesser used slicer….got it!
Cura? Probably the most used slicer. Maybe second to Prusa Slicer but I dont think so.
When you say the first layer is at 0.24mm for the .2 mm print, or does that mean that the nozzle is raised above the bed 0.24mm or is it pushing out more filament because it thinks that it is printing at a .24 layer height.
I've been playing with adaptive layers, and I agree I wish I could set it not to switch back and forth. I've got this part that has one little line of a different layer height and I'm worried that it will show up as a line in the part. It's a decorative part printed in silver silk filament, so the surface finish is very important.
Love Cura.
You and me both :)
id like to be able to pick where it starts to deviate an up or down so i could pick the layers i want to print with thinner or thicker layers.
thx
I believe Flash print has a automatic setting for that so it's clicked it to us and it will adjust according to like you explained. However there's not many videos going in depth for Flash print like there is for cura
Cura has improved quite a lot.It’s just a shame it’s not as good as Simplify 3D to set up multiple layer height at different heights with more control. Although manually
Is there a way to manually set the layer height on certain heights? Without the hassle of cutting up gcodes and such :)
3:40 into the video "Going with a lower resolution will cause the time to increase........." This seems backward. Did you misspeak?
do you suppose this can help with overhang curling?
Can this be done the same way in SuperSlicer?
Is there a way to print everything but outer walls thicker? Like say .3 vs .2 granted every other outer wall would be printed twice but that would even allow a spiral eliminating half of the layer starts on the outer wall too.
Not as far as I know. I feel like I have seen dual extrusion setups where you can do infill with a larger nozzle and use the finer for the outside to speed things up. But I have not tested myself and am not positive that it is a thing.
what is the setting called in simplify?
I am not positive that it is simplify. I confirmed Prusa Slicer and saw mention of simplify some years ago but I am not sure if they implemented it.
is there a way in Cura that I can change the layer height during the print? I would like my print object to be set at .2mm layer height, but the top few layers, I would like it to be printed at .1mm layer height. Is that possible?
Would this work if u have a design that's no detail until the very top like words but below it is just sort of rectangular
So for the rectangle portion, I am not sure if it would have many benefits unless there are curves on the edges. If you do try it please let us know how it interacts with the text.
Thanks 👍👍😎👍👍
Is there any way to do this and still have you're parts FEATURES be at the correct height? Can it increase and decrease the NUMBER of layers depending on the layer size locally in the model?
I can definately see the difference. but the real issue here is, does it matter on a piece like this. my answer would be no, it doesnt. if you were printing something that you wanted to look its best, then obviously you would do without the adaptive layers. but for this, you just want it done fast and still be useful, which it is. great video.
I tried adaptive layers a couple years ago and it messed up every print in the same spot of so many prints. It would cause jamming and skipping then under extrusion so i disabled it. For the longest time I thought it was bad Gcode or my printer was messed up but it turns out it was just the adaptive layers causing it. Maybe its better now than it when i last tried it?
So is a part stronger or weaker using adaptive layers?
is this not all way round? Low res will speed up the print speed and higher resolution will slow down print time? Will low resolution mean less layers, means thicker layers? I'm I correct?
lower resolution should mean thicker lines and speed up the print. I think that is what you are asking and I believe we agree.
Honestly, #4 looks the best.
Hmm I got #4 and #2 so far haha I should have ran a Poll!
how did you do the color settings bit to show the layers?
So in Cura when you slice a model go to the preview tab then click on the top where it says color scheme. Underneath that there is a drop down that you can change from line type to line thickness :)
Can this be used to change the layer height of the z-offset of the support?
Hi I’m planning to buy a 3D printer
To make mould
In a budget around 300 to 500 $
You have any suggestion
Go for an ender 3 :)
Hi thank you for taking the time and got back to me
I was thinking ender 5 Pro or 7pro
If you say ender 3 I’ll take your advice
Video starts on 3:51
It's not only print time, but also cost, electricity is not free 🙂
I use adaptive layer for all my print without issue.
Combined with differing infill density's, strength can be increased in areas where it is required without compromising a high resolution and aesthetic quality across the majority of the part.
I wonder if ironing is affected by adaptive layers?
Hmm I wonder how well the ironing would work with adaptive layers. Since it adjusts flow rates based on the top layers I would be curious to know if it can account for multiple top layers
Before I received my printer I watched a video where it was stated that printers can only move 0.08 in Z. Is this true? I’ve been using 0.08, 0.16, 0.24, and 0.32 respectively. I notice that most tubers including you use 0.2 and such. I take it that it works well for you but I have been too wary to try. I guess I could do a comparison. Great adaptive layer vid, will have to give it a go
Hmm, it may be the "magic numbers" that users talk about due to the pitch and thread of the lead screws and the stepper motors ability to turn. There may be some validity to this at least to an extent but it has never been an issue for me. Also with 32 bit boards and the implementation of trincamic drivers with extreme microstepping, I cannot imagine that still being a factor.
@@ModBotArmy 8 bit here, someday 32, someday
The ender 3 and therefore I assume most 3d printers have a 0.04 res in the z axis
Great info, thanks. 👍
Thanks for watching Ron!
Really ModBot, have a look at PrusaSlicer. It's implementation of variable layer height just makes Cura look like a novice. I still love the extra parameters Cura exposes for some stuff and PrusaSlicer does not have, but the paint-on-supports and variable layer height in PrusaSlicer have tipped the balance for me for most prints.
The paint on supports do look pretty cool. I do still follow Prusa Slicer so I see when they add new features which seems to be quite often.
@@ModBotArmy did you ever go back and play with adaptive layers in PS? Did you like the ability to adjust layer heights with their slide bar? Or use paint on supports? Just curious. Thanks!
Decent
Unless I'm doing something wrong, ticking adaptive layers, and using any of the 3 examples you used, my print time increases, rather than the expected decrease..
Same for me. It increased my benchy print time by about 45 minutes..
Remember It work both ways for every line: decrease time and quality or increase time and quality :) If your model has a lot complex features, it will on average decrease the layer height more often, than increase it. You can tweak it to force what you want, but remember it is not a magical tool.
Let's say your goal is only speed and your standard layer height is 0.2. Then, what you should do is to raise the default Height for example to 0.22 and Maximum variation to 0.2. Your height will be always between 0.2 and 0.24. With such parameters, it cannot take more time. Never. But as a consequence quality will decrease more or less significantly. Cura provides an overview, which layers will be impacted and how much, to assess if it make sense at all.
You can go the way around and decide to put focus having nice curves in the X-axis. You would just setup layer height to 0.18 with a 0.2 Maximum variation. With such paramters you will get layer height, between 0.16 and 0.2. In that case, printing time will be increased, but only for "complex" layers.
True that adaptive layers can speed up your prints. However, if you are printing with holes in say a vertical surface or variances in wall thickness it can produce issues. I have a box that has several holes in the sides and adaptive layers actually makes the part look exactly like the preview. Stripes and all. Not great for parts that require smooth surfaces.
Interesting, what is your max variation set to? That is great to know and I could see that as being an issue for things with tight tolerances.
I will set mine to the suggested 0.2/0.22 and try some experiments. I disabled it when I saw the issue so I am uncertain as to what it was originally.
Weird, I prepped a Benchy without adaptive at 1h 38m, and then with adaptive turned on it was 1h 52m.
for me all prints have diffects becouse of changing layer height. it is sad.
It's a cool feature but the OCD inside of me could never use it because of the different in layer thickness to be seen at the side of the model.
haha I do not think you are alone there. It is not for everyone and not for every application.
ender 3 has 0.04mm per step on Z axis, this doesn't make any sense, there is 0.2mm or 0.24mm layer height, nothing inbetween
Interesting video, adaptive layers, if i understand it could be used for faster print or better quality, but please, everyone that look your videos are not natively english speaking. You speak so quickly that without automatic cc i wouldn’t have understand anything.
Imagine if you were to combine this with non-planar slicing.
bigger layer height =stronger prints
bigger nozzle is way better imo
This is wrong. A bigger layer height produces a circle rather than an oval. An oval will contact more surface area with the prior layer resulting in greater strength. A bigger nozzle can create more of an oval though if that's what you mean.
I do not know how did you speed up anything there, i print on 1,50 layer , extra fine , without adaptive at all, with 0,6 nozlle, 23 hourst for model, with adaptive, fastest mode from your video is 28 hours and up to 32h print time. so its 30-50% MORE time not speed up. only thing that is, model look smuch finner with adaptive layer.
i havent seen a volcom shirt since 2009
Increasing layer heights over 0,2mm decreases print strength. It might be important for functional parts
Only if you're using a .4 nozzle or smaller. I use .8 nozzles for my functional parts and typically print at a .4 layer height and they are very strong. I usually don't go above half the nozzle width if strength is required.
Trick on printing faster on TH-cam:
Set replay speed to 2x. You're welcome.
Resumiendo, a menor tiempo de impresión menor calidad de impresion, lo mires como lo mires.
Video starts at 2:40 guys.
Hey I use Cura. lol
Woohoo :)
i think i did something wrong lol, adaptive layers added 5 hours to my print. hmmm
My print time went from 7 hours to 15 :(
Its great that you made this video. But slow the F$%k down!! You need to let people apply the settings.
I can’t do slow guides. That’s what the pause button is for.
When you say the first layer is at 0.24mm for the .2 mm print, or does that mean that the nozzle is raised above the bed 0.24mm or is it pushing out more filament because it thinks that it is printing at a .24 layer height.
So I set the first layer to a .24 layer height. What I mean is that I have it lay down that height of filament to give a slightly wider base. I can see why you may think I mean nozzle gap but I mean slicer setting for filament amount :)
@@ModBotArmy Thanks, that’s what I figured. 👍