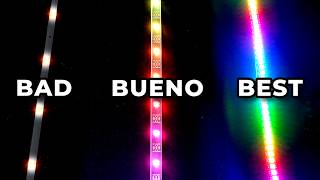
Easy DIY Corner Lights - Full Walkthrough - Diffusing LED Strips

ฝัง
- เผยแพร่เมื่อ 23 ก.ย. 2021
- 🚨 AMAZON’s BEST DEALS (Updated Daily): bit.ly/48FGnUv
☑️Check out my sponsor to begin your FREE 14 day trial to Aura: aura.com/chrismaher
Govee HomePage: amzn.to/3AJTW7R
BTF Lighting HomePage: amzn.to/3nWxQYb
GOVEE LED Lights: amzn.to/2XLpbha
LED Lights Amazon: amzn.to/43JQhCB
AliExpress LED Lights SK6812: s.click.aliexpress.com/e/_DF2...
Acrylic: amzn.to/3zyiUCL
GOVEE GLIDE (on center counsel in some pics): amzn.to/3APLFwx
Wood: 1" x 2" x 6' (use any length to fit your desired outcome) www.homedepot.com/p/1-in-x-2-...
Link to my previous video and at around 12 minutes in, I go more in depth on how to make vinyl cutouts and attach them to clear stencil sheets: • DIY LED Strip Diffuser...
In a few clips I have an animation where it looks like some balls are bouncing up and down. I ended up putting some WS2812b strip lights right next to the Govee ones. That specific animation was coming from the WS2812b led lights using the WLED app. The name of the animation is bouncing balls. I have not played around enough with the DIY feature on the Govee app to see if I can get the similar effect
Music I used:
Kalax - Out of Time (feat. Pyxis, Jay Diggs)
• Kalax - Out of Time (f...
Kalax is my favorite synthwave artist and in my opinion the best there is! Please support him in any way you can! I used his song at the end of the video.
Song: Beau Walker - Horizon
Music provided by Vlog No Copyright Music.
Creative Commons - Attribution-ShareAlike 3.0 Unported
Video Link: • Beau Walker - Horizon ...
Song: Vendredi - Deep Sea
Music provided by Vlog No Copyright Music.
Creative Commons - Attribution 3.0 Unported
Video Link: • Video
#NoCopyrightMusic #VlogMusic #VlogNoCopyrightMusic
The best way to help support my channel is to like, comment, make sure your subscribed and share my videos with as many people as you can. The other way is to use my links above as I get a small % at no extra cost to you if you buy something. Thank you all for the support!


![ถ้าพี่วุ้นท้อง แป้งจะท้องไปด้วยกัน !!!! [ดูคลิปเต็มหน้าช่อง] #Short | PANG ORNHIRA](http://i.ytimg.com/vi/FeyEnVMwitA/mqdefault.jpg)


🚨 UPDATED DAILY! BEST DEALS on AMAZON: bit.ly/48FGnUv
☑Check out my sponsor to begin your FREE 14 day trial to Aura: aura.com/chrismaher
Govee HomePage: amzn.to/3AJTW7R
BTF Lighting HomePage: amzn.to/3nWxQYb
GOVEE LED Lights: amzn.to/2XLpbha
LED Lights Amazon: amzn.to/43JQhCB
AliExpress LED Lights SK6812: s.click.aliexpress.com/e/_DF2aoqn
Acrylic: amzn.to/3zyiUCL
GOVEE GLIDE (on center counsel in some pics): amzn.to/3APLFwx
Wood: 1" x 2" x 6' (use any length to fit your desired outcome) www.homedepot.com/p/1-in-x-2-in-x-6-ft-Select-Kiln-Dried-Square-Edge-Whitewood-Board-418530/203450500?MERCH=REC-_-searchViewed-_-NA-_-203450500-_-N&
Link to my previous video and at around 12 minutes in, I go more in depth on how to make vinyl cutouts and attach them to clear stencil sheets: th-cam.com/video/56h5jSLMUH0/w-d-xo.html
In a few clips I have an animation where it looks like some balls are bouncing up and down. I ended up putting some WS2812b strip lights right next to the Govee ones. That specific animation was coming from the WS2812b led lights using the WLED app. The name of the animation is bouncing balls. I have not played around enough with the DIY feature on the Govee app to see if I can get the similar effect
Music I used:
Kalax - Out of Time (feat. Pyxis, Jay Diggs)
th-cam.com/video/em1Ar8iq3d8/w-d-xo.html
Kalax is my favorite synthwave artist and in my opinion the best there is! Please support him in any way you can! I used his song at the end of the video.
Song: Beau Walker - Horizon
Music provided by Vlog No Copyright Music.
Creative Commons - Attribution-ShareAlike 3.0 Unported
Video Link: th-cam.com/video/AmxmFcMoOu8/w-d-xo.html
Song: Vendredi - Deep Sea
Music provided by Vlog No Copyright Music.
Creative Commons - Attribution 3.0 Unported
Video Link: th-cam.com/video/XlzOXLOMiOY/w-d-xo.html
#NoCopyrightMusic #VlogMusic #VlogNoCopyrightMusic
The best way to help support my channel is to like, comment, make sure your subscribed and share my videos with as many people as you can. The other way is to use my links above as I get a small % at no extra cost to you if you buy something. Thank you all for the support!
rather, can you send me a strip of these Govee lights, Unavailable in my country: India
@@akshaykrishna5832 I wonder whey they are not available?! Sorry, I wont be able to send any your way. Maybe reach out to govee to see if they are going to be available in India any time soon?
@@ChrisMaherDIY haha you’re so sweet you actually replied. I was kidding. Yeah I’ll reach out to them or maybe ask someone to bring them for me. Anyway, lots of love. I love your channel
What acrylic is this exactly? I want to get the same exact transperancy as these. Great videos. Great ideas. 👍
ur using the ones with 30 led/m right?
Chrid dropping another LED bomb for the world to see. Well done.
Lol thanks Dustin! Your my unofficial hype man hahaha
Without a doubt the best lighting idea I have seen. Congratulations you really think outside the box.
Thanks buddy! Appreciate that and glad you liked it! Thanks for watching!
My OCD is exploding by the two speakers imparing the lower corners of the screen.... Awesome DIY project, looks super cool!....
Thanks so much for watching and taking the time to comment! Lol yeah its not ideal. The majority of movies do have the black bar on the top and bottom so that was my rationale. I did change things up and now here is what it looks like down there: th-cam.com/video/zCn4QzJawEs/w-d-xo.html
Wow Chris, this looks so amazing, just like your previous ones. I love em all!
Thanks Chris! Glad you like them and as always, thanks for watching!
Love the look of this!! I have been having a hard time finding a layout I like and you done it perfect. Doesn’t look off putting at all 👍🏻
Thanks so much for watching and taking the time to comment! Appreciate it buddy!
Best diy for ambient leds yet! Especially with that vinyl overlay.
Thanks so much! Glad you liked it. Thanks for the support buddy!
@@ChrisMaherDIY I've been working on an office rebuild, and have used rgbic govee for a while, but I have to ask what setting is that water dropplet effect in? I adore how that looks and can't replicate anything close to that. Was that one of the AI photo effects?
@@LapresOfficial for that specific effect I believe it was when installed some ws2812b led lights and was using the WLED program. It's an animation called bouncing balls. It's super easy to use WLED if you have never tried before!
My man Chris here doing god's work. Thank you.
Lol thanks buddy! Glad you liked the project!
Just discovered your channel. I'm a big fan of your work. Without a doubt, the best implementation of LED lighting that I have ever seen. Subscribed. Keep up the great work!!!
Thanks so much! That means a lot. I appreciate you taking the time to comment and I'm glad you have been enjoying the videos!
dude you're a legend! keep up the work man you have a lot of people who love your work!
Thanks buddy! Glad you enjoy the videos! Thanks so much for watching!
Just discovered your channel. Awesome work, great walkthroughs, great ideas that most could accomplish themselves. Very impressive, keep it up! Subscribed.
Thanks so much for subbing and I'm glad you like the videos! Appreciate you taking the time to comment. Thanks again!
Man, another stroke of genius. Cheap & easy. May have to use this or the baseboard idea, or maybe both 🤔🤷♂️
Thanks buddy! Easy enough to try both :)
A slam dunk finished product Chris - and excellent taste in music and visuals !
Thanks so much! Glad you liked it and glad your also a fan of the music! Hope you have a great day!
Cool project, well done! I watched several of your videos now and you have some great ideas!
Thanks buddy! Glad you are liking some of the projects! Thanks for taking the time to comment!
You’re really good at this, congratulations!
Thanks! I'm still very new at this hobby but I'm learning a little more each time I make something! Thanks so much for watching.
I love this channel, super cool lightning ideas!
Thanks! Glad you enjoy the videos! Thanks for watching buddy!
These look really good! I like them even more than the boxes!
I agree. They are so much easier to build too! Thanks for watching!
You win the internet today. I’m totally gonna do this when I finish my basement.
Lol thanks buddy!! Glad you liked the project. Let me know if you have any questions when you make them!
Chris, only just come across your channel looking for different ideas with LED strips. Awesome work buddy - subscribed 👍🏻
Thanks so much! Glad you are enjoying the videos! Appreciate your support!
Love it Chris you always have the best music love the final revels looks so so good Chris.
Thanks Val!! Glad your still enjoying the videos!! Thanks as always!
Yet again another awesome build.
Thanks so much! Glad you liked it. Thanks for watching!
Just what I needed, another project. But it will be bumped to the front of the line. Great idea!
Thanks buddy! Glad you liked the idea!
Awesome brother Chris 👏🏽. Jay Diggs got me at the end too
Thanks so much for watching and taking the time to comment! Yeah buddy!!
These look SO good. All of the overlay designs came out great too. Great work!
Thanks so much! I'm glad you liked them. Thanks for watching!
Very clever ideas, Thanks for sharing
Thank you so much for watching and taking the time to comment! I appreciate the support!
Just come across your channel and enjoying all the led hacks/ ideas.. thanks..
Definitely going do the rgb floor sideboards
Appreciate it! Glad you are enjoying the content! Let me know if you have any questions!
Super imaginative! Def gunna create a "deconstructed" version of this, thanks..:)
Great project idea man!
Thanks buddy!
very cool and creative ideas!!
Thanks! Glad you enjoyed! Thanks for watching!
Wow. Looks amazing. Subbing based on your choice of music. Bravo sir
Lol yes! I'm glad someone else likes this style of music! Thanks for the support buddy!
Thanx for the video to the point and good pics awesome idea going to use 😂 I have a big screen I bought lights but it can be expensive for some of the stuff out there such a great idea 👍👍
Amazing what you are doing 👏🏼
Thanks so much for watching and taking the time to comment! I'm glad you are liking the videos!
How tf dont you have way more subs????? This is amazing!!
Thanks so much for watching! Glad you enjoyed! I'll get there! Share the video with a few people :)
that's awesome! thank you for sharing this
You are very welcome! Thanks so much for watching!
Very cool respect, I'm going to do all these.. thanks
You are very welcome and thanks for watching! Let me know how they turn out!
u made my day by this idea thx bro
Thanks buddy! Glad you liked the idea! Thanks so much for watching!
Damn, that’s awesome!!!
After you make an ambilight nothing will stop you lol. Truly amazing job,
Thanks buddy!! Glad you enjoyed the video and thanks so much for watching and taking the time to comment.
First of all, your work is more than amazing and very unique, thank you so much for sharing. I'm definitely doing one or two of your projects as soon as possible. And great editing and music tho, keep up the good work bro.
Btw what is the hanging screen in the center of your room? It's really cool.
Thanks so much for watching and appreciate the support buddy! Glad you like the music as well! I just have a projector screen in the middle of the room.
Lol that's all I use is govee nowadays. I'm so making this. Thank u kindly sir
For quick and easy, I think Govee is for sure the best out there!!
Super nice! 😃👏
Thanks so much! Glad you liked the video! Thanks for watching!
Will done sir.
Thanks so much for watching! Appreciate the support!
thats dope!
Thanks so much for watching and glad you like the video!!
Excellent 👍
Thanks!!
Great work;)
Thanks!! Glad you enjoyed and thanks for watching!
Brilliant ideas ! +1 sub
Thanks so much!!! I appreciate the support!
Chris just stumbled across your channel and your videos are amazing 🤩 and so inspiring. With the Govee RBGIC you’ve used in the video, how did you control them to have the shooting light/ball effect shown at 7:24? It’s amazing again and thanks for taking the time to make your videos
Hey thanks so much! I appreciate it and thanks for watching and taking the time to comment. I updated my description a few weeks ago since a couple other people have asked the same thing. In a few clips I have an animation where it looks like some balls are bouncing up and down. I ended up putting some WS2812b strip lights right next to the Govee ones. That specific animation was coming from the WS2812b led lights using the WLED app. The name of the animation is bouncing balls. I have not played around enough with the DIY feature on the Govee app to see if I can get the similar effect. Let me know if you have any other questions at all!
@@ChrisMaherDIY can you make a tutorial of these ws2812b leds? How you programmed them?
Inspiration
Thanks so much!
Absolutely love it and have the perfect room to try it too. Thanks for the inspiration! Will definitely share the complete work. How did you sync your screen to the lights though? 🤔 I can't seem to sync ESP8266 and Wled with display.
Thanks so much! I'd love to see how it turns out! Most of the lights in the room i'm controling using the WLED. On wled i can sync all the lights together that are on the same wifi network and control them all at once. So in the video, i'm just manually changing them to match the screen. I know there is a way, but as of now, its a little too over my head when it comes to getting it set up. Maybe someday i'll try!
Chris this is amazing man.
I want to replicate this, however I don't have a machine to cut the wood like that.
Is there some kind of alternative to get the same outcome without cutting the wood?
thanks
Un verdadero genio
Thank you!
"yeah that's one fine looking strip light..."
Looks away from video to my room.
"why doesn't mine look like that!!??"
Lol thanks for watching and taking the time to comment! Hope you have a great day buddy!
The Cricut design @5:00 is perfect for what I am planning. Do you have the stencil dimensions for that?
Awesome job - turned out great! Did you have to hide the acrylic joints?
I did not. When they are butted up against each other, they pretty much entirely disappear. I wouldn't say its perfect, but its about as close as you can get unless you can find 1 solid piece of acrylic which would probably cost an arm and a leg. Thanks so much for watching and great question!
Looks fantastic! On a corner would using 60led per meter strips look any different?
Thanks so much for watching and taking the time to comment! Since the led strip is far enough away from the diffuser, I don't think you would visibly see a difference between an led strip that has 30 vs 60 leds/meter. Thanks for the great question!
Rich content.
Thangs again buddy!
Great and simple idea, man. Do you have any ideas on how to do "Ambilight" feature for those LEDs?
Thanks so much! I have not figured out a way just yet but I have also not spend too much time thinking about how it could possibly work. If I come up with an idea I'll for sure make a video about it! Thanks for watching!
Dude . the music that you put to your post is so relaxing . I really want to try this . I love doing electrical work installing recessed lighting throughout my house and all . I can see myself putting together some really dope base board lighting but its the chip boards and the disappointment of seeing dotted light that I don't want . Also, is using the paper safe I know that the LED's are low voltage . I really like the look and the fact that you can get that paper roll in like over 100 feet so I can easily get 20 ft of continuous light with no break if I weld the strips together .. Your thoughts?
Thanks again for the comment and glad you like the music!! Always good to know there are others that like this style as well! As far as the paper, I've never had any issues but do it at your own risk! And just like you mentioned, the fact you can get 1 long roll of paper for a seamless look is huge and nearly impossible to buy acrylic that is that long!
Chris, I did not think you could cut Govee RGBIC and still have all features work?
Can you please make a version where this can go on a flat wall instead of a corner. Also great video like always and keep it up! Also do you sell this stuff because I would absolutely buy it!
I can certainly put that on my project list to try making down the road sometime! You could certainly do something like I make here and mod it a little bit for a flat wall. However If I were making it for a flat wall, I would probably end up tyring to doe edge lighting so it didn't stick out at far. Thanks for watching! I'm just doing this for fun right now so no plans on making things to sell at the moment!
The first thing I have to do: Buy a table saw :-P I don't have one, but I will do something similar with WLED. Your project looks very cool.
Thanks so much!! Yeah the good thing about buying tools is they last for a long time and you can use them for a lot of things! Good investment!
This is amazing! Really inspired by your channel and looking forward to trying this out! Quick question, are the light panels you used sharing a controller and/or power or is it separate? Thinking about doing this with 12v addressable LEDs sharing an esp32 and single 12v power supply.
Thanks so much for watching! For this setup, they are 2 controllers and 2 power supplies but could certainly have been done how you are planning on doing it!
@@ChrisMaherDIY Awesome! thank you for letting me know! I might just go ahead and keep them separate for simplicity and eventual transportation. Thanks again
Chris, is each corner light individually controlled, or together?
1st timer.. how & where do you wire/plug in the leds?
Great video. This is what I am trying to do in my nursery. What I can't figure out is what acrylic sheet you are using? Is it just a frosted piece 1/8" thick? Please let me know. Thank you.
Thanks for watching! Yeah its a 1/8 inch thick frosted acrylic 12 x 12 inch square that I just cut in half. Here is the link to what I used amzn.to/3dx3J7U (if your not in the US i'm not sure if the link will work or take you to the correct product)
anyway to cut these 45 degree angles without a table saw? trying to do this but don't have a table saw. Wish I could buy them pre cut
Unfortunatly i'm not able to think of a way without a saw. Maybe someone else on here if they read your comment might have an idea?!
Just found your channel, love it! Any chance you know the name and artist of the song at the end of your video? Thanks
Thanks so much! That's one of my favorite synthwave artists! The song is: Kalax - Out of Time (feat. Pyxis, Jay Diggs)
Hey man. I've been looking at ur videos recently and I would definitely like to try decorating my room with this project on a single corner of the room. However, one thing that's getting in the way is the entirety of Step 1 as I unfortunately do not have a table saw or anything to be able to make the cuts specified. I was maybe wondering if there might be other alternatives to achieve a similar result, specifically when it concerns cutting the wood
Thanks so much for watching and taking the time to comment! That's a great question! I'm not sure off the top of my head but what I would probably do is just buy some different size smaller pieces of wood and see if you can create a groove by putting 2 of them together and then play around with ideas on how they might be secured to a wall. The other thing that I know you could maybe look into that I dont have any experience in yet is 3d printing. There has got to be an easy way you could print some brackets that would fit the wall where you could slide some acrylic into that might work. All I know is where there is a will, there is a way lol!
great job! Where do you get the cool background pictures?
Thanks so much! sorry for taking so long to reply! Most of my background are just ones from music i'm listening to on TH-cam. My go to search terms are "lofi 8bit" and "lofi" Always some very cool backgrounds!
Super awesome Chris! In one of your videos, you had used stencil sheet from hobby lobby to diffuse the leds, will that be a good replacement for the acrylic you're using here, to diffuse the lights?
I think you could potentially use those stencil sheets from hobby lobby! It would for sure do a good job of diffusing the leds. I think the most challenging part would be finding a good way to get them to stay put and come together with minimal gaps/light coming through where the pieces come together. Let me know if you try it and how it turns out!
@@ChrisMaherDIY thank you for your help
Congratulations awesome job, what measure was the acrylic cut?
Thanks so much for watching! So I got 12 x 12 inch acrylic squares and just cut them right down the middle to create the towers on the right and left side of the room. I believe the acrylic itself was 1/8th of an inch thick.
@@ChrisMaherDIY Thanks brother for the reply. I really liked this project, I have the materials to make here, I just didn't know the cut measurement for the acrylic. I will put it in the corner of my computer L-shaped desk.
Where can I get those vinyl stencils? Especially the horizontal oblong circle one. That’s perfect for my theater.
Thanks for watching! I ended up just using the Cricut softwar to make the designs. Watch this video starting at the 10:30 min mark to see the method I used: th-cam.com/video/2q_zrEcbXHE/w-d-xo.html
What type of light do you have right under your tv? I like it a lot
Thanks! Its the Govee Glide. Its awesome. amzn.to/3APLFwx
I've read multiple places say you can't cut RGBIC strips, can make them stop working or mess with effects like music mode. Seen some say they've had success, and yours obviously still work, but has there been any loss of functionality? Did you just discard the rest of the strip? Thanks
Thanks for watching and the comment. I can't speak for other brands, but this one works very well after cut. It's not completely perfect though. What I mean by that is all the animations are designed to use the full 16 feet. If I'm using 6, I will only get the first 6 feet of animation. But I would say for the most part you are not even going to notice much of a difference. I do save all the leftover strips because I can easily hook them up to a different controller and get them to work perfect! My favorite method of doing this is using an esp8266 wifi board that has WLED installed on it. It's super easy to do. Maybe I can make a video on it later!
Chris, can the Govee M1 perform all the same animations shown in this video?
Thanks so much for watching! If I remember correctly I think most of the animations were coming from WLED. There are a good amount of similar ones you can do with Govee but you are going to have a lot more options using WLED.
How do you color-sync everything to the image like that? Looks awesome!
Thanks so much! I wish I could figure out a way to have it done automatically but since all the leds that are connected to wled can sync together, I just have to change the color scheme once and it updates all the lights. So I'm just doing it all manually.
@@ChrisMaherDIY Thanks for the reply! I was hoping you had some kind of magic camera app for it, but c'est la vie. Hopefully someone makes it for us eventually. :)
Thanks again! Really appreciate the approachable way you built all of your stuff.
This is awesome! How narrow do you think you can go and it still diffuse out the led spots? I want to put this instead of a room corner, under a shelf in the corner where shelf meets wall.
Thanks again! You could get them pretty narrow! I would say if the led's are about 1.5 to 2 inches from the diffuser it should look good! If i had to guess, I'd say the leds in this video were closer to 4 inches away.
@@ChrisMaherDIY Perfect. I’ve got two ideas both from your videos. I’ll either just make a deeper channel and use acrylic for the lense or I’ll use your baseboard method but use that method as under a shelf. Still trying to decide which is better. Thanks for the help.
I think I’m going to take a 2x8 and cut it and make a channel that way. Should be deep enough at about 1.5. Then I’ll cut slots for the acrylic lens and stick a 1x8 on top to make the shelf solid again and then just add front and side boards to cover stuff. Little more work than necessary but I don’t have tools for all the cuts.
@@NewYears1978 That sounds awsome and its always fun trying to make something using the tools you have! Extra rewarding when it turns out good without having to spend a ton! Let me know how it turns out!
@@ChrisMaherDIY Will do! One last question, on the baseboard method, does it still throw light out pretty decent or does the acrylic and 90 degree keep the light inside the channel? This shelf will be about 6 feet off the ground and I kind of want the light to be thrown down (not like bright but just ambience).
Hard to tell in the video and I don't want to have to spend the money to do this twice hahah. Probably going to start this weekend.
What is that light right beneath your tv? Can you attach your link if you already showed a video of you making it please? Ty and awesome video
Thanks so much! Underneath the tv is the Govee Glide: th-cam.com/video/e3jJye-fYoM/w-d-xo.html
However in a lot of my newer videos I have my diy govee glide underneath: th-cam.com/video/n9LsiQARFas/w-d-xo.html
@@ChrisMaherDIY thanks man appreciate it
Can you add a responsive bias to follow what is being displayed on the screen?
That's something i would love to see if there is a way. I'm not sure there is since I'm using a projector. I'm going to have to try doing something which i think would be so cool looking! My only idea was possibly trying to use the Govee Immersion kit since its a camera to incorporate but I doubt that would work. Let me know if you have any ideas!
Did this stay up with the painters tape still? What do you think about using command strips? So you think that would hold well for a non-destructive removeable solution?
Painters tape still holding strong! That's a good question! I have no idea if painters tape over time will eventually bond to the wall destroy the wall or if it will come off easy. Probably would be better to use command strips as I think that will come off clean no matter how long.
Cheap fake alien tape from Amazon hold LEDs great. Sometimes2Good
Looks great. Does the color-transition is connected in any way to the screen to show similar colors (light ambilight) or did you only adjust them manually to fit the colors of the screen?
Thanks so much! I'm just adjusting manually. I'm sure there might be some way to get it to happen automatically but I have not looked into that yet but that is a great idea for a future video! I think what might complicate things is that I have a projector down there and not a tv. Let me know if you have any experience in this area! I'd love to know more. Thanks!
@@ChrisMaherDIY also have no experience with it. Was the only way I thought how it would work if it wouldn't be manual adjusted.
@@ChrisMaherDIY I want to try matching your projects with ambiliight... i just don't have experience with rasberry pi..... maybe you do?????? I hope so... lol
@@Mike335is I'm still just a beginner and although I have definitely heard of raspberry pi, I have zero experience working with it. Maybe sometime down the road I'll get into it!
Check out a project out there called Hyperion. It is a Raspberry Pi based project that you can use to make your own version of a Philips ambilight. It takes your HDMI signal and splits it to the TV and the Pi, then the does the matching edge lighting to whatever is on screen. That would work for this. I did an ambilight TV surround with it. A bit of DIY and learning, but would probably look amazing with this.
Could you please tell me what mode is at 7.54. That is so cool. I couldn't find it in the app. Thank you for the video.
Thanks so much for watching! So I ended up putting some WS2812b strip lights right next to the Govee lights (I can now choose which lights I want to have on) That specific animation was coming from the WS2812b led lights using the WLED app. The name of the animation is bouncing balls. I have not played around enough with the DIY feature on the Govee app to see if I can get the similar effect. I'm going to update the description since a few people have asked about this animation specifically. I did however make a video recently where I go over how you can hook up the Govee LED lights that were used in this video to be controlled with WLED. Here is the link to that video if you ever want to try: th-cam.com/video/l0sRG1WAbq0/w-d-xo.html If I do ever find a DIY setting in the Govee app that looks close to this, I'll for sure let you know!
@@ChrisMaherDIY thank you for your reply. That would be cool, definitely keep me posted if you do please. I'm new to these fancy leds. I'll also have a play in the settings. Will also check that video out. Thank you again ☺☺☺
Great video! But, those acrylic panels arent cheap. How many did you need to buy for two corners? Im considering building this myself, but the panels add up.
Thanks!! In the US they are about 10 dollars for one 12 inch by 12 inch square. Each corner i used 3 of the squares and cut them in half. So in total i used 6 squares which cost me $60.00 I wish there was something less expensive out there on amazon but that's about as good as it gets from what I found. I have heard from other people though that they are much more expensive in different countries which is a bummer :( Thanks so much for watching and taking the time to comment!
unfortunately they are $30 each where I live! but still, i like the idea! thanks for the video, ill find a way to build this lol
How were you able to cut them and still be functional? I assumed RGBIC had to be the full length.
The Govee led strips can be cut and still work quite well. The only thing they don't do is re-calculate their animations based on the lower number of led lights. What that means is if the last 20 lights on the strip are supposed to turn red for a certain animation and then you cut off those last 20 leds, Govee does not recalculate things so that the last led's on the now shorter strip are now red, you just simply wont see the red any more. I hope that makes sense. Its not perfect but it still works pretty well!
This might be obvious but when you cut the led strip, how can you make the rest useful? For example, if I want to make multiple one like this what materials would I need?
Some Govee led strip leftover strips can be connected to a separate controller and used! If your using some ws2812b led lights like I love to use, they can be cut at every led and you can connect them easily to a controller as well. I made a couple videos on this process that you can find on my channel. Thanks so much for watching!
Gonna be implementing a few of your designs for my game room. Any chance you could share the .svg files for the vinyls you used on this project?
Thanks so much for watching! I have a cricut machine and since I couldn't find any .svg files online, I just made them with the cricut software. I cannot for the life of me find a way to export designs that were made using cricut software. I've googled and youtubed and have come up empty. If you know of any way to export from cricut, let me know and I'll send them over to you!
@@ChrisMaherDIY appreciate it! I’m still waiting on my cricut to come in. I’ll give it a shot once I get my hands on it.
Can you link the SVGs you used for this project? I really like the look of your film one but I cant find it on the internet. Thanks!
Thanks so much for watching! I actually had to make the svg using Cricut software. It was super easy. Do you have the Cricut? Let me know if there is a way to download the design from Cricut as an svg and I can send the file to you! I played around a little bit just now and I cant seem to find the option to export as an svg :(
@@ChrisMaherDIY Yeah I came to that conclusion as well so I did exactly what you said and it was pretty easy. Thanks again for the video!
Hi Chris, I bought these lights through your link, after seeing the jumping affect you show at 7:33 in your vid. I can’t get these lights to do that 🤔 can you advise on how to get this effect. Thanks.
Thanks so much for watching! In the description I put how I achieved those effects. Here is how:
"In a few clips I have an animation where it looks like some balls are bouncing up and down. I ended up putting some WS2812b strip lights right next to the Govee ones. That specific animation was coming from the WS2812b led lights using the WLED app. The name of the animation is bouncing balls. I have not played around enough with the DIY feature on the Govee app to see if I can get the similar effect"
With that being said, I'm going to play around with the DIY section in the Govee app as I would assume there is some way to replicate the effect and saving it as a preset. I'll let you know if I find anything that is close!
@@ChrisMaherDIY ah yes lol sorry I didn’t read that part. I have ordered the WLED strip and controller. Just waiting for delivery. I’ve been watching you vids for ideas on how to make my cinema room look good with led light strips. My next task is to get the controller working, so will be watching you vid on that over and over lol. You’ve inspired me and I’m sure many others too. Thanks for the cool vids 👍 look forward to watching more in the future. Cheers Chris.
@@peteclark7044 that's awesome and thanks so much! Yeah I still don't know much but the more little projects you do you begin to understand the basics and then it's really fun to just think of different things you can make. When I was getting started it was just a lot of trial and error but that's the best way to learn! Let me know if you have any questions!
@@ChrisMaherDIY yes I will do Chris 👍 I’ll be attempting to set up the controller sometime this week. If I get stuck I’ll send you a message. Thanks again 👌
can you make a video on your projector set-up?
I can for sure put it on the to do list although its not very impressive by todays standards lol. Here is the projector I bought like 7 years ago thats still going strong! amzn.to/3zU3mx3amzn.to/3zU3mx3
@@ChrisMaherDIY I can tell you are very knowledgeable and do your research before putting these videos out. It would be awesome to see you release a video or perhaps 3 separate videos on budget, intermediate, and all out pro level setups for screening rooms. It can include sound systems, projectors, screens, the list is endless. Just a suggestion :)
Don't you think it's maybe better to use corner aluminium profiles for better cooling of led strips?
Thanks so much for watching! I'm sure its better for them but I have not had any issues with any of the led strips i've used that i've secured to wood but If I ever do, i'll make sure to follow up!
I got all my pieces of wood and acrylic cut. Only thing stumping me is soldering the wires onto the board.
You could use some breadboard wires and some wago connectors if you didn't want to solder. But I did make a video on the basics of soldering. The type of solder you use makes all the difference and the one I use in the video is the best out there. th-cam.com/video/apSz3NXYlx8/w-d-xo.html
@@ChrisMaherDIY yes you have and watched them. I think it’s my soldering skills that’s the problem. Not your video.
@@ChrisMaherDIY ok update. Ordered solderless connectors, and bread board wires. Connected everything and I might of screwed up but don’t think I did. I cut the first led off the strip thinking I was gonna solder. But I know my problem was the solder I was using. I can insert the wires into the solderless connector. Everything works but the leds don’t light up.
What are these pixel clips you are playing at 6:42 and 6:50 for example? I would love to try them with my Ambilight. I only recognized Totoro.
If your refering to the images I have on the screen, all i did was youtube "8bit lofi" lol. Apparently thats a thing and some very cool images come up during the music!
@@ChrisMaherDIY Thanks, I never heard about it before.
What can I use for the acrylics because the ones in the discribtion costs 40€ each and i dont have as tbat much money for a light
Ohh thats a bummer they are so expensive! They are 10 dollars each here which isn't super cheap but not horrible. You can use stencil paper or you can sand some think plexiglass down. Might have to get creative depending on whats available where you are and how much things cost! Thanks for watching!
Sooo my table saw blade just ripped apart my acrylic in a violent Dorito storm fashion...
May I ask... What spec saw blade would you suggest for cutting the acrylic?
Ohh man what a bummer! I just used the cheap generic one that my table saw came with! I looked on amazon and this one had some good reviews for people that used it to cut acrylic! amzn.to/3KU6kF0 Maybe give this one a try! I also went pretty slow when cutting it and did not try to rip it through really fast.
@@ChrisMaherDIY Thank you for your response! Yes, my blade was definitely of a lower tooth count (intended for general lumber cuts).
I'll try again with the higher tooth count soon!
If anything though, my last experience made me sooo thankful to have safety glasses on!
I always thought I couldn’t cut rgbic. Did you lose any features cutting those lights?
In my experience i've seen that when you cut the govee leds, they still work but govee does not adjust the animations to factor in the missing pixels. What that means is if you have an animation where lets say the last 30 pixels should be red, if you cut the last 30 pixels off, govee will not adjust it to make the last pixels of what you have left red. You simply wont see the red anymore. So is it perfect? No, but does it still work, yes. Also if you solder or attach those 30 leds back on, then in my experience it will work perfect again. The other option which I have used in a few of my projects is just hooking up the govee led's to WLED and controlling them that way. Here is a video I made showing how to do that: th-cam.com/video/l0sRG1WAbq0/w-d-xo.html
@@ChrisMaherDIY thank you!
Can you please provide a link for acrylic. My plan is to do something similar beside a dual tv setup. But i want to be able to use the govee leds so I can sync it to the backlight of the govee immersion on the back of my TV. The other lights you use, do you have to program them? I seen you plug it into a computer, which I don't currently have. Thanks in advance
Trying to figure out a good way to diffuse them to look as good as this.
Thanks so much for watching! Here is the link to the acrylic I use: amzn.to/3OZ8BPS The lights I mostly use I am controling with a free program called WLED thats installed on a 6 dollar esp board. Here is a video I made walking you through those steps: th-cam.com/video/TOEnFKLm9Sw/w-d-xo.html
But for this build, govee lights would work good since the diffuser is far enough away from the light source so you wont see any hotspots even though govee led strips only have 30 leds per meter.
@@ChrisMaherDIY thanks alot. Really enjoy your videos. I'll be utilizing quite a few of your ideas. Do I need a computer to set up those other lights.ans esp board?
So you can cut the RGBIC GOVEES??
Thanks for watching and yes you certainly can! They can also be soldered back together as well. The only thing is if you cut them in lets say half, the Govee app will still function and work as if there is still the entire strip there. The app does not adjust the animations for only half the strip if that makes sense.
what kind of projector do you have?
I have a super old one. Its nothing special but its certainly good enough for me! amzn.to/3vZ40qZ
The bouncing effect that you use at 7.40, can that be done with Wled
Great question! You certainly can. It would be the "bouncing ball" effect in WLED. In WLED you can customize the color as well as the speed of the animation. I love WLED!
@@ChrisMaherDIY Thanks you. It's working now
what projector do you use..?
I got it a long time ago. Nothing fancy but it still works and the picture is good enough for me! amzn.to/3vIozHT
It's my understanding that Govee advises against cutting the RGBIC strips. Is this no longer the case? Not being able to cut them has help me back from some projects. This could be a game changer.
Thanks for watching and for the comment. That was always what I thought but I finally got curious and started cutting them up. In my experience they work just fine but you do have to be aware of a few things. The best way I can describe it is that the app is programmed to work with the entire strip of LED lights. So lets say you are running 1 animation and in that animation the last 12 led lights on the strip are programmed to be pink. Lets say you cut off those 12 led strips. The app does re-calibrate the amount of led lights on the strip. What you would ideally like to happen is that the animation would stay the same and the last lights on the new shorter strip would be pink. However, that is not the case. The animation will still be the exact same as if those last 12 lights were still there. You would no longer see the pink at the end. Now if you were to solder those 12 lights back on or attach them, they would again be pink. I hope that makes sense. I always thought that if you cut them they just would not work. They will still work but the above scenario happens which for me was not a big deal. Another work around is I found a way to hook up the Govee LED lights i've been using to work with WLED which worked great! Here is the video for that if interested: th-cam.com/video/l0sRG1WAbq0/w-d-xo.html