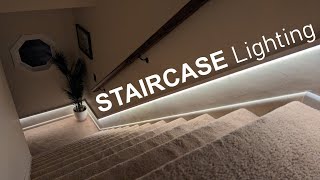
DIY LED Board and Batten Accent Wall | Wainscoting How to

ฝัง
- เผยแพร่เมื่อ 29 มี.ค. 2022
- 📦 AMAZON’s BEST DEALS (updated daily): bit.ly/3VWZKVS
📣 AliExpress’s BEST DEALS (updated daily): bit.ly/3VwoaDW
☑️ Check out my sponsor to begin your FREE 14 day trial to Aura: aura.com/chrismaher
Spotless Diffuser Channel 1m Amazon: amzn.to/47aIujz
Spotless Diffuser Channel 2m Amazon: amzn.to/3QoHeDb
Spotless Diffuser Channel 1m or 2m Muzata LED Store: bit.ly/3NHG5Uw
Spotless Corner Diffuser Channel 1m Amazon: amzn.to/3DFhRpf
Spotless Corner Diffuser Channel 2m Amazon: amzn.to/3Krqw2q
Spotless Corner Diffuser Channel 1m or 2m Company Site: bit.ly/3D3yI4R
LED Lights: amzn.to/3qPFA01
BTF Led Lights AliExpress: s.click.aliexpress.com/e/_Dm2...
ESP32 Module: amzn.to/387joI5
Power Unit: amzn.to/3IS3q16
Power Cord: amzn.to/3iPRbaN
Resistor: amzn.to/3tSPMqz
Wago Connectors: amzn.to/3uZhlOj
Cordless Brad Nailer Kit: amzn.to/3NuKxoC
Cordless Oscillating Saw: amzn.to/3DmuCnA
Silicone Wires: amzn.to/3KtISgE
Wire Strippers: amzn.to/36NM5Jj
Solder: amzn.to/3tGbixf
Soldering Station: amzn.to/3IWQo3t
Helping Hands: amzn.to/3hRMaOt
Soldering Fan: amzn.to/3uxgW54
Heat Shrink Tubing: amzn.to/3wL5JAR
The best way to help support my channel is to like, comment, and share my videos with anyone you think would enjoy them. Also please consider subscribing if you like the content! The other way is to use the Amazon links above as I get a small % at no extra cost to you if you buy something. Thank you all for the support!
#DIY #DIYLED #DIYPROJECTS


![อยู่ได้แล้ว - LIPTA feat. Mirrr [OFFICIAL MV]](http://i.ytimg.com/vi/-9-hpntNym4/mqdefault.jpg)


📦 AMAZON’s BEST DEALS (updated daily): bit.ly/3VWZKVS
📣 AliExpress’s BEST DEALS (updated daily): bit.ly/3VwoaDW
☑ Check out my sponsor to begin your FREE 14 day trial to Aura: aura.com/chrismaher
Spotless Diffuser Channel 1m Amazon: amzn.to/47aIujz
Spotless Diffuser Channel 2m Amazon: amzn.to/3QoHeDb
Spotless Diffuser Channel 1m or 2m Company Site bit.ly/3NHG5Uw
Spotless Corner Diffuser Channel 1m Amazon: amzn.to/3DFhRpf
Spotless Corner Diffuser Channel 2m Amazon: amzn.to/3Krqw2q
Spotless Corner Diffuser Channel 1m or 2m Company Site: bit.ly/3D3yI4R
LED Lights: amzn.to/3qPFA01
BTF Led Lights AliExpress: s.click.aliexpress.com/e/_Dm2FaeJ
ESP32 Module: amzn.to/387joI5
Power Unit: amzn.to/3IS3q16
Power Cord: amzn.to/3iPRbaN
Resistor: amzn.to/3tSPMqz
Wago Connectors: amzn.to/3uZhlOj
Cordless Brad Nailer Kit: amzn.to/3NuKxoC
Cordless Oscillating Saw: amzn.to/3DmuCnA
Silicone Wires: amzn.to/3KtISgE
Wire Strippers: amzn.to/36NM5Jj
Solder: amzn.to/3tGbixf
Soldering Station: amzn.to/3IWQo3t
Helping Hands: amzn.to/3hRMaOt
Soldering Fan: amzn.to/3uxgW54
Heat Shrink Tubing: amzn.to/3wL5JAR
The best way to help support my channel is to like, comment, and share my videos with anyone you think would enjoy them. Also please consider subscribing if you like the content! The other way is to use the Amazon links above as I get a small % at no extra cost to you if you buy something. Thank you all for the support!
"LEDs were going to be unnecessarily added..." 😆 Excellent 👍
Lol its a fun way to live life trying to add light to everything hahaha
"LED's were going to be unnecessarily added" This man gets it 👍🏽😎
was the start of a process that got alimony unnecessarily added to my expenses, haha
That's the first thing that's stuck in my head. LoL
7500k in my tree this year.
Not sure if my ex still looks at me madly, or she's squinting
I am an eletric engineering student and I've been working with RGB LEDs embedded systems for a few months now. I just came across you channel while looking up for some project ideas and I gotta say, you attention to detail and whimsy are great aswell as the looks of every project. Keep up the awesome work man! Also thanks for sharing your knowledge through such well made videos.
Much love from Brazil ✌
Thank you so much for watching and taking the time to comment! Love the support and Brazil is certainly a place I would love to visit someday! Hope you have a blessed day!
It’s the resistor in series is what got me lol
I watched a few of his videos now these are by far the most helpful videos I have ever watched on how to reuse my RGB that I've used for other people projects that don't have the logic board and power supply now I can safely assure myself that I can reuse those RGBIC lights now! Thank you so much! -Brent
Thanks so much buddy! Appreciate the kind words and thanks for taking the time to comment! Glad you are enjoying the content!
Chris, LOVE the videos, man. You spare no details for education AND create relaxing and entertaining videos. Bravo. Keep them coming!
Thanks so much buddy!! Appreciate the support and thanks for taking the time to comment! Glad you are liking the videos!
King of Addressable Led work. One of the best on TH-cam. Impeccable 🎉
wonderful project! 👏😎
Thanks so much!!
Your wife is beautiful @@ChrisMaherDIY both make a lovely couple 🙂
You projects never disappoint, how you included the LED lights into your wifes idea, kudos lol, hope it passed her longterm approval. As some else pointed out too, you can use multiple strips on the same ESP32 and last time I read, some people run up to four, all on seperate data pins BUT there maybe a limitation of pixels to about 200 or so on each. Even having two strips on one board will save you a few pounds/dollars which all count, well especially for me lol.
Thanks buddy! Lol she actually doesn't mind them so they get to stay! Thanks for the heads up on the fact the esp32 can control multiple strips with different pins. That would for sure be the more cost effective way of doing it! I'll have to look into that to figure out the logistics. Appreciate the info!!
I love the thought process. Especially the 2nd choice - Justifying "New" tools! Let's go!
This build is epic.
This is my favorite of your videos so far. The concept is exactly the kind of thing I think about doing. I think you are getting better at filming and editing as well. Great Job. I can't wait to see more projects!
Thanks so much!! Appreciate the support my friend! Glad I could help with the idea and for sure many different directions and designs you could take this project!
Been kind of bingewacthing your channel and come across a bunch of ideas ive had and never thought to follow through with and seeing them done in real life (better then i had come up with) is amazing the attention to detail in your projects and the video itself is truly high quality
That looks fantastic! Now I have another project idea and still not enough time to do them all haha.
One addition I'd have made is to remove the window trim and cut a channel in the back to run the wires through for a cleaner look.
Thanks so much as always! That is a great idea. I did think about that but I pictured myself somehow breaking the trim while removing it and then having to replace everything. I went with the safer yet not as professional looking rout lol.
This dude is a absolute bad ass. Thank you for taking the time to make this video. So going to do this.
Thanks so much buddy! Appreciate the love. Glad you liked the video and thanks so much for watching!
I just found your channel, and you’ve done so many of the projects I want to do! I want to do this without the vertical pieces in my garage.
Great minds think alike :) That sounds like a very fun project and probably not super difficult! Let me know if you have any questions!!
Love this design!
Thanks for watching and appreciate the support!
Bruh. That’s insane.. just got to the actual showcase of the finished results, and my mind is blown. Damn, I wish I had the money to do this type of stuff. I love designing, building, and creating areas though I’m only 19 hopefully one day I can turn that into a reality:)
Thanks so much for watching and the kind words buddy! I'm glad you liked the video! My advice would be to just start out with some small type projects and then go from there! Save up money if you can. Its a fun little hobby and sounds like you have a similar mind as mine where we like to create / build things!!
I also love the SK6812, great colors. I will definitely steal some gradient ideas from the end of the vid for my own WLED lamps 😄
I really do like them as well! Definitely a step above the ws2812b with the separate white channel! Thanks so much for watching!
this is middle class excellence !!!1
Lol that's awesome!
Simply put..... This is BADASS!
Thanks so much buddy! Appreciate the support and thanks for taking the time to comment!
Great work, now I’m getting this done for my bedroom! 😉✅
Niice!! Let me know how it turns out! Good luck buddy!
I'm so stoked I stumbled upon your channel! Thank you for your content and tutorials!
Thanks so much for watching and i'm glad you like some of the videos! Appreciate you taking the time to comment!
That looks fantastic brother. My wife wants a little more modern angled design using the board and batten style, and I am TOTALLY incorporating some of that channel into the design....
Thanks as always buddy! Yeah I really like the angled design look. You could for sure do something very similar with that and the leds! Might be a little more tricky to run/hide the wires but totally doable!
asmr for diy engineers ❤❤
Thanks so much for watching!!
awesome video and awesome idea. i love seeing the cool stuff you come up with, finding interesting and unique ways to integrate lights into dull spaces
Thanks so much! Its certainly fun trying to light up spaces and its fun seeing it all come together! Thanks for watching buddy!
Great one again, Chris,
Nice integration with the wood.
Thanks buddy! Appreciate it and thanks as always for watching!
I love the whole thing but the sheer visual offset kills me 😂. Great video and work.
Thanks so much for watching and taking the time to comment! Glad you liked the video! Lol yeah, its not perfect but a fun project regardless! Thanks again!
She is brave and talented to paint without covering on the floor! LOL I would have a white carpet after that.
Lol she is! Thanks so much for watching!
Turned out great fair play. Good job
Thanks so much for watching and taking the time to comment! Appreciate the support!
So I Googled some pictures and it seemed easy enough. Lol. Famous last words for any construction project. But you did a great job. Thanks for the inspiration.
hahahaha that was exactly me when I tried replacing the water temperature handle in one of our showers. Didn't take too long before regretting ever starting the project! Thanks so much for watching and taking the time to comment!
The lights looks lit!
Thanks so much buddy! Appreciate it!
WOW! It looks amazing.
Thanks so much for watching and taking the time to comment. Glad you like it!
I know very little about LED’s but have a custom Millwork shop, we could have made a good team.
This looks so extremely incredible and adds a high end element to the project.
Great job thank you for sharing.
Inspiring stuff, thanks for posting!
Thank you so much for watching! Appreciate the support my friend!
Looks amazing. Appreciate your detailed explanation and footage 👍💝
Thanks so much for watching and taking the time to comment! Glad you like the video!!
Looks great Chris!. Hopefully your wife is happy now and they won't be coming down haha! Keep up the great videos, love them and have started my own projects as a result, thanks a lot. :)
Thanks so much buddy!! She doesn't mind them so they will be staying! So glad you are enjoying the videos and that's awesome you are doing your own projects. Its a fun little hobby for sure!
Love the look. One small tip, if you want to make the seams between the aluminium profile seamless, use the smaller end piece of the diffuser at the start, that way the diffuser 'links' the aluminum strips together preventing separation.
Thanks so much for watching and taking the time to comment! Thats a great suggestion! I'll have to do that for sure the next time I use these channels! Thanks buddy!
Holy electrical engineering!
Thanks so much for watching!
Thats to sick💯
I love your videos bro ! Complete game changer 🙌🏼
Thanks so much buddy! Glad you like the videos! Thanks for watching!
This is amazing!! I'm impressed, I would honestly like to attempt this myself 😅
Thanks so much for watching and taking the time to comment! Glad you liked the video!
That's looks super clean 🤩
Thanks so much for watching and taking the time to comment! Glad you liked the project buddy!
you got a new subscriber, i love what you do, nothing better than DIY
Very nice result! Do try to add forked cable shoes to the end of the wires that go to the power unit! This way they are more secure in place and you can join two wires together for 1 good connection!
Thanks so much for watching and appreciate the advice! I'll have to look into those. Is there a certain type you recommend on amazon?!
Beautiful!❤
Thanks so much for watching! Glad you enjoyed it!
That looks good 👏🏽👏🏽👏🏽 worth it
Thanks so much!! Thanks for watching!
Yo Chris,
I really enjoy your stuff. Your creativity is excellent. A trick for you, try pushing your caulk line instead of pulling. After you practice you have more bead control, often not needing the "finger finish" method
Great job. Would love to do something similar for my home office and sons room.
Thanks so much! Definitely give it a try! Its pretty simple but let me know if you have any questions at all!
As always it looks fantastic😀
Thanks buddy!
Now my board and batten wall looks like trash. I can’t unsee this!
Lol thank so much! Glad you like it and thanks so much for taking the time to comment!
Fantastic job !
Thanks so much for watching and taking the time to comment. I appreciate the support buddy!
Wow the looks amazing. Great job
Thanks so much for watching and taking the time to comment! Glad you liked the video!
This is SICK🔥
Thanks so much!
Ok, I was loving this video and then boom... the Thielen jersey. We're definitely kindred spirits my friend! Skol!
lol that's awesome! I'm a Vikings fan for life and its a very tough life to live knowing that we will neve win a super bowl but it is what it is lol! Thanks so much for watching!
This was awesome. Great project and video 👏
Thank you so much for watching and taking the time to comment! I appreciate the support! Glad you enjoyed the video!
Hah! Really cool as well, projects are getting bigger and bigger 😂😃
Thanks as always Chris! Yeah I was just thinking that this was probably my biggest project to date!
you're an artist dude and your work is amazing
Thanks so much for watching and the kind words! Appreciate it buddy!
you're a vikings fan!? I love this channel even more now
I bleed purple! Its been a tough life being a Vikings fan so I'm glad there are others out there who know the pain lol. Thanks buddy! You from MN?!
Absolutely FKN love it! My home improvement ideas just got put on steroids! THANK YOU!...just SUBSCRIBED and I'm about to go ham on your videos bro!
Thanks so much buddy!! Glad you liked the project and thanks for the support my friend!!
you got my attention with the first 30s. im going to add LED light weather my wifre likes or not lol the project looks great.
Lol thanks buddy! Glad you liked the video!!
Great video as always, but as good as the project was, that intro was the best part. LEDs unnecessarily added lol.
Thanks buddy!! lol she was not very excited but she doesn't mind how it looks after its all done so I think it will stay!
Nice work. Very clean looking 👌
Thanks buddy!! Appreciate the support!
Thanks for the advice
Thank you so much for watching and taking the time to comment! I appreciate the support!
Hey Chris… awesome video. I love what you make with LED’s. I’m standing at the edge of the pool sticking my toe it to see how the water feels before I just jump right in with WLED’s.
Thanks buddy!! Lol come on in, the water is great! I dont have really much to compare it too but for someone that does not know or really have a desire to do programming, I cant picture anything better than WLED!
@@ChrisMaherDIY oh I’m gonna jump. I’m waiting for your new video with the true white LEDs you told me about
Your music selection is impeccable.
Thanks so much buddy! I realize everyone is not going to have the same taste in music but I'm glad there are a few out there who appreciate the style that I like!!
Turned out fantastic! I've been wanting to do something like this for awhile. I was wondering how you were gonna clean up the power supply and control boards to hide them, then I remembered... use plants! Awesome job!
Thanks so much! lol yeah I just used a plan for now but once all our new bedroom furniture arrives I may build a little wooden decorative box to keep everything in or the other Idea was to have a fake plant in the corner and most of those bases are hallow. I would then stick the power and controllers in the base of the plant unit (probably have to drill a few holes) and hide everything that way!
Very nice work! You just gave me some great ideas. Also, try to convince your wife that you need a small hand router. Then you can just route out a channel in the wood, and run the wires in that and won't need any additional cover pieces.
Thanks so much and I'm glad you were able to get the gears turning! That's a really good idea to use a router! I actually have one but never thought of using it. Thanks for the suggestion!
Badass!
Thanks buddy!
Sick bro!
Thanks buddy!! Always appreciate the support!
gd man. you keep batting a 1000. Amazing job.
Thanks so much!! Appreciate the support buddy! Thanks for watching as always!
Great job, that's what I'm talking about.
You could also add a bit of trim around the lower section of window frame as well so the width is consistent.
That's a great idea! Wouldn't be that hard to do either! Thanks for watching and for the great suggestion!
Nice job!
Thanks so much!!
Another excellent project, you had me giggling with the line of "unnecessarily adding LEDs," that is me through and through! 🤣 🤣 🤣 🤣
Great to see the sk6812's.
Lol yeah we definitely think alike! Why even bother making something if you can put lights on it?! lol. I really am loving the sk6812's! A little more expensive but I do love having the separate white led!
@@ChrisMaherDIY I knew you would, like you said a little more cost but so much more ideas, especially for main lighting, my lounge has all black furniture and curtains and magnolia walls and ceilings and I get all my colour from LEDs whether they be strips and chipsets or whether I borrow from my professional lighting stuff, that way it's nice and bright and white when you need to do stuff but every colour of the rainbow and more when it's chill out time.
Quick question, do you have a patreon account?
@@-djs I do not. Maybe sometime down the road I'll look into it!
@@ChrisMaherDIY
I'll keep my eyes open, until then keep up the great work,
I made it 3 minutes in and you’ve managed to creep me out that you might be the exact same person as me… All the way down to the same LED diffuser that I’m in love with on Amazon! 😂
Hahahaha i'm glad there are others out there like me lol. Thanks for watching buddy and thanks for taking the time to comment! They really are the best diffusers out there!!
You could also consider bringing the power up from the baseboard to fill in the longer section of the top rail. Then you could avoid trimming around the window.
Thanks so much for watching and the great idea!! I never thought about that. I was fixated on keeping the wires on 1 side that I never thought about different ways I could have done things. Thanks for taking the time to comment!
For the dap and caulking products, push the product with the tip instead of pulling and it'll come out perfectly smooth on its own.
Thanks so much for watching and for the advice! I'm certainly no expert so I appreciate any tips from people that know a lot more than I do!
Master genious¡¡¡¡¡¡¡
Awesome job 👏 👍
Thanks so much!!
"LEDs were going to be added unnecessarily rather my wanted them or not" ..... I love it 😂
Lol its only going to get worse the more projects I do hahaha.
the twinkling white and blue in the daytime looks really cool! not subtle, but also not far off from "normal." kinda like an aquarium vibe. great work!!
Thanks so much!! Appreciate the support and glad you like the results! Thanks so much for taking the time to comment.
@@ChrisMaherDIY you are inspiring all of us to get into soldering and elevating the diy rgb game to new heights.
super cool project
Thanks so much!! Glad you enjoyed the video!
Great project! In the future you should try out the multi output support in WLED. You can control both of those strips (both individually or as one single string) from a single ESP8266 using two data output pins.
Thanks so much and thanks for the tip! I heard you could do something like that but I've never done it so I'm not entirely sure how it would be done. Is it pretty easy to do/set up? Do you know what pin you could use can it literally be almost anyone for the data output pins?
@@ChrisMaherDIY on an 8266 recommended pins are GPIO 1,2,3 , for esp32 recommended is GPIO 1,2,3,4,16 so really it’s as simple as soldering to those pins then jumping into the web interface and defining the pins. Then everything can be controlled from the one board.
@@benellis2377 Thanks so much for the info! That helps a ton. I'll have to try that for sure on future projects!
@@ChrisMaherDIY about wled, its extremely simple to use, just need to flash the Bin file on a esp8266/32. get a board like the node mcu it has pre soldered pins also they tell you to use a level shifter of the led strip but honestly if you initial wire is shorter than 30cm.you should be fine, rest like pin definition you can do that on the web ui, they even have excellent documentation, what makes it cool is thag you can sync multiple of those together
@@ShahZahid Thanks so much for the information! That's all very helpful to know! I definitely have a lot to learn about the esp boards as well as all the features of WLED!
Chris, you're amazing. I've been watching all your videos for the last few days and have started ordering supplies for my own LED projects. I'd like to have a dedicated, preferably wireless, on/off switch for them and was wondering if you have any suggestions on how to accomplish this.
Nice 👍🏼. One thing you could’ve done is to have identical strips for the lower part and the top one and hide the LEDs that run across the window in the window from so you can’t see their light and and then run an extra wires to the last part. This will give you seamless and identical effects on both strips. Either way it looks good.
Thanks so much! Yeah I was trying to wrap my head around how I could keep the animations identical if I wanted too but I never figured out a way in my mind so I didn't try attempting anything! A couple other people had some suggestions as well. That's what I love about the led community! Everyone is so nice and offers ideas and suggestions on how to improve!
15:25 your neighbor walking his dog is going to wonder wtf is going on in your bedroom. Nice job, cool idea.
Hahaha i was thinking the same thing when I was filming this lol Thanks for watching!!
excellent this your doing great ideas for us thumbs up
Great project! My preference would be not to see the light source, but it's an amazing idea.
Thanks so much for watching and taking the time to comment! Yeah its for sure a personal preference! Hope you had a great Christmas!
I love you your videos my friend
Thanks buddy and thanks so much for watching!
Your content is great keep it up you are a genius
Thanks so much my friend! Appreciate the support!
Wow. it turned out a lot more beautiful than I had expected. Any idea on the maximum length/amount of LED that a single strip and go before it gets wonky?
Thanks so much! Glad you liked the project! I've never ran more than a couple strings so i'm not sure the max distance. I'm always a trial and error type of guy so I would probably just experiment with first three 5meter strips and go with more or less depending on the results. Its also going to completely depend on what your using for power and how much/often you do power injection.
Damn this looks sick with the leds I wish room was bigger so I could do projects like this but sense it's small you wouldn't be able to see it
Thanks so much for watching and taking the time to comment! You could still maybe use the design idea for something else? The diffuser channels I use in the video can be used for so many different things!
@@ChrisMaherDIY thanks for the idea I could probably do the design or lights in the hallway
I really like this I'm kind of like you. I think about how I can add lights to everything lol
Hahaha! Its a fun hobby that not everyone appreciates lol.
Your videos are awesome. I would love to make baseboard trim like urs but have them motion detected. Not sure how to go about that as well as power them permanently so there's no plug into the wall.
pro tip:::::: paint your trim BEFORE installing to the walls
Really clean job. Would love to see how you hid the controller and the massive power supply 😂
Thanks again buddy! I mostly just hid things behind furnature or plants but if thats not possible I did make a video of a way you could hide it so it does not stick out horribly. th-cam.com/video/ibRp6eeUwBA/w-d-xo.html I'm not wanting to hide things in my wall or behind sheetrock, (too much work) so options are kind of limited!
Absolutely doing this asap. Thnaks for the links to everything too! Nice touch...
But my question is, what software runs all the color patterna and movements?
Why using 2 separate esp32s?
Looks amazing!!
Im hoping to visit your house on day just to see your lights.!!
SKOL!!!!! hahaha, my people!
Yeah buddy! Every year its a letdown but every year we come back for more!!