I really appreciate the time and effort you put into showing ALL the steps and issues hanging a new door. I have a slab I absolutely love but the jambs and threshold need to go and I know it's going to be a pain but it'll be worth it. Thankfully I have a decent impact 😁
Absolutely. It works well with roller covers as well. Just wrap the paint covered roller in plastic wrap and you can go a week or more between coats without having to clean them out or use a new one.
I’ve started using a v notch tile trowel to flush trim my notably generous applications of spray foam. A Japanese saw isn’t a bad idea either! That free door is coming along nicely.
A v-notch trowel is a great idea. I just use the saw so I can catch the shims at the same time. I'm not good at the score-and-snap. I always end up with splinters protruding.
i think they have that pink putty backwards it should go on white and dry pink .if your doing alot of primed trim and you miss sanding a spot it flashes through the pain bad.
Very good video! i don't normally press the like button often but you got one for great results. I however think your in jeopardy of giving up a Mancard using that hammer sideways. LOL
I need to know what you did to cut out the part above the door so that you could install the storm door, because that's what I need to do. My soffit is too low
I says to myself; " Why doesn't he just use a thingamajigumm to do that part, why I'd use a doodad and instead of doing that part like that I woulda used a what chamacallit, but NO!!!" then it dawned on me,,,This guy is showing how easy this job is to dems what's knows what they're doing, and he is just first of all showboating his skills but most of all this guy is enjoying what he's doing, Fine hands craftsman is what they call guys like this.
Ha ha! Thanks for all that, Henry. Sometimes I just get the urge to feel a handsaw cutting through wood, and I figured, if I enjoy it, maybe someone else would too. I can watch Mr. Chickadee cutting wood all day long!
workmanship looks great, try to get a sturdier camera mount, a little shacky, dont get too fancy with transitions and toss on some copyright free music, and this video would be more eye catching. Keep up the awesome stuff.
For the record, I disagree with the music. It’s distracting in my opinion. Except for the trip to the hardware store, I liked hearing just the ambient noise.
I don't have a table saw ): to run trim through Any suggestions? Also I would sand first before caulking or run the risk of accidentally scraping smooth caulk with the sanding block/paper & messing it up
It would depend on how good you are with a circular saw or even a hand saw. I have ripped multiple boards down to size with a handsaw (for window jamb extensions on a bank of 4 windows-- I wish I'd made a video of that) and it didn't take long. But you would also need to plane or sand the edges smooth afterwards. -- good tip about the sanding :-)
I'd use a block plane to take it down a little. A miter saw would definitely be better, and I have a miter box and power miter saw, but sometimes I need to satisfy an urge to do some freehand sawing. Thanks for the comment!
Hey Dave, Thanks fr the video. Is it necessary to caulk the aluminum flashing at the top of the window? meaning caulking the flashing to the brick? Thanks.
I usually take a day just for the door jamb. But that’s because I work slow, get distracted, run errands, forget things, and sometimes filming what I’m doing. A pro could definitely do the whole jamb and trim in one day, maybe a half day. Hope this helps. Thanks for the comment.
Good question, Paige. It's just a piece of 1x material (1x6 I think) to help bridge the gap and make the brickmold trim land in the right place. Since trim is not structural, you can (and sometimes must) be creative to make the finished product look right. The double reveal (quirk) I used was really only to widen the trim as well, so that the sides could reach the brick. If the space between the jamb and brick had been smaller, I would have been able to to nail the brickmold directly to the jamb without using the extra filler pieces. Hope this helps (and wasn't too much info.)!
Juvenile black rat snake. Pretty common around here. They loose those markings as they grow until they're almost completely black. Thanks for the comment, hm G!


I appreciate that you just got on with the work and didn’t try to be a “character.” Well done. Helpful.
Thanks, Rock! I'd rather not talk in ALL my videos if it were possible. Have a good one!
I appreciate you making this look like a job any of us could do.
I really appreciate the time and effort you put into showing ALL the steps and issues hanging a new door. I have a slab I absolutely love but the jambs and threshold need to go and I know it's going to be a pain but it'll be worth it. Thankfully I have a decent impact 😁
All the best on your project. And let us know how it goes!
Thanks! I've been needing to trim around my door and windows. I'm an electrician, plumber,... the trim had me perplexed. Thanks again!
Thanks for watching, James!
I would’ve loved if this had a voice over, but nonetheless subscription earned. This is exactly what I need to do to front and back doors!
Well done. Thank you 🙏🏻 I have to do the main entry trim and threshold on my own and have no idea what I’m doing. This helped.
Thanks! All the best on your project! Also I have a newer threshold video on my channel if you’re interested.
The paint brush in the fridge was a bonus tip. Thanks for that!!!
Absolutely. It works well with roller covers as well. Just wrap the paint covered roller in plastic wrap and you can go a week or more between coats without having to clean them out or use a new one.
I’ve started using a v notch tile trowel to flush trim my notably generous applications of spray foam. A Japanese saw isn’t a bad idea either!
That free door is coming along nicely.
A v-notch trowel is a great idea. I just use the saw so I can catch the shims at the same time. I'm not good at the score-and-snap. I always end up with splinters protruding.
Great vid! All understandable and without any talk! Thanks
Thanks for the kind comment, Henry!
No nonsense very informative video. It was exactly what I was looking for. Thanks for sharing.
Thanks for the kind comment, Will!
i think they have that pink putty backwards it should go on white and dry pink .if your doing alot of primed trim and you miss sanding a spot it flashes through the pain bad.
That looks great, and the double-reveal is a nice touch! Thanks for sharing! I'm about to do a similar job on a 1905 brick house!
Much appreciated :-) All the best on your job!
This is quite entertaining. AND Exactly what I was looking for. Thanks
Thank you. Glad you enjoyed.
Very good video! i don't normally press the like button often but you got one for great results. I however think your in jeopardy of giving up a Mancard using that hammer sideways. LOL
Thanks!
Nice work with the hand saw
no talking the best
@11.20. Lol. Nice job and love the music
What a relaxing and informative video. I loved watching it!
Glad you enjoyed it, Stephanie. Thanks so much for the kind comment!
That's my same Lowe's store! Nice work
Thanks, neighbor! 😁
Good job man. Thanks. I learned a lot.
Thanks for the kind comment!
I need to know what you did to cut out the part above the door so that you could install the storm door, because that's what I need to do. My soffit is too low
Good job!
I says to myself; " Why doesn't he just use a thingamajigumm to do that part, why I'd use a doodad and instead of doing that part like that I woulda used a what chamacallit, but NO!!!" then it dawned on me,,,This guy is showing how easy this job is to dems what's knows what they're doing, and he is just first of all showboating his skills but most of all this guy is enjoying what he's doing, Fine hands craftsman is what they call guys like this.
Ha ha! Thanks for all that, Henry. Sometimes I just get the urge to feel a handsaw cutting through wood, and I figured, if I enjoy it, maybe someone else would too. I can watch Mr. Chickadee cutting wood all day long!
Great job I learned a lot, very detailed thank you..
Thanks, and thanks for the kind comment, Mike!
I'm curious if all those little pieces you spliced together have started warping and separating due to being out in the elements.
Still looks like new!
Thank you! Looks fun to do and very nice!
Thanks!
Good video man. Anytime you get polyurethane for 5.00$ that’s a steal. Now come do my door for me. Lol
Ha ha ...thanks
Really good video!
Much appreciated, Lori!
Excellent video, keep it up, thanks!
Thank you too!
Great Video!
Thanks!
Can a storm door be installed on this? I need to do a similar project and wonder if it's strong enough to support a storm door.
Absolutely. The caulk to the brick and the nails to the jamb make it very solid.
workmanship looks great, try to get a sturdier camera mount, a little shacky, dont get too fancy with transitions and toss on some copyright free music, and this video would be more eye catching. Keep up the awesome stuff.
For the record, I disagree with the music. It’s distracting in my opinion. Except for the trip to the hardware store, I liked hearing just the ambient noise.
I don't have a table saw ): to run trim through Any suggestions? Also I would sand first before caulking or run the risk of accidentally scraping smooth caulk with the sanding block/paper & messing it up
It would depend on how good you are with a circular saw or even a hand saw. I have ripped multiple boards down to size with a handsaw (for window jamb extensions on a bank of 4 windows-- I wish I'd made a video of that) and it didn't take long. But you would also need to plane or sand the edges smooth afterwards. -- good tip about the sanding :-)
@@FamilyFriendlyDIY thx for the suggestions
Thank you for sharing your video. ☺
Thanks for watching, Susan!
Great job!
Using a hand saw, what if you cut the piece 1/16th too long, how do you take off 1/16th inch?? Wouldn't a miter saw be much better?
I'd use a block plane to take it down a little. A miter saw would definitely be better, and I have a miter box and power miter saw, but sometimes I need to satisfy an urge to do some freehand sawing. Thanks for the comment!
What type of material trim did you add to the top with the adhesive caulking?
Hey Dave, Thanks fr the video. Is it necessary to caulk the aluminum flashing at the top of the window? meaning caulking the flashing to the brick? Thanks.
No, Doug, flashing is usually not caulked. It should do its job because of the shingling effect. Thanks for the question.
Very nice job.
Thank you!
Guess I don’t need sawhorses and a miter box after all!
Jeez man, cut out all that chatter, would you? 😁
That drydex stuff is crap , use window glazing. Looks good though. Alot of people would just smear caulk in the holes and call it good .
I wish I could explain my issue but I don’t know the correct terms to explain
With the door frame and trim. Estimated time on how long it took? I need to redo my front door this weekend. Trying to plan accordingly
I usually take a day just for the door jamb. But that’s because I work slow, get distracted, run errands, forget things, and sometimes filming what I’m doing. A pro could definitely do the whole jamb and trim in one day, maybe a half day. Hope this helps. Thanks for the comment.
What happens when the wall starts separating from home? Is that reparable?
It depends on why they're separating Ernesto, but most things are reparable--though expense can vary greatly.
What length fasteners did you use please.
I believe I was shooting 2 inch 15 gauge nails
What is the white piece called that you installed at the top of door frame?
Good question, Paige. It's just a piece of 1x material (1x6 I think) to help bridge the gap and make the brickmold trim land in the right place. Since trim is not structural, you can (and sometimes must) be creative to make the finished product look right. The double reveal (quirk) I used was really only to widen the trim as well, so that the sides could reach the brick. If the space between the jamb and brick had been smaller, I would have been able to to nail the brickmold directly to the jamb without using the extra filler pieces. Hope this helps (and wasn't too much info.)!
@@FamilyFriendlyDIYinteresting in my door I didn't need to use a piece there but did paint my rusty lindel a nice white
Thanks!
Very much appreciated, Erin!!😊
Instead of luggin big shot tax deductable machinary around this guy resorts to samurai techniques handed down from grandpa to grandpa....
Like therapy, ahhhhhhhhhh.....
That's what I like to hear!
That's pretty callous using your child's drawings as a drop cloth/paint shield.
I dug them out of the recycle bin ;-)
Gopher snake?
Juvenile black rat snake. Pretty common around here. They loose those markings as they grow until they're almost completely black. Thanks for the comment, hm G!
Might need more nails. Gah lee
😂
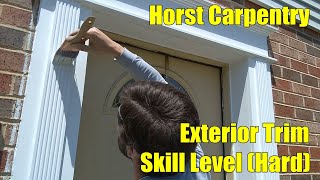
Sandels are a clear giveaway on the skill level. Sry Dave
:-) Thanks for the comment, Ryan!
So; not how to install but watch me install.
Dude u need a second table saw or skill saw. Why are u using a slow ass cross cut saw?
I have power tools. Sometimes I just get the itch to do it the old-fashioned way. Thanks for the comment, Chavez586.
@@FamilyFriendlyDIY Cool. I was both impressed and annoyed that u were using the cross cut saw. U are good with that thing! Lol
I love that you did this door installation in your Teva sandals 🩴 💪🏽😂 and this video was very helpful by the way!
Thanks 😊 Comfort before safety