EEVblog

ฝัง
- เผยแพร่เมื่อ 29 พ.ย. 2014
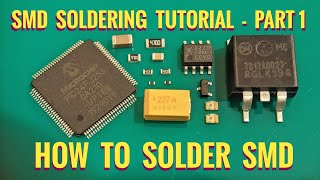
- Dave shows you how to rework and replace a blown SSOP surface mount SMD chip with ChipQuik, solder wick, and drag soldering. And also mentions other methods using a hot air gun and pre-heater.
Can he fix the Back To The Future Time Circuits and restore the timeline to it's original order?
Bonus rant about the lack of PDF schematics in Github projects.
The BTTF Time Circuits were designs and made by Shackspace
github.com/shackspace/bttf
shackspace.de/?p=4343
Video of Dave blowing up the Time Circuits:
• EEVblog #513 - Mailbag
Forum: www.eevblog.com/forum/blog/eev...
EEVblog Main Web Site: www.eevblog.com
The 2nd EEVblog Channel: / eevblog2
Support the EEVblog through Patreon!
/ eevblog
EEVblog Amazon Store (Dave gets a cut):
astore.amazon.com/eevblogstore-20
Donations:
www.eevblog.com/donations/
Projects:
www.eevblog.com/projects/
Electronics Info Wiki:
www.eevblog.com/wiki/ - วิทยาศาสตร์และเทคโนโลยี


Nothing can't be done just as long as you have the proper tools and magnification. Good Video!
Oh yeah? I tried taking my own appendix out once. It couldn't be done.
Doc :"No wonder this circuit failed; it says 'Made in Japan'."
Marty: "What do you mean, Doc? All the best stuff is made in Japan."
These are the best videos Dave. There just isn't enough of this on TH-cam. Cheers.
Please make a follow up video, always fun to look at some troubleshooting!
I agree with you 100% Dave - that stereo microscope must be fantastic to use for fine SMT work. I recently spent about three weeks off and on attempting to reattach a 144pin TQFP with a unregulated Weller 2012 iron, 5mm solder and a 10x jeweller's loop. Needless to say I failed - due partly to removing a pad while trying to clean my excess solder off for yet another try. Also, by that point all the CPLD's legs were badly bent and the final death knell came when one broke off as I was trying to straighten it. That hurt - a LOT - as the work piece was a retro graphics board for a 1980's Atari home computer and had taken months and months to save up enough to buy in the first place. One of those microscopes with the vast depth of field and cavernous working distance would have made all the difference. I can't tell you how much I grew to hate the smell of burning plastic when I time and again touched the barrel of my iron against the loop, all the while singing my eyebrows as I was crouched about 15mm from the joint. Oh, for that stereo scope...!!!
The problem is very simply the cost.
I am an amateur hobbyist - not even a full-blooded hobbyist! - and trying to get back in to electronics after more than twenty five years. I am giving it a try as a means to keep a mental focus and battle depression. I also have almost no income. I had to sell a kidney just to buy a rebadged Atten soldering station. I cannot afford a multimeter more expensive than the £10 ones you get in car parts shops. An oscilloscope is *pure* fantasy - I can't spare any more body parts!!! I bet more than a few hobbyists are in a similar position.
Humour aside, it would be incredibly useful if you would do a video - or better yet series - about real budget electronics; not the super swish gear but how to get the absolute best value from the least cost, or at least _workable_ value from _reasonable_ cost.
Aww... I was really looking forward to you troubleshooting this thing.
Hopefully you can follow up on this one day.
I know everyone has their pet favourite videos, but these repair ones really great. Thoroughly good watch.
(also loved the AC/DC coupling, the factory tour, and ... yeah - don't change a thing).
Definitely get the Scope out, i'd like to see that!
Very interesting episode. I learned a lot. Very funny with the flux, flux capacitor :-)
you need some flux for that capacitor as well
It works, Just needs to get to 88MPH to get a display...............
A fellow youtube blogger, sorry I don't remember his name, runs a bare thin copper wire under the chip, just behind a row of pins. Then he anchors by soldering one end of the wire to a nearby pad and applies heat and tension to the wire at the free end. The wire will slice under the heated pins lifting them from their pads without causing any damage to the IC or the PCB. It may sound complicated but it is a lifesaver as you do not require any tools but the soldering iron and a piece of wire. You can easily desolder quad flat packages in no time at all.Worth a try
Any chhance of his name, never seen this method.
Another method for SMT chips is to use a fine set of diag cutters and cut the pins. I have some Xelite 170M cutters with a narrow tip. I did a bit of filing to get them to fit better. Just cut the pins then wipe them off with the iron.
My rework station works nice. I just crank the temp way up so the IC will come loose before the PCB heats up too much. Sometimes I blow a cap or something loose while I'm removing the IC, but it's no problem. I just solder them back.
It seems like your way would put too much stress on the pads.
I think I'll give the Chipquick a go next time and see how it works.
The diag cutters are very thin. I have not had much of a problem with it stressing pads.
I do need to get some of that chipquick stuff for rework.
please do a followup. would LOVE to see you get that thing working. such a neat idea
Disappointed you didn't use 1950's components to fix the time circuits!
It was made in the the 80's. they went back to the 50's after it was made. just sayin' ☺
Son of a Zombie www.autoblog.com/2011/11/22/on-the-block-back-to-the-future-iii-delorean-up-for-auct/ : Stuff on hood is the repair to the time circuits made by 1955 Doc Brown, with 1950's components, at beginning of the third film after the lightning strike at the end of the second film
Mark James hello McFly!! anyone home!!? this is the interior time circuit - not "stuff on the hood". It's 1985, get with the times lol
Agreed! I would have like to have seen the construction of a two car garage, this display would have bolted on to, to hold all the 9 pin miniature vacume tube logic gate arrays and high voltage power supply.... !
Son of a Zombie Speaking of getting with the times, aren't we supposed to have flying cars next year? Or do we need solar road ways first. :)
At 10:20 my question was answered about braiding.
My guess would be more fried chips on the LED board. Might be why the green one was so dim and got super hot when you turned it up in the last video.
The Github site now have the schmatics. Yea!
I agree with dave,people should make schematics in pdf. format
If I do not have my tweezers tip available or if I am not using an SOIC package I usually just cut the leads with an exacto knife (generally one quick slice per side) and clean up the pins and excess solder with a solder wick to remove SMT parts. In run little risk of disrupting surrounding components. Tweezer tips work wonderfully though. I'll have to keep this in mind though, because this looks like it works a bit quicker.
Every time I hear you say 'H', I grin a little bit. I don't know how the UK does it, but in the US we say it like 'aych', while you say it like 'haych'.
We also pronounce it 'haych' in "the old dart".
Scotty Catman "H" shouldn't begin with "hate." :)
He's in Australia btw. Yes both Aussies and UK say it 'haych'
Alex Wright Speak for yourself ;) 'H' is "correctly" pronounced as Aitch in British English, with mostly younger people in the South East using the aspirated H. Having said that, English is a glorious diverse and dynamic language which is changing all the time in the real world, haych is fine by me!
kalhana1 It's usually pronounced haych by the lower classes, or the Irish. :)
Please can you do a video getting this to work. In accordance that you broke it! Very very big fan
Love the old school, and Era correct, labels on the front. My parents had one I use to play with. It had a wheel you turn to dial in the letter, number, or symbol and then you would squeeze this crimping like trigger to press the character into the tape.
yeah i used one when i was a kid, i remember it, too bad it doesn't exist anymore anywhere, afaik.
David Lightman You never see Dymo tape labels used these days, but can still buy them: global.dymo.com/enGB/Categories/Personal_Manual_Labelmakers.html
24:11.
HAHAHA! PEBKAC!! I haven't heard that term in quite some time!
Nice little soldering, Dave...:)
As i got a fully working Protel 99 SE on my Win98 machine, i only use that one. If there´s something i want to check out and if i need to install another EDA on my current win7 machine just to see how it´s done, i just won´t do it. If there´s no .pdf for the schematics, i leave it alone.
Awaiting part two. .. ... ....
Gutted, I wanted to see it working.
Was there a video before this one, that showed the troubleshooting and how you figures out what was wrong with this circuit?
Hey dave,
I've done some smd assembly work with a dslr to document and act as a impromptu magnifier. I fed the video signal to the computer monitor beside me so I could blow up the picture, the delay was workable. I found the best way for me to do it was to put the camera on the tripod in the corner of the room (I have a u-shaped arrangement but no desk space in the corner). I found that worked quite well to keep the camera out of my face, it was behind the work slightly so it might not be an ideal angle.
I know your desk has a long run with no gap in-between, but I'm wondering what if you got one of those mini tripods, or a tripod with a clamp and an articulating arm to put it on the desk or clamped to the shelf above to get slightly behind the work?
I know you don't do soldering videos very often, just throwing ideas out there.
Would copper braiding work to remove chip? Or is that not a usual method? I found sucking of solder difficult. Never thought of adding big blobs solder, ŵill work a treat with my tongue at right angle.
The solder wick can not remove the solder that is trapped between the underside of each lead and the pad. It would remove the excess surface solder from each joint but the component itself would still be very securely attached to the pads.
I would have gone the hot air soldering route myself as it cleanly releases all the pins at once and does not leave a mess of very expensive solder to be cleaned up afterwards. You just follow up by using solder wick to clean up the old solder then either lay down a bead of fresh paste solder or preload each pad with flux and solder and apply fresh flux to either the soldered pads or the component leads (if using paste solder). Heat evenly with hot air and when the solder fully wets the most you have to do is tap the component with tweezers (only needed if you used wire solder) to immerse the component in your preloaded pads.
But it is nice that we have a choice of approaches to choose from.
Just for a note - the "quickchip" thing is otherwise known as Lichtenberg's alloy. Can be really cheap sometimes.
I have always lifted pads if I don't swipe longitudinally... Pulling the wick straight up always resulted in at least one completely lifted pad. My anecdotal evidence trumps yours this time, Dave! :D
Oh, and nice gigantic tip for SMD work. I'm sure that only added to the skill required, in addition to the camera and weird angle.
Just a thought, does the power jack on the shield PCB also power the Arduino? Or do you need a separate supply for each?
Could the ChipQuik cause the cold solder joint that you found in the next video, if not cleaned off well enough?
Awesome. I have a radio and like most radios when you scan/seek for channels the static is muted out. How do I change that so I can hear the static? Or are some radios "programmed" and can't be undone unless re-programmed???
Is there certain objects to look for and or a trace I can cut? Some radios are obvious and have a pin labeled MUTE which can easily be bent or cut. But what about the radios that don't? Hopefully you can answer my crazy question?
Thanks
Thank you very much, i leared a lot :)
To remove the chip without using ChipQuick which is VERY expensive stuff for what it is, cut the legs of your otherwise DEAD chip, add alot of flux and apply your solder iron. Finish with braid to clean the pads. Takes a couple of minutes, doesn't arm anything, and cost pennys.
Dave, you missed the key mark (white oval) that indicated how to align your ribbon connector.
I like this guy
cheers from romania
Yes! The BTTF might work again.
Love it !!
I think it could be the Design Spark. Unfortunately they are using also the .sch and .brd files. Besides the board is too big for the free Eagle version, so one can bet on the free DesignSpark.
Anyway. Thanks for a nice hand working tutorial. Love it
What i would like to know, is why not use a soldersucker? i had no idea solder wick was a thing until this video and you talked about it actually, but is there anything strictly wrong with just, heating up the solder a side at a time and sucking it off with the solder sucker in one smooth step, rather than doing three things, and all of them requiring heat and time?
If soldersuckers are inherently evil or something, id rather learn about it now than later, and ive never used one or needed to use one yet in my experience, because when i put the wires together, i never have needed to take them apart.... cut them out and do whole new wires? yes, but unweld them no.
The problem with a sucker on SMD is that it is nearly impossible to suck all the solder from under SMD pads and if any solder is left behind, the chip won't lift and you risk ripping the pads off.
Suckers work ok for through-hole as long as the holes are large enough for the sucker to clean them out and for any remaining solder bridges to get cleared by re-heating and wiggling the pins.
Daniel Sauvageau Ah, i see, well that makes sense i guess
Daniel Sauvageau + the fact its so bloody unwieldy to use most of the time -.- (the sucker, not the wick)
One cosmetic issue with this time circuit replica is each row of numbers in the movie was configured in a step form factor not flat on like this one. Also when it turned on it emitted a series of bleeps.
As for SMD reworking, me personally would never use and iron on.
Camera getting in the way allot ? Try using a 45° prismatic combination mirror, that way you can have your head on top of the situation, rather than peeking in from the side of the lens. I made my own contraption with a salvage prism from an old projector, but maybe the people here know more about an online optical parts store, where you could buy one. You basically need a larger version of what's being used on the Google Glass display.
Or Dave could just film the PCB from the reverse angle, pointing towards him, and viewing the output in a monitor rather than the tiny on-camera screen?
Electron Alchemy That sounds OK for stuff you can get away with by looking at a 45° angle of the target, but you get variable focus of the field, and for the small circuitry it's useless because there's always something in the way. You need the prism for a good perpendicular view, and also having the ability to move the prism away from the lens, is a relay nifty trick.
Dave, I think your problem is that there's a short in your re-work between pin 1 (gnd) and pin 2 (data in) on one of your TLC59282. try testing each board with the interboard jumpers removed.
Also, the github repos now have the PDFs posted..
Hi Dave, we have here in Mexico some kind of green paste to remove SMT chips very fast, I don't know who made this paste or what's on it (I heard it has some nasty and poisonous stuff on it so it's forbidden in some countries) but it still works great. A 4 CC jar can remove more than 200 chips ! Please let know if you want me to send a jar of it and a video of how to use it for you to demonstrate how it works and how safe or dangerous it can be.
Desoldering is kinda like Kerbal Space Program.
In both cases, you aim the pointy end toward your goal!
They are different, in that in soldering, the pointy end is also the hot end.
Jebadiah doesn't like when the pointy end of a rocket becomes the hot end! XD
Pointy tips are a waste of time in soldering. Chisel tips are much better.
Another easy way to remove SMT packages with leads is to carefully cut the leads with a sharp knife (don't cut the board), then you can just swipe what's left of the leads off with your iron.
I should elaborate, when I was doing that, I would hold the knife nearly flat to the board, and cut the more vertical part of the leg, so if I cut too deep I just scratch the dead chip, not the pcb.
I solved my video drop out problem by just using a HDMI splitter. Also I use a device that can record to a hard drive rather than messing with drivers. ER130 and generic 1x2 splitter
Another thought, if all of the 3 displays should be showing something, how about changing the connections so you only feed data to a single board at a time?
Easy way to determine if the other two boards work :).
So al you need is a keypad to be able to enter the dates and then it's on to the flux-capacitor; the thing that actually makes time travel possible! :-P
Awww fix it Dave- that will be an interesting enough video :)
PDF schematics are a must...
I replace quite a few chips at work... If I don't need to save it for some reason I just use an exacto knife and a soldering iron to lift the legs, only takes a few seconds...
There's something very funny about stroking it back & forth with a featherlight touch, can't think why though... :P
You have tried to resolve a past time event with a present time solution, this has created a time paradox that can only be corrected with a future time action and as you've buggered up the display this will prove extremely difficult.
Doc.
I hear ya about PDF schematics... I'm releasing some OSHW for my senior project and everything but the C code (which is a plain text file) will have a .pdf (or .svg vector image) version... I used KiCAD, codevisionAVR, and libreoffice and I know a lot of potential viewers and users don't care to use those.
Fully agree on the mandatory PDF schematics. There has been countless occasions of me spending an hour installing eagle or kicad or whatever just to view the damn schematics. Come on people...
I noticed the "missing .pdf schematic" issue with a few of the Hackaday finalists. Same for the mechanical drawings. Such a fail (at least in my books)!
How about the Blackmagic Design Intensity Pro?
Wondered when you'd fix that
The only thing you need is a flux-capacitor and a DeLorean and a reactor for time traveling :)
Yeah this is another case of the cooler something is, the more likely something is to go wrong.
It's a little riskier, but you could also cut the pins off and wipe them away with the iron. Does not work for thermal pads of course
How did you keep the solder from not blobbing up and shorting out the pins? (like a huge puddle?) Does the flux keep the solder only on the pins?
Yes, the flux keeps the solder on the pins and helps with surface tension as you solder. It's amazing the difference the flux makes! Always use lots of good quality flux!
EEVblog Well, there is this small white line on every board that seems to mark the position of the "notch" of the header connector... but yes, they should've included the frame around the header...
Is it just a bit misalignment, or is the pitch of the pads for the LED driver chip a bit smaller than the pin pitch itself?
Great scott
It doesn't really make sense to put a PDF in a Git repository, because it's nearly impossible to keep the PDF in sync with the KiCad/Eagle source files. OTOH, I guess it would be helpful to push the PDFs up to a website somewhere.
Dave... I can't believe you didn't spot the fault... The Flux Capacitor is bolloxed...!!!
I been looking for something like chip quick. I been destroying boards because I didn't have something like this. I thought I needed to get the temperature higher.
Argh! I'm always so disappointed when a repair video ends with no resolution. It drives me nuts! Like send me the board so I can trouble shoot it or something. Not trolling, I love eevblog, but the cliff hanger dives me crazy.
I was about to post the same thing!, I really thought that i will see it working at the end, duuuhh, darn!, too bad i am so far away from you dave, otherwise i will do it for you for free, just to see it working!, i hope you an do a follow up of the repair when you have the time.
Skip Tabor I DID repair it. The fault now is not part of the blown up chip. It should have worked and it's not. Even the designer is stumped and I've shown him a follow up troubleshooting video of what I've done so far.
EEVblog Give it one more round, and then conclude it BER if not working.
EEVblog Granted, you did replace the blown chip and I get it's got both you and the designer stumped. Anyway, I just saw that you posted a followup vid. I'll be watching it as soon as I get home. Fingers crossed it is fully operational.
Does anybody know where can you get nozzles for this hot air gun 4:23 ? or how they are called?
Wow. Must . find. one. you . fix... :)
I did this 8:36 and wiped out two tiny pads for a WiFi antenna connection. Under a microscopic it looked like an explosion at a solder factory - no hope of fixing it.
So one thing i have a hard time understanding, is how do you know what SMD device is bad on a motherboard? There are so many...
The shift registers failed! 100% sure about that! I repair those coffee vending machines and the f*ckin shift registers fail like crazy! Change them and the clock will start ticking :)
Eviltech You are 100% wrong :->
Than what's wrong with it? You can't just say i'm wrong and not give any other info! Prove me wrong dammit!
EEVblog Eviltech is right.
I've blown so many of theese 74HC595s.
EEVblog would love to see you prove him wrong, as was going to say exactly what he did minus the coffee machine repair part.
ManBearPig624 Whatever, i still love most of his videos! :)
You should fix it and hold onto the video until October... ;)
Awesome!!!!! :)
Oh gosh there are so many frames!
I figured you didn't use the flux because it would mix with that decoupling cap and the flux capacitor and time circuits would activate and you'd travel back to 1955.
Why would you use lead-free solder if you don't have to?
Because lead is poison
@@thedogbarked123 Only if you eat it.
@@Gooberslot You in denial. blink.ucsd.edu/safety/occupational/hazard-control/lead-soldering.html
are these recorded at 60 FPS? youtube is displaying them at 60
Ooo! 50FPS! I like it :D
Dave: "My chips disappeared magically!!
Me: Don't worry, this is normal business at my house... A few cable ducts (a few hundred bucks) disappeared magically after I laid them directly in forn of my dad's desk (like "Hey, this time you can't get around helping me to install these").. They never reappeared...
Now teach us how to remove BGA chips!!!!
Flux capacitor next please.
Am I the only one finding humour from the brand name of the IR heating plate?
Watching that (de-)soldering was reeeaaally painful... sure, everybody has his own preferred techniques, but taking it off only with wick (since it's broken anyways), and stitching the new one on with some finer solder wire and a pencil tip would probably have done the job in half the time. (and is it just me, or is this QuickChip stuff rather awful to clean off, which makes it quite-not-so-quick instead?)
Hi Dave & everybody. Has anyone here ever managed to repair a lifted smd pad- i.e. completely busted off the board? You can get kits with kapton tape, replacement pads, hot melt glue and epoxy and stuff but they ain't cheap. Anyone tried?
1080 50 looks noticeably better.
EEVblog With your capture card, why not use the Avermedia GameCapture HD2 it's PC free and records directly to either usb or an internal HDD. Has HDMI in with Live Passthrough
I was hoping you were going to flux a compasitor. RDRR
Pleease do a Repair Video!!!!!!!!!!!!!
why some old electronics have cristals on PCB and camponents?
Because tin is funny that way.
It can form any of several crystalline structures and has several possible oxidation states. It is also a big part of the reason why so many RoHS (lead free) soldered electronics die early deaths due to shorts (tin whiskers) and broken solder joints (when subjected to either board flex or thermal fluctuation). Lead was originally added to tin solder to tame these gremlins but now we have completely removed the lead so that we may dramatically increase the rate at which modern electronics wind up in landfills due to early mortality because well utilized (full) landfills are better than a small amount of lead contamination in an otherwise sealed sarcophagus (where they will be well preserved for future generations to admire). A bit of tongue in cheek humor, but otherwise true.
Dave
It's never going to work without the flux capacitor
50 FPS :) Surprised by how much of a positive difference it makes
how to do it with 88i6745-TFJ1
You need 1.21GW of power to make it work.
Do you think SMD soldering for hobbiyist would be doable with heat gun?
Can it be done with a heat gun? Obviously, "yes" since it has been done.
However, you have very limited control over temperature and airflow with a hot air gun. In hot air soldering (which would have been my preference) you would have continuous control over the amount of heat applied and can adjust temperature and turn airflow down quite low so as to avoid overheating (or losing) surrounding components. A hobbyist grade hot air gun only costs perhaps twice the cost of a heat gun, so one might as well use the proper tool for best results -- especially if electronics is to be your hobby as most everything consumer is SMD these days.
Can't agree more with making schematics available in pdf. I do hate the pdf conversion due to the cost of the converter however, it is the program that everyone has. It's one of those things where the beer is free but the cup cost 5 bucks.
Cost of the PDF converter? CutePDF is free.
Thanks for letting me know there is a free alternative to Acrobat. I don't keep up with software for sure.
bain5872 CutePDF is not exactly new: I started using it something like 10 years ago.
No doubt. I don't have regular need for it so I wouldn't know however, I did need to convert a document to PDF a couple years back and did not find cutePDF at that time. I'm sure I didn't search it out long enough. Thanks again.