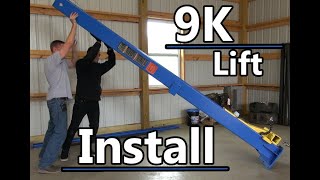
2 Post Lift Cable Adjustment | Maintenance

ฝัง
- เผยแพร่เมื่อ 14 ต.ค. 2024
- Maintenance is the key to keeping your lift running safely. Today I am adjusting the balance cables then double checking a bunch of the bolts and grease points. Stay safe and get some work done!
Products/Affiliate links: Help me out by purchasing from a link. It helps keep the videos going.
[As an Amazon Associate I earn from qualifying purchases at no cost to you.]
Direct link to my Amazon Store- www.amazon.com...
Looking for a Dash Cam for your car? Save 5% on purchases over $100 with my link:
blackboxmycar.com?ref:Driving_Forward_Builds
Video Equipment-
Iphone 14pro
DJI Osmo 6- amzn.to/3W5bsLd
DJI Mic- amzn.to/3UO1XPp
Tripod- amzn.to/3FEynYq
Editing Software-
Davinci Resolve Studio 18.1
Editing Talent-
Almost none. Hope to build that with time :-)
TAGS- #2postlift , #2postliftcables,
#adjustinga2postlift, #champion, #bendpak, #liftreview, #challengerlift, #danmar
Side note- This DIY is not intended as instructional content. It is merely entertainment for you to do what you wish with. I’m just a guy with an awesome beard playing in his garage.


Just had this happen after 4 years non commercial use and had to adjust the cables. Having a 10k lift doesn’t mean you don’t do proper maintenance. Thanks for the great information and remember to make sure the cable feeds through is or are not twisted which could loosen the nuts.
Thanks for the info. I’ll have to watch my cables for twist!
Perfect! Thank you for the great, clear instructions and presentation.
You're very welcome!
Thanks for you use of knowledge I appreciate it. Have a BLESSED day.
You are so welcome
Interesting. Many say the clack clack should not happen at the same time so you can hear both locks engage.
I can see that. That also means the carriages aren’t moving in time. Realistically the adjustment doesn’t last forever and is rarely perfect. Mine have a fraction of a difference so I can hear mine click clack as they go up.
It should only be 1 click with no weight on it. It will be out of sinc with a lot offset weight. If it's been a few years and you find yourself adjusting your cables a lot, stop. And check the condition of the cables because they most likely have frayed.
You saved my weekend! Thank you
Glad I could help!
Very useful info. Thank you.
Glad it was helpful!
Thank you for your advice
For sure. Hope you get all adjusted.
I just put my lift in last week.
My instructions says about a half inch.
I tried it out with a car with them kinda loose like you set yours, and the heavy side sagged significantly and made all the slack on one side.
For it to operate without one side sagging, they have to be pretty snug.
You will see if they're too loose when it's loaded.
Thanks for the feedback. So far mine is holding up great.
Great video and very informative!
Thanks!
Excellent video.. great job! Thank you
Thank you. I appreciate the comment.
Excellent tutorial
Thank you!
You actually want one to clack before the other because that way you know that they both got to the locking position. It has happen to me that I thought they both where locked and when I push the lever to lower the lift only one side was coming down and that’s super dangerous.
I can see how that would happen. I have markings on my lift to denote when I am clear of both locks for safety as a secondary measure.
@@DrivingForwardBuilds Thats actually a great idea , definitely going to do that
Nice video. Really helpful. Joined your channel . Any chance you have replaced seals on cylender for the 2 post lift?
I have not. I do plan to do a fluid flush though in hopes of keeping moisture out of the cylinders and prevent seal degrade.
@DrivingForwardBuilds, while the hoist is on the ground, disconnect the line going the cylinder you want to fix and cap it off (pump side) lift the hoist, the cables will lift the dead side with it. Now you can access the cylinder.
You will ether have a threaded cap or wire that wraps around the inside of the cap of the cylinder wall that holds it together. . And she's apart. Get a seal kit online and go nuts.
Thank you great information
Awesome. Thanks for watching!
Good video..
Thanks
awesome!
Thanks!
thx
Thank you for watching.
My lift hydraulics tank and motor looks the same as yours, I just installed, I see some units where guys bleed the cylinders but I do not see any bleeder screws on my Cylinders. There was a relief valve listed by the control unit. Not sure? any thoughts?
For my unit the bleed procedure was to run it up and down multiple times. Straight from my manual.... "Place a vehicle on the lift and raise until swivel pads are in contact with the frame of the car. Raise the vehicle up about 3 more feet and lower until the tires touch the floor. Keep raising and lowering the vehicle, increasing the height each time, until the vehicle is completely to the top. This procedure pumps all the air from the system. Now the lift is ready for use." Hope this helps. Mine had air in it that was mostly pumped out when I lifted to synchronize the carriages. I also ran it to the top a few times without a car just in case.
@@DrivingForwardBuilds Great! Thank you very much!
Do you need to lubricant your wire rope with something like 90w gear lube? My Bendpak lift says to. Not sure I want that smell.
That’s a good question. My instructions don’t mention lubing the cables. I wouldn’t like the smell either of gear oil in the air. If I lube mine I’ll use a dry lube.
They make a penitrating oil just for cables.
How long does it take to come down with nothing on them???
Forever................. Or around 1-2 minutes.
👍🏻
Thanks!
What about lowering uneven?
That sounds like a potential restriction in the hydraulics.
To be more transparent, the one side will lower a specific and consistent amount but then remain that distance ahead of the other the remainder of the descent. Could you elaborate what the potential restriction could be?
@@Justin131993 First let's make sure the carriages are even going up. That should eliminate the balance cables as the problem. Then I'd double-check check the carriage sliders aren't binding on the pressure release. After that, a hydraulic restriction would be the last path. A tight bend, kink, or line failure could cause one side to "pause" overcoming the restriction and then lowering it. Is this an old lift, has the fluid in the system been changed? Also, I'm just a dude in his garage too, not a lift tech. But happy to try and help.
Would this be the same for a chain drive?
Yeah. The cables might be in a different location but the concept is the same.
Nice lift, did you have to do anything special as far as the concrete in your garage floor before it was put in?
Thanks,
DC
@@danconlan8735 This lift had minimum specs for the concrete for PSI rating and thickness. It will vary with each brand but 3000PSI and 4" min is a good start. The only prep work I had to do was to locate my tension cables via an X-ray of the floor.
@@DrivingForwardBuilds are the tension cables put in by the builder when the floor was poured? I am considering a lift more for storage of a car but I figured I would have to reinforce the floor or replace it with some kind of beefed up concrete!
Thanks,
DC
@@danconlan8735 My house has "post tension" cables built into the slab (by the builder) rather than rebar. The cables in my slab are under 10's of thousands of pounds of tension. For storage of a car a 4 post is a great style, plus the load is distributed so the concrete doesn't need to be as robust as with a 2 post.
Thanks 💯🔥🍻
No problem 👍