THERMAL CINCH INSPIRATION ( DIY Modern Notepad )

ฝัง
- เผยแพร่เมื่อ 10 พ.ค. 2024
- Thermal binding using a thermal binding tool typically involves these steps:
1. **Prepare Your Document**: Organize the pages of your document in the desired order.
2. **Choose a Thermal Binding Cover**: Select a thermal binding cover that fits the size of your document and offers the desired spine width.
3. **Preheat the Thermal Binding Tool**: Turn on the thermal binding machine and allow it to heat up according to the manufacturer's instructions. This usually takes a few minutes.
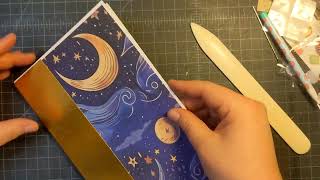
4. **Place the Document in the Cover**: Open the thermal binding cover and place your document inside, ensuring that the pages are aligned evenly and fit snugly within the cover.
5. **Insert the Cover into the Thermal Binding Machine**: Slide the cover with the document into the slot of the thermal binding machine. Make sure it is inserted fully and correctly.
6. **Wait for Binding Process to Complete**: Depending on the machine, the binding process may take anywhere from 1 to 3 minutes. The machine will usually indicate when the process is finished.
7. **Remove the Bound Document**: Carefully remove the bound document from the thermal binding machine and let it cool for a minute or two.
8. **Trim Excess Binding Material (Optional)**: If there is any excess binding material protruding from the edges of the document, you can trim it with scissors or a paper cutter for a clean finish.
9. **Repeat as Needed**: If you have more documents to bind, repeat the process from step 2 onwards.
10. **Turn Off the Thermal Binding Machine**: Once you have finished binding your documents, remember to turn off the thermal binding machine to conserve energy and prevent accidents.
Always follow the specific instructions provided by the manufacturer of your thermal binding tool for the best results and to ensure safety. - แนวปฏิบัติและการใช้ชีวิต


Great tutorial…🫶🏾 Paper Source paper!
From watching other videos, I place my projects in wax/parchment paper in case extra glue comes out and it won’t get on heating element.
I visited Paper Source today (4/17/24) and saw your Crinkled Gold Handmade Paper. I decided to purchase {3} GORG Specialty Papers to use in future projects…
Gold Sheen Tissue
Hot Pink with Gold Marbling {Thailand}
Gold Wavy Marble on Blue Handmade paper {Italy}
Can you help me find the metalic wrapping paper you used in video
Hey you should become an affiliate because I wanted all the stuff you have especially that ruler or at least tag the items in your Instagram page