Update: the Dryer in this video ended up leaking gas, needing a Valve replacement. The Belt also needed to be replaced. Due to the cost in parts, I decided it was time to replace the set: th-cam.com/video/dpphpJzCjYw/w-d-xo.html
Only real men fix their shit. I fix mine then throw it away. Just makes more sense, why put something at the curb that doesn’t work. Junkers wouldn’t like that too much. 🤣
Thanks for this video. It was really helpful for repairing my WF200ANW washer. A couple of notes. The gasket in the WF220 is a bit different from most other Samsung washers and is not sold separately. They expect you to buy the whole rear tub! So I reused it but added silicone grease to help get more life out of the seal. Also, when reassembling the control panel I plugged the thermistor into the wrong (but same size) connector leading to a t3 error. Other setups may vary so take photos of everything as you're disassembling to have a reference for what goes where. Good luck to everyone else doing this repair. It's not so difficult but will leave you achy the next day.
Thank you for posting these directions. This is exactly my problem. Now that I have it taken apart, my Spider Arm is completely in pieces. Wish I could post pictures, its a mess. The only thing I wish I would have ordered at the time was the door diaphragm. Just ordered it, could have everything back together tomorrow, but have to wait for that new seal. The old one is gross... These directions are super helpful.
Huge thanks for making this video! I was able to follow your instructions & use your links to get the parts that I needed and get my washing machine back up and running. I don't think I would have tried the repair without your excellent video so thanks again! If anyone else does this, but finds that your machine is still behaving badly after replacing the spider arm and will not enter the spin cycle - I also had to replace the rotor position sensor (samsung p/n DC31-00098A) which was $11 on Amazon. Machine is running like new now. Thanks again James!!!
Thanks for the video! I had the same issue on mine, fixed it, like new again. Thanks to you!! SO dirty inside, took me longer cleaning the muck then it took me to take it apart/put it back together.
Good video and well explained. I think running the washer with bad shocks contributes to the spider failure due extra shaking of the drum. This causes extra forces on the spider due to shaking. I am thinking a good thing to do would be to replace shocks at the first sign of increased vibration or perhaps every three or so years as a preventative maintenance.
Nice and concise directions. Thank you. I did this about five years ago and am once again facing this issue and needed a reminder about how to do this. Still cheaper than replacing the entire unit. Good for the wallet and good for the environment! As a materials scientist I have to say that the spider arm is an example of engineering done right. They have to balance (excuse the pun) the opposing requirements for a highly stiff arm while minimizing the chances of brittle failure. They obviously chose to compromise on the brittle failure because it would be much more annoying if the arm were to plastically deform. The harsh environment the arm has to endure does not help the situation, especially when pretty much every light weight alloy is going to be made out of metals that are very reactive. Hmm... I might have to do a video on that after I take apart my washer.
Thank you very much for the detailed instructions. Even though I don't have the exact Samsung model as the one you demonstrated with it was close enough. I was able to successfully disassemble my washer, replace the spider arm, shocks and rubber door boot by following your video. Very much appreciated, thank you!
Excellent video. Well-organized and well-edited. I will follow it closely as i do this repair. Thank you for spending the time to create and post this detailed and helpful video. This just what I will need to get my Samsung humming again.
I did it. Couldn't find the parts on AMZ but found a parts place who had the spider and the bolts which must match. I am putting the front back on again tonight, did the inner rubber boot, kind of tricky but once you see it, it's easy. So hopefully the outside one snaps on easily and all the rest is good. I am likely going to do first load with the top off just to watch closely for any leaks. My units are on the 2nd floor (I know, not a good idea) but they have been working for 12+ years, like your video says and they are big $, not to mention putting these into landfill is not good. So I really appreciate your video, it was great! Thank you, Thank you, Thank you. ps., agree pull it out, fix, then put it back in and take lots of pics with your phones before you take things apart.
Glad you were able to locate the parts and get everything situated. Running the first load with the top off is a great idea! Hope everything went well!
@@JamesFixIt Washing machine is so good. I don't remember it being this quiet when new. It's smooth and the spin cycle no longer sounds like a missile is about to launch next door. The removal and re install of the spider/balancing and all the screws electronics connectors and drain tubes were mostly logical. took pictures on my way out, wrote down each part I did in order and qty of small screws then put them in magnetic dish. The risky part was re-connecting the white drum (which looked legendary after we cleaned it out) and we didn't have or couldn't locate a gasket. So i made sure the current one was not damaged and I purchased ATV heat gasket seal and put a light bead of that all around (blue stuff like toothpaste). I placed them together and did about a 60% tighten, left it all day when at work, and that night cranked it down tight. It's holding water - not a drop. I think this was about $250 or so for parts and my time but it's rewarding and satisfying to fix things and I have now fixed that dryer heat element and the washer spider. thumbs up.
Good video, nicely done! Ours doesn't hammer as hard as yours did, and it doesn't wobble when we turn it manually, so I'm just hoping that new shocks will make our 8 year old Samsung front loader purr like new... I would also recommend re-calibrating the washer after you've done all that work. Takes les than a minute.
Great video thanks. I need to dismantle mine (Kenwood) as it makes a horrible noise, could be the bearings or spider or both! Been putting it off for ages as I cannot find the right bearing code/size. I'll need to disantle it first to see what bearings it has which is a pain as we'll have no machine for a week or so. Not a cheap model - washer and dryer 10kg. If it was a cheap model I'd just buy a new one.
A couple of notes from my experience doing this... 1. take lots of pictures during the teardown... it helped a lot when putting things back together. 2. James is right about getting the top on and off of the springs. I did it, but it is not necessarily easy, and I am relatively strong. 3. On my model, WF42H5200AW/A2, there was a trick to getting the control panel off. you had to undo the screws holding the soap tray in and slide it back. 4. My impact wrench did not budge the " difficult" bolt. I took half of the tub off, grabbed the metal basket between my legs and used a long rachet handle. 5. In my case, the shock absorbers were difficult to get out of their brackets. If you pull/twist while wiggling them, they will eventually come out. I had to twist and wiggle them while pushing to get them back in as well. 5. It will be a miracle if your machine needs this repair and you do not snap the heals off of a couple of the screws holding the spider arm in. They are made of sh*t metal 6. if you are going to replace the bearing on the inside of the tub, be aware that the plastic seal that covers seems to actually be a metal disk coated with plastic. It is (or was in my case) *very hard* to pry out, and since there is a metal ring inside, if you are pushing down on one side to pry up the opposite, you are very likely (as I did) to bend the metal disk. Given how tight it is seated, I am not sure how you would get it out without bending it. You could just assume you will replace it of you are replacing the bearing (the seal disk is pretty cheap, I think), or do what I did (under time pressure - no time to order a new seal), and use a small hammer and rachet extension or piece of wood to bang it back into shape on a flat surface. 7. Also about that disk. When it finally popped out, a small spring also popped out. It took me a little while to figure out that it goes in a groove around the edge of the flexible part of the seal toe hold the rubber against the shaft of the spider arm. 8. Wear mechanic's gloves. l cut my hands to pieces.
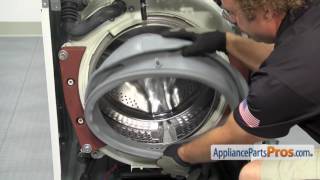
In case time stamps are not showing up: 0:00 - Introduction 3:09 - What Parts Did I Replace? 4:30 - What Tools Are Needed For This Job? 5:12 - How to Disassemble The Washing Machine 9:28 - Disassembly to Access the Spider Arm 12:20 - How to Install the Spider Arm and Bearings 14:59 - How to Reassemble
Amazing video very detail oriented but I would like to know where you got the kit. I also have the same set and color.Ive had mine 11 years doing same thing as ur ty so much for all ur help and video
Very good video. I have a brand new 7.6.2022 one month old Maytag front loader that is shaking its self apart. Under warrantee the company is sending a repair person to check it out.
Great tutorial. My washer shakes violently, and there are no error codes. During the cleaning cycle, I noticed plastic pieces in the drum. Could the plastic housing be breaking off as well? I am going to follow this tutorial, at this point, nowhere else to go but up! Thanks for sharing!
Hmm not sure how plastic pieces could show up inside the drum like that. At least it isn’t coming from the outer plastic shell. I was finding tiny bits of metal in the bottom catch filter (from the broken spider arm), but nothing inside the drum. What color are the plastic pieces?
@James Fix It! Thanks, James - they appear to be part of the plastic mounting frame that holds the rubber seal. Everything else checks out fine as you described. The holding drum rotates fine both ways, looking in through the back, the springs, and 4 shocks appear new and undamaged or worn. Should I check the machines balance with a level and perhaps adjust the pads if necessary? Then recalibrate?
My 2009 wf209anw/xaa wash tub has movement back and forth along the axis of rotation, but no wobble when the machine is off. While running it will wobble and cut off. I'm hoping the problem is either the balance springs or shocks. The spider arm repair is more time and money than I am willing to spend. Is this just wishful thinking? You're repair video is excellent. Well done.
If there is no wobble when turning the drum with the unit off, it does sound like your spider arm is straight. Hopefully it's a different issue of shocks, leveling feet, etc. Were you able to find the source?
Yes. I replaced all 4 shocks. The 2009 washer works much better, although I avoid the high speed spin setting. The air shocks are unbelievably flimsy, old and new.
Hello, I have a Samsung WF42H5000AW/A2. The drum wobbles a shakes when trying to start the spin cycle. As it's trying to spin, it seems to rebalance and tries to start the spin again and again and again. The is a knocking sound as as the drum wobbles out of balance. I replace all 4 of the shock with the correct one "B" in the rear. I can hear the shocks trying absorb the drum system. I do wonder if i have a bad order. the 2 I wonder if it balancing ring as it look like it damaged around the edges from the excessive knocking. The 2 heavy spring the hold the drum system look ok/. What are you thoughts? Thank you so much!
thanks a lot I bought a new LG washing machine 22KG direct drive top laoding but I am trying to balance level and stabilize it but there is no directional info in the user manual that came with it and also the top surface is curved so can you help me thanks in advance .
Great video! Also… I spy some fabric softener on the shelf. Fabric softener as well as not leaving the washer door open to dry out is a recipe for broken spider arm due to corrosion 😢
I am always on my family about leaving the door open, but did not know about the fabric softer. Going to go give my wife an earful about that now 😅. Thank you!
@@JamesFixIt How old was the machine and how regularly did you do a maintenance wash? Didn't find the machine too dirty so surprised the spider was corroded.
@@johndoe-vc1we This washing machine is a good 13 years old! I started doing maintenance washes after about 5 years of owning it, and now do them monthly.
Did you coat the spider with some kind of protective coating? We did ours around 2010, so we are probably on borrowed time with this replacement spider. It's starting to shake bad again occasionally setting a shaking code. So we probably do spider, bearings , and seal plus shocks and both front and rear balancers. But, before I can buy parts I will diagnose unit just to see how far gone it is. I want to coat the new spider and see if I can eliminate this problem of spider deforming.
Mine has a wable and a rubbing noise. .1/4" offset on one quarter of the ring. So it's rubbing and stops it from going to full spin. Replaced shocks. got better but not fixed. .how do you know if it's balance ring vs bearing and spider ring? Also a 15 year old scenario so sounds the same but worst worp and rub.
Are you trained In working on such appliances or is this the first time you did something like this ? I probably have the same issue with my washer but I m dead scared to dismantle it as I have never worked on such appliances . Any valuable tips for me ?
Not a trained person on this, just generally handy. Should be good for the average person following this video. Lmk if you have any specific questions!
Thanks for making this video. Here's my issue... My 2014 WF42H5600AW washer makes noise ONLY during spin cycle, and it can be broken into two distinct sounds: (1) a knocking during initial spin up followed by (2) a loud vibration-type racket during max RPM. Furthermore, knocking occurs at the start of the spin cycle during low RPM as the washer seeks to balance the load; the washer then stops, begins again, stops, restarts, et cetera, some random number of times until it begins to spin in earnest and the loud vibration-type racket occurs. All of this-apparently-are symptoms of a broken spider. A knocking noise during the spin cycle can also be caused by three items: - worn shocks; - loose counterweights; and... - broken drum shaft assembly (aka, "spider"). I hate to fire the parts cannon at a problem. Is there a assured test to absolutely confirm the spider is the source of the knocking during the spin cycle?
Yes you can! So, with the washer off, spin the drum by hand. If the drum has a wobble to it, you know for sure it's not the shocks, weights, or balance ring, and a broken spider arm is the culprit.
@@JamesFixIt I have the same problem with my 5-year-old Samsung front load washer, the washer is shaky when the drum spin, but I can't be sure if it's a bearing problem or a hydraulic leg problem, or a spider-arm problem. But seeing your discussion, I think it should be a spider-arm issue. BTW, Thank you for the great video.
So the kit I bought came with new bolts, as it’s common for the old bolts to break off on the old spider arm when using a wrench. If you still need to remove the broken bolts out, you can try a broken bolt extractor.
I have this exact same washer, I replaced the spider shaft , and shocks and it still shakes pretty bad. Does anyone have advice about how and why this machine is still doing this?
With the new Samsungs they Have four Bolts in the back that are used for delivering purposes..Don't forget to take them off and Calibrate your washer before you use it first...Great Video by the way!!!!@👍👍
It took a couple of hours for sure, as I did everything solo. A second person to assist with the heavy lifting would definitely make things easier and speed things up!
So I have a family of five and this washing machine is used about every other day (sometimes daily). It’s been completely perfect, and literally works like a brand new unit! 👌🏽👌🏽👌🏽
What to do to prevent the same thing happening again and have to change in 5 years? How to prevent galvanic corrosion? how about plastidip or placing a plastic washer to prevent contact of the two dissimilar metals?
Not a lot at all, but it was a tedious process for sure doing it incrementally on all sides. I’m sure there is a specific bearing tool available somewhere.
There is a simple solution to avoid having this problem in the first place: leave the door open between washing. The water stays inside the washer and moisture corrodes bearings and metal spider. Or attach a string to keep the door slightly open.
I've trained my family to always leave the door open after each wash. After 10+ years, it still corroded, unfortunately, but I'm sure that lifespan would have been much shorter without leaving the door open between washes. 👌
@@JamesFixIt Thanks to your video, I was able to fix it. Machine runs like a top now. Mine was a slightly different model, but I could figure out my way around the minor differences. I was a bit surprised at the crap metal used for the arm and the screws holding it in. They are white metal and snap off so easily. THANK YOU again for this video. After a really bad experience with an appliance repair guy / bandit, I much prefer to do my own work. Given how long it took to tear this down and put it back together, I am guessing I saved at least $300 on labor.
That is awesome to hear, and you definitely saved $300 at least! It's great to know that you've also done the work without skipping corners as some "handy men" out there might do to make a quick buck! Thanks!@@markhickey4979
Is the replacement machine brand new? They come from the factory with four shipping bolts on the back of the unit that you need to remove. If those are already removed, maybe it’s defective?
@James Fix It! yes I took all 4 out. The level is ever so slightly more to the right but I wouldn't have thought that would make all that difference I haven't touched adjustable levelling feet I might try that. It's a Haier series 5. I had broughtba Samsung 5+ autodose. But the programmes were much longer on the cotton programmes than it said so I sent it back. It's a lively sleek washer.. but not for me. You would think the Samsung would be as customisable with washers as the Haier. But it's not. Thanks for replying though.
Great video, I attempted to fix my washer only to realize that there is a slight crack in the plastic housing, was wondering if it’s worth replacing the spider due to that crack in the housing unit. Can the plastic housing be replaced
@@JamesFixIt can’t find it anywhere not even Amazon, it’s the front part not the rear housing I guess because the drum was spinning out of control it caused a crack in the housing
@teronegodsent7097 New parts are the best. But sometimes you have no options. Try JB Weld and a tiny piece of metal fly screen mesh. Take a picture of the original cracked plastic part first for your reference of how much you can or cannot add to the repair reinforcement part so it can't interfere with the parts function. Roughen up the areas of part needed repairs with medium or coarse sand papers or files. Clean off all dirt and dust then mix and apply your epoxy cement into and on top of the cracks. Add metal mash on top of cracked areas. Then add more epoxy over the mesh. Over spread it if permitted. Just be sure your repair doesn't interfere with the necessary moving parts. Let it sit dry more than than the adhesive manufacturer suggested by adding additional hrs or more, depending on the thickness of your application. It works most of the time on broken parts with no replacement available. You can put thicker application of JB Weld on parts where the sun don't shine, if it doesn't interfere with movements or interfere with the covers. Good luck .
lol yup!!! Actually, the belt on this one snapped, and the valve was leaking gas. I finally gave in and replaced this unit due to the cost of parts! (Check out my latest Samsung video)
so mine completely stopped spinning and now it can’t move at all by hand… hopefully it’s the spider arm. my filter also has been building up with zinc small rocks so we will see
My 11 year old Miele started getting very loud and wouldn’t stop shaking a little more violently than this one especially at 1400rpm was SO LOUD! and walking never done before about a month prior my spider arm was corroded and my drum was knocking and Miele wrote it off even though it could of been fixed.wasn’t happy as it was stainless steel and chrome door I loved the look of it more than anything else lol. But went back to the first machine I bought myself when I moved out at 18 years old and that’s a lg I am now 39 on my 2nd lg and it’s so much better than the Miele I think personally cleaner clothes an so so quiet… 🤫😊 even before my spider went on my Miele it was never the quietest machine and I live in apartment so couldn’t use it at night the whole block would hear it 🤣🙈 Samsung are good to I think but never owned one, but love their tvs 💯
I think my spider arm is gone but this seems a little too advanced for me, maybe time for a new machine. Samsung isn't very impressive when it comes to their washing machines. I'm going to try another brand next time.
while fabric softener definitely causes corrosion, Samsung front loader spider arms (at least within the last ten years) are extremely notorious for breaking/corroding very quickly most Samsung appliances are junk. their under two separate lawsuits on their fridges for their compressors going out within a year, or their dispensers breaking within a year.


![[LIVE] : ONE ลุมพินี 88 | คู่เอก "ป้อมเพชร vs อัสลามจอน"](http://i.ytimg.com/vi/1ZqTVVbMgbo/mqdefault.jpg)


Update: the Dryer in this video ended up leaking gas, needing a Valve replacement. The Belt also needed to be replaced. Due to the cost in parts, I decided it was time to replace the set: th-cam.com/video/dpphpJzCjYw/w-d-xo.html
All the other videos just tell you to buy another washer. Thanks for taking the time to educate. Enjoyed the video
Glad it was helpful!
Only real men fix their shit. I fix mine then throw it away. Just makes more sense, why put something at the curb that doesn’t work. Junkers wouldn’t like that too much. 🤣
Thanks for this video. It was really helpful for repairing my WF200ANW washer. A couple of notes. The gasket in the WF220 is a bit different from most other Samsung washers and is not sold separately. They expect you to buy the whole rear tub! So I reused it but added silicone grease to help get more life out of the seal. Also, when reassembling the control panel I plugged the thermistor into the wrong (but same size) connector leading to a t3 error. Other setups may vary so take photos of everything as you're disassembling to have a reference for what goes where. Good luck to everyone else doing this repair. It's not so difficult but will leave you achy the next day.
Thank you for posting these directions. This is exactly my problem. Now that I have it taken apart, my Spider Arm is completely in pieces. Wish I could post pictures, its a mess. The only thing I wish I would have ordered at the time was the door diaphragm. Just ordered it, could have everything back together tomorrow, but have to wait for that new seal. The old one is gross... These directions are super helpful.
Glad you were able to fix the issue! I guess I am lucky that my spider arm only had a single break :D
Thanks for taking the time to post this video. This is what real community service looks like!
Awesome comment right here and thank you!
Huge thanks for making this video! I was able to follow your instructions & use your links to get the parts that I needed and get my washing machine back up and running. I don't think I would have tried the repair without your excellent video so thanks again!
If anyone else does this, but finds that your machine is still behaving badly after replacing the spider arm and will not enter the spin cycle - I also had to replace the rotor position sensor (samsung p/n DC31-00098A) which was $11 on Amazon. Machine is running like new now.
Thanks again James!!!
Awesome to hear! Thank you for mentioning the rotor position sensor, and that's great that it's so cheap!
This is one of the best repair videos I have ever seen, period!
Thank you! 🙏🏽
Thanks for the video! I had the same issue on mine, fixed it, like new again. Thanks to you!! SO dirty inside, took me longer cleaning the muck then it took me to take it apart/put it back together.
Good video and well explained. I think running the washer with bad shocks contributes to the spider failure due extra shaking of the drum. This causes extra forces on the spider due to shaking. I am thinking a good thing to do would be to replace shocks at the first sign of increased vibration or perhaps every three or so years as a preventative maintenance.
Good theory and bad shocks can definitely cause premature cracks and pressure on the spider arm! 👍🏽
I would just replace them on a set interval cuz by that time it's probably too late
Nice and concise directions. Thank you. I did this about five years ago and am once again facing this issue and needed a reminder about how to do this. Still cheaper than replacing the entire unit. Good for the wallet and good for the environment! As a materials scientist I have to say that the spider arm is an example of engineering done right. They have to balance (excuse the pun) the opposing requirements for a highly stiff arm while minimizing the chances of brittle failure. They obviously chose to compromise on the brittle failure because it would be much more annoying if the arm were to plastically deform. The harsh environment the arm has to endure does not help the situation, especially when pretty much every light weight alloy is going to be made out of metals that are very reactive. Hmm... I might have to do a video on that after I take apart my washer.
Wow thank you for the information, and I'd definitely like to learn more about the materials. Keep me updated if you end up creating a video on that!
@@JamesFixIt Will do!
Leave the door open and never need to fix that problem again
Awesome Video. Had not seen this video and eneded up replacing the shocks with no resolve. Problem exactly as you mentioned. Gracias! :)
Welcome! I too replaced my shocks initially, with no change except having a lighter wallet lol 😭
I found you to be very informative. NO music is necessary to keep the viewer interested; I'd rather concentrate on your message and learn. :)
Thanks for the tip!
Thank you very much for the detailed instructions. Even though I don't have the exact Samsung model as the one you demonstrated with it was close enough. I was able to successfully disassemble my washer, replace the spider arm, shocks and rubber door boot by following your video. Very much appreciated, thank you!
Wow, glad to hear that you were able to replace all of those parts! Thank you!
Very well explained video! Will try to fix my mom lg washer that had started to do the banging and jumping! Thank you!
Excellent video. Well-organized and well-edited. I will follow it closely as i do this repair.
Thank you for spending the time to create and post this detailed and helpful video. This just what I will need to get my Samsung humming again.
Glad it was helpful!
I did it. Couldn't find the parts on AMZ but found a parts place who had the spider and the bolts which must match. I am putting the front back on again tonight, did the inner rubber boot, kind of tricky but once you see it, it's easy. So hopefully the outside one snaps on easily and all the rest is good.
I am likely going to do first load with the top off just to watch closely for any leaks. My units are on the 2nd floor (I know, not a good idea) but they have been working for 12+ years, like your video says and they are big $, not to mention putting these into landfill is not good. So I really appreciate your video, it was great!
Thank you, Thank you, Thank you.
ps., agree pull it out, fix, then put it back in and take lots of pics with your phones before you take things apart.
Glad you were able to locate the parts and get everything situated. Running the first load with the top off is a great idea! Hope everything went well!
@@JamesFixIt Washing machine is so good. I don't remember it being this quiet when new. It's smooth and the spin cycle no longer sounds like a missile is about to launch next door. The removal and re install of the spider/balancing and all the screws electronics connectors and drain tubes were mostly logical. took pictures on my way out, wrote down each part I did in order and qty of small screws then put them in magnetic dish. The risky part was re-connecting the white drum (which looked legendary after we cleaned it out) and we didn't have or couldn't locate a gasket. So i made sure the current one was not damaged and I purchased ATV heat gasket seal and put a light bead of that all around (blue stuff like toothpaste). I placed them together and did about a 60% tighten, left it all day when at work, and that night cranked it down tight. It's holding water - not a drop.
I think this was about $250 or so for parts and my time but it's rewarding and satisfying to fix things and I have now fixed that dryer heat element and the washer spider. thumbs up.
Great job, young man. You are very easy to watch and listen to. Thank you for this detailed video. Great information and presentation.
Thank you!!! 🙏🏽
Thanks so much , I am turning 65 female. You are good I understanding everything you said. I feel I can do it myself. Thanks so much. ❤
You can do it! I would recommend a second hand for the heavy lifting, but totally possible to DIY with moderate tools and knowhow :)
Good video, nicely done!
Ours doesn't hammer as hard as yours did, and it doesn't wobble when we turn it manually, so I'm just hoping that new shocks will make our 8 year old Samsung front loader purr like new...
I would also recommend re-calibrating the washer after you've done all that work. Takes les than a minute.
Great info and that does sound like a shock issue. Thanks and will look into the recalibration!
sir.. . if i could. . i would recommend you for saint hood. i used your steps. . and got a fabulous result. thank you very much!
Great video thanks. I need to dismantle mine (Kenwood) as it makes a horrible noise, could be the bearings or spider or both!
Been putting it off for ages as I cannot find the right bearing code/size. I'll need to disantle it first to see what bearings it has which is a pain as we'll have no machine for a week or so.
Not a cheap model - washer and dryer 10kg. If it was a cheap model I'd just buy a new one.
Thanks for a great video. I fix things for people and save items being tossed out and buying new. I need to go this and your video will help big time.
👍🏽 Awesome! It’s crazy to think about how many of these get thrown out over just a single issue like this.
Thank you for taking so much time to explain exactly how you did this. I will definitely give this a try to save my machine.
Thank you and welcome! Highly recommended as mine is still working in tip top shape. It’s like a new washing machine!
@@JamesFixIt my machine is running like new now. I am soooo happy
Amazing video and detailed steps. Thanks for taking the time to do this.
A couple of notes from my experience doing this...
1. take lots of pictures during the teardown... it helped a lot when putting things back together.
2. James is right about getting the top on and off of the springs. I did it, but it is not necessarily easy, and I am relatively strong.
3. On my model, WF42H5200AW/A2, there was a trick to getting the control panel off. you had to undo the screws holding the soap tray in and slide it back.
4. My impact wrench did not budge the " difficult" bolt. I took half of the tub off, grabbed the metal basket between my legs and used a long rachet handle.
5. In my case, the shock absorbers were difficult to get out of their brackets. If you pull/twist while wiggling them, they will eventually come out. I had to twist and wiggle them while pushing to get them back in as well.
5. It will be a miracle if your machine needs this repair and you do not snap the heals off of a couple of the screws holding the spider arm in. They are made of sh*t metal
6. if you are going to replace the bearing on the inside of the tub, be aware that the plastic seal that covers seems to actually be a metal disk coated with plastic. It is (or was in my case) *very hard* to pry out, and since there is a metal ring inside, if you are pushing down on one side to pry up the opposite, you are very likely (as I did) to bend the metal disk. Given how tight it is seated, I am not sure how you would get it out without bending it. You could just assume you will replace it of you are replacing the bearing (the seal disk is pretty cheap, I think), or do what I did (under time pressure - no time to order a new seal), and use a small hammer and rachet extension or piece of wood to bang it back into shape on a flat surface.
7. Also about that disk. When it finally popped out, a small spring also popped out. It took me a little while to figure out that it goes in a groove around the edge of the flexible part of the seal toe hold the rubber against the shaft of the spider arm.
8. Wear mechanic's gloves. l cut my hands to pieces.
Awesome video thanks just like a professional
Thank you for the great feedback!
Finally someone teach how to fix trully, thanks
Thank you and hope it was helpful!
In case time stamps are not showing up:
0:00 - Introduction
3:09 - What Parts Did I Replace?
4:30 - What Tools Are Needed For This Job?
5:12 - How to Disassemble The Washing Machine
9:28 - Disassembly to Access the Spider Arm
12:20 - How to Install the Spider Arm and Bearings
14:59 - How to Reassemble
Great video looks bit complicated but very good video Mine is not that bad YET probably headed there
Thanks 👍 Yes, a lot of little steps, but much better than shelling out $$$ for a new unit.
I'd take pictures of the electrical connections for reference. Great job.
Great idea!!!
Nice job explaining the process
Thank you! 🙏🏽
Amazing video very detail oriented but I would like to know where you got the kit.
I also have the same set and color.Ive had mine 11 years doing same thing as ur ty so much for all ur help and video
You can find it here: amzn.to/3B77x8I
U make it look so dang simple!!
Great instructions! I followed to a T and everything went 👍
Awesome, happy to hear!
Thanks and remain blessed.
Thank you and likewise!
Great video thank you. Mine has the same problem like yours
Thanks brother, it was very helpful. And the links helped too.
Glad it helped and you’re welcome!
Great job. Thanks for sharing
Great tutorial! Thanks for sharing.
You are so welcome!
Thanks for this video, best video ever
Thank you!!🙏🏽
Exactly my problem, thanks so much for the video.
Hope you got it all fixed and you’re welcome!
Thank you for this vid and the links! Super helpful 😎
Glad it was helpful!
Very good video. I have a brand new 7.6.2022 one month old Maytag front loader that is shaking its self apart. Under warrantee the company is sending a repair person to check it out.
Thank you and glad it is getting repaired under warranty!
Do I have to get the exact same spider arm or do they all come in the same size? Thank you for the video!
You'll need to get one that is compatible with your washer model. There are different models/sizes...
Great tutorial. My washer shakes violently, and there are no error codes. During the cleaning cycle, I noticed plastic pieces in the drum. Could the plastic housing be breaking off as well? I am going to follow this tutorial, at this point, nowhere else to go but up! Thanks for sharing!
Hmm not sure how plastic pieces could show up inside the drum like that. At least it isn’t coming from the outer plastic shell.
I was finding tiny bits of metal in the bottom catch filter (from the broken spider arm), but nothing inside the drum. What color are the plastic pieces?
@James Fix It! Thanks, James - they appear to be part of the plastic mounting frame that holds the rubber seal. Everything else checks out fine as you described. The holding drum rotates fine both ways, looking in through the back, the springs, and 4 shocks appear new and undamaged or worn. Should I check the machines balance with a level and perhaps adjust the pads if necessary? Then recalibrate?
I was finding bits of plastic in the filter that I think were being scraped off of the inside of the plastic tub by the unbalanced basket.
My 2009 wf209anw/xaa wash tub has movement back and forth along the axis of rotation, but no wobble when the machine is off. While running it will wobble and cut off. I'm hoping the problem is either the balance springs or shocks. The spider arm repair is more time and money than I am willing to spend. Is this just wishful thinking? You're repair video is excellent. Well done.
If there is no wobble when turning the drum with the unit off, it does sound like your spider arm is straight. Hopefully it's a different issue of shocks, leveling feet, etc. Were you able to find the source?
Yes. I replaced all 4 shocks. The 2009 washer works much better, although I avoid the high speed spin setting. The air shocks are unbelievably flimsy, old and new.
So it was about a $60 repair and several hours playing with it, although I'm retired. Saved hundreds on a newer washer. Thanks again.
Great video 👍
Thanks 👍
Hello, I have a Samsung WF42H5000AW/A2. The drum wobbles a shakes when trying to start the spin cycle. As it's trying to spin, it seems to rebalance and tries to start the spin again and again and again. The is a knocking sound as as the drum wobbles out of balance. I replace all 4 of the shock with the correct one "B" in the rear. I can hear the shocks trying absorb the drum system. I do wonder if i have a bad order. the 2 I wonder if it balancing ring as it look like it damaged around the edges from the excessive knocking. The 2 heavy spring the hold the drum system look ok/. What are you thoughts? Thank you so much!
That sounds like the same problem I had in this video; broken spider arm. Does the drum wobble when you try rotating it by hand, even when empty?
Thanks!
Thank you!!!! 🙏🏽
anyway to diagnose this without taking it apart ?
If you rotate the drum by hand and it sinks in a certain spot, the spider arm is most likely toast.
Thanks for the video!
You're welcome!
Nice video,thanks
Thank you! Hope it was helpful!
What was the size of your bearings and drums seal, thank you 😇
Thanks a lot Sir.
Most welcome 🙏🏽
thanks a lot I bought a new LG washing machine 22KG direct drive top laoding but I am trying to balance
level and stabilize it but there is no directional info in the user manual that came with it and also the top
surface is curved so can you help me thanks in advance .
Hi, do you perhaps have a DC92-00658C PC board?
amazing video
Thank you!
Great video! Also… I spy some fabric softener on the shelf. Fabric softener as well as not leaving the washer door open to dry out is a recipe for broken spider arm due to corrosion 😢
I am always on my family about leaving the door open, but did not know about the fabric softer. Going to go give my wife an earful about that now 😅. Thank you!
Downy Fabric Softener is like cholesterol for your washer hoses. It also ruins the plastic parts of your machine.
Also closed door leaves mold that ruins door seal and leaks later.
@@JamesFixIt How old was the machine and how regularly did you do a maintenance wash?
Didn't find the machine too dirty so surprised the spider was corroded.
@@johndoe-vc1we This washing machine is a good 13 years old! I started doing maintenance washes after about 5 years of owning it, and now do them monthly.
Good job man. How much did you end up buying the parts? Mine did not turn on so I bought a new one.
Very helpful‼️
Glad the video helped!!
Good video
Thank you!!
Did you coat the spider with some kind of protective coating? We did ours around 2010, so we are probably on borrowed time with this replacement spider. It's starting to shake bad again occasionally setting a shaking code. So we probably do spider, bearings , and seal plus shocks and both front and rear balancers. But, before I can buy parts I will diagnose unit just to see how far gone it is. I want to coat the new spider and see if I can eliminate this problem of spider deforming.
I did not, but I definitely wish I did! Please let me know what type of coating you end up going with!
Do the damper shocks first,all four $32 bucks amazon. Also dont overload the washer, asking for major problems like this video.
Nice
Thank you!
Were you able to repair this from the front and top, or did you have to pull out the washer to get access to the back?
Are wave washers important? My washer didnt come with it but yet should have from the diagram
Great video fyi fabric softener destroys washing machines
I've seen this happen to machines that never saw any. They also hadn't had a maintenance wash in a long time
Thanks for the tip! I haven't heard this before till recently.
U have a link to order the spider arm?
Do you think this parts that you changed can be compatible with a Samsung wf45h6300ag/a2 thank you if you respond
Hello, while some parts might be the same, it looks like the Spider Arm is a different part...
If your reading this remeber to put the washer and gasket on the new spider arm. I have to take mine appart to do this...
Great point, and hope this helps someone! Hope the reassembly was not too bad.
Hi James, quick question, Is the Shaft removable? meaning the middle shaft where the bearing attach.
Thanks a lot.
Mine has a wable and a rubbing noise. .1/4" offset on one quarter of the ring. So it's rubbing and stops it from going to full spin. Replaced shocks. got better but not fixed. .how do you know if it's balance ring vs bearing and spider ring? Also a 15 year old scenario so sounds the same but worst worp and rub.
Are you trained In working on such appliances or is this the first time you did something like this ? I probably have the same issue with my washer but I m dead scared to dismantle it as I have never worked on such appliances . Any valuable tips for me ?
Not a trained person on this, just generally handy. Should be good for the average person following this video. Lmk if you have any specific questions!
I'm having issue with on eif the leveling leg, where the bolt goes doesn't have the grove where bolts is tightened on what should I do ?
Did you put silicone on your rear tub seal? One video says to do this and others don’t mention it at all
The rear tub seal actually had silicone pre applied when I purchased it, and I haven’t had any issues. I’d recommend adding it in 👍🏽
Thanks for making this video.
Here's my issue...
My 2014 WF42H5600AW washer makes noise ONLY during spin cycle, and it can be broken into two distinct sounds: (1) a knocking during initial spin up followed by (2) a loud vibration-type racket during max RPM. Furthermore, knocking occurs at the start of the spin cycle during low RPM as the washer seeks to balance the load; the washer then stops, begins again, stops, restarts, et cetera, some random number of times until it begins to spin in earnest and the loud vibration-type racket occurs. All of this-apparently-are symptoms of a broken spider.
A knocking noise during the spin cycle can also be caused by three items:
- worn shocks;
- loose counterweights; and...
- broken drum shaft assembly (aka, "spider").
I hate to fire the parts cannon at a problem. Is there a assured test to absolutely confirm the spider is the source of the knocking during the spin cycle?
Yes you can! So, with the washer off, spin the drum by hand. If the drum has a wobble to it, you know for sure it's not the shocks, weights, or balance ring, and a broken spider arm is the culprit.
@@JamesFixIt I have the same problem with my 5-year-old Samsung front load washer, the washer is shaky when the drum spin, but I can't be sure if it's a bearing problem or a hydraulic leg problem, or a spider-arm problem.
But seeing your discussion, I think it should be a spider-arm issue.
BTW, Thank you for the great video.
How'd you get the broken bolts out?
So the kit I bought came with new bolts, as it’s common for the old bolts to break off on the old spider arm when using a wrench. If you still need to remove the broken bolts out, you can try a broken bolt extractor.
I have a new machine bought from a outlet center. I will try this another video said shipping bolts
Yes, if it is brand new, that should be shipping bolts as the issue. If not, I’d contact the seller for a replacement 👍🏽
I have this exact same washer, I replaced the spider shaft , and shocks and it still shakes pretty bad. Does anyone have advice about how and why this machine is still doing this?
Did you replace the bearings also (there are 2 of them)? That could be the culprit. Otherwise, the entire drum could be out of round…
When I spin my tub in a certain spot when spinning it is tough to spin . Would it still be the spider arm?
Definitely could be. Does it wobble while spinning it by hand? It could be binding up on the one side that is drooping.
With the new Samsungs they Have four Bolts in the back that are used for delivering purposes..Don't forget to take them off and Calibrate your washer before you use it first...Great Video by the way!!!!@👍👍
Great point, as a lot of sellers do not inform buyers of this, and I’m sure plenty have thought they had defective units.
@@JamesFixIt Yes!!!!!👍
@@JamesFixIt Yes!!!!!👍
I'm curious to know how long this took you?
It took a couple of hours for sure, as I did everything solo. A second person to assist with the heavy lifting would definitely make things easier and speed things up!
how long it's been used , and repaired it
So I have a family of five and this washing machine is used about every other day (sometimes daily). It’s been completely perfect, and literally works like a brand new unit! 👌🏽👌🏽👌🏽
What to do to prevent the same thing happening again and have to change in 5 years?
How to prevent galvanic corrosion? how about plastidip or placing a plastic washer to prevent contact of the two dissimilar metals?
How long did it take to do the complete job?
Took about 2-3 hours, but I was working solo. With a second person, it would be closer to 1-1.5 hours 👌🏽
How much force did you need to tap those bearings out ? I wonder if there are tools to do it.
Not a lot at all, but it was a tedious process for sure doing it incrementally on all sides. I’m sure there is a specific bearing tool available somewhere.
My samsung front load washer is brand new and has this rocking issue. I balanced and still couldn't fix it. Any ideas on how to fix it?
Did you remove the shipping bolts from the back of the washer? There should be four of them.
@James Fix It! lol thank you. First washer and dryer I've ever had.
There is a simple solution to avoid having this problem in the first place: leave the door open between washing. The water stays inside the washer and moisture corrodes bearings and metal spider. Or attach a string to keep the door slightly open.
I've trained my family to always leave the door open after each wash. After 10+ years, it still corroded, unfortunately, but I'm sure that lifespan would have been much shorter without leaving the door open between washes. 👌
We also always leave the door open, but mine was also very corroded with one arm cracked clear through.
@@markhickey4979 It's an unfortunate quality/design issue :/
Have you fixed the broken part, or replacing the entire washer unit?
@@JamesFixIt Thanks to your video, I was able to fix it. Machine runs like a top now. Mine was a slightly different model, but I could figure out my way around the minor differences. I was a bit surprised at the crap metal used for the arm and the screws holding it in. They are white metal and snap off so easily.
THANK YOU again for this video. After a really bad experience with an appliance repair guy / bandit, I much prefer to do my own work. Given how long it took to tear this down and put it back together, I am guessing I saved at least $300 on labor.
That is awesome to hear, and you definitely saved $300 at least! It's great to know that you've also done the work without skipping corners as some "handy men" out there might do to make a quick buck! Thanks!@@markhickey4979
My old machine did that I eneded up getting rid but the new one is doing something similar except not moving
Is the replacement machine brand new? They come from the factory with four shipping bolts on the back of the unit that you need to remove. If those are already removed, maybe it’s defective?
@James Fix It! yes I took all 4 out. The level is ever so slightly more to the right but I wouldn't have thought that would make all that difference I haven't touched adjustable levelling feet I might try that. It's a Haier series 5. I had broughtba Samsung 5+ autodose. But the programmes were much longer on the cotton programmes than it said so I sent it back. It's a lively sleek washer.. but not for me. You would think the Samsung would be as customisable with washers as the Haier. But it's not. Thanks for replying though.
How much you spent in parts?
Great video, I attempted to fix my washer only to realize that there is a slight crack in the plastic housing, was wondering if it’s worth replacing the spider due to that crack in the housing unit. Can the plastic housing be replaced
Thank you. Is it a small crack that can possibly be sealed? If not, perhaps u might find a replacement online.
@@JamesFixIt can’t find it anywhere not even Amazon, it’s the front part not the rear housing I guess because the drum was spinning out of control it caused a crack in the housing
Get some serious plastic glue and try seal the crack
@teronegodsent7097
New parts are the best.
But sometimes you have no options.
Try JB Weld and a tiny piece of metal fly screen mesh.
Take a picture of the original cracked plastic part first for your reference of how much you can or cannot add to the repair reinforcement part so it can't interfere with the parts function.
Roughen up the areas of part needed repairs with medium or coarse sand papers or files.
Clean off all dirt and dust then mix and apply your epoxy cement into and on top of the cracks.
Add metal mash on top of cracked areas.
Then add more epoxy over the mesh.
Over spread it if permitted.
Just be sure your repair doesn't interfere with the necessary moving parts.
Let it sit dry more than than the adhesive manufacturer suggested by adding additional hrs or more, depending on the thickness of your application.
It works most of the time on broken parts with no replacement available.
You can put thicker application of JB Weld on parts where the sun don't shine, if it doesn't interfere with movements or interfere with the covers.
Good luck .
Repair costs are so ridiculous nowadays. How do they charge $600 for a $800 machine!? I might as well just buy a new one lol
lol yup!!! Actually, the belt on this one snapped, and the valve was leaking gas. I finally gave in and replaced this unit due to the cost of parts! (Check out my latest Samsung video)
How to remove the belt and more
Actually, on this model, there is no belt.
so mine completely stopped spinning and now it can’t move at all by hand… hopefully it’s the spider arm. my filter also has been building up with zinc small rocks so we will see
Small rocks is definitely a sign of a broken spider. I did see a few in the catch drain as well. Hope a new spider arm will fix your issue!
shock is plastic or hydrolic?
The shocks are plastic, no hydraulics, just some thick grease applied to resist movement.
@@JamesFixIt Thank you very much
My 11 year old Miele started getting very loud and wouldn’t stop shaking a little more violently than this one especially at 1400rpm was SO LOUD! and walking never done before about a month prior my spider arm was corroded and my drum was knocking and Miele wrote it off even though it could of been fixed.wasn’t happy as it was stainless steel and chrome door I loved the look of it more than anything else lol. But went back to the first machine I bought myself when I moved out at 18 years old and that’s a lg I am now 39 on my 2nd lg and it’s so much better than the Miele I think personally cleaner clothes an so so quiet… 🤫😊 even before my spider went on my Miele it was never the quietest machine and I live in apartment so couldn’t use it at night the whole block would hear it 🤣🙈 Samsung are good to I think but never owned one, but love their tvs 💯
I was told that the spider arm is made of galvanized metal, which gets corroded from the humidity and wetness
I wish I have seen this before i got someone to fix it for me
I think my spider arm is gone but this seems a little too advanced for me, maybe time for a new machine. Samsung isn't very impressive when it comes to their washing machines. I'm going to try another brand next time.
My samsung machine do not have any buttons on the side cant find my delay button
I bet the fabric softener is the cause of the badly corroded spider arm
while fabric softener definitely causes corrosion, Samsung front loader spider arms (at least within the last ten years) are extremely notorious for breaking/corroding very quickly most Samsung appliances are junk. their under two separate lawsuits on their fridges for their compressors going out within a year, or their dispensers breaking within a year.
Yes, I’ve been reading about fabric softeners and I’m sure that is one of the main culprits!