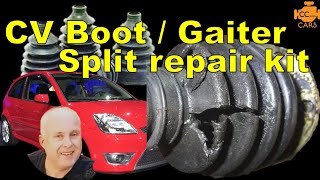
Here's Why You NEVER MESS WITH Your Factory CV Axle Boot!!

ฝัง
- เผยแพร่เมื่อ 15 พ.ค. 2024
- Here's Why You NEVER MESS WITH Your Factory CV Axle Boot!! CV Axle Boot Replacement!! Super Easy CV Axle Boot Fix!! CV Boot Removal and Replacement!! How To REPLACE A CV AXLE BOOT!!
#CVAxleBoot #CVAxleRepair #CVBoot
** I am an Amazon associate. I make a commission based on sales through my Amazon associate links.**
Lisle 30950 CV Boot Banding Tool: amzn.to/3OITACf
Lisle 30800 CV Boot Clamp Pliers: amzn.to/3yqlIos
Dorman 614-004 Uni-Fit CV Boot Kit: amzn.to/3ONTaKY
www.1roadgarage.com
/ 1roadgarage
In this video I show how I was able to replace my CV Axle Boot very easily with this Dorman 614-004 cv axle boot kit. This was the first time I had ever done anything like this but with a bit of due diligence I was able to see that it actually is a fairly easy job. (cv axle is the same as 'constant velocity axle')
This cv axle boot replacement does require specialty tools like the Lisle 30950 axle boot band tool or the Lisle 30800 cv axle boot clamp pliers but both tools I found to not only be made to a high quality but also very affordable.
This Dorman cv axle boot kit came with the band type boot clamps and so I only needed the one Lisle tool but I will be keeping both since I'm sure they're very handy to have.
**This channel is for entertainment purposes only! Do not do what I do. Do not take my advice. I am not a professional. The methods I use may be completely wrong and/or dangerous. Please seek professional help with anything and everything and do your own due diligence (research). Working on cars is extremely dangerous. I am not responsible for any loss of life or limb or property. DO YOUR OWN RESEARCH. THIS CHANNEL IS FOR ENTERTAINMENT PURPOSES ONLY!**
FTC Disclaimer: I am an Amazon associate. As such, I earn a percentage of sales made through Amazon associate links found in the description of my videos and on my website and other places.
00:00 Intro
00:39 New CV Boot Kit
01:36 Remove Old CV Boot
09:49 Test Fit New CV Boot
10:37 Inspecting For Damage
12:05 Cleaning Old Grease
14:36 Installing New Boot
19:55 Installing CV Boot Clamp
23:37 Finished CV Boot Installation
25:10 Conclusion - ยานยนต์และพาหนะ


A long time ago, I worked in a manufacturing plant making CV joints. Those markings you mention are from the clamping chuck. There's ID (Internal Dimension) clamps used while lathing the outside of the bell and shaft. OD (Outer Dimension) clamps are used when lathing the inside.
I know this comment is a year old but would be interested in hearing how much of the assembly process was automated? I guess there are probably lots of special tricks and tips to assemble these things in an assembly line. They are a nightmare and I always just replace the entire shaft as a mechanic. The only time I have not replaced with a new shaft is when it comes to cases where the car is a classic or a quality new or refurbished part is too expensive.
@@danielmorris6523 it was over 20 years ago when I did that work. And the factory I worked in produced cv bells, races, u joints. Pretty much most drive line components. But they seldom did the direct assembly of those into half shafts. Even the pto shafts were unassembled.
Ĺ
Q
I have learned one thing during many DIY projects I have done over the course of past few years. Do not replace any factory fitted parts if they work fine, do not leak or similar. I have replaced old CV boots because they looked old and any replacement boot I have bought afterwards fell apart quickly, including the OEM bought from the VW Classic centre. In the end I had to reinstall old boots and it all works fine even today.
That was not OEM. They buy pirate and sell as OEM
I would have just left this stock one on the boot was fine
@@janlombard6712
Even for OEM the manufacturing contract will go to the cheapest bidder.
Those marks on the inside of the housing are almost certainly from a 3-jaw chuck holding the flange when it was machined for the flat and mounting holes of the flange.
Amen.
Yep and they don't bother buffing them out because that's not a contact point for the axle anyway so why waste money on it
I was just coming down to say the samething. They use hard jaws with these.
Chuck worked here too.
Yessir
I used to HATE changing CV joints just to save the customer a few bucks. It's so much easier and a helluva lot less messy to change the entire axle.
If you count the labor time,i don’t think you’d save some money. Don’t know the prices for many cars,but my 05 Maxima’s axles were $60 a peace (Duralast) fully assembled,and way faster to install.
@@volodymyrbuchak1852 Just bought a set for a Chevy Cobalt. $90.25 for both axles. Boots and tools would have cost almost that before me making a mess.
@@lovesrc4296 I don't hay a garage, I'll just change whole axel. Exspealy b/c it's winter also
@@lovesrc4296 usually they rebuild the axle you turn in as a core. If you buy reman.
Not the one that has the leak may already be damaged slightly depending on how much grease is left. Also you don't want any dirt getting in there either. I would think as long as there is grease coming out the dirt won't get in
To much grease is also a problem, that is the reason for a fixed quantity of grease in the set.
The reason it only comes with one bag of grease is because two bags is to much grease it will tear the boot as the axle turns at higher speeds. Also 180* the clamp ends. Helps to balance them out.
So why should we not mess with factory CV?
Not a friggin' clue bro.
Cause it's messy?
I did it ONCE and it is a huge mess for your DIY guy. I would never do it again. I also believe you get a core charge if you return the used part.
Exactly, gives a click baity title and never once mentioned why we should not mess with a factory cv joint.
the reality depends on the car. especially inner CV boots some have a flange mount some are spline fit inside the gearbox, wouldn't touch one of the spline, too much trouble if you eff up the sealing.
Just one tip: You really do not want to get any grease between the boot and the housing under the clamp as the big end can start to rotate on the housing due to the grease. This then leads to grease starting to exit and fly in all directions - maybe on to the brakes - and could mean that the joint dries out inside over time. I have seen this problem, specially when done by back yarders and when you put in as much grease as you did. So it pays to thoroughly wipe and degrease this area on the housing and the boot or just be really careful not to get any on there in the first place. Cheers from NZ!
Good advice, thanks for pointing it out!👍
Shut up
THANKS 👍
That's only if you don't clamp it down hard enough & even to FSM spec, with an interference fit (as designed) that grease layer should squeeze out and the remaining thin layer will turn to an adhesive with the pressure via oil bleeding (seperation of the oil and thickening agent).
@@ReyLaFleur "...will turn to an adhesive with the pressure via oil bleeding." That is something I'm hearing for the first time and I find it most interesting. I'm going to see if I can dig up any white-papers on this. I'm always learning something new...
Normally whenever a replacing a boot or rubber gasket, I thoroughly clean the surface with with electronics grade alcohol. It is very time consuming but it seems to work. For a few parts I've had to take apart a second time, I've observed that the rubber will actually be slightly stuck-on to the metal surface with zero grease migration.
Dremel Moto-Tool with a cut off wheel makes easy work of that steel band. NOTE: During install, It is recommended by manufacturers to cover the axle splines with (teflon) tape in order to protect the new boot from cut damage to the inside of the boot that can lead to leaks.
Was going to say the same if one spline has a burr, etc real possibility of a tear.
Great video and patient explanations /reasoning along the way! Keep up the good work!
I've had good luck with a cold steel chisel. The band breaks before the rubber cuts underneath.
even easier is a flat head and a hammer to get underneath twist n pop
In my experience the dorman rubber material here is sub quality. It won't last but a year even less in very dirty climates.
Last time I did this on my all wheel drive Jeep Cherokee a high quality boot kit was $41 and the entire axle shaft assembly from NAPA was only $97. If I have to take as much stuff off as I did on my Jeep I replaced the complete axle shaft assembly with CV joint in a complete unit.
I did 2-3 of these in the past on my wife's 1984 Honda Civic. Given the cost of boots, clamps and grease and amount of messy work involved and the mileage on the drive axles, it became apparent that the cost of replacing each axle unit in new condition was the better route and cheaper than I originally assumed to be the case. It's not necessary to buy replacement over-priced units from the car dealer. Napa and other chain auto parts stores are all over the country. If the insides of the boot areas are generally clean, there is no need to get all of the grease removed from all parts. Never use split boots, they are worthless!
There are cars like the 4g eclipse which has a balance that doesn't come on aftermarket ones and you can't buy the balance separately. A lot of people who've bought aftermarket ones had horrible vibration with aftermarket ones.
I guess you never owned a Subaru with an automatic transmission?
Tolerances are very tight and the boxer engine makes the axles vibrate the car when in drive with foot on brake. The inner joint is dual offset joint don't have as much side to side extension and you find your turning radius has increased.
Aftermarket boots are never as good as OEM, and tears are the main reason an axle goes bad.
The only good aftermarket for a Subaru is a refurbished unit..but they have cheap boots.
@@bbodan5393, I doubt that I would ever be interested in a Subaru. Maybe fine if you live/travel in snow, gravel, etc. We have a 1989 Honda Civic Hatchback with 5-speed manual. I replaced the tires, front disc pads, distributor, battery, passenger side CV axle and do my own oil changes. Only the tires were done at tire shop. We have had the car for over 10 years. This is the perfect car for us. Good luck with the rest of the cars.
DITTO .. for a lot of vehicles, those complete axle assemblies aren't that expensive, relative to the time, effort, extra tool cost etc.. required to change out the rubber boot. Just did one on my Porsche 911 Turbo .. even there, next time around, I'll just buy an axle asm.
@@KrustyKlown, No free lunch(s). There is little to no doubt when replacing the whole unit. Even if these newer single boot item's last longer than the old variety, who really wants to do the job more than once. Most of us are not so poor that we have to hope for the best with a boot only approach. Only in an emergency situation where I had no option would I want the boot alone approach. To each their own as the old saying goes.
I worked for VW when I got my start in the industry. I "rebuilt" more axles than I care to remember.
A couple of tips I live by:
#1 mark everything so it goes back in the same orientation and position. For balance purposes.
#2 never, ever, reuse the circlips. They are one time use only, and should always be replaced.
#3 Dorkman products are junk. Many OEM manufacturers sell boot kits for their axles. You just have to request them from the parts guys at the dealership. Usually their kits will include everything needed to reboot the axles. Grease, boots, and hardware.
Good info! Thanks!!
Awesome! Much appreciated. I know the CV axles are coming with my VW. 200k on the odometer. 2012 Jetta 2.0 S manual. I'm surprised the original clutch is still going strong. So far TRQ parts have been pretty solid for me.
It is acceptable to re use the clips however when the new one has hit mach 7 and fell to the bottom of the scrap bin and a customer is waiting for the vehicle.
@@matthewdorricott4514 you shouldn't. They deform, and the axle can flop out. Especially on the transaxle side if it uses a clip to lock it in the flange.
@@AltruisticWarrior The 2.slow is a workhorse. Those run forever, especially with a manual trans.
One of the most thorough, not overly complicated, and easy to understand how to videos on you tube thanks.
I can't believe that I closed my eyes as you were spraying air. I guess I didn't want any grease in my eyes. Automatic thumbs up on this video. After reading other comments, I agree with them to just buy a complete CV axle but we wouldn't have this video.
Entertainment my foot... This is the most instructional video on changing CV boots I've ever seen.
What I normally do when I do CVS is I take a saw blad from a hacksaw and cut a line in the ring. Once it's got a slight line you can shove a screwdriver uner it and then it breaks off
I like to take detailed pictures of everything as I’m taking something apart when I forget what I did later
As a professional mechanic, the time and effort required to do this is not cost effective. You can order rebuilt CV axles and sometimes even new ones from your local auto supply. In the past I have ordered 2 axles and installed them in under 2 hours. This includes the time it took to have them delivered. I’ve also spent 3 years as a tool distributor and we sold the exact lisle tools you have.
Snap-on.
Haha you’re not a mechanic you’re just a part changer lol 😂
@@raymondeldridge6068 flat rate doesn’t pay enough to spend that much time changing the boot. He removed the whole axle and might be paid .5 to change the boot. And 1.5 for the whole axle. There is actually more labor in changing the boot and less money.
@@nordiccowboy3430 I’ve been a flat rate mechanic for over 40 years and I never collect my guarantee of 500. A week in 1996 my average hourly pay was 28.00 hr I wouldn’t work as a mechanic unless it was flat rate where else could turn 80 hours in a 40 hour week
@@raymondeldridge6068 I would have to agree that a mechanic by the nature of the trade would reboot, with OEM boot, OEM grease or equivalent with same g weight. Axles are never better than OEM. I recently saw a truck that the dana axle had to be OEM, period. Cost effective as in you can churn more profit if pull/swap, charge up on part. We are strictly speaking axles. Live axles, in particular. How engineered is that driveline? The quality control of the OEM part in car manufacturing is huge to sell the car as a whole. A shitty axle, and seriously how much does aftermarket rebuild it? I can buy the pieces of the axle OEM relatively cost effective if it's hard to find decent used. Yeah if you're a mechanic, you got your sources.
Fun job, did a 4Runner reboot with my son. Now he knows what to do and will inherit a bad-ass battery-powered impact wrench!
If you drill, use cutting fluid. The shavings will stick to the drill bit and make the whole process a lot smoother.
Thanks for the video. Two things I would do a little differently. Pack the bearings with the grease in the palm of the hand trick and the band clamps 180 degree out from each other. Keep up the great content.
Regarding the band clamp location, at 60 MPH a 33" dia. tire and its axle are only spinning at 611 RPM. I would not be concerned about the balance impact of such a tiny weight variance, especially on such short distance from the axis of rotation. You'd have a hard time measuring any centrifugal effect if the assembly was set up in balancing machinery.
@@eldorado96 even if you could meassure any imbalance the wheight of the grease will be a bigger problem 🤣
@@eldorado96 Looks like he’s talking about 180 offset for sealing purposes
They should give this information with the grease
@@eldorado96 Exactly a valve stem cap or rock in the tire tread, is going to have more effect on balance than those clamps. But i use the Pinch style boots clamps all the manufactures use on CV's. Much easier to install and remove, an they are a lot stronger.
One thing I would do differently and I have done this many times is ,it is recommended to install both clamps connections at 180 degrees apart. It is for counter balance. Thank you for the video.
It honestly wouldn't make any discernable difference.
Lots of work to change boot. If CV is still good. Get grease gun with needle adapter, pump full with grease. Wipe off excess from the outside. Clean outer surface with 70% alcohol. Dry. Then cover tear with (Permatex 82180 Ultra Black Maximum Oil Resistance RTV Silicone). Or something similar in ability to be flexible stick,seal. Nice video. Thanks.
agreed... that factory boot was in near mint condition...absolutely would have rtv on that minor nick vs all this work.
Or add a little grease and tolerate the minute leak.
What is the best way to add grease? Do you need to remove the clamp - since the hole like yo said is so small.
I definitely enjoyed this tutorial on how to replace a CV boot. Definitely good to watch, I think anybody looking to replace the inner CV boot should watch this video first. Definitely a thumbs up. I like the chrisfix style.
Used to change these out a couple times a summer on Kawasaki Mules we ran full time on a ranch. The boots would get tore or something similar would happen. I got pretty good at doing it. Enjoyed the video, thanks for sharing.
I enjoyed watching this. I have always wanted to know how this was done. Great job filming and unlike so many videos I could actually hear what you was doing.
Nice video, I've done this and few times over the years on my car. I typically check them as well as several other pretty much every time I change the oil to look for signs of any other problems. When I see a cracked and leaking boot I usually take care of it quickly before the joint gets damaged. In my case, it's often better to do that way as it saves me from having to replace the axle nut and transmission fluid as I can simply take the axle apart at the inner CV joint by simply removing the boot and sliding the bearing set out of the cup that can be left in the transmission to avoid draining and replacing the fluid. At that point most of the axle comes right out with the wheel hub upon removing the hub and from there I can take care of the boot or boots while I have it out, and proceed with reassembly once everything has been cleaned and greased. I honestly like doing it that way on my car because of how it's all configured. Makes it both easier and cheaper, not only as far as compared to buying a new axle, but also replacing the axle nut and transmission fluid as well. It's also less of a hassle than getting the half shaft out of the transmission and saves me the extra steps of removing and replacing the axle nut as the hub has to be removed anyway to get the axle out. Unless the axle is actually bad I prefer just to replace the boot and save the axle. I'm also doing it myself so I'm not ruining anyone's day at a shop. Lol
Great little vid and tutorial. That trick using compressed air to remove the old grease from needle bearings is excellent!
the inner joint uses a different grease than the outer joint. Its made by GKN specifically for tripod joints and comes in a tube. I guess any grease would "work" but I would want to use the correct grease if I was rebuilding an OE axle since they are much better than new china axles.
I just use high temp graphite grease for inner and outer joints. Never an issue from the mid 90s to present.
Agreed. It should be a thinner grease, such as NLGI 1 or 0. The thinner grease enables the needle rollers to be lubricated. It's strange that the replacement grease always seems to be the graphite base for outer CV.
I put Sika flex on a damaged boot that was spitting grease, 8 years later and its still holding strong today, also the car is a daily work car with weekend beach and bush driving. Sika all the way
I will have to look for that! Never heard if it. Patching makes a lot of sense to me if it can be done in time. As long as it is not a heavy layer that gets thrown out too much right? You gotta let whatever you use set up right? It isn't like patching a tire tube
..or is it? Patch and go?
I would periodically spray the CV boots and any other rubber parts / components with 303 Protectant . To help the rubber resist drying out and cracking .
Just rebuilt my CV axles. Didn’t have that ring tool you have but I DO have a PEX crimp tool I bought for plumbing work. It did the job beautifully!
I mentioned this in another comment, Rough Country makes an adapter that allows you to use 3/4 - 1 ton front axles on the 1/2 ton front end. The 3/4 - 1 ton front half shafts use a stronger universal joint than the 1/2 tons. If you ever decide to do it again, now you have the info. Great huh? Since you more than likely have already reinstalled your 1/2 shafts :D . Stay on the Road! Thank you for your videos!
You could have marked the shaft to match up with the marks on the bearings. Always make alignment marks. Good video so if I have a torn boot I will replace it if the joint isn't worn out.
@@repentandbelieveinJesusChrist9 Jesus is an Alien.
prove me wrong.
"This one time, at band clamp..."
😂🤣 You nailed it
@@smms5056 that's what she said
Lol I died when I read that.
Love the way you do the brake cleaner over your grass … this is why my yard looks like shoyt also 😂
5:10 why re use it? You have excessively and needlessly fatigued the metal messing about with it making it more brittle. Throw a new one on and call it a day.
Like bending a paper clip and and forth. Do it a few times and it looks okay but it's become brittle, weak, and a new failure point.
Agent LokVokun. It will likely out last the vehicle 3 times over if you have wads of extra money spend it however you like but not needed. Metal fatigue your ass.
@@theoldmanreed8818 Apparently you think a metal clamp is too expensive? They're like $5
You either do it right or do it twice. The $5 saved is wasted if you ever have to deal with it again. Even 1Road didn't bother to re use them because they're literally consumables. Brah
@@theoldmanreed8818 Sound like you're talking out your butt with no sources or citations "Your ass"-ness.
"Wads of extra money" watch out boys a $7 glorified metal zip tie is going to break Theold's bank account!
Take an Advil for your back you're getting cranky boomer.
- Haha... I had a small tear in a CV boot very similar to the one you shown. While still on the car I rotated the tear to the twelve o'clock position, brake cleaned the rubber around the tear and then applied a generous dab of high temp red silicon right on the tear, allowed it to cure for twelve hours.. It never leaked again.
I was literally going to do that! I still may to ‘repair’ it for a backup. I really wanted to tackle this job since I’ve never done it before. Was fun! 👍🤙
@@1RoadGarage replacement made a better video too. 👍
skoot61. Because you were born with a brain. And like the Brylcream commercial you knew a little dab would do.and all that was due.
@@1RoadGarage in that regard you were smart experience does not have to occur in a shop class. Even more unneeded spending.
@@theoldmanreed8818 - Haha... yes, Theold Manreed, I was born and raised at a time when Brylcream was an item regularly advertised on TV and was used commonly. Unfortunately, free-thinkers are a dyeing breed these days....
😂 Love the Title of the video. That's a lot of work for a tiny leak. As you mentioned the factory boot is built like a tank and there is probably an easier way to rebuild it and patch the hole. I like detailed videos like this that show you the inner workings of stuff. Thanks it was very Entertaining!!
This video randomly showed up on my feed. Not a mechanic or watch a lot of car videos. Dudes voice just made me want to keep watching and learn lol
I have to say I'm not a paid mechanic but there's not much I cannot fix. I love watching DIY videos since it shows different ways of fixing something. There's always two or three sometimes four ways of fixing the same problem.
I just want to say for anybody who's thinking about doing this it needs to be done exactly like this. Do not buy the split boot. It's the boots that you see in the video but it's there's a cut running from top to bottom and it's meant to fit in place of the broken boot. Those things are almost impossible to keep together. I think there's more videos on how to keep that boot on then it is to tell you how to do it from start to finish. If you're not up to doing all this then you're better off buying a new CV axle. And this one was saved just in time. When your grease looks like peanut butter or chocolate milk the water has gotten in there and you only have two choices and that's only if you have not already ruined the bearings.
I really did enjoy your video I made sure to get you a big old thumbs up and I definitely hit the subscribe button. I'm looking forward to watching more of your videos. Thanks for sharing your experience.
.
Mm MN
I've used those split boots a few times in the past and didn't seem to have a problem with them, when they did eventually fail it usually wasn't at the seam. I think the trick is that you have to do a pretty good job gluing them for it to work (make sure no grease gets in the seam). I understand this is more of a "gamble" for some people but realistically the CV axles are cheap enough that it's not that big a deal anymore if you cause damage to the bearings.
In the mid 90s on our Chevy celebrity 1984, I used a Speedi-boot, don’t recall the brand name, but it was a split boot, where you used 4 to 6 small bolts and nuts , no glue necessary. It came with some grease to put in. At the time I heard people had trouble with split boots that you had to glue together. The ones I used worked just great!
BTW it looks like they still are being sold in some fashion, I just did a search.. there are also things called Speedi-boot that have to do with venting for houses,, so don’t get confused when you do a search.
There's also a stretchable one that will go over the end without disassembly, needs a special tooth though to keep it from getting cut up when you put it on.
I had a slip-on boot in my toolbox for years. I would repair / rebuild old VW's and then go somewhere for the weekend in the repaired Bug or Bus. That was a good way to have a test drive and I never needed the spare boot.
I have replaced a hundreds off boots back n the 80’s & 90’s , oh the memories . Good times ! If it ain’t clicking replace the boot .at least back then …
This is what you need "Pneumatic CV Joint Boot Slider Install Tool Boot Spreader Expander Removal Tool"
There is a warning on the packaging about not overpacking grease. You will find it is near impossible to get a good seal on the boot if you do
I ended up replacing the split outer CV boot on my 1985 Honda CRX many years ago. I ordered the OEM inner and outer boots for the same shaft and replaced them at the same time. The CV joint was an rzeppa type with three steel balls and a cage. This configuration was a bit tricky to get apart and back together. Moreover, the cage was asymmetrical so you had to make sure you assembled it the correct way or the joint did not articulate to the extent is should. That was the one and only time I replaced a CV joint boot.
Having worked as a machinist in the tool and die trade and later as a tooling designer, I was utterly amazed at how beautifully machined and finished the parts were. They fit together perfectly.
Thanks for taking yours apart! I Just changed an axle and factory sealed boots. Now making a strange noise after a few weeks and I suspect that it was not greased. So, I now know how to remove those collars, check the CV bearings , and either re grease and refit, or go kick up a stink for a replacement axle!
I used to rebuild these CV axles and the CV joints in the lincoln and Cadillac driveshafts which were a pain in the butt. Snap-on makes a pair of clamp cutters that does a great job
God bless you man!! You just saved me 1/2 day of work.
It looked like there were 4 dots on the shaft that match the 4 on the spider. Could they have been alignment marks? This type of CV axle requires the inboard and outboard spiders to be offset by 60° to avoid a vibration issue.
I would love to see how it's completely made at the factory assembly line.
I rebuilt c joints in the early 80s at the age of 12 on my dads 75 Eldorado. This guy is making everything look difficult.
Great attention to detail with a nod to conservation
Once used a supposedly fast fit boot replace with less disassembly, but for some reason (maybe opetator error) it failef.Had to bite the bullet and pull the half shaft to replace that outer boot
That was a very informative video and I would just like to say thanks and possibly offer one small piece of advice if I may.
I would always try and keep the mating surfaces of the of the rubber to metal as clean as possible so after some time they will both bed in and kind of bond to each other and not have any tendency for any seepage of grease.
I know the clamps will hold it in place, but having grease around that section of the boot will enable the boot to potentially slide. Just my observation.
That makes total senses. I have done a few CV boots but never paid attention to that detail . Thank you, 06 taco here I come .
Exactly
Had a 1/2in slash in my boot and ,cleaned very well [ lac thinner] and put 5 coats of flex seal and STILL SOLID,NO LEAKS..Worked for me..
😂😂😂👊
I have a pair of farrier Nippers that I use to remove crimped bands. Get a good bite on the crimp, holdfast and twist. Works every time.
Absolutely amazing video. Informative and good quality
FYI if you do a lot of CV boots you should go ahead and get a CV boot expander therefore you just put the boot on the expander push the handle a couple times it expands it and you go right over the outside without having to actually disassemble the CV axle you can still clean it but leave it connected without having to take any snap rings off or anything
I've seen those! They must make a job like this nearly enjoyable 😂
I just used the top of a medium sized coke bottle with some silicon sprayed to get it to slide over. It worked astonishingly well!
And oddly enough...I have one. made in England. Never used it yet, but yes, I could see how it would make the job a lot simpler.
I used to replace boots but then rebuilt axles because much cheaper to just get than all the labor to replace the boots. Unless you are a shade tree mechanic and it’s your own labor. Sometimes you need the right tools.
your videos are always interesting thanks for sharing ✌🏻
The very best video I see doing CV boots ,👍🏻👍🏻
Now you see why the axel nut does nothing to hold the wheel bearing in place and yes, those are tooling marks, probably made by the chuck or clamping device used for maching.
I believe those marking are from being clamped in a lathe , while manufaturing. Cheers from B.C. Canada.
Nice video, no music , can hear perfectly all the informations , well I really enjoy looking at your performance and thanks for Sharing your knowledges with us . Have a Nice Day.
Nicely done Jimmy.💪👍👍👌
The video is spot on, don't bother with the boot , just replace the entire CV Axle and get the wheel hub and bearings while you're at it .
unless you get a crack in a boot of a $300 axle 1month after buying it, like me....NO WAY I'm replacing a perfectly good axle with
Explain that to the customer, oh needs a couple of quarts of trans oil as well because you pulled the axles out
Excellent tutorial on servicing CV joints & boots, Jimmy! Myself, I'd go get 2 new axle assemblies, as the axle assembly has to come out to change the rubber boot & regrease it. Ez to just put a new one in and be done with it. 😎
Mark Miller . sounds like your bank account is in good shape.
Mark some people have more time and talent than money
Mark i would fix a hole with silicone of some sort
Good quality zip ties works just gine for clamps on the dirt and dust covers or boots
@@theoldmanreed8818 Compared to when they first came out with these CV joints the prices have come way down depending on your vehicle. Well until uncle sniffy started fouling up the economy!
Very interesting... I'm not a mechanic. But I have been in the auto parts business for 25 years . I have worked for O'Reilly Auto Parts , AutoZone , Pepboys , now i work at a smaller auto parts company... But i did find this video interesting.. 👍
Excellent demonstration of what order to perform each step. I will add that the hybrid would need to have the pos(+) battery term removed no less than 30 min before you begin. Otherwise problems will be presumed by the computer for the electronic brake system.
So why shouldn't we mess with Factory CV boots?
I guess they are of inferior quality. If i got one message thats it i think. And dont bend those axles back and forth it gives them metal fatigue like a paper clip gets after you bend it a lot of times.
@@theoldmanreed8818 lol...bending them back and forth does not give them metal fatigue...lmao.. you need to look at how much those things flex and turn from one of the many on board cam videos... if bending them back and forth a few times by hand fatigued the metal they wouldnt last a day on the road...
@@sierraridgereaper
Depends. Elastic vs plastic deformation. Also depends on material and other characteristics, but he didn't really bend it all that much imo. The band should be reusable. Not like it's gonna bend all that much sitting there.
Not sure it matters... but bearing set doesn't appear keyed. Could be put on in a different orientation. When packing bearings... cup grease in palm of hand push bearing down into palm of hand to push grease up and into needles. FYI your videos are of best out there... not to mention love they are for these trucks... I have one too!
I bought some cheap axles at oriellys for my g35 when my front right boot tore. They seem to be holding fine. The oem replacement axles were unaffordable unfortunately. Thank you for making the video!
Outstanding! I appreciate the education.
Nice video. You may have wanted to note the position of the bearing assembly in relation to the shaft. There may need to be kept in the same alignment like a "U" joint.
Yes. You’re supposed to mark the position and put it back exactly where it was. If you don’t, you end up with vibration and premature failure. I bought a quad that used the same type of joints, and the previous owner had changed the boots. Put the joints on out of phase, the front end self destructed.
I'm glad someone pointed that out! This is very important.
Really great video. I have replaced way too many axles that just had ripped boots. I will note that for a small cut/hole like the one you had in your boot, I would have just used some silicone RTV to seal it.
I definitely would have just left the original one on it wasn’t bad at all it actually looked really good probably better than the one he replaced it with
Mine started to make clicking noise and found out the boot has small hole on it. What's your advice? Can I just put the grease thru the hole and seal them?
Yup we have tools to inject more grease and close all rips and holes.
@@purnadika clicks are sign of bearing slap they are bad. Housing could be bad also look at marks see if wear marks.
that is what cowboys do
Those crimp clamps are called Oetiker clamps and Knipex makes a very nice crimping tool for them 👍
I like when you try to save parts to reuse
For that tiny puncture you could have used silicone gasket maker and smudged it over a decent area of it and would have been fine.
Yup. Someone cut the boot to spray some grease in there. Then smear the silicone. A trick I use.
I had a hole in my boot. I put on some gorilla waterproof tape and its been on for 3 years. You just don't want to wait to long because it can get dirt inside the boot. It saved the replacement or repairing it and it work great.
Does it still keep your socks dry ?
Its crazy how this works . great video
Awesome video!
You’ve done a great job!
Good video and good content, but that nick was marginal. I would have cleaned it off with a little brake clean and patched that nick with some high temp silicone.
👍💯
Yeah, will probably last longer repaired than the aftermarket.
One of the few cases where a repair probably would have held.
Cheaper, easier, and quicker to repair that boot. I would tried that first before removing the old one off. It was a barely a hole.
Are you for real? You can’t silicone a hole in a rubber boot that spins @ a few thousand revs per minute. He wasted sooooo much time that he could have replaced that cv ( lifetime warranty at every parts stores) every year for the rest of his life. The replacements are not that bad and I would never again ever ever ever reboot a cv axle ever again. A brand new (not reman) CV for that truck is about $65. Dorman products are junk I wouldn’t even trust their grease
@@nismo20032 Or you can use a soldering iron and melt the sucker shut. Done!
All this for that small tear? Taking preventative maintenance to another level.
Exactly and maybe try to seal it with quality hot glue or silicone
Jesse Campbell. Stop that bloomin Metal Fatigue at any cost!
Just seal it. Silly cone works good if its cleaned well around the hole. Butter works on a well cleaned hole if you dont have vaseline. Long as you leave out the salt that would be an assault.
Agreed. I can think half dozen ways to take care of that.
Yep! A certain Nissan dealership in Kansas City cut the boot on my Rouge to try and get me to pay them more $ to fix it. Good thing I inspect the car before and after I bring it to a dealership for recall work.
So basically this was a Lisle Tools sales pitch/commercial?! Every tool he's selling has an alternate tool we all have in out tool boxes! (and the fact that we probably already have em' as mechanics!)
Rookie error … should have marked the orientation of the joint so that the rollers return to the same places.
(And the boot clamp can easily be removed with a cold chisel)
NOTE2: Avoid the Beckman brand CV boots. They don't last. I replaced all 4 of my factory boots and they've all cracked and tore in under 9 years, with no sub-freezing weather exposure. The factory boots lasted 15 years, crossed the USA 3x, subjected to Canadian winters, before cracks were appearing.
They crack because of ozone exposure, not just temperature.
@@panzerveps Well that may be the case, but mine were only subjected to very high Summer temps and mild winter temps. They should have stayed pliable for most of its life. They didn't see a lot of miles or bad roads either. But failed much sooner than expected.
@@wngimageanddesign9546 I'm pretty biased towards oem anyways. I have plenty of bad experience with after market parts like brake pads and coil springs, so when I'm hunting for parts for my car, I always go for the oem supplier.
Knocking on 9 years worth of service isn't what I'd call something to avoid.
Even good quality OEM parts never get close to outlasting factory fitted stuff.
yet another great video. thanks again!
Good job Jimmy nice repair @1ROAD
The marks are for balancing. Removing tiny amounts of material to balance out a rotating assembly. Usually when same marks are noted throughout it was most likely a weight trimming. If the material isn't removed on all sides the same it will be out of balance. Probably a combination of both seen there.
Those are tool/fixture marks, balancing marks are way more uniform
@@almarkowbender Please pray tell what tool would hold the material on the inside and not the outside. I'll wait.
@@MrAnderson5157 3 jaw chucks can hold the outside or inside of a part... Look at any basic lathe video.
@@almarkowbender Those are mass produced. That method of machining not only makes zero sense its not cost efficient. I've never seen anyone turn the inside, put the chucks inside in order to turn the outside. That is the opposite of how its done.
@@MrAnderson5157 Well hopefully you educate yourself since you won't allow me to, those are clearly marks from some kind of chuck or fixture to hold the part during machining, they are evenly spaced and almost the same pattern. Balancing marks need to be uniform and precise otherwise it's hard to balance anything. Look at the marks they look like they were made from something biting and dragging on the material, the ends are raised like a bite mark. Educate yourself.
It's best to just buy some new cv axels, Amazon has new ones for most vehicles for about $40 to $80 apiece.
Jay Wires if you dont have zip ties handy but some skill you can use bailing wire on those boots for clamps
@@theoldmanreed8818 I'd never use zip ties or bailing wire on cv Axel boots, Ill just get new ones.
You are so right he is wasting time
Buddy, most of those axles are absolute garbage. You're lucky to get 50k out of them. If you have your OEM axles still, a rebuilt OE axle with a quality boot kit and some good grease is often wayyyy better. Most rebuilder won't even touch an aftermarket/chinese junk axle. Some last ok. I have a cheap pair of backups for my Yota 4wds so that I can remove and have the originals rebuilt, swap them back when I have time. Way better to just rebuild them day of, but having a spare can literally save your ass if you break one somewhere in the boonies. I used to carry a spare on longer trips in my 4runner. Good to have anything that is common failure on your vehicle if you're inclined to fix it, and able to remotely. I made and replaced a brakeline in a parking lot in -10deg weather on one trip. Saved me thousands of dollars given the job I was using my truck for. Drove it for a day and a half with rear line clamped in vice grips until I could get a piece of line.
When I did my 87 Daytona's CV axles I bought NOS boot kits from Chrysler and found the special clamp tool on ebay. The chrysler tool has both pairs of pliers built into one tool.
These marks may come from the lathe or mill jaws in the factory that machined the faces of the pulley at the end of the machining process
I keep watching these to see why I shouldn't do these things but never find out why so I'm unsubscribed
Martin Lewis. Dont give up. But be careful what you listen to.
And metal fatigue is a real thing but not as prevalent as many believe. On stuff used off road and frames and such is where ive seen it most. Anything that abused should be taken into consideration.
Not worth messing with axles anymore,time consuming and cheaper to buy a new axle replacing the whole axle.If the boot is torn badly,dirt and crud got in ruining the joint
I learnt something. The use of compressed air to remove grease, with use of a towel or rag.
Good job Jimmy always messy working with those CVS.
Very Nice, information explained was easily understood.
no info about the orientation of the cv joint in relation to the other cv joint? That is a very important point to get correct
That was educational and entertaining. Thank you!
Use a beveled edge chisel to cut the band folks.
Thank you great video.