TH-cam
US
How to change brake discs and brake pads on MERCEDES VITO W639 [TUTORIAL AUTODOC]
7:16
Mercedes-Benz Vito W639 Rear Parking Brake shoes/Brake Discs/Brake Pads Replacement.
17:36
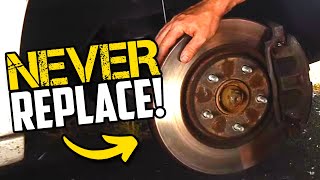
Don't Replace Your Brake Rotors Before Watching This! #Resurface
5:27
ไก่วิเศษ #การ์ตูน #นิทาน #cartoon
00:51
ทัวร์สตรีมเมอร์ ROV ชิงเงินรางวัลรวม 25,000 บาท 8 ทีม : รอบ 8 ทีม
5:25:16
ถ้าทาสไม่ขุดทอง แล้วทาสจะขุดอะไร #hererm #เกม #gaming
00:46
How to change brake discs and brake pads on MERCEDES VITO W639 [TUTORIAL AUTODOC]
autodoc.co.uk
ติดตาม
432K
ดาวน์โหลด
โหลดลิงค์.....
มุมมอง 43 372
0
0
เพิ่มลงใน
เพลย์ลิสต์ของฉัน
ดูภายหลัง
แชร์
แชร์
ฝัง
ขนาดวิดีโอ:
1280 X 720
853 X 480
640 X 360
แสดงแผงควบคุมโปรแกรมเล่น
เล่นอัตโนมัติ
เล่นใหม่
เผยแพร่เมื่อ 25 ธ.ค. 2024
ความคิดเห็น • 37
ต่อไป
เล่นอัตโนมัติ
7:16
How to change brake discs and brake pads on MERCEDES VITO W639 [TUTORIAL AUTODOC]
autodoc.co.uk
มุมมอง 36K
17:36
Mercedes-Benz Vito W639 Rear Parking Brake shoes/Brake Discs/Brake Pads Replacement.
HOW TO DO
มุมมอง 16K
5:27
Don't Replace Your Brake Rotors Before Watching This! #Resurface
Budget Mechanic
มุมมอง 144K
00:51
ไก่วิเศษ #การ์ตูน #นิทาน #cartoon
วัยรุ่นผาฮอม
มุมมอง 17K
5:25:16
ทัวร์สตรีมเมอร์ ROV ชิงเงินรางวัลรวม 25,000 บาท 8 ทีม : รอบ 8 ทีม
Chicken V
มุมมอง 215K
00:46
ถ้าทาสไม่ขุดทอง แล้วทาสจะขุดอะไร #hererm #เกม #gaming
Hererm
มุมมอง 82K
04:20
วาทะลูกหนังขอเสนอ"แมนเชสเตอร์ ซิตี้ VS แมนเชสเตอร์ ยูไนเต็ด หลังเกม เรือใบสีฟ้าแพ้ปีศาจแดงคาบ้าน"
วาทะลูกหนัง -Football Quotes-
มุมมอง 404K
6:53
How to change front brake discs / front brake rotors on MERCEDES-BENZ VITO 1 (W638) [AUTODOC]
autodoc.co.uk
มุมมอง 3.7K
15:00
MERCEDES C-CLASS W204 - How To Replace Front Brake Discs & Pads Change Swap Replacement (295mm Disc)
Select Automotive
มุมมอง 69K
15:20
MERCEDES VITO REAR BRAKE DISCS AND PADS WITH HAND BRAKE SHOES REMOVAL
Mark Davies
มุมมอง 80K
25:55
Mercedes Vito W639 discs and pads change with seized guide / slide pin (Sprinter, Viano, Vito Taxi )
fixitfallows
มุมมอง 12K
14:40
The Mercedes Vito Is A Bargain VW Transporter Alternative With One BIG Problem
Dadcars
มุมมอง 244K
15:39
Mercedes Vito 2009 W639 gear change is stiff, worn, sloppy or play selector bush replacement how to
Daniel&John
มุมมอง 13K
15:05
Mercedes vito 2007 fitting new front brake calipers
Mark Davies
มุมมอง 3.7K
11:28
1) How to remove a 2nd gen wheel bearing rear on Mercedes Vito RWD
Mike Bryan
มุมมอง 108K
9:58
Car or Truck Brakes Squealing After Being Replaced? Simple Way to Choose the Right Brake Pads
1A Auto: Repair Tips & Secrets Only Mechanics Know
มุมมอง 227K
00:42
🎄✨ Puff is saving Christmas again with his incredible baking skills! #PuffTheBaker #thatlittlepuff
That Little Puff
มุมมอง 21M
00:55
ไม่มีใครรักหนูเลย #shorts #แม่สุน้องซูกัส
HeHaa TV
มุมมอง 2.6M
00:18
ใครขยับไม่ได้เป็น!!
DOME TTP
มุมมอง 21K
16:21
พ้นเส้นตาย "ทหารไทย" 18 ธ.ค.หมดเวลา "ว้าแดง" | DAILYNEWSTODAY 18/12/67
Dailynews Online
มุมมอง 423K
39:39
ใครคือฆาตกรตัวจริง ?! EP.11 (ver. คืนคริสมาสต์ สุดสยอง !!!
Sunflowava
มุมมอง 307K
5:17:45
🔴LIVE สด! PGC 2024 ศึกชิงแชมป์โลกพับจี Circuit 3 วันที่ 2
PUBG: BATTLEGROUNDS THAILAND
มุมมอง 169K
00:48
Oren helps Durple escape Pinki in a way you wouldn't expect
Slime Cat
มุมมอง 774K
00:17
คุณอยากเรียนเวลาไหนทุกวันไปตลอดชีวิต? เลือกเลย!
GennoRing
มุมมอง 161K

![How to change brake discs and brake pads on MERCEDES VITO W639 [TUTORIAL AUTODOC]](http://i.ytimg.com/vi/GJ_NekNho0k/mqdefault.jpg)
![How to change brake discs and brake pads on MERCEDES VITO W639 [TUTORIAL AUTODOC]](/img/tr.png)


![How to change front brake discs / front brake rotors on MERCEDES-BENZ VITO 1 (W638) [AUTODOC]](/img/n.gif)