
- 43
- 838 044
Science Fun
United States
เข้าร่วมเมื่อ 29 พ.ย. 2017
Welcome to Science Fun Innovations, LLC! My passion is finding simple and affordable ways to automate things at home using platforms such as the Arduino and Raspberry Pi. I love motors, actuators, pumps, 3D printers, and solar power. I try to leave detailed step-by-step DIY instructions in my videos and links for parts so that you can do similar projects on your own. Some projects (like my automated etch-a-sketch) are just for fun and learning, but others have the intent of saving me money. Look for future projects on my channel that make my house more efficient, make life easier, or that are just plain Science Fun! If this interests you, please subscribe to my channel and share my videos with others. Find me on Facebook and Instagram. Thanks for watching!
How to build a large CNC router controlled by Arduino GRBL, UGS, and Fusion 360 - Part II
This video is part II - Here is the link to part I: th-cam.com/video/DF_1bY8aJbc/w-d-xo.html
Welcome to Science Fun Innovations, LLC
Make your own CNC parts out of wood, plastic, or even aluminum. In this video I show you step-by-step how I build a large CNC router for under $600. This router is controlled by an Arduino using GBRL (G-Code) delivered by the free Universal G-Code Sender application. This project does not require a lot of tools and is very fun to build. CNC routers this size normally cost several times more. Below are the links to most of the parts used in this video. Note that some of these are affiliate links, meaning no extra cost to you, but my channel might make a little extra to put towards the next video. Thank you for your support! (Note: Some of these items may be cheaper on AliExpress)
Templates and schematics available here: sciencefuninnovation.gumroad.com/l/arhgh
Follow Science Fun Innovations on Facebook: ScienceFun4u/
Follow Science Fun Innovations on Instagram: sciencefuninnovations
Links to software used in this video:
Arduino GRBL - github.com/gnea/grbl
Universal Gcode Sender - github.com/winder/Universal-G-Code-Sender
UGS Fusion 360 Plugin - github.com/tapnair/UGS_Fusion
Watch this video if you get stuck trying to install UGS or UGS Fusion Plugin - th-cam.com/video/Rrmu9QoHVx8/w-d-xo.html
500W Spindle and Speed Controller ebay.us/QC96Ma or amzn.to/48Myw8l
Spindle Holder 52mm Diameter for CNC 3018 MAX ebay.us/aV12dh or amzn.to/3SxrCOu
SFU1605x1050mm Ball Screw Set amzn.to/497oDBT
Y rods 12mmx500 ebay.us/uBKdKK or amzn.to/47OY6YP
Y sk12 Supports ebay.us/eDxUtc or amzn.to/47KgTVm
ReliaBot 600mm T8 T8x4 Tr8x4 Lead Screw and Brass Nut (Acme Thread, 2mm Pitch, 2 Start, 4mm Lead) amzn.to/42giHV6
6.35x8mm Rigid Shaft Coupling amzn.to/3OjeE4x
Base Frame 2040 Aluminum 1000mm 5pc ebay.us/K0uW9B or amzn.to/3OgVoEP
Gantry Frame 2040 Aluminum 500mm 4pc ebay.us/LCjUpS or amzn.to/3Ok27O9
Aluminum Corners (Hidden) 20pc amzn.to/3Hz02Kv
Aluminum Corners 20pc ebay.us/RsgOkD or amzn.to/495JGor
T-nuts 5mm drop in ebay.us/CN2GL9 or amzn.to/3SuBnNt
M6 x 25mm Flanged Button Head Socket Cap Screws, Black Oxide, 25 PCS amzn.to/48LCfmF
M6 x 8mm 12mm 16mm 20mm 25mm Flat Head Socket Cap Screws
CBlack Oxide Finish, Fully Threaded, 50PCS amzn.to/48N4K3g
25Pcs M6 Slide in T Nut amzn.to/3SsXFix
M5-0.8 x 10mm Flanged Button Head Socket Cap Screw Bolts amzn.to/3SAP1yM
2 PCS 1/4 x 8 x 12 Inch Aluminum Sheet 5052 Aluminum Sheet Metal Plate amzn.to/3UdjVy6
Motor Mounting Holder 132x65mm Black for NEMA 23 Stepper Motor amzn.to/3HxgF9j
Stepper Motor Driver TB6600 4A amzn.to/3vNprgN
36V 10A 360W Switching Power Supply amzn.to/47OZwCI
HiLetgo 5V One Channel Relay Module Relay amzn.to/47UABxE
39.3 inch Carrier Drag Chain Cable Wire R18 10x20mm amzn.to/3SuALHF
15 amp switch amzn.to/3tWqgna
14 Gauge Replacement Power Cord,8Ft Cable 110V 115V 120V 300V
Pigtail for Appliance, NEMA 5-15P amzn.to/42dd5uu
ReliaBot 1pc T8 Tr8x4 Anti Backlash Spring Loaded Nut Elimination Gap with 4-M3 Holes for 4mm Lead Acme Threaded T8x4 Lead Screw (2mm Pitch, 2 Start, 4mm Lead) amzn.to/4bapYcO
SpeTool Spiral Upcut Router Bit 1/4 inch Shank 1/4 inch Cutting Diameter Solid Carbide End Mill amzn.to/48Tn2A4
NEMA 23 Bipolar Stepper Motor Model 23HS22-2804S stepperonline.com
NEMA 23 Bracket Model ST-M2 stepperonline.com
มุมมอง: 4 566
วีดีโอ


How to build a large CNC router controlled by Arduino GRBL and Universal G-Code Sender UGS
มุมมอง 10K3 หลายเดือนก่อน
Welcome to Science Fun Innovations, LLC Make your own CNC parts out of wood, plastic, or even aluminum. In this video I show you step-by-step how I build a large CNC router for under $600. This router is controlled by an Arduino using GBRL (G-Code) delivered by the free Universal G-Code Sender application. This project does not require a lot of tools and is very fun to build. CNC routers this s...

Control an Arduino using Wii Nunchuck - Linear Actuator Control
มุมมอง 2.2K5 หลายเดือนก่อน
In this video I will show you how easy it is to interface a Wii Nunchuk with an Arduino using I2C. This tutorial will demonstrate the many features of the Wii Nunchuk, and I will show you how to control the speed and direction of a linear actuator with L298N using the Wii Nunchuk and the Adafruit Wii Nunchuk Breakout Adapter Board and QT to JST SH 4-pin Cable sold here (affiliate link): ebay.us...

Linear Actuator Position Control using Arduino XIAO BLE and MIT APP Inventor for Android
มุมมอง 7Kปีที่แล้ว
Tutorial Part 2 of 2 In this video I test out the XIAO BLE microcontroller from Seeed Studio. This may be my new favorite microcontroller as it is fast, powerful, and works great using Arduino Code. This video demonstrates how to control BluetoothLE devices using an application on your Android device using MIT APP Inventor. In this video I show you how to control the exact postion of a linear a...

XIAO BLE Digital Output Control using Arduino and MIT APP Inventor
มุมมอง 6Kปีที่แล้ว
Tutorial Part 1 of 2 In this video I test out the XIAO BLE microcontroller from Seeed Studio. This may be my new favorite microcontroller as it is fast, powerful, and works great using Arduino Code. This video demonstrates how to control digital outputs on your microcontroller using a Bluetooth LE application on your Android device using MIT APP Inventor. Source code for this video is available...

Arduino Linear Actuator Position Control // Linear Actuator with Position Feedback Return to Center
มุมมอง 68K2 ปีที่แล้ว
Find Science Fun Innovations, LLC on Facebook @sciencefun4u. In this video tutorial, I show how to control the position of a linear actuator using an Arduino and a BTS7960 or L298N motor control board. The Arduino source code the hookup schematics are available here: sciencefuninnovation.gumroad.com The following are affiliate links for products used in this video. Purchasing from these links w...

Arduino Controlled Dog House Heater with Bluetooth Display for Android Smart Phone MIT APP Inventor
มุมมอง 1.1K2 ปีที่แล้ว
Find Science Fun Innovations, LLC on Facebook @sciencefun4u. In this video tutorial, I show how I made an insulated dog house with a built in Arduino controlled heater. I also show how I use Bluetooth Low Energy (BLE) to display the doghouse temperature on my Android phone using MIT APP Inventor. This video uses a Bluno Nano BLE because of its Bluetooth capability, but a regular Arduino Uno or ...

Arduino Bluetooth Motor Controller // Bluetooth Low Energy BLE and MIT App Inventor for Android
มุมมอง 11K2 ปีที่แล้ว
In this video I use an Arduino with Bluetooth Low Energy BLE and a smart phone app created with MIT App Inventor to control the speed and direction of a gearmotor. The Arduino also reads the motor encoder and send the motor rpm to the Android application. The Arduino version is the Bluno Nano BLE, which is essentially a miniature Arduino Uno with built-in Bluetooth (BLE). In this tutorial, I wi...

RC Arduino Hovercraft Version 3 (finally on water) : Arduino 4-wire CPU Fan Control
มุมมอง 2.2K2 ปีที่แล้ว
In this tutorial, I finally get my Arduino controlled RC Hovercraft onto the water! This Hovercraft uses an Arduino Code and an ATTINY microcontroller to control a 4-wire CPU fan. The video includes hookup instructions and explains the software (which I will post on my Facebook page @sciencefun4u. The 3D (.stl) files and Arduino (.ino) codes are available here: sciencefuninnovation.gumroad.com/...
Arduino Analog Joystick
มุมมอง 9K2 ปีที่แล้ว
Quick tutorial on how to interface an analog joystick with an Arduino for PWM motor control. The following is an affiliate link for the joystick used in this video. Using this link may help me earn a small commission to help my channel grow. Thanks for your support! 2 Channel analog joystick: amzn.to/3pcXOX7
Paper Rocket Launcher
มุมมอง 4.9K2 ปีที่แล้ว
DIY Paper Rocket Launcher Tutorial. This is a great project to do with your kids or with a youth group. The launcher uses compressed air to launch paper rockets farther than you would expect. Most paper rockets can withstand 20-40 psi, but if you make them robust you can crank sometimes withstand 60-100 psi. Ideal activity for kids 8 to 14 (and for parents too)! Check out more fun projects on m...
How to use Force Sensitive Resistors (FSR) with Arduino - Simple Force Sensing Arduino Tutorial
มุมมอง 43K3 ปีที่แล้ว
How to use Force Sensitive Resistors (FSR) with Arduino - Simple Force Sensing Arduino Tutorial
Arduino RC Hovercraft Version 2// DIY 4-wire CPU Fan with ATTINY85
มุมมอง 2.4K3 ปีที่แล้ว
Arduino RC Hovercraft Version 2// DIY 4-wire CPU Fan with ATTINY85
Arduino Fan Control using High Frequency 25kHz PWM // 4-Wire CPU Fans
มุมมอง 71K3 ปีที่แล้ว
Arduino Fan Control using High Frequency 25kHz PWM // 4-Wire CPU Fans
DIY Color Changing Acrylic Nightlight using ATtiny85 Microcontroller and Arduino
มุมมอง 1.3K3 ปีที่แล้ว
DIY Color Changing Acrylic Nightlight using ATtiny85 Microcontroller and Arduino
How to measure distance with an Arduino and Ultrasonic Sensor // HC-SR04
มุมมอง 7K3 ปีที่แล้ว
How to measure distance with an Arduino and Ultrasonic Sensor // HC-SR04
Arduino Attic Fan Control with Nextion Touch Screen GUI // Part 2 - Software
มุมมอง 1.6K3 ปีที่แล้ว
Arduino Attic Fan Control with Nextion Touch Screen GUI // Part 2 - Software
Arduino Attic Fan Control with Nextion Touch Screen GUI // Tutorial Part 1 - Hardware and Wiring
มุมมอง 3K3 ปีที่แล้ว
Arduino Attic Fan Control with Nextion Touch Screen GUI // Tutorial Part 1 - Hardware and Wiring
Arduino IR Sensor Tutorial // LED chaser using Arduino Interrupts
มุมมอง 4K3 ปีที่แล้ว
Arduino IR Sensor Tutorial // LED chaser using Arduino Interrupts
Arduino RC Hovercraft Version 1 // DIY MOSFET CPU Fan L298N PWM Propellers
มุมมอง 3.4K3 ปีที่แล้ว
Arduino RC Hovercraft Version 1 // DIY MOSFET CPU Fan L298N PWM Propellers
Arduino Fan Control // 2-Wire, 3-Wire, and 4-Wire CPU Fan Speed Control and Measurement
มุมมอง 216K3 ปีที่แล้ว
Arduino Fan Control // 2-Wire, 3-Wire, and 4-Wire CPU Fan Speed Control and Measurement
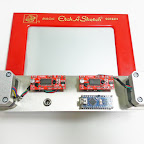
Arduino Etch-a-Sketch Time Lapse: Six Soccer Stars
มุมมอง 3753 ปีที่แล้ว
Arduino Etch-a-Sketch Time Lapse: Six Soccer Stars
3 Great Arduino Temperature Sensors // LM34, DS18B20, and DS3231 Real Time Clock
มุมมอง 13K4 ปีที่แล้ว
3 Great Arduino Temperature Sensors // LM34, DS18B20, and DS3231 Real Time Clock
Linear Actuator Arduino Control - L298N with RC Transmitter and Receiver
มุมมอง 13K4 ปีที่แล้ว
Linear Actuator Arduino Control - L298N with RC Transmitter and Receiver
1 Year Review - 200-Watt HQST (Renogy) RV Solar Panels
มุมมอง 6K4 ปีที่แล้ว
1 Year Review - 200-Watt HQST (Renogy) RV Solar Panels
Linear Actuator Arduino Control using L298N Motor Control Board
มุมมอง 42K4 ปีที่แล้ว
Linear Actuator Arduino Control using L298N Motor Control Board
Arduino Solar Tracker with USB Phone Charger - DIY Tutorial
มุมมอง 40K4 ปีที่แล้ว
Arduino Solar Tracker with USB Phone Charger - DIY Tutorial
ANET A8 3-D Printer Assembly, Upgrades, Bed Leveling, and Cura Setup - English
มุมมอง 10K4 ปีที่แล้ว
ANET A8 3-D Printer Assembly, Upgrades, Bed Leveling, and Cura Setup - English
Arduino Windspeed Anemometer or Redneck Speedometer?
มุมมอง 8K4 ปีที่แล้ว
Arduino Windspeed Anemometer or Redneck Speedometer?
L9110 with Arduino Code - Part 3: How to Stepper Motor Speed and Direction
มุมมอง 17K4 ปีที่แล้ว
L9110 with Arduino Code - Part 3: How to Stepper Motor Speed and Direction
Hi! I use lots of Fans(over 10+) so I use independent 12v supply. In my case, I just connect yellow&blue line of fan to 2, 3 pin of Arduino and Fans +/- lines connecting to 12v supply? I can't English well so you might be hard to understand my sentence. I'm sorry but I hope you answer my question Thank you!
I will Use it for Self made rc car. Butt Cold also work on an rc window opener for our attic 😅
Nice!
Congratulations with this excellent video , just subcribed and looking forward to the rest of the content on this channel!
Awesome, thank you!
I have 3 nema 17 60mm for x and y. Will this do or should i buy nema23's. I have exactly same planed dimensions 1000mm x 500mm. Plan to use rack and pinion with spring foy y and common lead screw for x and z for now. Any thoughts? Will mainly use on wood designs. Will use hgr15 linear rails.
My Z axis is NEMA 17 and it does fine. 17's would probably work for this, but you might want 23's if you ever want to upgrade. Thanks for watching! Good luck!
@@ScienceFunInnovations thanks
Good day. I would like to control a TGM7 series 24V 6A geared motor using a 24V DC motor controller (lithium battery) and Arduino. I would appreciate your help on this subject.
What exactly are you needing help with? You could send an email to my business email with details.
I am using one of these to send signal to a plc. Is there a way to get a signal high output when it detects a magnet? I'm a mechanical engineering student.
Use pnp sensor nc
Yes, but you need a different sensor.
I want to control 7 actuators Is there a board designed to handle 7 actuators at once. I have a joy stick control box that can handle the 7 actuators
An Arduino Mega might have enough input/outputs.
Can you control it via wired joystick?
You could wire a joystick to an Analog Input on the Arduino.
Can you show me what the hardware connection would look like? I am trying to connect a 12 V 4 wire Fan to Arduino I understand Arduino only takes 5V wouldn’t the power supply fry the circuit?
Have you seen my other fan videos? I think those would answer your questions. The fan would need its own power supply.
Hey, update for the project I am making similar to this one. It mostly works, the only thing is that the phone isn't charging (I'm using an iPhone 8). when I connect it, the light from the Step Up DC-DC Boost Converter is on for like 2 seconds, then is off. I have to turn the switch off, and back on for the converter to turn back on again. Do you know why that is? Also, for some reason, the lithium-ion battery charger, when the solar panels are connected, the red and blue lights turn on when it is in direct sunlight. When there is minimal sunlight, only the blue is on. Do you know why is that as well? Thank you so much and I would love to hear from you asap on either or both of these questions.
That project was such a long time ago, I'll try to remember a little. If I were to do it again, I would use bigger solar panels. I would turn off my phone to help it charge faster. And I was using an older phone that didn't have rapid charging. So long story short, if I did it again I would use a bigger solar panel and make sure the it has the right voltage output during full sun.
How could I do this using the BTS 7860?
The BTS is very similar except that it doesn't have 5V power supply. Perhaps soon I will do a video using one. Thanks!
This video helps a lot! Starting my electronics journey, I have made a basic inverter circuit with two npn transistors and practiced soldering various thongs. Thought it was time to get an arduino and see how to control these computer fans that i got from a trashed computer, with just an arduino and not have to use a speed controller!
Glad it helped. Good luck!
Excellent, just what I was looking for 🎉 now if you could just add a 10w pwm diode laser and show how and show us how it all works together on the cnc that would be amazing.
Down the road a year or two. Too many projects going on right now. :-)
Excellent video and instructions!!!! Exactly what I was looking for and thanks,
Glad it helped!
I'm not able to connect the Arduino Seeed chip to the MIT app once it's on my Android Tablet. I think it may have to do with Bluetooth permissions with newer versions - is this something you encountered?
I didn't have that issue... perhaps there is a setting preventing connection? Does the tablet at least detect the device?
Great help! Thx, any chance to tell me how to do it with ESP32 ? Thx!
Sorry, no. I haven't worked with ESP32 before.
Great video,I will build one similar to yours. I have questions. why the power supply is 36V instead of 24V? What is the ampere for the 36V power supply
36V allows the stepper motors to turn faster. Just make sure that your stepper motor controllers can handle the voltage.
great tutorial! what size wires do you use. I am trying to use a 12 V linear actuator with a current load of 4.5?
I use wires that can handle the stall current for the actuator. You will have to look up that value for your actuator and size the wires accordingly.
Hi Please can you assist if possible
If you have a business inquiry, please send an email with specifics. Thanks!
Hey there, I love the project Idea. I'm planning on doing a similar project and I have a quick question on the 3d Print. How did u make it so that the gear motor can move even with the 3d printed base? How did you make the 3d print so that the motor isn't just stuck to the bottom and is still able to rotate. Pls get back to me asap as I would love to hear from you soon. Thx!
It's been a while since I built that, but I think that the shaft of the motor was stuck into the base. (The motor is upsidedown) Hope that helps.
sir can the l9110 handle 1A input current
It can only handle 0.8A. But other motor controllers in my other videos can handle much more. Hope this helps.
thank you for sharing. could you please share how you developed the codes for MIT in details?
Sorry, that project was so long ago it would take me a while to get back up to speed. But thanks for watching!
will this work on infrared sensor?
I haven't used infared sensors, so I couldn't tell you for sure. Sorry!
Is the gear motor 12V???
It has been a while since I built that, but I would suspect it would be a 6V motor.
So how would you make it self center?
I have another video about that. Check it out. Thanks!
Hi sir 😊may i see the full source code of this project?? just for educational purposes😊
facebook.com/ScienceFun4u/ You can find the source code here.
Nice
Thanks
S on a MOSFET is called the SOURCE, not the sink. Think about it: a basin with a drain and a sink would have two outflows but no inflow. You need an inflow of electrons into the transistor in order to have an outflow. Electrons flow from the negative to the positive pole, which is why the MOSFET pins are called SOURCE and drain. Other than that, nice video!
Yeah, wish I could go back and fix that...
its not connecting sos
it is scannable, but pairing is not working
Did you get it to work?
no copy and paste???
facebook.com/ScienceFun4u/
Would it be possible to control in the same way a linear rail actuator driven by a stepper motor? To gain high accuracy.
Different code and different motor controllers, but yes this could easily be done with stepper motors. Thanks!
Wooow it's a great work, can'I make it bigger with the same code?
Yes. It can be as big as you want. I'm sure version 2 will be bigger. :-)
Hello Thank you for this video. Will this anemometer work in a tube?😅 I'm thinking to measure the heart recovery ventilation air flow..
It should. You would just have to adjust the values for the interference from the tube.
What about 5 wire, 6 wire, 7 wire fans?
Someday...
HOW ARENT YOU FAMOUS?
Working on it...
How did this not get lots of likes AMAZING❤
Thanks!
My toxic trait is thinking I could do this
Go for it!
draw me next!
LOL
wow so cool!!
Thanks!
It would be cooler if you could find a way to do this would it making lines across the face
I've tried. The math is much trickier and you still end up with lines connecting the eyes, nose, and mouth. Would be easier if you could pause the stylus, but we are working with 64 year old technology. :-)
These videos with the actuators are so awesome! Thanks for yet another great video :)
Glad you like them!
Something is not right when 0% gives 780 RPM. My guess is that the fan you are testing with does not follow PC-fan spec. 0% means no rotation, 0 rpm.
Some fans have minimum speeds so that the motors do not overheat.
I built one many years ago, since then i bought one better built. You should always do the outside cut last.
Good tip. Still learning. :-)
Where did you download fusion 360?
From Autodesk. They have free versions for hobbyists.
gr8 project, i think leaning toward more user friendly interface and maybe intergrating some 3D printed vacum nozzles and this will be a hit
Good luck!
Thank you so much. I decide to do this project. However I have some issues with finding this model of stepper motor. Is there any alternative stepper motor?
Find a NEMA 23 motor with the right sized output shaft.
Thanks for your informative and helpful video👍🏼
Glad you liked it!
Great content, but the Actuator file has 2 INOs no AIA, just FYI, thanks!
My bad. I just added it to Gumroad. But you can also email ScienceFunBiz@gmail.com and I will send it to you. Sorry about that!
no worries at all, thank you so much for the fast response!!
Looking good!
Thanks! I've got some good mentors. :-)
Great project and information! What stepper motors did you use? I don't see it listed in the description
Woops. Sorry about that. NEMA 23 Bipolar Model 23HS22-2804S and bracket model ST-M2 from StepperOnline.
Thank you!