L9110 with Arduino Code - Part 3: How to Stepper Motor Speed and Direction

ฝัง
- เผยแพร่เมื่อ 16 ม.ค. 2020
- L9110 with Arduino Code - Part 3: How to Stepper Motor Speed and Direction
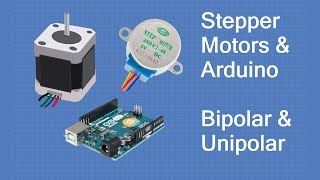
This video is the third part of the tutorial where I will discuss how to use small stepper motors such as this NEMA-17 with the L9110 motor control board using Arduino. I will also explain how to perform micro stepping and prevent your stepper motors and control boards from overheating.
This board can be used to control two small DC motors simultaneously or can be used to control a small stepper motor, such as a NEMA 17. The board operates between 2.5- and 12-volts DC. It is capable of sourcing 800 mA per phase sustained and 1.5 Amps momentarily.
This tutorial is divided into 3 videos. Part 1 covers the speed and direction control of DC motors. Part 2 discusses the control of linear actuators. Part 3 demonstrates how to control the speed and direction of stepper motors. Each video includes step-by-step set-up instructions as well as basic Arduino coding that can be incorporated into your own projects.
The following are affiliate links for products I used in this video. Using these links will not affect the price for your purchase but may result in a small commission for me, allowing me to keep making helpful and entertaining videos.
L9110 with Arduino Code - Part 1: • L9110 with Arduino Cod...
L9110 with Arduino Code - Part 2: • L9110 with Arduino Cod...
EasyDriver tutorial: • EasyDriver A3967 Stepp...
L9110S H-bridge Dual Channels Motor Driver Control Board for Arduino
rover.ebay.com/rover/1/711-532...
Bipolar Stepper Motor
rover.ebay.com/rover/1/711-532...
14 Function Multimeter with light meter and thermocouple
rover.ebay.com/rover/1/711-53...
Arduino
rover.ebay.com/rover/1/711-532... - วิทยาศาสตร์และเทคโนโลยี


Great video, answered the questions I had and some I didn't know I had... Thanks!
Glad it was helpful! Thanks for watching!
Hi - really like this approach. Clear explanation of the fundamentals which opens up a lot of experimentation opportunities to get to understand the performance of a stepper. Thanks!
Glad it was helpful!
You do nice work
Thank you!
Video is good👌 .i have one doubt bro I have 1 DC motor for rotation and I have 1stepper motor .Based on DC motor speed the stepper motor move in linearly.but accuracy of stepper motor not that much.i want accuracy is (.05).what can I do bro.
Not sure exactly what you are trying to do, but changing the micro stepping can improve position accuracy. Also make sure that the torque is turned up high enough that the stepper motor is not skipping steps. Hope this helps...
Cool job..dude .
Thanks!
Hi, nice video but I can't figure how the code can work. How can the rotation stop if in the move function there are no combination where all the PWM output are LOW or HIGH at the same time? And in the secon for loop (in the loop) the variable stepnumber is not decreased, why it should go backwards?.
Regular DC motors will continue to rotate unless both PWM's are the same value (LOW or HIGH) at the same time (just like in Part 1). Stepper motors are very different. For example, if one PWM is LOW and the other is HIGH, the stepper motor will not move. If one PWM is LOW and the other is LOW, the stepper motor will not move. The stepper motor will only move when one of the PWM changes. In order to keep the motor turning, the PWM values have to continue to change. That is why I use sin and cosine for the PWM values. Each time the step changes, the motor will move just a little bit. To rotate in one direction, I change the stepnumber by using the increment command i++. To rotate in the other direction, I decrement the step using i--. The great thing about stepper motors is that you can keep track of their exact position. Hope this helps. Thanks for watching!!!
hi, I try to reproduce the same thing with an arduino due, an L9110S and a stepper motor KYSAN 1124090 but the beer motor without running. can you help me ?
What exactly is happening? That is a larger motor. Perhaps it requires more power than the L9110 can provide. You could try with an L298N instead. The code would be the same but it could handle more power.
The shown code seems to have two errors:
"for ( int i=0; i
Good chance I made a mistake. Unfortunately I can't find that code to look at it.
Hi! I have the NEMA 17 motor and the L9110. But arduino nano instead of uno. My motor just vibrates when i run this code and doesn't spin. What could be the problem?
The first thing I would do would be to double check the wiring for both the motor coils and the Arduino. (I have goofed it up plenty of times) The motor could be drawing too much current, causing the L9110 to fail. You could try a lower supply voltage which would lower the current. If you have a multimeter or voltmeter, try running the motor really slowly and checking if your PWM pins are working properly. If not, try using different PWM pins. Arduino Nano should work just fine. I hope you figure it out!
I have the same problem...
Is there a link to download the code here?
Thanks great video!
const int A1A = 5;
const int A1B = 6;
const int B1A = 9;
const int B1B = 10;
int stepnumber = 0;
int Pa; int Pb;
void setup()
{
pinMode(A1A, OUTPUT);
pinMode(A1B, OUTPUT);
pinMode(B1A, OUTPUT);
pinMode(B1B, OUTPUT);
Serial.begin(9600);
}
void loop() {
for (int i=0; i0)
{
analogWrite(B1A,Pb);
analogWrite(B1B,0);
}
else
{
analogWrite(B1A,0);
analogWrite(B1B,abs(Pb));
}
delayMicroseconds(wait);
}
is it possible to add 2 limit switches to the code?
Definitely. I will be doing another video soon using stepper motors and limit switches.
Hi everyone.
Can someone tell me or guide me for changing polarity for one coil with L 298 N ?
I want to see how is work 100 times per second.
Thanks
What exactly are you trying to do?
@@ScienceFunInnovations
Thanks for your replay.
Only to manage to change polarity of coil minimum 100 times per second.