Hi Guys, just a friendly reminder. If you've joined with the Membership + Downloads option PLEASE send me your email address to anthonyeditsyourphotos@gmail.com. I need it to add you to the file sharing folder. Thanks again everyone who helps to keep this channel free by supporting me. I appreciate each and every one of you!
This was probably one of the best Raw editing videos i've seen, not just because it's Luminar Neo but because the explanation behind using the tools can be applicable across all Applications. so this was very helpful information.
I can't tell you the number of tutorial videos I watch, across all my interests, and AT does them as well, if not often better, than anything I've seen (watching more hours of YT than I care to admit). Forget about these affiliate links, if this guy isn't on Luminar's payroll, he certainly should be.
I find this video + the one on camera matching profiles the two absolutely fundamental tutorials for working with Luminar Neo. Thanks for posting! 👍👍👍👍👍👍
Others have mentioned it in the comments, but I'll echo it here: this video is an *excellent* editing walkthrough. So many good tips in here that go beyond just Luminar (although that's why I'm here bc that's what I use)
Super impressed with your tuts and calm and positive demeanor instructing through these vids. Just became a subscriber; really enjoy how you deliver your explanations and don't jack-jaw on and on.
EXCELLENT!!!! I will use this video over and over!! I always did the Develop raw 1st and now you have explained why and what to do with it! You went into the curves to show how to adjust the skin tones, which was a brilliant explanation!! Thank you AT!! You are the best!!
Another very interesting video and extremely professional!!! Thank you Anthony. It is always an honor to receive advice from you on how to best use Luminar Neo!!! 👏👏👏👍🏽👋🏼 Greetings from Switzerland 😁😁😁 🇨🇭
Great video. Most of it I knew - but the trick of finding skin-tones in the curve/histogram was new to me - love it. Beautiful young lady as the subject. (your daughter). Thanks for the tips/share.
Really useful video. Will need to watch it again (probably twice) to fully appreciate all the techniques. Glad you pointed out the bit about where develop raw is as it didn’t appear on my page but does now.
Another brilliant AND extremely useful tutorial. It’s so great to discover someone who does know how to process photos and share it. I would gladly pay for this type of Master Class!
Master Class is exactly what this level of content is. Should be on a different system than “likes” and “subscriptions” but that’s what we’ve got that allowed us to see it in the first place. Really grateful and will be following this channel. So well done. 👏
Hi Anthony - thanks for doing all of these tutorials which I will be working my way through. I'm new to Neo and the first thing I don't really care for is that if you delete an image from the catalogue and the trash within the app it also puts the original image file in the trash of my Windows 11 PC - I'm OK with it now I know how it works bur it would be better if it didn't tamper with the original file. Coming form Affinity I'd also like a means of saving a 'project' ie an image with all of the edits and history without having to keep the image always in the catalogue of Neo.
Tbh, the best tool to start with would still have to be develop. The only drawback is you won't have the same latitude to change the photo before it starts to fall apart (banding, colour anomolies, potential visible compression elements etc.)
Absolutely brilliant video thanks! For once I feel like it's clear and understandable. I have one question though. During the video you sometimes go back to the view before edits. like a before/ after thing. How do you achieve this? I did my best to catch that but couldn't.
Some comments, and you know this already. On that white tool dropper it is very easy to find the neutral grey by watching the hexadecimal numbers on the bottom of the tool. Just drag it around till the three numbers come as close as they can to being equal value and boom you have a very accurate white balance point!!! This is far more accurate than the eyeballing method. Start using it this way and you will find it to be the prefered method. Hey, thank you!!!! I learned a lot from you and really have helped me fix my post editing nightmares!!! Starting with Raw and white balance is the way to go! I like to do sharpening and deal with pixel peeping issues next (Chromatic aberration and fringing etc). Thank you also for explaining the term "Masking" in your video. I wish Luminar could had made up a new term instead of masking for that adjustment tool. When someone says masking (for me anyways) I am always looking at "Layer mask". I am sure, the reality of the matter is that this adjustment probably "is" a layer mask, it is just that I didn't understand it until the way you presented it!!! Again, thank you, lots of guys on the web who are supposed "experts on these Luminar programs" yet, you are by far the best!!!!! You have a great skill set in the field of teaching! Very clear, very precise and you look for problems and take a second to explain them. That part of the video where you showed how to brighten the girls face by using "Correctly" the curves adjustment and how to get where you want to be, was just classic Luminar teaching (Eye popping moment)!!!! You are my number one go to guy, keep up the great work, I appreciate you!!!! Rich aka Mr Moonpie
Here's an advice from an amateur to anyone struggling with photo editing. I've been taking pictures for over 10 years as a hobby. Started shooting JPG, then switched to RAW+JPG. 95% of the time my edited RAWs looked worse than the out of camera JPGs! Very frustrating - what's the point of shooting raw then!? After watching gazillions of YT videos from Anthony T, Anthony M and Jim Nix I finally got it. Anthony actually mentions it in this video. Did you catch it??? I'm sure you've heard it before but the advice was lost on you among the other 1000 suggestions about post processing. If you don't like your edits it is because you are most likely OVER PROCESSING them. If you move a slider and see a sizable change in your photo then you moved it too far. It's counterintuitive, but this is KEY. I guess the exception would be if you use a single slider like Enhance AI to fix your photo in one shot. But for "regular" edits where you're stacking several tools on top of each other - less is MORE. Stick a Post-It not to your monitor - less is more - and look forward to your editing. This was the answer for me. I'm still no expert, but I'm finally starting to like my edits. Hope this helps you.
I use Fuji X system cameras and don' t need to shot raw, so I save hours of time. I use Neo when I miss a log in a waterfall or a missed stick in a composition. The erase tool is amazing and when I travel I don't have to think about power lines anymore. BUT, I don't have much to do since I control things in the camera. ESPECIALLY high lihgt and shadow tones wiht those controls, as well as WB options and "filM" choices all in camera.
Nice. I'm away travelling at the moment and left my nikon gear in favour of my Fuji XT-4. I'll miss the quality a bit but the reduction in weight and size is great for travelling 😀
@@AnthonyTurnhamYou have the sharper alternative with the Fuji. Having owned nikons, I wouldn't go back if they were free. Fuji's lenses are sharper and all color match and Nikon can't imagine Fuji's colors, let alone reproduce them.
Great tips. I have both Luminar AI and NEO. I haven't used Neo much at all because you can't apply a preset style then custom edut off that like you can in AI. I use presets in AI to get picture close (and get an idea of what settings are used), then do final touch-up in edit mode. With these tips, I am going tontry to use Neo and hopefully get better results.
In Luminar NEO, should we do / apply [presets] first to get us closer to what we want AND THEN proceed further with [develop] like your advise here ? Thx Anthony for the great instructional videos!
Hi Anthony, I’ve just discovered your channel. A very useful find. I have a question for you. Is it possible to shift all my Lightroom photos into Luminar Neo?
Good question. Yes, in terms of point Luminar to the root folder and it will populate with the photo files. What won't come over though are the edits to a raw file because Luminar and Lightroom share different tools so they handle them differently.
Another cracking vid Anthony will done mate👍you make it look so easy and after some practice it is easier to do. Could you tell us how to download the presets for the camera that we're using, that would be brilliant if you could. 😎
Hi Anthony! Great video for Luminar Neo beginners. Yes, all those tools can prove very intimidating for some novices, 🙀🙀 however, your video provides real reassurance and helps overcome tool options 'overload confusion'. 😺😺 Regards from. Felix the Cat. 🐱🐱
Hi again Anthony! Yesterday I had the chance to put Neo HDR into practice. I had a nice day out to a pub located next to a canal lock to watch the narrow boats going through. There I took various sets of 3 photos at +1 stop, -1 stop and at normal exposure, then tried out Luminar Neo's new plugin, and the results were fantastic! HDR is a great plug-in Anthony, I wonder what Luminar will add next? Would you like to see some pictures? Regards from Felix the Cat. 🐱🐱
Completely new to photography and contemplating investing in photo-editing application. Currently playing with NX Studio from Nikon (Z6 owner) a bit and wondering which one to seriously spend time and money and effort on - without getting frustrated with speed (hence hardware resources requirement) and / or complexity.
Hi Alex. Luminar Neo is a good choice from an ease of use point of view. However it can be resource intensive due to the AI tools. TBH I think it's a better place to start than Adobe or with proprietary software from Nikon.
Hi Anthony! Thanks for your video! I have a quick question: Is there a specific camera profile available for iPhone RAW photos, and if so, where can I locate it?
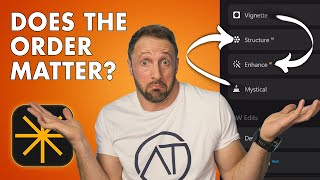
Develop RAW should be highlighted first before anything. All the other tools should be collapsed to steer users in the correct way to edit photos. Also they should have a helpful hints when first using to help people understand why. IMO 😁
love your tutorials. I've watched a few. However, in all 3 I don't have any of the tools on the program that you talk about. I also do not have this "develop" thing you use. Why is that?
Hi Brian. I'm really not sure. I'm running Luminar Neo version 1.7 on a pc. All the tools are standardised in the program and should be there. I'd go to the about section via the drpdown menu and just check on your version of the program.
Back to basics Anthony! Another great video. Hey you said you would do some edits using Topaz AI, I hope you will. By the way, Topaz Gigapixel has a new update to correct facial distortions when increasing photo sizes. Regards from Felix the Cat. 🐱🐱
Great demonstration again Anthony. I want to upgrade to NEO but from a few weeks past I'm having problems with Luminar AI. The program suddenly crashes and I must reinstall everything. I don't know where the problem comes from but it's very annoying.
Hi Anthony. Thanks for the cracking video. I've just been messing around with this and this is such a great way to easily edit. In your video roughly around the 4 minute 10 mark you mentioned about loading camera profiles. Do you have a video on this? If so, could you please direct me to it? One more question, if you don't mind. Is there a way you can censor sensitive objects on Luminar Neo, say a vehicles registration plate? Appreciate your help.
Maybe you said it in the video but was the original file of your daughter RAW or JPG. In other words will this process work as well on a JPG or only on RAW? Either way thanks also for an excellent tutorial!
Thanks. Yeah this photo is raw and I do prefer to edit raw as it's going to give you a lot more latitude to push and pull your photo before the quality starts to fall apart. However, yes, this tool and approach still works with jpegs but as jpegs only hold a fraction of the information there won't be as much room for recovery of shadows and highlights etc.
Excellent tutorial. I would love to see a tutorial on how to use Neo for portrait editing, particularly skin edits that the model requests such as removing varicose veins, dark circles under the eyes, and wrinkles. Luminar AI had the clone feature which proved useful but this doesn't exist in Neo. Thanks!
I watched this and your video about camera profiles . I installed the Adobe program and Luminar Geo shows various profiles but no Camera Flat. Also, there is nothing listed that mentions the actual name of my camera, just Camera Landscape , Camera Standard and so on. How do I know I have the profiles specifically for my Canon camera ? I am using a Mac.
if it says camera something then you're good to go. The names of the profiles can be specific to the manufacturer. It's possible camera flat is Nikon's naming convention but you'll probably find Canon has an equivalent by a different name.
Hi Anthony , thank you for your excellent Video. I have one stupid question , I have imported a Raw photo from my library into Luminar Neo version 1.6.0 on a MacBook Pro macOS Ventura 13.0 . When I open up Develop , I do not have the Raw logo against the Develop icon sign. Is this normal or am I missing something ?. Sorry if this seems dumb but I am new to this & have only just started to use Luminar. I have only been using Apples own software.
I just encountered the same issue after getting a new camera. In my case, the camera was not yet supported by Luminar Neo. I had to convert the files to DNG and then was able to process with the "Raw logo" tool.
Hey! I use Mac Photos to store my pics. I recently upgraded from Luminar 4 to Neo. My previous work flow was photos (export as TIFF) to Topaz (sharpening and noise) and then to Luminar 4, so the develop tool wasn't available. What is the best way to send the pic from photos to NEO if I still want to use Topaz and the Develop tool? Hoping this makes sense. Thanks for your videos and your help in advance.
Hi Darla, congrats on the upgrade. In Neo if you have the extensions then you can apply Noiseless AI and Sharpen AI and still have develop RAW avaialble all in one place. No need to export as tiffs first. If you're using Topaz first and want to then send as a 16bit tiff to neo, that's fine however the develop RAW tool isn't available, but the standard develop tool is. It's very similar but you miss out on working with the greatest depth of pixel info at the raw level. A lot of my work with Topaz is done on older shots that I've already processed and just want to improve the resolution, noise level and sharpness. So a topaz at the backend after Neo for dev raw wouldn't be a terrible workflow either. 😀
@@AnthonyTurnham Thanks and I will try Topaz after. I promise not to contact you everyday.....So sorry but one more question.I have a very weird issue and I am unsure if you will have the answer, but I have asked on FB and contacted Skylum, without answers. I upgraded to Neo from Luminar 4. When my MAC screen is at a normal (Default) resolution, the entire NEO menu is not visible and the side scroll bar does not appear. Only if I take the resolution down below the default can I see the entire side menu. At that point I don't need the scroll bar (and it's still not available), but the print is so small, it's uncomfortable work with. I did (do) not have this issue with Luminar 4. Any suggestions or guidance to where I might find answers will be so appreciated. And thank you for all of your education
G'day Anthony Great edit mate! I was wondering, would it be advantageous if you would copy an under exposed photo and do the develope raw only to get it to the correct exposure and then do the HDR. Use this version to place over you full edit that you have done? Havagooday mate Greg
Hi Greg, because the HDR merge tool builds it's final output from the raw file without any processing, making adjustments to the photo first won't render a different result to just dragging in the original raw. However, you could make those adjustments and then save the raw as a tiff or jpeg and send that file into HDR merge, but you're not giving the tool the best data to work with. RAW is KING! 😀
@@AnthonyTurnham I understand, but could you use Topaz's jpeg to raw conversion programme after doing the exposure in Neo? I just downloaded a trial version yesterday to try it out. Haven't used it yet, thought. Greg
Hello. I enjoy your videos on Luminar Neo and the Noiseless Extension but you and all others only show how to improve recent shot photos.. What about doing a tutorial(s) on how to improve colour photos that were taken in say the 1960's and 70's that need to be improved using Luminar Neo including the Noiseless Extension.... Lee
For me it's an issue of access. I was only just born in the 70's so I don't have the materials to demo with. If you'd like to send a selection of scans to anthonyeditsyourphotos@gmail.com I'll see what I can do. I've got a few requests from my channel members at the moment and I prioritise them to thank them for their support. But by all means send me some examples and I'll try and take a look!
@@AnthonyTurnham. Thanks Anthony for your quick reply. If you want some photos from that era to do a Tut on your channel I am happy to send you some. Let me know, however, if you have no time to do a Tut then I would not like you to waste your precious time on just having a play around to see what you can do with them in Luminar Neo. I hope that makes sense. I just thought it would be a great idea/video for the non " semi-professional photographers" on how Luminar Neo can make old photos pop if they are faded, have noise etc etc In the meantime I will continue to enjoy watching your helpful tutorials. Stay Safe Lee
@@AmazingM_1 thanks Lee. Yeah, send a few through and let's see what I can do, time permitting. Best wishes, Anthony. (And you thought the last reply was quick 😉)
Are you working with RAW files? Jpeg won't show it. ALso make sure it's the FIRST tool yo use otherwise you've missed you opportunity and the tool reverts from develop RAW to just the standard develop tool.
By the way Anthony, what can you do if you only have Jpegs; can you also give advice to beginners who don't have Raw files which tools are most important? Just a thought! Felix the Cat. 🐱🐱
Sure thing Felix TC 😀 TBH most of the tools are the same for jpegs as for raw. It's just that you have less latitude to work with in a jpeg file, and the camera has already processed the photo.
My preference is to get a feel for the contrast adjustment, highlight and shadows, profile I like etc. I'm regularly making and then save them into a "starter" pre-set. The exposure may need a slight adjustment but the rest tends to stay fairly constant between shots. Alternatively the AI driven Enhance AI is a quick and easy way to improve the photo in many ways with the use of one slider. Again you could set the amount where you want, say 50%, and then just save it as a preset.
Well, what can I say ?? For those new to Neo or wanting to explore it further, I would suggest shutting down your computer and then beetle off to a stone supplier, buy a large lump, together with a hammer and chisel ..... return home, watch this video again and again and hammer same into your lump of stone. Bit like tablets from On High to Moses. For any editor, this is as good as it gets - digest and you CANNOT go wrong.
You don't need luminar, you need to take an extra minute to adjust your camera, you can adjust heavier contrast, warmer color, exposure and speed. What about if you have, say 150 bad pictures, are you going to waste a week? Fixing naaaah, next time remember, take time and play at home with contrast, tones and saturation values on your camera, those are the most important, then learn to manage speed and aperture, flash and ambient. 1 to 2 good hours will free you from wasting time and money. How much you spent in luminar? 200.00? Creativity and Knowledge = great savings. Next time show that you are better photographer.
That's a really nice sentiment. I wish 1 to 2 hours of learning camera settings would mean people never took a bad shot that would benefit from a bit of editing. I'd love to brag on nailing my exposure every time, but after thousands of hours of shooting I still don't get it perfect in camera every time, and an editing tool, be it Luminar, Lightroom, or whatever is an invaluable tool. To think that editing is unnecessary after 1 to 2 hours of learning at home and playing with exposure settings just seems a bit naive. What about people who want to use there photos as the base for more creative work. Even back in the film days the "master" photographer's work was often still heavily post produced in the dark room to get the final print they envisaged when they pressed the shutter. This is a ridiculous line of thinking.
@@nathanthournmy6478 once I saw a nice, nice picture and I went with my camera to discover it was a photoshop picture, I felt like, I hate photoshop. If you see the picture of the little girl, it needs knowledge with the camera, I have photoshop but not to fix pictures like this, why don't you try that too, I have seen people acting like super photographers with no knowledge over the camera, think light, master it.


Hi Guys, just a friendly reminder. If you've joined with the Membership + Downloads option PLEASE send me your email address to anthonyeditsyourphotos@gmail.com. I need it to add you to the file sharing folder. Thanks again everyone who helps to keep this channel free by supporting me. I appreciate each and every one of you!
I do this with Photoshop, do i need this app? Looks very simple and not so complex.
Thanks!
Very kind of you Eric. Thank you so much!
I learned more about editing raw photos in this video than in dozens of others. Thank you Anthony!
Great to hear!
This was probably one of the best Raw editing videos i've seen, not just because it's Luminar Neo but because the explanation behind using the tools can be applicable across all Applications. so this was very helpful information.
Thank you. Yes you're totally right. Most raw editors will use this set of tools so the info should be applicable to most raw editing programs.
@@AnthonyTurnham Yes. It would be great to see more videos like this that explains concepts that can be used universally!
I can't tell you the number of tutorial videos I watch, across all my interests, and AT does them as well, if not often better, than anything I've seen (watching more hours of YT than I care to admit). Forget about these affiliate links, if this guy isn't on Luminar's payroll, he certainly should be.
I find this video + the one on camera matching profiles the two absolutely fundamental tutorials for working with Luminar Neo. Thanks for posting! 👍👍👍👍👍👍
Glad they've been helpful!
Phenomenally useful ideas and details about your process using luminar neo. I’m excited to start editing with all this new info. Thanks! Subscribed.
Great to hear!
Dang, best curve/histogram description ever! I didn’t know about the “J” key. Thank you, Sir.
Thanks Robert. You're welcome 😊
You're helping me skyrocket my editing skills in this software! Thank you so much 🙏
Happy to hear that!
You have a great way of conveying your knowledge. I just learned a lot from this video. Thanks!
Your step by step of the develop raw tool was very helpful. Thank you for taking the time.
Great tip for brightening the skin tones. ❤
Others have mentioned it in the comments, but I'll echo it here: this video is an *excellent* editing walkthrough. So many good tips in here that go beyond just Luminar (although that's why I'm here bc that's what I use)
Brilliant all the way around. You have the best Luminar NEO training tool available.
Super impressed with your tuts and calm and positive demeanor instructing through these vids. Just became a subscriber; really enjoy how you deliver your explanations and don't jack-jaw on and on.
Awesome, thank you!
Hi Anthony, thank you the 'Develop' tutorial. especially the 'Çurve' tool.
EXCELLENT!!!! I will use this video over and over!! I always did the Develop raw 1st and now you have explained why and what to do with it! You went into the curves to show how to adjust the skin tones, which was a brilliant explanation!! Thank you AT!! You are the best!!
Thanks, I use the Olympus raw developer and this tutorial was transferrable
Another very interesting video and extremely professional!!! Thank you Anthony. It is always an honor to receive advice from you on how to best use Luminar Neo!!! 👏👏👏👍🏽👋🏼 Greetings from Switzerland 😁😁😁 🇨🇭
Excellent video. I just started with Luminar Neo and this was very helpful. Thank you.
Great explanation, thnx!!
Thanks Anthony. Really appreciate these informative lessons.
Great video. Most of it I knew - but the trick of finding skin-tones in the curve/histogram was new to me - love it. Beautiful young lady as the subject. (your daughter). Thanks for the tips/share.
Thank you, Anthony. Another great tutorial. Accent AI helped a lot.
Glad it helped!
you have such a beautiful way of showing us how to use this , I just purchased Luminar Neo and AI and I am loving it . thank you for what you do.
Another information packed video. Thanks!!
Nice video. I use white and black correction at first.
Is it possible that you can make a video about the camera profile. preferably where you pick them up and put them into the Luminar neo. thank you
Fantastic video. Not JUST for Luminar but a great explanation for editing in general
Really useful video. Will need to watch it again (probably twice) to fully appreciate all the techniques. Glad you pointed out the bit about where develop raw is as it didn’t appear on my page but does now.
Another brilliant AND extremely useful tutorial. It’s so great to discover someone who does know how to process photos and share it. I would gladly pay for this type of Master Class!
Master Class is exactly what this level of content is. Should be on a different system than “likes” and “subscriptions” but that’s what we’ve got that allowed us to see it in the first place. Really grateful and will be following this channel. So well done. 👏
I liked the comparison provided on the order to process.
Wooow you nail it with this Video, great work !!!
Excellent tutorial.
Many thanks!
Hi Anthony - thanks for doing all of these tutorials which I will be working my way through.
I'm new to Neo and the first thing I don't really care for is that if you delete an image from the catalogue and the trash within the app it also puts the original image file in the trash of my Windows 11 PC - I'm OK with it now I know how it works bur it would be better if it didn't tamper with the original file.
Coming form Affinity I'd also like a means of saving a 'project' ie an image with all of the edits and history without having to keep the image always in the catalogue of Neo.
You're the best. Thanks for the video.
Simply excellent tutorial…you make it easy to understand and simple for everybody…thank you for sharing your expertise with us👍
Excellent video never knew that with ‘J’ key 🔑
Brilliant video thanks. So helpful.
How about one on ’the best way to start’ for those times when you happened to only have JPEG files?
Tbh, the best tool to start with would still have to be develop. The only drawback is you won't have the same latitude to change the photo before it starts to fall apart (banding, colour anomolies, potential visible compression elements etc.)
Absolutely brilliant video thanks! For once I feel like it's clear and understandable. I have one question though. During the video you sometimes go back to the view before edits. like a before/ after thing. How do you achieve this? I did my best to catch that but couldn't.
Found the answer "\" 🙂
Yep, the good ol' backslash key.
Wonderful instructions. Can you batch process with the same crop ratio on many photos?
Muchas gracias.
Some comments, and you know this already. On that white tool dropper it is very easy to find the neutral grey by watching the hexadecimal numbers on the bottom of the tool. Just drag it around till the three numbers come as close as they can to being equal value and boom you have a very accurate white balance point!!! This is far more accurate than the eyeballing method. Start using it this way and you will find it to be the prefered method. Hey, thank you!!!! I learned a lot from you and really have helped me fix my post editing nightmares!!! Starting with Raw and white balance is the way to go! I like to do sharpening and deal with pixel peeping issues next (Chromatic aberration and fringing etc). Thank you also for explaining the term "Masking" in your video. I wish Luminar could had made up a new term instead of masking for that adjustment tool. When someone says masking (for me anyways) I am always looking at "Layer mask". I am sure, the reality of the matter is that this adjustment probably "is" a layer mask, it is just that I didn't understand it until
the way you presented it!!! Again, thank you, lots of guys on the web who are supposed "experts on these Luminar programs" yet, you are by far the best!!!!! You have a great skill set in the field of teaching! Very clear, very precise and you look for problems and take a second to explain them. That part of the video where you showed how to brighten the girls face by using "Correctly" the curves adjustment and how to get where you want to be, was just classic Luminar teaching (Eye popping moment)!!!!
You are my number one go to guy, keep up the great work, I appreciate you!!!!
Rich aka Mr Moonpie
Hey thanks Rich. 😊 That's such a nice comment 👌 Much appreciated!
Here's an advice from an amateur to anyone struggling with photo editing.
I've been taking pictures for over 10 years as a hobby. Started shooting JPG, then switched to RAW+JPG. 95% of the time my edited RAWs looked worse than the out of camera JPGs!
Very frustrating - what's the point of shooting raw then!?
After watching gazillions of YT videos from Anthony T, Anthony M and Jim Nix I finally got it.
Anthony actually mentions it in this video.
Did you catch it??? I'm sure you've heard it before but the advice was lost on you among the other 1000 suggestions about post processing.
If you don't like your edits it is because you are most likely OVER PROCESSING them.
If you move a slider and see a sizable change in your photo then you moved it too far. It's counterintuitive, but this is KEY.
I guess the exception would be if you use a single slider like Enhance AI to fix your photo in one shot. But for "regular" edits where you're stacking several tools on top of each other - less is MORE.
Stick a Post-It not to your monitor - less is more - and look forward to your editing.
This was the answer for me. I'm still no expert, but I'm finally starting to like my edits. Hope this helps you.
Nice advice Tom. 👌
Very usefull, thank you 👏🏻
I use Fuji X system cameras and don' t need to shot raw, so I save hours of time. I use Neo when I miss a log in a waterfall or a missed stick in a composition. The erase tool is amazing and when I travel I don't have to think about power lines anymore. BUT, I don't have much to do since I control things in the camera. ESPECIALLY high lihgt and shadow tones wiht those controls, as well as WB options and "filM" choices all in camera.
Nice. I'm away travelling at the moment and left my nikon gear in favour of my Fuji XT-4. I'll miss the quality a bit but the reduction in weight and size is great for travelling 😀
@@AnthonyTurnhamYou have the sharper alternative with the Fuji. Having owned nikons, I wouldn't go back if they were free. Fuji's lenses are sharper and all color match and Nikon can't imagine Fuji's colors, let alone reproduce them.
Great tips. I have both Luminar AI and NEO. I haven't used Neo much at all because you can't apply a preset style then custom edut off that like you can in AI. I use presets in AI to get picture close (and get an idea of what settings are used), then do final touch-up in edit mode. With these tips, I am going tontry to use Neo and hopefully get better results.
Excellent tutorial. Thank you. I would love to see another video going into more detail on how to use the tonal curve effectively.
Already got ya covered 😀. th-cam.com/video/Y-qQGSEXupw/w-d-xo.html (It's done in Luminar AI but the concepts are universal so applies equally to NEO)
great video, thank you!
In Luminar NEO, should we do / apply [presets] first to get us closer to what we want AND THEN proceed further with [develop] like your advise here ? Thx Anthony for the great instructional videos!
Hi Anthony, I’ve just discovered your channel. A very useful find. I have a question for you. Is it possible to shift all my Lightroom photos into Luminar Neo?
Good question. Yes, in terms of point Luminar to the root folder and it will populate with the photo files. What won't come over though are the edits to a raw file because Luminar and Lightroom share different tools so they handle them differently.
An excellent video Anthony. There seems a lot to take in, but practice is bound to make the process become second nature.
Another cracking vid Anthony will done mate👍you make it look so easy and after some practice it is easier to do. Could you tell us how to download the presets for the camera that we're using, that would be brilliant if you could. 😎
Hi Anthony! Great video for Luminar Neo beginners. Yes, all those tools can prove very intimidating for some novices, 🙀🙀 however, your video provides real reassurance and helps overcome tool options 'overload confusion'. 😺😺 Regards from. Felix the Cat. 🐱🐱
Brilliant Anthony, thank you
Second comment, must say best Luminar tutorial on TH-cam.
Hi again Anthony! Yesterday I had the chance to put Neo HDR into practice. I had a nice day out to a pub located next to a canal lock to watch the narrow boats going through. There I took various sets of 3 photos at +1 stop, -1 stop and at normal exposure, then tried out Luminar Neo's new plugin, and the results were fantastic! HDR is a great plug-in Anthony, I wonder what Luminar will add next? Would you like to see some pictures? Regards from Felix the Cat. 🐱🐱
Completely new to photography and contemplating investing in photo-editing application. Currently playing with NX Studio from Nikon (Z6 owner) a bit and wondering which one to seriously spend time and money and effort on - without getting frustrated with speed (hence hardware resources requirement) and / or complexity.
Hi Alex. Luminar Neo is a good choice from an ease of use point of view. However it can be resource intensive due to the AI tools. TBH I think it's a better place to start than Adobe or with proprietary software from Nikon.
@@AnthonyTurnham Thx Anthony!
Great video 👍
thanks for sharing your skills. 🙏🏼❤ Unfortunatelly I am really unhappy with the speed auf Luminar Neo 1.8. It is way too slow. 😕
Hi Anthony! Thanks for your video! I have a quick question: Is there a specific camera profile available for iPhone RAW photos, and if so, where can I locate it?
Hi. Hmmm, not sure about that I'm afraid. Let me know if you locate one! 😀
Develop RAW should be highlighted first before anything. All the other tools should be collapsed to steer users in the correct way to edit photos. Also they should have a helpful hints when first using to help people understand why. IMO 😁
Hi Michael. They've added a tip panel about this on the latest update. 😀 Yes, about time.
love your tutorials. I've watched a few. However, in all 3 I don't have any of the tools on the program that you talk about. I also do not have this "develop" thing you use. Why is that?
Hi Brian. I'm really not sure. I'm running Luminar Neo version 1.7 on a pc. All the tools are standardised in the program and should be there. I'd go to the about section via the drpdown menu and just check on your version of the program.
@@AnthonyTurnham I did finally figure it out and found it! Thanks again for all your helpful videos
Back to basics Anthony! Another great video. Hey you said you would do some edits using Topaz AI, I hope you will. By the way, Topaz Gigapixel has a new update to correct facial distortions when increasing photo sizes. Regards from Felix the Cat. 🐱🐱
Great demonstration again Anthony. I want to upgrade to NEO but from a few weeks past I'm having problems with Luminar AI. The program suddenly crashes and I must reinstall everything. I don't know where the problem comes from but it's very annoying.
Hi Anthony. Thanks for the cracking video. I've just been messing around with this and this is such a great way to easily edit. In your video roughly around the 4 minute 10 mark you mentioned about loading camera profiles. Do you have a video on this? If so, could you please direct me to it? One more question, if you don't mind. Is there a way you can censor sensitive objects on Luminar Neo, say a vehicles registration plate? Appreciate your help.
Maybe you said it in the video but was the original file of your daughter RAW or JPG. In other words will this process work as well on a JPG or only on RAW? Either way thanks also for an excellent tutorial!
Thanks. Yeah this photo is raw and I do prefer to edit raw as it's going to give you a lot more latitude to push and pull your photo before the quality starts to fall apart. However, yes, this tool and approach still works with jpegs but as jpegs only hold a fraction of the information there won't be as much room for recovery of shadows and highlights etc.
@@AnthonyTurnham thanks Anthony
Excellent tutorial. I would love to see a tutorial on how to use Neo for portrait editing, particularly skin edits that the model requests such as removing varicose veins, dark circles under the eyes, and wrinkles. Luminar AI had the clone feature which proved useful but this doesn't exist in Neo. Thanks!
Hi Steve. That's a great idea. Btw, hold tight for the clone tool... I hear it'll come in a future update!
You mentioned calibrating my monitor, what do I calibrate it to?
I watched this and your video about camera profiles . I installed the Adobe program and Luminar Geo shows various profiles but no Camera Flat. Also, there is nothing listed that mentions the actual name of my camera, just Camera Landscape , Camera Standard and so on. How do I know I have the profiles specifically for my Canon camera ? I am using a Mac.
if it says camera something then you're good to go. The names of the profiles can be specific to the manufacturer. It's possible camera flat is Nikon's naming convention but you'll probably find Canon has an equivalent by a different name.
Hi Anthony , thank you for your excellent Video. I have one stupid question , I have imported a Raw photo from my library into Luminar Neo version 1.6.0 on a MacBook Pro macOS Ventura 13.0 . When I open up Develop , I do not have the Raw logo against the Develop icon sign. Is this normal or am I missing something ?. Sorry if this seems dumb but I am new to this & have only just started to use Luminar. I have only been using Apples own software.
I just encountered the same issue after getting a new camera. In my case, the camera was not yet supported by Luminar Neo. I had to convert the files to DNG and then was able to process with the "Raw logo" tool.
Hey! I use Mac Photos to store my pics. I recently upgraded from Luminar 4 to Neo. My previous work flow was photos (export as TIFF) to Topaz (sharpening and noise) and then to Luminar 4, so the develop tool wasn't available. What is the best way to send the pic from photos to NEO if I still want to use Topaz and the Develop tool? Hoping this makes sense. Thanks for your videos and your help in advance.
Hi Darla, congrats on the upgrade. In Neo if you have the extensions then you can apply Noiseless AI and Sharpen AI and still have develop RAW avaialble all in one place. No need to export as tiffs first. If you're using Topaz first and want to then send as a 16bit tiff to neo, that's fine however the develop RAW tool isn't available, but the standard develop tool is. It's very similar but you miss out on working with the greatest depth of pixel info at the raw level.
A lot of my work with Topaz is done on older shots that I've already processed and just want to improve the resolution, noise level and sharpness. So a topaz at the backend after Neo for dev raw wouldn't be a terrible workflow either. 😀
@@AnthonyTurnham Thanks and I will try Topaz after. I promise not to contact you everyday.....So sorry but one more question.I have a very weird issue and I am unsure if you will have the answer, but I have asked on FB and contacted Skylum, without answers. I upgraded to Neo from Luminar 4. When my MAC screen is at a normal (Default) resolution, the entire NEO menu is not visible and the side scroll bar does not appear. Only if I take the resolution down below the default can I see the entire side menu. At that point I don't need the scroll bar (and it's still not available), but the print is so small, it's uncomfortable work with. I did (do) not have this issue with Luminar 4. Any suggestions or guidance to where I might find answers will be so appreciated. And thank you for all of your education
I have a question. Why do I have a yellow triangle with a black exclamation mark on se of my pick in luminar neo?
G'day Anthony
Great edit mate!
I was wondering, would it be advantageous if you would copy an under exposed photo and do the develope raw only to get it to the correct exposure and then do the HDR. Use this version to place over you full edit that you have done?
Havagooday mate
Greg
Hi Greg, because the HDR merge tool builds it's final output from the raw file without any processing, making adjustments to the photo first won't render a different result to just dragging in the original raw. However, you could make those adjustments and then save the raw as a tiff or jpeg and send that file into HDR merge, but you're not giving the tool the best data to work with. RAW is KING! 😀
@@AnthonyTurnham I understand, but could you use Topaz's jpeg to raw conversion programme after doing the exposure in Neo?
I just downloaded a trial version yesterday to try it out. Haven't used it yet, thought.
Greg
Hello. I enjoy your videos on Luminar Neo and the Noiseless Extension but you and all others only show how to improve recent shot photos.. What about doing a tutorial(s) on how to improve colour photos that were taken in say the 1960's and 70's that need to be improved using Luminar Neo including the Noiseless Extension....
Lee
For me it's an issue of access. I was only just born in the 70's so I don't have the materials to demo with. If you'd like to send a selection of scans to anthonyeditsyourphotos@gmail.com I'll see what I can do. I've got a few requests from my channel members at the moment and I prioritise them to thank them for their support. But by all means send me some examples and I'll try and take a look!
@@AnthonyTurnham. Thanks Anthony for your quick reply.
If you want some photos from that era to do a Tut on your channel I am happy to send you some. Let me know, however, if you have no time to do a Tut then I would not like you to waste your precious time on just having a play around to see what you can do with them in Luminar Neo. I hope that makes sense. I just thought it would be a great idea/video for the non " semi-professional photographers" on how Luminar Neo can make old photos pop if they are faded, have noise etc etc
In the meantime I will continue to enjoy watching your helpful tutorials.
Stay Safe
Lee
@@AmazingM_1 thanks Lee. Yeah, send a few through and let's see what I can do, time permitting. Best wishes, Anthony.
(And you thought the last reply was quick 😉)
@@AnthonyTurnham Photos emailed👍
If one shoots jpeg, do you recommend developing those photos first as well?
How do you get the histogram? Ive got the software but not that
Help
view / show histogram
@@AnthonyTurnham that easy 😂 shows how hard i have looked 🤦🏻♂️
Letting luminar aside, why hasn't anyone explained to me how to easily use the histogram until now?
Thank you!
Another good one . I do believe you are slowing down your presentation 😂
Nice tutorial. Cannot find in my Luminar Neo : Develop/Camera profile . I have the version 1.2.1 update 2 for Windows
Are you working with RAW files? Jpeg won't show it. ALso make sure it's the FIRST tool yo use otherwise you've missed you opportunity and the tool reverts from develop RAW to just the standard develop tool.
@@AnthonyTurnham I have the same problem. I always start with the RAW file and I have never seen a camera profile.
By the way Anthony, what can you do if you only have Jpegs; can you also give advice to beginners who don't have Raw files which tools are most important? Just a thought! Felix the Cat. 🐱🐱
Sure thing Felix TC 😀 TBH most of the tools are the same for jpegs as for raw. It's just that you have less latitude to work with in a jpeg file, and the camera has already processed the photo.
Is there a way of automatically Developing?
My preference is to get a feel for the contrast adjustment, highlight and shadows, profile I like etc. I'm regularly making and then save them into a "starter" pre-set. The exposure may need a slight adjustment but the rest tends to stay fairly constant between shots. Alternatively the AI driven Enhance AI is a quick and easy way to improve the photo in many ways with the use of one slider. Again you could set the amount where you want, say 50%, and then just save it as a preset.
it is so easy to make an excellent photo and to play with such a photo with such a gorgeous model: where can we hire your daughter???
Well, what can I say ?? For those new to Neo or wanting to explore it further, I would suggest shutting down your computer and then beetle off to a stone supplier, buy a large lump, together with a hammer and chisel ..... return home, watch this video again and again and hammer same into your lump of stone. Bit like tablets from On High to Moses. For any editor, this is as good as it gets - digest and you CANNOT go wrong.
What is the specs of your monitor? Medical grade made my ears stand up lol
the specs are here: amzn.to/3yxkQRA I also use this one which is excellent but a more affordable option: amzn.to/3UbFgVm
@16:17 video starts there 😂
Are you sure? Haha that's one heck of a preamble! Jeez, what the heck was I banging on about for 16 minutes? I almost want to re-watch to find out 😆
How did you barely talk about curves, but make curves make more sense?! 😂
Are you on a BenQ?
Nah. Eizo and Dell UltraSharp
i sub so you can take care of your daughter
I think you make things very complicated confusing the viewer, my opinion.
While I appreciate the comment, thankfully this view isn't the norm.
You don't need luminar, you need to take an extra minute to adjust your camera, you can adjust heavier contrast, warmer color, exposure and speed. What about if you have, say 150 bad pictures, are you going to waste a week? Fixing naaaah, next time remember, take time and play at home with contrast, tones and saturation values on your camera, those are the most important, then learn to manage speed and aperture, flash and ambient. 1 to 2 good hours will free you from wasting time and money.
How much you spent in luminar? 200.00? Creativity and Knowledge = great savings.
Next time show that you are better photographer.
That's a really nice sentiment. I wish 1 to 2 hours of learning camera settings would mean people never took a bad shot that would benefit from a bit of editing. I'd love to brag on nailing my exposure every time, but after thousands of hours of shooting I still don't get it perfect in camera every time, and an editing tool, be it Luminar, Lightroom, or whatever is an invaluable tool. To think that editing is unnecessary after 1 to 2 hours of learning at home and playing with exposure settings just seems a bit naive. What about people who want to use there photos as the base for more creative work. Even back in the film days the "master" photographer's work was often still heavily post produced in the dark room to get the final print they envisaged when they pressed the shutter. This is a ridiculous line of thinking.
@@nathanthournmy6478 once I saw a nice, nice picture and I went with my camera to discover it was a photoshop picture, I felt like, I hate photoshop. If you see the picture of the little girl, it needs knowledge with the camera, I have photoshop but not to fix pictures like this, why don't you try that too, I have seen people acting like super photographers with no knowledge over the camera, think light, master it.