I ordered the enclosure kit the day my printer arrived, and the kit parts were my first prints. I think printer mods are a fun way to learn a new printer. My front panel strip started falling off since it was just a press fit so I glued a couple of magnets to it and now it is fine. The best thing I found with the enclosure is just noise reduction. Fast printers are loud.
Yea, that strip is badly designed. Considering that some of the part design is quite ingenious, I have to think that either someone else designed that strip, or the designer just lost interest at that point.
This was a pretty entertaining video and educational too. I'm probably going to pick up one of these printers today. I was also considering the Creality K1 Speedy but the Flashforge is $182 cheaper right now at my local store and they seem very similar.
For $300 it's hard to go wrong unless you want one that's already enclosed and with a filtration system. But but A5M Pro is $500, and at that price point, I'd start looking at the Qidi Tech Q1 Pro. It's on sale now for $450 and not only is it enclosed, it's also heated and has a 350c hot end.
Thank you Chuck. I was debating getting the 5M Pro pretty much for the enclosure, but the price tag was causing me to hesitate. I think the 5M with the $40 enclosure will be a better for me. I appreciate it!
And printing and installing the enclosure was mostly fun and you learn a bit about the printer in the process. If you're interested in putting a light and camera in it I posted a video on that too. I'm loving the light and camera.
I have flashforge. This one, the screen clip came so tight, that it stopped working right, and I ended up returning it. I do this kind of clips everyday on laptops and this one was waayy tighter than it should have been. I got the pro!! Everything comes ready. Even came with an additional nozzle.
Hi. Thanks for the video. I was hoping it would be more straightforward. I am not super mechanically oriented but fairly capable. Do you think this is too much for some people? I would like an enclosure but not sure of the DYi. Is the full kit you can by without the 3d prints any easier? Appreciate your video.
I have only found 2 reviews on this enclosure and they are more about the insulation than the actual review. The flashforge has professional videos I only need your opinion and review. I am curious if you never used any of the other filaments would you still recommend the product? How about a quick review on all the other extras you have installed? was it worth the time and did it make your printing experience better ? I have a big old shop light over my printer so the aftermarket lights probably won’t make much difference. I had a webcam I already had laying around and have it mounted on the shelf next to the printer Is it worth it to use the aftermarket one that wires to the printer? a message/reply to my comment would help. A honest assessment on all the extras that you have installed and what ones you think are a real benefit? If they were free would you still install them? I gave your video a like but you left me with more questions than answers. If you can help me out I would greatly appreciate it.
The enclosure is absolutely worth the time. It made my printing experience better and I recommend it. Everything I installed on this printer has been worthwhile. The android app is called Flash Maker and it's not really necessary unless you want to remotely monitor a print. I'm not sure I understand the point of some of your other questions about "if it were free" or about "other filaments". if you have a specific question go ahead and ask and I'll do my best to answer.
@ I appreciate you taking the time to respond. I installed the app but haven’t been home to pair the printer with the app. Do you know if you able to cancel a print with this app? This printer has been much easier compared to the last one my son was gifted. Mother-in-law got him a anycubic two Christmas back and I spent the better part of a year dealing with the customer service, emails back-and-forth over three different tech workers, a language barrier on top of time changes and the problem still never got me passed the test print. We never had a receipt so all the parts I ended have to buy out of pocket and they still never figured out what was wrong. They had a script and I was never able to get it straightened out. I gave it to my engineering buddies and they right away noticed a fried resistor on both motherboards the one it came with and the replacement I bought. The company had pictures but never took the time to really look at them. I guess that story is just telling people to avoid Anycubic if you have any problems its a mess over there. I have this printer now and I have had 0 problems so far. I have a big light over it but the aftermarket would make it look more put together. Like I said I have a webcam hooked up and if something goes wrong I have the printer itself plugged into a smart plug so I can at least shut it off that way. I have only had a couple problems with the filament getting knotted on the spool which would be solved by the top load I think. I have a issue that I think would be fixed with a filament dryer box. do you know how you would be able to run one of those with the set up you have now? I kinda think I would like to run it straight from the box to the printer have you looked into that yet? Anyway thanks again for getting back to me and even though I don’t really watch channels like yours I am going to add you to my subscriber list. One wrong subscription can really mess up my very curated Al G Rhythm but you seem to have the answers to my questions and its worth the gamble to help out your channel
Just got my 5M last weekend and I'm having trouble with the wifi not connecting after turning the printer on. It will not even show any networks to connect to. I then have to power it off and back on again then it will show the wifi icon in upper right corner of the screen and all is well... until tomorrow. Other than that I love this printer.
I noticed two things on mine. First, the wifi module on the mainboard is very slow to initialize, sometimes it takes 2 minutes before it's showing access points. Second, it fails to reconnect after being powered off and on. On mine setting a static IP cured the issues. Well, it probably still takes 2 minutes to initialize, but since it reconnects automatically with the static IP I never notice it.
I had a lot more fun stringing issues with my corner pieces I printed. Also do you have to scale down the spool holder? It won’t fit on my build plate. I’m a noob so I’m probably doing it wrong or have the wrong settings
I had stringing too, but I find it pretty easy to deal with, I scrape off the larger pieces and use a butane lighter to melt back the finer strings. Kind of like melting spider webs with a torch in Harry Potter, lol. The spool holder fits on the bed, you've got to rotate it a bit to get the sweet spot.
did you use supports for the curved corner pieces? im using black overture petg and my curves look terrible with and without supports. im using flashprint to slice. any help would be appreciated thanks
What I would suggest you do is what I did, load the .3mf file that comes with the enclosure files into Orcaslicer and print from that without changing any of the settings other than nozzle size and printer type. Iit opens nine build plates and each plate has the proper settings for those parts, including filament and they worked perfectly for me. The 3mf file was designed for Orcaslicer 1.90, but I found it woked fine in the latest build Orcaslicer other than I had to move some parts to fit on the plates. By loading in the individual STL files you're losing all the settings and you're going to have to work them up on your own, so whenever possible, use a 3mf if one is included with a design.
When you load the 3MF file into Orca Slicer it arranges all the parts on 9 print beds, if I remember right 6 of the beds have PLA parts and 3 of them have PETG parts and they're colored differently and the print settings are already loaded for each bed. Made it really easy to print. Most of it is PETG, but the top riser is all PLA and some of the small parts are also PLA. Good luck!
I just put my enclosure on mine today and now i can't get the filament to load passed the sensor... Can't find anything to help troubleshoot it nor can I get the tube out.... Rather frustrating...
I take it you're new to 3D printing, what you're dealing with is what we all went through with our first printer. To get the filament past the sensor cut the end at as steep an angle as you can. Also, straighten it at the end for 4-6 inches, then feed it past the sensor, sometimes twisting it as you push can help. To get the tube out push the ring on the mouth of the sensor inwards before you pull the tube. Also, check to see if there's a removable piece there that prevents you from pushing the ring in, and pull that off first. Good luck!
I used what's specified in the instructions, which is PLA for most of it and some of the parts called for PETG. Sorry, but I can't remember which, but it's in the instructions or you can watch my other build videos. For brand I used Elegoo Rapid PLA and Rapid PETG.
ive been using this for parts and stuff for my builds and 3d printed planes compared to my ender 3 neo max its night and day in quality with sunlu pla+ which i never had a issue with printing and tends to be stronger and lighter then regular pla
$40 for the kit, $40 for the filement. Add $40 for a second nozzle, a camera and you're not far from the 5M pro. There was a large sale recently that made the pro only $30 or so more than the base 5M. So glad I went that rout as my time is also worth sonething as well.
You over priced what the filament and nozzle costs, but your point still remains valid. Plus you get the filtration system in the Pro. but at the cost of the Pro you have to consider the Qidi Tech Q1 Pro is now $450 and you get all that and an active heated chamber.
You do have a valid point, but from what I've seen, the pro actually has a shortcoming that you can get around with the nonpro version. The pro has an soft on/off button. if you supply power to the printer through a switchable plug The Pro will not come on where the non pro will and you can completely automate your setup remotely.
The one thing I don't get is people who buy a 3D printer who don't wanna print stuff for their printer and customize it, it's just weird, what r you buying a printer for in the first place, to print plastic of course why not customize the machine that's doing it, to look the way you want it to, you gotta have a little bit of DIY in you to buy a 3D printer to begin with unless you're buying it to print toys and trinkets and stupid ish like that....................
I'm a bit of a mad scientist and I've modified just about everything I've ever owned, but for some people I suppose their printer is like their toaster, they don't want to modify it, they just want their toast. For example, if I bought a printer to make prototypes for my business, I wouldn't want to spend time modifying the printer, because that's not advancing my business, I just want to get on with making prototypes.
@@3rdpig yeah but if you're just making prototypes the regular version of the printer with PLA is fine but even the pro version doesn't have a heated chamber so I think ABS and ASA would be a challenge especially larger parts, but who knows
I mainly use my 3d printer for functional parts, so doing cad design for parts takes most of the time. Doing mods to the printer isn't a big deal for me. All the bambulab lovers swear by not doing any mods to the printer. But 3d printer prices have become so cheap that even an enclosed 3d printer isn't much more.
@@oneanother1 yeah but if I'm going to buy an enclosed printer it better have a heated chamber cuz even though sometimes it's not needed it sure does help, and the Q1 Pro for the price you can't beat it


I ordered the enclosure kit the day my printer arrived, and the kit parts were my first prints. I think printer mods are a fun way to learn a new printer. My front panel strip started falling off since it was just a press fit so I glued a couple of magnets to it and now it is fine. The best thing I found with the enclosure is just noise reduction. Fast printers are loud.
Yea, that strip is badly designed. Considering that some of the part design is quite ingenious, I have to think that either someone else designed that strip, or the designer just lost interest at that point.
This was a pretty entertaining video and educational too. I'm probably going to pick up one of these printers today. I was also considering the Creality K1 Speedy but the Flashforge is $182 cheaper right now at my local store and they seem very similar.
For $300 it's hard to go wrong unless you want one that's already enclosed and with a filtration system. But but A5M Pro is $500, and at that price point, I'd start looking at the Qidi Tech Q1 Pro. It's on sale now for $450 and not only is it enclosed, it's also heated and has a 350c hot end.
Thank you Chuck. I was debating getting the 5M Pro pretty much for the enclosure, but the price tag was causing me to hesitate. I think the 5M with the $40 enclosure will be a better for me. I appreciate it!
And printing and installing the enclosure was mostly fun and you learn a bit about the printer in the process. If you're interested in putting a light and camera in it I posted a video on that too. I'm loving the light and camera.
@@3rdpig awesome. I will definitely look at that!
I have flashforge. This one, the screen clip came so tight, that it stopped working right, and I ended up returning it. I do this kind of clips everyday on laptops and this one was waayy tighter than it should have been.
I got the pro!! Everything comes ready. Even came with an additional nozzle.
Hi. Thanks for the video. I was hoping it would be more straightforward. I am not super mechanically oriented but fairly capable. Do you think this is too much for some people? I would like an enclosure but not sure of the DYi. Is the full kit you can by without the 3d prints any easier? Appreciate your video.
Did you have to use support for any of the pieces to print the enclosure I’m kinda new to the flash forge family I’m also using orca
I have only found 2 reviews on this enclosure and they are more about the insulation than the actual review. The flashforge has professional videos I only need your opinion and review. I am curious if you never used any of the other filaments would you still recommend the product? How about a quick review on all the other extras you have installed? was it worth the time and did it make your printing experience better ? I have a big old shop light over my printer so the aftermarket lights probably won’t make much difference. I had a webcam I already had laying around and have it mounted on the shelf next to the printer Is it worth it to use the aftermarket one that wires to the printer? a message/reply to my comment would help. A honest assessment on all the extras that you have installed and what ones you think are a real benefit? If they were free would you still install them? I gave your video a like but you left me with more questions than answers. If you can help me out I would greatly appreciate it.
The enclosure is absolutely worth the time. It made my printing experience better and I recommend it. Everything I installed on this printer has been worthwhile. The android app is called Flash Maker and it's not really necessary unless you want to remotely monitor a print. I'm not sure I understand the point of some of your other questions about "if it were free" or about "other filaments". if you have a specific question go ahead and ask and I'll do my best to answer.
@ I appreciate you taking the time to respond. I installed the app but haven’t been home to pair the printer with the app. Do you know if you able to cancel a print with this app? This printer has been much easier compared to the last one my son was gifted. Mother-in-law got him a anycubic two Christmas back and I spent the better part of a year dealing with the customer service, emails back-and-forth over three different tech workers, a language barrier on top of time changes and the problem still never got me passed the test print. We never had a receipt so all the parts I ended have to buy out of pocket and they still never figured out what was wrong. They had a script and I was never able to get it straightened out. I gave it to my engineering buddies and they right away noticed a fried resistor on both motherboards the one it came with and the replacement I bought. The company had pictures but never took the time to really look at them. I guess that story is just telling people to avoid Anycubic if you have any problems its a mess over there. I have this printer now and I have had 0 problems so far. I have a big light over it but the aftermarket would make it look more put together. Like I said I have a webcam hooked up and if something goes wrong I have the printer itself plugged into a smart plug so I can at least shut it off that way. I have only had a couple problems with the filament getting knotted on the spool which would be solved by the top load I think. I have a issue that I think would be fixed with a filament dryer box. do you know how you would be able to run one of those with the set up you have now? I kinda think I would like to run it straight from the box to the printer have you looked into that yet? Anyway thanks again for getting back to me and even though I don’t really watch channels like yours I am going to add you to my subscriber list. One wrong subscription can really mess up my very curated Al G Rhythm but you seem to have the answers to my questions and its worth the gamble to help out your channel
Just got my 5M last weekend and I'm having trouble with the wifi not connecting after turning the printer on. It will not even show any networks to connect to. I then have to power it off and back on again then it will show the wifi icon in upper right corner of the screen and all is well... until tomorrow. Other than that I love this printer.
I noticed two things on mine. First, the wifi module on the mainboard is very slow to initialize, sometimes it takes 2 minutes before it's showing access points. Second, it fails to reconnect after being powered off and on. On mine setting a static IP cured the issues. Well, it probably still takes 2 minutes to initialize, but since it reconnects automatically with the static IP I never notice it.
@@3rdpig Thanks for the reply. I will try that and see what happens when it gets turned back on tomorrow morning. Thanks again.
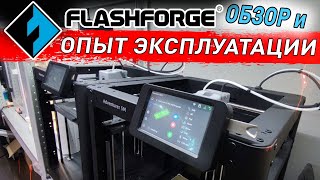
Nice work. The enclosure doesn't look too bad.
Thanks!
I had a lot more fun stringing issues with my corner pieces I printed.
Also do you have to scale down the spool holder? It won’t fit on my build plate. I’m a noob so I’m probably doing it wrong or have the wrong settings
I had stringing too, but I find it pretty easy to deal with, I scrape off the larger pieces and use a butane lighter to melt back the finer strings. Kind of like melting spider webs with a torch in Harry Potter, lol. The spool holder fits on the bed, you've got to rotate it a bit to get the sweet spot.
did you use supports for the curved corner pieces? im using black overture petg and my curves look terrible with and without supports. im using flashprint to slice. any help would be appreciated thanks
What I would suggest you do is what I did, load the .3mf file that comes with the enclosure files into Orcaslicer and print from that without changing any of the settings other than nozzle size and printer type. Iit opens nine build plates and each plate has the proper settings for those parts, including filament and they worked perfectly for me. The 3mf file was designed for Orcaslicer 1.90, but I found it woked fine in the latest build Orcaslicer other than I had to move some parts to fit on the plates. By loading in the individual STL files you're losing all the settings and you're going to have to work them up on your own, so whenever possible, use a 3mf if one is included with a design.
I have this printer and enclosure kit arriving tomorrow. What material did you the parts with?
When you load the 3MF file into Orca Slicer it arranges all the parts on 9 print beds, if I remember right 6 of the beds have PLA parts and 3 of them have PETG parts and they're colored differently and the print settings are already loaded for each bed. Made it really easy to print. Most of it is PETG, but the top riser is all PLA and some of the small parts are also PLA. Good luck!
I just put my enclosure on mine today and now i can't get the filament to load passed the sensor... Can't find anything to help troubleshoot it nor can I get the tube out.... Rather frustrating...
I take it you're new to 3D printing, what you're dealing with is what we all went through with our first printer. To get the filament past the sensor cut the end at as steep an angle as you can. Also, straighten it at the end for 4-6 inches, then feed it past the sensor, sometimes twisting it as you push can help. To get the tube out push the ring on the mouth of the sensor inwards before you pull the tube. Also, check to see if there's a removable piece there that prevents you from pushing the ring in, and pull that off first. Good luck!
@3rdpig a bit new. I have only used an anet A8 and this is a big upgrade. Thanks for the tips!
@@3rdpig thanks much for the tips, I was able to get the tube removed without breaking anything. It seems to me that the sensor is a one way only...
what type of filament did you use for the 3D printed parts
I used what's specified in the instructions, which is PLA for most of it and some of the parts called for PETG. Sorry, but I can't remember which, but it's in the instructions or you can watch my other build videos. For brand I used Elegoo Rapid PLA and Rapid PETG.
Unfortunately I went to the video on TH-cam and the pdf file for directions won't open
ive been using this for parts and stuff for my builds and 3d printed planes compared to my ender 3 neo max its night and day in quality with sunlu pla+ which i never had a issue with printing and tends to be stronger and lighter then regular pla
$40 for the kit, $40 for the filement. Add $40 for a second nozzle, a camera and you're not far from the 5M pro. There was a large sale recently that made the pro only $30 or so more than the base 5M. So glad I went that rout as my time is also worth sonething as well.
You over priced what the filament and nozzle costs, but your point still remains valid. Plus you get the filtration system in the Pro. but at the cost of the Pro you have to consider the Qidi Tech Q1 Pro is now $450 and you get all that and an active heated chamber.
You do have a valid point, but from what I've seen, the pro actually has a shortcoming that you can get around with the nonpro version. The pro has an soft on/off button. if you supply power to the printer through a switchable plug The Pro will not come on where the non pro will and you can completely automate your setup remotely.
Does it make it quieter?
Yes, a lot quieter!
@ ok thanks 😊
it's just a pity that there is no clever solution for the enclosure so that the ventilation also works well with asa etc.
Can this be put together without their spool holder? I have a dry box behind my M5 where 4 spools reside.
It doesn't require the spool holder, you can use whatever you want for that.
The one thing I don't get is people who buy a 3D printer who don't wanna print stuff for their printer and customize it, it's just weird, what r you buying a printer for in the first place, to print plastic of course why not customize the machine that's doing it, to look the way you want it to, you gotta have a little bit of DIY in you to buy a 3D printer to begin with unless you're buying it to print toys and trinkets and stupid ish like that....................
I'm a bit of a mad scientist and I've modified just about everything I've ever owned, but for some people I suppose their printer is like their toaster, they don't want to modify it, they just want their toast. For example, if I bought a printer to make prototypes for my business, I wouldn't want to spend time modifying the printer, because that's not advancing my business, I just want to get on with making prototypes.
@@3rdpig yeah but if you're just making prototypes the regular version of the printer with PLA is fine but even the pro version doesn't have a heated chamber so I think ABS and ASA would be a challenge especially larger parts, but who knows
I mainly use my 3d printer for functional parts, so doing cad design for parts takes most of the time. Doing mods to the printer isn't a big deal for me. All the bambulab lovers swear by not doing any mods to the printer. But 3d printer prices have become so cheap that even an enclosed 3d printer isn't much more.
@@oneanother1 yeah but if I'm going to buy an enclosed printer it better have a heated chamber cuz even though sometimes it's not needed it sure does help, and the Q1 Pro for the price you can't beat it