FreeCAD: Tracing and modelling a part to scale with only photos / pictures. Trace Beginners guide

ฝัง
- เผยแพร่เมื่อ 2 ก.พ. 2021
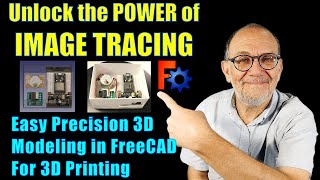
- Scaling and tracing a part to scale from a photograph. We explorer how to get your image into a 1 to 1 scale from just from photo's so you can create your sketch geometry to the same scale as the finished item you want to model or fabricate. What do you do when you have a job for an urgent part that needs replacing on an old machine, part needs fabricating from scratch and the client is shipping the part but needs it yesterday? Or you want to recreate some props that appear in your favourite films. As long as you can get some images that are photographed with a reference object that can be used for scale even (a bolt hole or a coin) this should give you a nice start which can then be refine later. This tutorial is great for beginners and experts alike.
#freeCAD #Tutorial #Beginner
Journey with me and
Donate:
ko-fi.com/mang0
Subscribe:
/ @mangojellysolutions
Browse my Redbubble Shop:
MangojellyLabs.redbubble.com - แนวปฏิบัติและการใช้ชีวิต


![[Full Episode] Hell's Kitchen Thailand EP.12 | 28 เม.ย. 67](http://i.ytimg.com/vi/xCjbu5t25Pw/mqdefault.jpg)


Unleashing the freecad beast!
🤣🤣🤣😎
This video was incredibly helpful. Thank you so much.
You're so welcome! Glad it was helpful
Really good tutorial! FreeCAD is a hassle to learn all by yourself. Didn't even know about the cutting tool for intersections!
Thanks for the comments. I feel your pain. I have spent many hours in there and it does take time to get some knowledge under your belt if your working on your own. It's one of the reasons why I built this channel and to get back into CAD.
Incredible tutorial. Thanks
Thanks for cool tutorial!
Here is a safety tip: if you have selected us inches in the preferences at some time, you still have to select the scale dimensions in MM. If you use inches, even spelled out, your dimensions will be extremely wrong from that point on and figuring out whats wrong can drive you Nuts! With freecad, even doing everything right, step by step, from a working example can result in hours of head scratching. Good video, cut my problem down to one issue. There are So many variables and procedures which can reach across Workbenches causing errors eventually to destroy hours of work.
Thank you for the tip you have solved one of my problems today on a project that I am working on. I thought freecad was being twitchy again as my scaling just wasn't working the first time for some images. Did what you said by specifying the measurement postfix and its working evert single time. Thank you. Great tip
Very good tutorial, you've just opened a whole new world of possibilities for me
Thank you, glad it's given you the knowledge to go further.
Great video! Thank you!
Thank you very much. It is very helpful. I learned lots of things I did not know.
Glad you enjoyed and thank you for the comment.
Nice one! I would be tempted to start rounding all those dimensions to nicer numbers though 😅
Great tutorial ! Subscribed .
I'm addicted to how easy it is to follow your tutorials. If you're employed in CAD, tell your employer he doesn't pay you enough!
Lol thank you so much. Unfortunately I don't I work in photography but CAD is my original background.
Nice, thanks for the learning experience.
Glad you enjoyed and thank you for the comment. I will be doing another one soon on a more complex parts which is not flat like this piece but has a number of different features on each side. It requires multiple photos so a more involved.
Thanks for the video.
No problems glad to share the knowledge
This video learns me a lot. Trying over and over again. What I can not figure out is how I can remove the constraint so I can move the right horizontal line down. The part between the slots stays connected. It moves down too. Is there a way to make this line without constraints?
This video is everything I wished I've seen 12h ago instead of drawing everything 🤦♂️🤣
Thank you
Glad it helped, at least you got some practice trying to draw it by eye but I feel your pain. Last week I took my laptop apart, took me an hour to get to the part I wanted to replace. Googled the part and come across a video. I didn't see the small door on the side that opened with two screws. Would of taken 2 minutes😭 😂
@@MangoJellySolutions 🤣🤣 I know the feel. I've printed test part and "hold on a second, something wrong isn't right". 🤣
Thanks again for sharing this gold knowledge ❤️
Thank you, had difficulty understanding how it should work.
Glad it helped!
Love your tutorials and this one helped me a lot. But one thing you didn't address is perspective. IE., what if the photographer was not taking the image perpendicular to the object. In other words he took the image from an angle that makes the near side look larger than the the far end, even tho they are the exact same size? Compensating for that is a pain, BUT you have - at least - to be aware of the effect to be anywhere near accurate. (Easiest way to compensate is to overcompensate and fire the photographer and get one who knows what they are doing)
Hi I want to thank you for the Very interesting video. I learned alot from you and your freecad video's. I had to delete the other comment I made about Freecad. It was mostly me who had to do things with Freecad Mindset. So It is much more reliable than I tout. So once again Thank you very much, and Yes Freecad is a wonderful Program, and IT IS RELIABLE :) when one get to learn how to do things. Have a nice day, weeks, Mounth and more.....:)
So pleased that my videos have guided you through the journey. I know how painful that can be especially coming from a industry leading Cad package. I know that journey and it's hard road. Total respect for you to come forward and say that you was mistaken. That takes a certain person. Full respect to you. Thank you so much and I hope you enjoy your journey.
Thanks!
Glad you enjoyed
I you take not only 10 mm on the ruler to scale, but as much as possible (20cm), the deviation gets smaller!
For the holes remember, that there are drill tolerances. A M7 hole is normally a bit larger than 7mm, to make sure, the 7mm screw gets trough.
I thought the same thing about the ruler but it is not true. You kinda want to take a distance close to the center of the image because the sides of an image are always deformed by the camera lens. I think it does work better to take the whole length of the ruler if you take an image with a photo scanner.
My thoughts exactly. If you're off by 0.1mm on a 7mm measurement, that's a 1.4% error. On a 100mm measurement, it's only 0.1%
@@fincrazydragon but the picture deforms to the side I just tried it and it does not work. Instead I used 4cm next to the object in the middle of the picture and that was more accurate.
@@heimdall4148 Right, the best is, to use a scanner to take the picture. If you take it by a phone or a camera, use a grid scaler as background, to be able to get the deformations out with GIMP or Photoshop ... or lay rulers beside it. To improve the precision, you can check measurements with a caliper.
However a 7mm hole is typically a clearance hole for a M6 fastener Especially with stamped parts like this
i don't get the create planar image in 3d space option up when i import/open a jpeg in this app however? seems greyed out even if followign your same steps
Another great tutorial video. Thanks. I was wonder, I’ve seen you use b-spline in the curves workbench to create a 3d model from several perspective images (sports car), but have you use b-spine in a sketch to trace irregular shapes? I would like to model a 5015 axial fan from an image. These fans are “round”, but the actual shape is more like a involve curve. Is the b-spline to trace in sketcher even a viable solution? Thanks.
Thank you glad you enjoyed. After a google for the fan I found the images I believe you are looking at (graphic card / computer fans?). I am guessing it one like this? www.amazon.co.uk/WINSINN-50x15mm-Brushless-Extruder-Makerbot/dp/B07DB7DLMM If so then you still use a circle for the casing but the 'snails head hole' (technical term lol) can be made by trimming in a rectangle and making the bottom edge of the rectangle tangent to the circle. Is this the shape your looking for in the image?
@@MangoJellySolutions thanks for the reference. I did finally find a model of the fan on thingiverse. Solves my current issue. I also played around with the b-spline tool tracing an image in the sketcher workbench. Tedious, but doable. Thanks again for your response. 😊
I want To make a template I can print to locate the holes I'll need to drill in the enclosure I want to mount my arduino it. This is an awesome video to help me accomplish this. Thanks Dave
Great to hear and thank you for sharing what you are using it for. It's always good to see what people are using these videos for in the real world.
Great video! Is there a way to specify the image scale based on a scanned image's dpi? In other words, if I use a flat-bed scanner that is set to scan at 600dpi, can I enter that information somehow to get a precise scaling, or would I still have to reference two points in the image? Thanks
Or does it just do this by default?
That's an interesting question, I work in the photography industry and can see what you are looking for. Unfortunately there is no feature to allow for this.
When you import an image onto a plane it will read the DPI from the file and use that for the initial scale. I have used images directly from a flat-bet scanner and they show up correctly. If you use a picture from a camera you can use an external image editing program to calibrate the DPI or scale it with FreeCAD's scaling tool.
The scanner's glass can be protected with a carefully applied piece of cling film if the part might scratch it.
How would one set the scale image pane distance in 0.21.2 ?
Nice tutorial, the reason you can’t get exact measurements of the holes at 5 and 7 mm is because your reference image is not directly above making the image slightly distorted.
And because of the thick paint and radiused edges. In reality, a hole intended for a mm-size screw or bolt is larger than the nominal size anyway. The same is true of course for imperial sizes. The hole can't be the same size as the fastener unless it's meant for press fitting. It needs clearance, and there's actually standards for wide clearance, tight clearance, and threading size. A hole in a stamped part such as the one used here intended for a nominal 7mm screw will be at least 7.5mm, and maybe more. Accuracy on that scale may not be important here, and this was a pretty-good demonstration.
❤
I can probably get this whole thing I want to design done in 60 minutes with Autodesk Inventor. But Freecad is so yuck to use when you come from professional software... these tutorials are helpful
Thank you very much you are very kind. I have a question which I hope you could help me with. I have an image and I have done everything step by step as your video. The problem starts when I want to move the image so that it maches the line in setcher. I move the image ( which I find it very hard to match with the setcher line) and as soon as I f.example do the Angle and want to move the x and y position. It just jumps to a holl new place. I have tried saving it without any help. Do you know what the problem might be!!? I am doing everything that you show in your video. I am Grateful for any help ... :) Thank's ( sry my spelling )
I have tried attacking the problem so that I first do the angle and then x and y positioning, Every time I click on x the picture jumps in another position and my sktcher also moves so that the lines (x and y) are not streyt any more! Any Idea's. Thank you
How big is the image? I am wondering if your working in quite a small scale. If your changing the x y position are you typing in the number into the image position or are you using the up and down arrow keys, or pgup and pgdown to alter the number? Using up and down arrow keys moves the image by 1 unit at a time. If you are working in such a small scale then nudging by 1 unit may be causing it to fly off into the distance so you would need to use something like 0.1, 0.2 etc. This is the only thing I can think of unless my interpretation of your question is wrong.
If you find its down to using the up arrows moving by 1 unit I. e if your using mm you can change to micro mm by changing mm to um just by typing um in the field and then you can use the up and down arrow keys to move in um for more precision
Can you do this for me on a tank track
I'm puzzled - how do you get the image in the first place? Is it copy and paste, or 'load file/image' or sacrifice a goat?! I'm trting to work on a 3d picture/drawing of an aircraft.
In the first part of the video I went to the image workbench and clicked on the import planner image button 2nd along on the toolbar and that adds the image to FreeCAD so you can start your scaling and tracing. Hope that helps.
Very helpfull video... However using small dimensions for scale reference is a mistake, it amplifies your error. Why do yo use 10mm of your ruler as a reference when you have almost 300mm of this ruler available on picture? Another point of improvement is to prepare your picture before with a photo editor to get crispier contour and correct the camera lens deformation
I tried using more of the ruler in my picture but that was less accurate because of lens deformation. Instead I used a couple of cm's in the middle of the picture next to my object and that was more accurate.
It does matter where you place your reference measurement because a camera isn't a right angle to every surface on the plane you're shooting. It's a right angle to the center point only, everything else is distorted.
You Dancer you...
Although you seemed a bit heavy on the dimensions and light on the geometric constraints like horizontal/ vertical with points such as circle centres the actual subject was very good, and of course why I came..
I am planning on a modification for my 3d printer, and to release it to the 3d printing community if it works, and I needed to make a part that fits the x carriage of my printer perfectly, with holes lined up perfectly, and so the fan/ hotend cover fits to it perfectly, and although I could measure every one of the 9 holes positions, and the cover size, which of course cannot be a rectangle its got more angles than a con man, it was a task I was not looking forward to!
Then up pops you in my recommendations! I swear google is reading my mind now not just listening to me!
And... A couple of hours later I have printed a slimmed down part just to check the concept using just my phone camera and if it looks promising get the DSLR out and strobes and line it up square/ true and all that jazz to create a more accurate one to actually use.
So knocked together a freecad model, sent it to 3d printer just 5mm thick for a test fitting without wasting hours on a print, and I kid you not it fits like a bloody glove!!
Every hole is bang on centred on the holes on the printer, every screw just pops in there and screws into the carriage threads. the cover fits on it perfect, edges lined up like it was actually made to fit!! Well, it was meant to be made to fit, but i didn't expect it to ACTUALLY fit perfectly first go with a phone camera, hand held!!!
To say I am blown away would be the understatement of 2021, that is just completely and utterly fan bloody tastic!
Thank you so much for your insight, you are a legend :)
I love comments like yours, they really make me smile, it's great to see how people are using my videos to resolve real world problems and what they actually are, great to hear that the video helped. I do cringe when I look back at this video and see how many of the wrong constraints I used. Worth my older video I used to come up with ideas of videos then could wait to tell the world. I'm a little bit (not much) more restrained now. Thanks once again for the comments. It's what drives me to make these videos.
@@MangoJellySolutions Yeah, I know exactly what you mean.. When I started with FC I was working completely backwards and dimensioning everything then looking for a geometric solution LOL..
its very much easier to read when you flip that LOL
@@MangoJellySolutions Hey... Amiga 1200 model and retro gaming
I hail from Amiga days, I was a coder in one of the big Amiga cracking groups back in the day :D
@@LouisePaisleyUK No way, what group was you in? I came to Amiga quite late during its last life throws and wish I come to it earlier, was a great machine. I was marked down on my A level for using one for my course work lol. I used to work with the guy who scored the music from Blood Money. My sister sold my machine in the end after I let her borrow it, she's still in my bad books lol
@@MangoJellySolutions LSD.. Monty Python.. I created the Grapevine disk mag, then Shagrat took over when i left the amiga scene..
Did you ever get around to making another video with a 3d shape
Nope totally forgot! Sorry. Thanks for the reminder I will put it on the list.
Does anyone know if there is an automated way to do this? Opencv and python?
That would be very useful if you could, I can see taking the object placing it on a white background and reducing the colours to detect the edges. The problem is having some kind of intelligence to decide on the constraints to use. It would be an extremely interesting ML project.
@@MangoJellySolutions I will be creating something like that in a few months. I was hoping there was an open source project I could look at to get ideas to help me plan. The search continues :)
So, how do you save the sketch as an .stl?
Click on the model in the tree view, go to file, export and pick the stl file format. When you specify the file name make sure you add the. Stl file extension.
@@MangoJellySolutions Thanks for the reply, I really don't understand what you are saying, totally noob to this. I followed the video as best I could and after having created a polyline I clicked on sketch to the right under the model tab, exported in .stl and .obj but Tinkercad is saying it is corrupt. Fusion 360 shows nothing on the plane. I even clicked on image plane and exported but there is nothing showing in Fusion 360. By the way I spent ages trying to find a video on smoothing edges of an object when using scribble in Tinkercad. Then this video appeared and is an answer to my problems. It is so hard to find this kind of tutorial
The only thing you did not say at the end is how to save it and in what format to save it. So my project is hanging in the air at present
File save in freecad to save your project. It's up to you what format you want to export the finished model in as it depends on your application. i e If your going to use this as a model, cnc project, 3d printed project etc
@@MangoJellySolutions wow thanks for the quick response. I want to just save it so that I can edit it later
I hate fusion 360 for letting me use the program for free and later stripping it from several features. I've gotten so used to it and it's incredibly easy and clear interface.. freecad looks like a dumpster fire and Is so damn cluttered, it's really hard to get a feel for it. But I really hope I learn to use it someday.
The process is sketching, not tracing, although it’s good tutorial
I'm sorry but the people updating freecad are seemingly unable to stop from doing bulls.
the video is useless for the new version.
I am guessing you are referring to the missing image workbench. Yep it's been removed and replaced with a new method of importing images. That's the main difference, all the rest in the video would be the same. I have created a video in regards to the new way th-cam.com/video/WhxDAgskcHA/w-d-xo.html