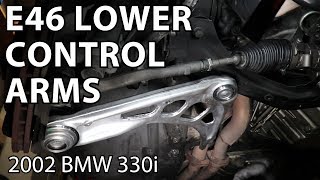
How to Replace the Control Arms, Bushings, Ball Joints, Tie Rods, & End Links On A BMW E46 M3

ฝัง
- เผยแพร่เมื่อ 12 ก.ค. 2024
- ►No matter how well BMW designed the E46 M3, with worn-out bushings, and tired control arms, you aren't doing the car justice in performing the way it was intended. Your suspension system is responsible for the safe/sporty handling of your BMW.
If you've noticed that your BMW is experiencing poor responsiveness, or rattling and vibrating as you turn the wheel, it is more than likely a suspension related issue. This front left lower control arm works in accordance with other suspension components to ensure that your BMW turns with authority and precision.
Gareth Foley is here to take you through the steps needed to give your BMW a complete front suspension overhaul. From replacing the control arms to pressing in new bushings, and replacing the tie rods - Gareth Foley has you covered.
With all the parts you need to recondition your BMW E46 M3, FCP Euro is proud to bring you this OEM quality control arm from trusted BMW manufacturer, Lemforder. Lemforder is a leader in the BMW parts game and is revered as the highest quality manufacturer of BMW parts.
Read this DIY on our blog: blog.fcpeuro.com/how-to-repla...
Shop The Parts Used in This Video:
www.fcpeuro.com/products/bmw-...
www.fcpeuro.com/products/bmw-...
www.fcpeuro.com/products/bmw-...
www.fcpeuro.com/products/bmw-...
These parts fit the following vehicles:
BMW M3
2001 BMW M3
2002 BMW M3
2003 BMW M3
2004 BMW M3
2005 BMW M3
2006 BMW M3
SUBSCRIBE: hubs.ly/H0cDnfN0
Get free parts from FCP Euro:
www.fcpeuro.com/page/lifetime...
Follow FCP Euro on:
/ fcpeuro
/ fcpeuro
/ fcpeuro
www.fcpeuro.com/ - ยานยนต์และพาหนะ


Excellent. I own a shop and i get my apprentices to watch this quality of content in their down time.
Really great content, great filming, great commenting! Very very good work over all! Thank you for such awesome videos!
Good stuff again... pretty much everything I needed to know about what to look into replacing on the front of the ZHP... Keep this stuff up, i'm a visual learner and the high quality production of these videos makes understanding these cars so much easier!
Glad you enjoyed it Michael Johnson, we're happy to help!
Thanks for the tutorial. I found it very helpful and a job I'm confident I can do on my 2000 323ci.ill be taking fast corners again in no time.
Side note.just banging on it with a hammer the ball joints just didn't drop down that easily. But after busting my balls they came out
Love the video very detailed and organized will be subing and liking dream car is the E46 m3 keep up the vids
Informative details and those highlight for most important parts that can save hours and hours of labors. Thanks you for your intelligent and thoughtfulness.
Thank You for a well presented tutorial.
thank you so, so much for this video!
Thanks 👍🙏🙏 and that was very helpful ❤❤
Excellent and informative. Thank you.
You're welcome! Glad it was helpful!
Great info!! @ 15:02 I don't own that fancy tool...turned out, a common carpentry bar-clamp and a block of wood did the trick. I also put a metal ring to keep the block -clamp-combo from pressing on the rubber bushing itself. I clamped the control arm itself into a bench-vise to hold the whole thing while I went at it.
You are awesome! thank you and i appreciate it.
We appreciate you watching Eric!
Thanks 👍
I just did this job and uploaded the video to my channel. I guess I'm the only person who doesn't remove the cross member brace torque-to-yield bolts for this job. I didn't loosen or remove the sway bar either for this job. Like most people, I used common tools. I don't have a shop lift, I used the BMW jack and some jack stands. The press on bushing spacing is essentially entirely about lining up with the stud holes and has nothing to do with the alignment. Basically, if the bushing is pressed to the correct depth, the control arms will bolt into the frame very easily as the all studs will line up with the holes in the subframe. Further, the "lollipop bracket" bolts pull the arm bushing bracket into alignment with the subframe dowels as you tighten the bolts. Nevertheless, this FCP video does provide some useful information, although it is obviously not the only way nor the simplest method to do this job.
How tf did you use the bmw jack
@@jeradjackson1609 my thoughts exactly 🤣
Very nice video
Thanks Alan, you're pretty nice too
great vid - more 46 m3 content! (but confirms why I buy my parts form FCP and get a pro to install)
More on the way krbcrwlr! We appreciate your support.
This looks way too easy than actually is 😂😂👍👍 god job
You got this!
Awesome high quality DIY video!! How come no grease inside the steering rack boot? I also see a lot of seeping on the steering rack. I think this car may need more than a front end refresh. More E46 M3 videos please!
Many more to come David, we are doing the subframe bushings, and some rear end work next week on it!
Just did this refresh on my M3. And I hope my experience can help/prepare anyone who goes down my route.
Bought the bmw genuine control arms from FCP and they didn't come with new nuts for the inboard and outer ball joint. Here's the proper specs for the nuts
outer nut 18mm is a M12 1.5 nut BMW Part # 31-10-6-774-714 $2.70/NUT
inboard ball joint nut is a M14 1.5 nut BMW Part # 31-10-6-777-806 $8.27/NUT
hope this helps someone or somehow contributes future control arms to come paired with these nuts from FCP
all in all great job and awesome video ;)
Thanks for the insight OG Guardian RJ , can you please send us a link to the product page you purchased from? Want to ensure it was not an actual error in the photography or listing, if the nuts were supposed to be in there. Thanks for watching the video and the support!
@@fcpeuro this is the two products I got from my order
www.fcpeuro.com/products/control-arm-front-left-lower-31122229453
www.fcpeuro.com/products/bmw-control-arm-front-right-lower-31122229454
They are sure proud of their nuts
Good video- this job went smoothly. However, I wish replacing the steering coupler would have been suggested- which is another steering wear item...
Great point! We'll pass that along to the team for the future
Is the angle OK for a ratcheting flat wrench? I dont need to use mine very often, but when I DO need them they are GOLD!
on my 2001 (08-00) 330ci the factory control arm nut sizes were "18-21" passenger side, and "19-22" driver side? have you seen this before? BMW branded control arms as well...
Thanks for the video and all the effort that goes into this. Question: the bolts that go on the reinforcement plate, all same size or are the ones that go into the bushing bracket shorter and less torque possibly? Stripped the threads on a bushing bracket (lollipop) thanks. E46 M3
Happy to be of some help! The bolts for the reinforcement plate are one-time use, and they are a different part number than the bolts for the control arm bushings. You can view both of those on a diagram over at bimmercat.com
I fuckin love this guy 🤙
Great stuff...
How much did thus all cost....
Quick question about the sway bar links....are they supposed to be torqued under load? I’ve replaced everything up front in the last year, and still get an annoying clunking, pretty sure it’s the sway bar links. I ask this because I read in a thread on e46 fanatics that a guy said they had to be under load when torquing the nuts ...great video btw, and thank You guys for always being awesome with quick shipping of my orders.
did you end up fixing the problem by torquing it when the car is on the ground. This is how it should be loaded
@@francischan8263 ball joints don’t need to be torqued under load, however, the front sway bar itself does.
I used to hear a clunk/ scratch checked everything in my suspension and dust covers for the tires. Changed every pulley. Ended up being my AWD front Diff seal had went bad and the pinion was just spinning until it snapped one day. Just got it out the shop
Me thinking to myself " this car has a good amount of corrosion". Two minutes later the guy in the video " this car is corrosion free!" lol
does it matter if i use M Sport control arms or the non M sport or are they interchangeable?
Primer comentario 💆🏿♂️
hey so i wanted to know if it’s my control arm bushings when im turning into a corner with some speed with traction on and the brake pedal is fighting me to go back down?
Note to anyone replacing with Febi brand control arms. Top inboard ball joint nut on top of subframe is 22mm rather than 21mm.
Appreciate the note! That can happen depending on the manufacturer.
In my experience OE bmw is 22 aswell. at least on non-m sport non-m e46's. I replaced mine recently with a new pair and on one side was some cheap aftermarket part and the other one was the original bmw one from 1999. It was a 22mm on the bmw one and a 21 on the aftermarket one.
Hello, is there a difference beetwen e46 and m3 tie rods?
Easy peasy when you have a ramp ;)
excuses
Steering rack boots and clamps does not come with the Front suspension refresh kit.
what name the tools when u bushing lower arm bush there
Great video! Which component would be responsible for steering wheel wobble and pulling to the right?
Did you get it fix? Read something that if it wobble around 55mph, increase your tires PSI to 42PSI.
@@Oneklickmedia
Yes I did. Replaced them.
I just did this job and you really don't need that tool to press the bushing if you ve got the control arm off the car.
Its osam
why dont you jack up the hub to preload these CABs (not a rhetorical question, really) ?
Reconsidering doing my control arms on jack stands.... lol
It’s do-able. I’ve done them on my bros 325i
How to open the track on 2000 caravan avenue
I roll an E55 so I could care less about a beemer, but I watch your videos because the technique can easily carry over to any car. You're an excellent instructor but a close up on specific steps would be great on the future. Ex. Press the bushing on a few mm? Let's see how that looks.
Noted PaulieFein, Gareth has a wealth of knowledge and we can tap into it as depth as we want, so we will go one layer deeper on his future content. He does have a handful of DIY's coming out in the coming weeks from pressing out bushings on rear subframes, to electrical diagnostics. So stay tuned! Hope the e55 is treating you well.
How much should a mechanic charge for this job?
Reinforcing plate bolts are not re-usable!
No one has ever mentioned how heavy that plate is.
Where do I get that hoodie?
idk brb lemme check... lol . Sorry I had to , unfortunately we dont have them up for sale quite yet, we were having them made right when everything hit. Hope to have them up on Merch.fcpeuro.com soon though!
FCP Euro awesome thanks looking forward to buying one
Self tapping????
After owning a e46s and 1 had a starter problem on me and realizing that I had to take off the intake manifold just to get to it. That was strike 1. Man I went back to a 93 Honda civic hatchback with a k24/k20 motor and couldn't be happier.
16:50 "easy"
I wish the camera man would zoom in to the actual parts (like control arm bushings), instead of showing the techs face.....
close your eyes and tell me you don't hear Danny Mcbride
What crazy kind of job on a German car doesn’t call for a 10mm?
You're as suprised as us. Its likely they rnd team at BMW simply misplaced all the 10mm's when designing the car and just swapped the size out.
FCP Euro 😂
If it were a "normal" E46 a 10mm would be used for xenon headlight leveling sensor bracket :P
@@steifan Valid!
How about making a video showing how to expedite shipments, cuz your shipping department takes way too long? And when you promise to overnight a replacement part for a defective part, you damn well do it, and not leave your customers hanging for 5 days.
Hi Adam, sorry to hear that was your experience, that's certainly not how we want to be of service to you. When you get a moment, if you could let us know your order number we can look into a resolution for your trouble.
Stay *out* of *politricks* fcp thank you.