ไม่สามารถเล่นวิดีโอนี้
ขออภัยในความไม่สะดวก
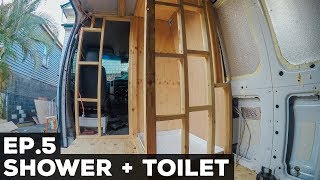
Waterproofing Our Van Shower | DIY Sprinter Conversion Bathroom Build

ฝัง
- เผยแพร่เมื่อ 4 ก.ย. 2024
- Join our van build extraordinaire email club here: bit.ly/3Apcz0r
Show your support by buying us a beer here: bit.ly/3bX58UE
________________________________________________________________________________
Hi friends! We’re here with another episode in our Sprinter van build series. You’ll have seen us on/off building the frame for our van bathroom in previous videos, but this week we’re really cracking on with the job & waterproofing our van shower cubicle.
First up, we apply a tanking kit, then we install the wetroom flooring & PVC clad the walls, before finally sealing it all up with a good helping of silicon. Oh & we also get the actual shower fixed onto the wall!
Working in such a small space with so many curves & corners made for an interesting task. And we definitely started to question this part of our DIY campervan design. But we get there in the end & we’ll think you’ll agree it looks pretty spiffing.
Stand by for the next installment where we set to work on getting our water tanks hooked up & the van conversion shower plumbed in with drainage & water supply.
There’s also a popular blog post on our website with lots more detail about how to build a shower in a van. Click here: thewholeworldo...
Thanks for watching! If you enjoyed this episode don’t forget to smash the thumbs up & if you’re new around here don’t forget to subscribe.
Catch you in the comments!
-------------------------------------------------------------------------------------------------------------------------------
Here’s a list of the materials & tools we used in our DIY van shower build:
Kreg Pocket Jig: amzn.to/35fYlz0
Metal Ruler: amzn.to/3omDHo7
Silicone Finishing Tool: amzn.to/3hPlSfd
Grip Fill Adhesive: amzn.to/2JStQYk
Shower Waterproofing Kit: amzn.to/2JTIUoC
PVC Bathroom Panels: amzn.to/3bhQwMO
External Corner Trim: amzn.to/3bgbY4S
Rubber Wetroom Flooring: ebay.us/ySrYQG
Waterproof Dimmable Light: amzn.to/2MtVKdZ
Sticks Like Flexible Silicone: amzn.to/35ig4pj
Flooring Adhesive: amzn.to/35is0aB
Black Mixer Shower: amzn.to/3bdyD1G
Shower Fixing Plate: amzn.to/3hNOh50
JG 12mm Female Tap Connectors: ebay.us/4xxV83
Charcoal Shower Curtain: amzn.to/3pVD6do
Aluminium Step Protector: amzn.to/3ojPQKI
You can also find everything we used in our Sprinter van conversion over on our website shop: thewholeworldo...
P.s. These are affiliate links, so if you buy through them we may earn a small commission from the seller. It’s at no extra cost to you & so is a lovely way to say thanks if you found the video helpful.
Full van tour video: bit.ly/3dVYWei
Full van conversion series: bit.ly/3dRSSDl
UK travel series: bit.ly/3yorzbo
Subscribe to our TH-cam Channel: bit.ly/32ZTD67
Follow our daily updates on Instagram: bit.ly/2ypQsXw
Visit our website: thewholeworldo...
Work with us: hello@thewholeworldornothing.com
#VanBathroom #VanBuildSeries #SprinterVanConversion


I used to install bathroom cladding. (on and off over the past 20 years) The secret to cutting it is to use a blunt wood saw. There are also different grades/types of cladding. Sadly you got some of the harder/brittle panels. The more brittle panels are also the thinner panels. The thicker 8mm and 10mm panels are much easier to work with. I would say you did an extremely good job for your first install, especially because you used the thinner panels.
Aha, that explains a lot! And is so good to hear that it’s not just us 😅 We went for the thinnest possible cladding panels down to weight and space considerations and we imagined they would be easier to bend into shape than the thicker ones. Sounds like we were very wrong. Thanks so much for the info on how to best to cut them too, that will no doubt come in useful for anyone else reading this who is doing the same thing. Really appreciate it 😊🙌
damn i admire you all so much for this. your van looks professionally done. i never would have imagined how many twists and turns and hard work and restarts it took to get done. wow! i think i'd have burned the whole place down.
We’ve just got to this stage and really thankful for this video 😂 why is nothing easy in a van build 😭🙏
Thanks for sharing this. Normally in a lot of builds people jump past this part because it's not pretty.
Haha yes definitely not pretty! We’ve tried to include as much of the not so glamorous stuff as we could and the stuff that went wrong too 😅
Oh boy.... My partner and I are in the beginning stages of a complete airstream rebuild... it doesn't feel like the beginning because we've already done so much but we have yet to build the inside (including bathroom)! We've removed everything, fixed up/welded the frame, installed new floors, taken out the inside skins, polished the outside, taken out the door to fix up, and so much more, and yet the inside is empty! It's encouraging watching this video though, it looks like a lot of work but so far we've learned that every single step is always 10x more complicated than you expected. At the end of the day, you HAVE to be able to laugh off the struggles and mess-ups, or a mental breakdown is right around the corner haha. You two seem like a good team though and you show that perseverance pays off. Anyways, thanks for the detailed and thorough recording/blog of this shower build, it looks amazing!!
Wow that sounds like a really big project! It’s crazy how you can do weeks/months of work and then still feel like you’ve not done much but the attention you pay to the bits that you don’t ever see definitely pay off in the long run. You’re absolutely right about the sense of humour though, you’ve gotta be able to laugh even in the face of disaster 😅 We never got any better at budgeting our time though, everything EVERYTHING took waaaaay longer than we thought or wanted. Good luck with the rest of your build 😀
Your conversion is so beautiful, I forget how much work must have gone into it. You're such a great team. Congratulations on the finished project.
Thank you 😊 Sometimes we forget too! These videos definitely bring it all flooding back though 🤣
Well done guys. Learning so much following your build. We're not all Greg Virgos so your a real inspiration.
Thank you, glad you’re finding it useful! “We’re not all Greg Virgos” that made us both chuckle 🤣🤣🤣 We love Greg’s channel but you’re so right - he’s in a building league of his own.
I really enjoyed the video and love that you aren't shy about showing all the highs and lows.Great to see you took it all in your stride. Good job guys!
Another job well done people. Those bathroom panels looked like trouble from the beginning and the working temperature didn't make things any easier either.
I'll go for acrylic 3mm panels that cover the wall in one piece. Getting nervous already.😰
Yeah we’ve heard that those large sheets are a little easier to work with but we’ve seen people struggle to cut them to the correct shape as well! And we just figured that if you mess a single panel up it’s easier to fix than if we messed up a whole sheet. Let us know how it get on anyway! Sure you’ll be fine 👍😀
💕Great job lots of laughs memories & knowledge gained💕Listening to your antics of installing the shower walls makes me think if I ever manage to get a van I’ll put some posh looking Lino on the walls💕
Haha probably a better idea - much easier to install that’s for sure! 😀
Well done, I think that's how I would do mine, but with acrylic sheets. But I need to get a loo in there as well. And have the dilemma of: compost, cassette or porti loo!!
We have heard people say that the acrylic sheets are a little easier to work with, we were just a little worried about a single mistake messing up a whole wall, at least with panels you can just redo a single panel 😅 We went with a porta potti in ours but we’re considering upgrading to a compost. Just need to find one that will fit through our tiny doorway 🤔
silicone standard are only the gap both ways :)) but i feel you :p
Thank you for all your help. We are just installing our drain and was just wondering how to tackle the left over water on the shower floor when you shower as it’s a flat floor?
Smashed it again guys - great video - well done things are looking awesome
Thank you! Definitely getting close now 😀
Hi, great video! We're using it to help us build our own campervan shower at the moment :) Would you be able to link the extra long shower waste/ drain you used? The link doesn't appear to be working in your blog and it's not listed under the components on this video.
Great video you two, reminded me of the time I did my 1993 auto quest shower room with those boards I think mine went a little bit easier than yours did but the end result with those boards was worth it, as with yours it looked great so well done again look forward to the plumbing video take care.
Thank you! We definitely brought a lot of the difficulties on ourselves as usual 😅 but as you say, the end result is worth it. They’re definitely waterproof, look great and are really easy to clean too 👍
Well done guys, that was an amazing effort. Gave me some great tips for when I do mine so thanks again.
Thank you 😊 Glad you’ve found it useful!
Bathroom looks great, you did such a good job! Doing the bathroom is one of my next jobs on our van but I used that kind of bathroom cladding in our house and it was a total nightmare to fit - never again!!
Thank you! Yeah we’d never used them before as in houses we’ve always used tiles. They were definitely quite hard to work with. What have you opted for in the end?
@@TheWholeWorldorNothing Ahhh I really cannot decide for the van bathroom - hoping if I procrastinate for long enough the perfect solution will come to me in a dream...either that or I'll just never wash again :D
Haha two top options there 🤣
Just subscribed to your channel and well, its fantastic. Love the content and the way you both get amongst it. To get up to date we're gonna binge watch as we joined part way through the van build. Keep it going. Massive thumbs up you two 👍👍
Ah thank you, that’s lovely to hear you’re enjoying it 😊 We hope you enjoy the ones you haven’t watched so far and look forward to chatting again in the comments! 👍
Amazing van! Amazing video!
Thank you for sharing.
You are living the life we are going for.
We just bought our own family van and started to build. It's a great adventure, which we love to share with you, too. You are welcome to watch our videos.
😀
Thank you very much. We’ll be sure to take a look 😀
Hi did you use ordinary ply ofr your walls? Ive seen some shower builds that use marine ply but think Id have to remortgage lol
hi wondering if you got link to the shower drain you used thanks
Just done my first draught of my plans for my van just looking for nod in the right direction plan to put my shower left of the side door and take the bulkhead out and put plywood wall half way so creating a L shaped kitchen area on the opposite side,not seen many vans like this just wondering if it was possible,any ideas on if i would need a more powerful water pump or even two if need be,hope you dont mind but i have also nicked your seating and your hidden table idea i have mine at 600mm wide is that same as yours any hints would be helpful fiat ducato lwb is what i would be purchasing
How wide is your shower door? Thanks!
Man I wish I've done it this way, no shower tray
I've got the same shower mixer at least 😅
How is it holding up on the floor?
Would you bother going to the effort of installing a shower in your campervan?
Absolutely 💯 yes, it's just knowing you can take one when you want. Some van builders do and some don't. I guess down to personal preference 😁 great video as usual guys 👍🏿
Thanks! Yes personal preference and how you intend t use the van too for some people, lots of van people always stay on campsites so have all the facilities right there. But we’re with you, 💯 a yes 🙌
Great video again, looks great, how well does it work?
Thanks! The shower works really well, great pressure, really hot, and at a nice height for both of us. The only thing we’d possibly change would be to contour the floor into the drain but I dread to think how much more effort and time that would have taken 😅
@@TheWholeWorldorNothing thats awesome. Be safe, have fun. Love your videos
Thanks! Oh forgot to say it’s waterproof too - probably the most important thing 😅
Looks like watered down pva glue
Rule 1 dont let sarah build anything.
We’d only have half a van and no electrics if we followed that rule 😅
What was the rough cost of this do you know?
I'm trying to plan putting this set up in my Iveco and figuring out budget