ORDERING INFO FOR ALL L.E.D. BULBS FRONT AND REAR: Front Park Bulds inside headlight assembly (as seen in the video): amzn.to/41n8ZP4 HIGH/LOW Beam H4 LED bulbs inside the headlight assembly: amzn.to/49Sdki7 Front Blinker Switchback LED bulbs: amzn.to/3KRHMOK Front Blinker Clear Lens assemblies: amzn.to/3MBsxe9 Rear Brake light LED bulb (red): amzn.to/3KRZXUw Rear Blinker LED bulb (amber/orange): amzn.to/3o4fCr9 BLINKER RELAY (required when replacing blinker bulbs with LED): amzn.to/41iotne (“As an Amazon Associate I earn a very small commission from qualifying purchases.”)
@@patrickdesmedt1029 The video is about replacing the 194 peanut bulb which can NOT be done in 10 minutes. The H4 low/high beam CAN be done in 10 minutes as you mentioned 🤙🤙. Here is the section of the 194 bulb at this starting point: th-cam.com/video/rorWDa1d8I0/w-d-xo.html Left side angle: th-cam.com/video/rorWDa1d8I0/w-d-xo.html
It CAN NOT be done in 30 minutes or less. I tried reaching in with my hand to access the little bulb from the back. It is absolutely IMPOSSIBLE as some viewers wrote & bragged about. I followed your method but unfortunately, my right 194 peanut bulb fell inside the headlight assembly like yours. Seeing how miserable your experience was, I got a shop vacuum cleaner and attached a long little rubber hose, and sucked my bulb out of the headlight. Your method was working to grab the little bulb out, but use a shop vacuum next time. Thanks for the great video.
Doing major maintenance/ inspection on my 2004. Planning to order in a full set of new lamps while the nacelle/ cowl rests itself on my sofa! Glad to have your vid as a reminder, thank you!
Hello Matt. Thank you for watching 🤙. I hope the video helps. I have LED's all around the bike plus the extra blinkers bulbs upfront. You/we own on of the best Sport Touring Bikes out there. Have a great weekend. ❤️🤙🏍️
To help remove the buggered t5 globe, use Small diameter tubing hooked to a vacuum cleaner then poked through into the headlight assembly. Worked for me years ago. 😁
loved the dark melodic moonlight sonata when you started to go after the fallen bulb....such a tragic moment building intensity.....your French was most excellent too (and the final bashing with the hammer...f'n great)! thanks for the video.....I have a 2010 ST and I've been thinking about the LED lights for a while.
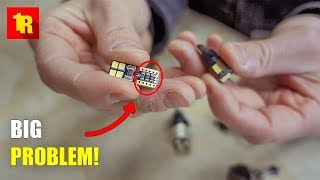
Hello Michael, sorry for the super late response. I noticed you sent me this message 8 days ago. I'm currently in Malaga Spain on holiday sitting on the couch looking on the coastline and reading your message. You definitely gave me a good laugh this morning 😂 LOL..... . I love your description of the Moonlight sonata, lol. You have no idea how much I edited out my potty mouth and all the "F" bombs and all the swearing ?##@!?€&#@@!! that I did when the bulb fell into headlight assembly. I literally cussed some really bad words for 5 minutes. So there's about 5 minutes of editing that I had to cut out. I love the fact you enjoyed my very special beautiful moment smashing those junk LED bulbs that I originally installed. I highly recommend some good LEDs. Don't get any cheap ones that come in package of 10, those are junk. Just buy 2 good ones and keep your fingers crossed they will last a long long time. Again thanks for watching and have a great weekend. Heading to Salzburg Austria in 2 days. ❤️🤙🏍️
@@MotoTouringWorldWide Hey, no worries! Malaga, Spain sounds way better than Louisville, Kentucky. I've only been to Barcelona (a long time ago). Safe travels to Salzburg!
@@michaelbarryprojects ,, we had a great time in Malaga and we also headed down to Gibraltar, there were 100's of motorcycles everywhere going somewhere. Definitely next time I have to rent a motorcycle. By the way your first initial comment is by far my favorite ❤️🤙🏍️
Great video ! Thanks a lot , I’m in the process of “ refurbishing “ a new to me 04 St that’s been sitting for years , will love to change to LED all around , I was wondering How hard it is to remove the headlight out ? Couldn’t find any videos so far ….other important thing will be finding the best quality LED so I don’t have to go through this any time soon ….
Hello Dan, thank you for watching. You will have a exciting project coming up with your new ride. I'm currently traveling and I will provide you the links for all the bulbs for your ST. I will update the description for the LED links to order. I am currently traveling and I will get all the information for you soon. Have a great day 🤙🏍️
Hello Dan, I added for you in the description all of the LED light bulbs that you will need. I also saw you on Facebook and I will reply to you there also 🤙🏍️
This is way to difficult. Did it last week in 1/2 hour with removing the plastic covers beside the fork (3 screws and a couple of plastic buttons) and going in under the front of the bike. You need do do it with a litlle bit of patience and "fingerspitsengefuhl"
Hello JD,, , thank you for watching, thank you for the feedback. 3 years ago when I did it that way the way you mentioned,, I unfortunately was victim to the bulb falling inside the headlight assembly. It was an absolute nightmare the first time and a lot worse than what you saw in this video. I think what I need is someone to make a video and show me how you twist and pull the bulb rubber socket out without it falling into the headlight assembly even few components only removed such as your suggestion (the plastic covers beside the forks which is three screws and plastic buttons). I love your idea, did you see painfully hell I went through twisting and pulling the right side bulb out? It was an absolute pain in the ass even with "straightforward access". "Fingerspitsenfuhk" LOL 🤗😆😆 Thanks again for watching and have a great weekend. ❤️🤙🏍️
Bedankt voor het kijken 🙋♂️. Start de video om 9:56. Kijk wat er bij komt kijken voor alleen de 194-lampen aan de rechterkant met "rechte toegang tot de doorvoertule". Het probleem is de rubberen doorvoertule waar de lamp in wordt geduwd. ST-bezitters zijn het slachtoffer als deze lampen tijdens het vervangen in de koplampunit vallen. Het is "ONMOGELIJK" om uw vingers en hand te verwringen om de kleine 194 lampjes te vervangen zonder dat er iets verwijderd is. (De koplamplampen zijn echter eenvoudig te vervangen door simpelweg aan het stuur te draaien.) Als u beide 194 lampen kunt vervangen zonder iets te verwijderen, of in minder dan 1,5 uur, deel dan een videolink. Bedankt ❤️🤙🏍️
Mee eens, ik zal het proberen, maar de rubberen plug is heel erg moeilijk te verwijderen. Er is toegang aan de voorkant nodig om de rubberen lampplug recht naar buiten te trekken om te voorkomen dat de lamp in de koplampunit valt.
Klopt hoor erg lastig je kan hem wat heen en weer wrikken met een beetje geluk blijft ie in de houder en anders toch maar een waterslamg in de stofzuigerslang tapen en het lampje wegzuigen eigenlijk een kleine actie 😊
jullie breken gans de motor er voor af en je kan ze er zo insteken , ja het is wat wring werk maar op een half uurtje steek ik ze er in zonder iets af te breken.
Hallo 🤙🙋♂️. Bedankt voor het kijken. Upload een video of geef een link waarin een klus van 30 minuten wordt getoond bij het vervangen van de "194 park bulb". Start de video op 9:56. Bekijk wat er allemaal bij komt kijken voor alleen de rechter 194 lamp met "RECHTE" toegang tot de "LAMP" doorvoertule". Het probleem is de rubberen doorvoertule waarin de lamp wordt geduwd. ST-eigenaren zijn het slachtoffer van deze lampen die tijdens het vervangen in de koplampunit vallen. Het is "ONMOGELIJK" om je vingers en hand te verdraaien om de kleine 194 lampen te vervangen zonder iets te verwijderen. De koplamplampen zijn echter "gemakkelijk" te vervangen door gewoon aan het stuur te draaien EN de ene H4-lamp kan in 2 minuten worden vervangen. Als je beide 194 lampen kunt vervangen zonder iets te verwijderen in minder dan 1,5 uur, deel dan een videolink of de TH-cam-link. Bedankt, ❤️👍🤙🤙🏍️ Hello 🤙🙋♂️. Thank you for watching. Please upload a video or provide a link showing a 30-minute job when replacing the "194 park bulb". Start the video at 9:56. See what's involved for just the right side 194 bulb with "STRAIGHT" access of the "BULB" grommet". The issue is the rubber grommet the bulb is pushed into. ST owners are victims of these bulbs falling inside the headlight assembly during replacement. It is "IMPOSSIBLE" to contortion your fingers and hand to replace the tiny 194 bulbs without anything removed. However, the headlight bulbs are "easy" to replace by just turning the steering wheel AND the one H4 bulb could be replaced in 2 minutes. If you can replace both 194 bulbs without removing anything in less than 1.5 hours, please share a video link or the TH-cam link. Thank you, ❤️👍🤙🤙🏍️
im sure there’s a way to access from under the bike , once you remove the mud guards or fender liner, there shouldn’t be anything in the way done it for Kawasaki Concours, Honda Silverwing scooter, Yamaha Majesty also handgun cleaning kits can clean the lenses, just need to put a vacuum cleaner in there to dry it out good and any dust remaining you have to do it by touch since you can’t see anything
Hello and thank you for watching. It can not be done from underneath. You would break your arm, fingers, and fingernails trying to remove the rubber plug that is in the housing super tight.... See this starting point: th-cam.com/video/rorWDa1d8I0/w-d-xo.html Here is another angel: th-cam.com/video/rorWDa1d8I0/w-d-xo.html This is an important angel on the right side. See how hard it is to remove with straightforward access: th-cam.com/video/rorWDa1d8I0/w-d-xo.html
@@JM-de7yn Ik ben het er helemaal mee eens. Honda heeft een grote fout gemaakt bij het ontwerpen van de "push-in" rubberen plug. Honda had gewoon een eenvoudige plastic fitting voor de lamp moeten maken en links en rechts een deurtje moeten maken achter wat lijkt op de luidsprekerafdekkingen.
Hey, what is clamp that you have around the clips where thr mirror goes into? Is that something you added? My ST did not have those. Maybe that's why they keep falling out.
Hello thank you for watching. Great question. Your Clips are missing if they're not there. See if you can order those clips from the dealership or from a salvaged ST. The trick that I was doing squeezing the clips I do to keep the dowel pins snug. I Wish you success ❤️👍🏍️
@@MotoTouringWorldWide Hey, thanks for the reply. To be clear, I am referring to that round ring looking thing around the clips (27.38 in your video). I have never seen that on any ST and I looked it up on honda parts diagram and I don't see it there. Did you add those or do you happen to have a part number?
@@MRMRS2wheeler , Here is a very good website. It is difficult to see the part, but it looks like #7 and/or #20 www.motosport.com/oem-parts/honda/2007/st1300/upper-cowl
Hello Steve, sorry for the delay responding, you have a good eye for noticing the RAM mount. My bike already came with the heli bar risers that come with the center BMW style socket charger and then there is a threaded screw hole just below that to screw in the RAM mount ball joint. Once the ball knuckle is in there then the RAM attaches. Here's a link to my Google photo cloud. photos.app.goo.gl/ShyyQ8yTnKJ1hTTc8 I hope you're able to find what you need. Have a great weekend. 🤙🏍️
Hello Robert. Thank you for watching. Here is the link of the JUNK LED Bulbs that I bought. This is the link of the bad bulbs: www.amazon.com/gp/product/B079HSSNN8/ref=ppx_yo_dt_b_asin_title_o07_s00?ie=UTF8&psc=1 And here is the link of my 1 STAR Review. www.amazon.com/gp/customer-reviews/R1DKVHD9ORDRL8/ref=cm_cr_othr_d_rvw_ttl?ie=UTF8&ASIN=B079HSSNN8 Hope all is well and your LED bulbs are really good ones :>)
Hello Candham, thank you for watching ❤️🏍️ these are the LED bulbs that I bought this time around. I'm keeping my fingers crossed these will last for many many years. I noticed these definitely have high quality. The link is below this description: MAXGTRS 194 LED Light Bulb 3000k Amber 168 2825 W5W T10 Wedge 18-SMD 3014 Chipsets LED a.co/d/bhmetgp
Ah, this is no fun. I go in from the bottom. Very very tight but doable. I only remove the small wind deflector on the fork. 2 screws. Then I just can reach it with 2 fingers and that is enough because I pull on the cords lol. One of my bulbs also fell. I pulled it down and out from below(main H4 headlight hole) with double sided tape on a small inspection mirror.
Hello Anders,, thank you for the valuable information and thank you for watching.😎. The last time I did this I was really upset because the factory bulb fell way down in the headlight assembly and there was no way to get to it or reach it even with wire. I spent I think around 8 or 10 hours taking everything apart and then removing the headlight assembly and shaking the bulb out which took forever to do. Thanks again for watching and hopefully this time these LED bulbs will last for many many years trouble free ❤️🤙🏍️
Hello Patrick. 🙋♂🙋♂ Thank you for watching. Please upload a video or provide "us" link showing a 10-minute job when replacing the 194 park bulb. Start the video at 9:56. See what's involved for just the right side 194 bulb with "STRAIGHT" access of the "BULB" grommet". The issue is the rubber grommet the bulb is pushed into. ST owners are victims of these bulbs falling inside the headlight assembly during replacement. It is "IMPOSSIBLE" to contortion your fingers and hand to replace the tiny 194 bulbs without anything removed (I would have done that). However, the "headlight bulbs" are easy to replace by just turning the steering wheel AND the one H4 bulb could be replaced in 2 minutes with a regular bulb). If you can replace both 194 bulbs without removing anything, PLEASE share a video link or a TH-cam link. I/we have yet to see evidence that the 194 bulb in the rubber grommet can be replaced quickly. Thank you ❤❤🤙🤙🏍🏍
Must say that changing light bulbs in the st1300 is not arranged very clever from Honda. So much work to get to a place that must be much more accessible. Imagine your light bulbs burn just while you are driving at night, what are you suppose to do? I am sure there must be another simpler way getting there.
Hello and thank you for watching. Honda did not make it very easy to replace bulbs. However here's something to consider, you have 2 headlight bulbs and 2 high beam bulbs. The good news is both will not burn out at the “exact same time”. You will still have the other bulb working. To replace the headlight bulbs you can reach in without taking everything apart to replace the low beam/high beam bulbs. If you turn your steering wheel left and right, with a flashlight you can reach in there (if your hands are not too big) and replace those 2 bulbs. However the park 194 bulbs inside of the headlight assembly, as seen on the video are impossible to replace unless you take everything apart similar to what I did in the video. Once you replace all the bulbs with “Quality” LED bulbs, then you should be OK for many years without having to replace the bulbs again. Have a wonderful week. ❤️🤙🏍️
You went through entirely too much just to change your headlights and them two smaller ones. I change mine with no problem without having to remove the entire front end and the windshield.
Thank you for watching 🙋♂️. The headlight bulbs were not changed, just both 194 peanut bulbs were replaced. Start the video at 9:56. Watch what's involved for just the right side 194 bulb with "straight access of the grommet". The issue is the rubber grommet the bulb is pushed into. ST owners are victims of these bulbs fall inside the headlight assembly during replacement. It is "IMPOSSIBLE" to contortion your fingers and hand to replace the tiny 194 bulbs without anything removed. (However the headlight bulbs are easy to replace by just truing the steering wheel.) If you can replace both 194 bulbs without removing anything, or less than 1.5 hours, please share a video link. Thank you, 🤙🏍️
bonjour l ami il y a plus simple pour changer c est ampoules je demonte les deux cache noir en plastis de chaque coter du radiateur d eau et je passe ma main par derriere et si l ampoule tombe je me suis fabriquer une tige avec un aimant et c est plus facile pour l attraperet une astuce metter un peu de lubrifiant silicone sur les douille en caoutchouc sa sera plus facile a retirer et une autre chose penser a retenir vos coque de retroviseur avec un petit filin ou colrindg sa vous evitera de les perdre sur l autoroute si jamais les fil electrique ce casse bonne route et V motard
Hello Jean pierre, thank you for that excellent information 🤙🏍️.. It is definitely a very tricky situation. I have learned my lesson to add some silicone thank you for that recommendation. It will be a lot easier to slide the rubber plug out later. Thank you again and have a wonderful weekend ❤️🤙🏍️
Thank you for watching. Please upload a video or provide a link showing a 2-minute job when replacing the 194 park bulb. Start the video at 9:56. See what's involved for just the right side 194 bulb with "STRAIGHT" access of the "BULB" grommet". The issue is the rubber grommet the bulb is pushed into. ST owners are victims of these bulbs falling inside the headlight assembly during replacement. It is "IMPOSSIBLE" to contortion your fingers and hand to replace the tiny 194 bulbs without anything removed. However, the headlight bulbs are easy to replace by just turning the steering wheel AND the one H4 bulb could be replaced in 2 minutes with a regular bulb). If you can replace both 194 bulbs without removing anything in less than 1.5 hours, please share a video link or the TH-cam link. Thank you, 🤙🏍
@@MotoTouringWorldWide next time I change one I will. This is is the method I use as I've changed from normal to LED and like yourself the LEDs failed and therefore change them a couple of times, admittedlythey're not the best design. I take off the mirror and then literally reach up from underneath. If you struggle remove the inner black fairing along the top where it joins to the coloured fairing but this adds to the time. I squeeze and pull the plug so the bulb is retained. Through the hole which is left from when the mirror housing is removed I push the bulb through this hole and replace the bulb. Then from underneath offer it back into the headlight whilst looking at from the outside of the headlight. Replace mirror job done. Equally I dont have an issue with the headlight bulb either. Having worked on military vehicles and construction equipment for over 35 years I try not to tear down too far if I can help it.
@@malkauczok66 Fast forward through those 10 minutes,,, "IF" you're lucky enough your peanut bulb does NOT fall into the headlight assembly then you're one of the "VERY FEW" not having deal with this nightmare and awful design, and work and time involved,,, , however we have learned since the video to grab a Shop-Vac and a tiny vacuum hose and suck the bulb out. If you have a chance, record your experience with this LITTLE 💡 and post on TH-cam. I'm sure my video will save you a nightmare!! GOOD LUCK 🤙🤞🤞🤞🤞🤞🤞🤞🤞
Jesus dude, you don't have to take everything apart, just pull out the control panel and you solve everything in 15 minutes. There is no need to disassemble everything, especially not the front windshield. There are many easier methods than yours. 😂
Thank you for watching 🙋♂️🤙. There is no way to get to the 194 bulb and no way to twist it out without the threat of the bulb falling inside the headlight assembly. You MUST HAVE "direct" "frontal" access to the rubber bulb grommet. I would "LOVE" to see it done in 15 minutes. Please provide us a video of this bulb being replaced in 15 minutes (via the Google Cloud link of the video or upload your video to TH-cam). Even if you get it done in less than an hour, that would be impressive. When you do provide a video, no cheating, no editing, and no pre-prep work, before starting the video. (2007 or new Honda ST1300). Good luck ❤️🤙🏍️
Look man, I didn't come here to argue or prove anything, if I said that it can be changed in 15 minutes and in a much easier way, then I stand behind it, why would I lie about it. what you did is useful and it will surely help someone once, but there is no need for all these actions that you do. I guarantee that all this can be done with much less unscrewing of screws and much less work. I know because I've done it at least 25 times since I got the ST1300. just last night I changed all the front bulbs on it..👍🍻
@@SO-ff1hw , hello, and thank you for watching. My apologies for not seeing your questions until now. The bulbs are the 194 peanut bulbs available at any auto parts store. If you want to upgrade to LEDs like my bike, here is the link for the park Bulds inside headlight assembly (as seen in the video): amzn.to/41n8ZP4 Thanks again and good luck, 🤙🤙🏍🏍


ORDERING INFO FOR ALL L.E.D. BULBS FRONT AND REAR:
Front Park Bulds inside headlight assembly (as seen in the video): amzn.to/41n8ZP4
HIGH/LOW Beam H4 LED bulbs inside the headlight assembly: amzn.to/49Sdki7
Front Blinker Switchback LED bulbs: amzn.to/3KRHMOK
Front Blinker Clear Lens assemblies: amzn.to/3MBsxe9
Rear Brake light LED bulb (red): amzn.to/3KRZXUw
Rear Blinker LED bulb (amber/orange): amzn.to/3o4fCr9
BLINKER RELAY (required when replacing blinker bulbs with LED): amzn.to/41iotne
(“As an Amazon Associate I earn a very small commission from qualifying purchases.”)
You can easily replace it without having to loosen anything. I replaced mine in 10 minutes without loosening a screw.
@@patrickdesmedt1029 The video is about replacing the 194 peanut bulb which can NOT be done in 10 minutes. The H4 low/high beam CAN be done in 10 minutes as you mentioned 🤙🤙. Here is the section of the 194 bulb at this starting point: th-cam.com/video/rorWDa1d8I0/w-d-xo.html
Left side angle: th-cam.com/video/rorWDa1d8I0/w-d-xo.html
It CAN NOT be done in 30 minutes or less. I tried reaching in with my hand to access the little bulb from the back. It is absolutely IMPOSSIBLE as some viewers wrote & bragged about. I followed your method but unfortunately, my right 194 peanut bulb fell inside the headlight assembly like yours. Seeing how miserable your experience was, I got a shop vacuum cleaner and attached a long little rubber hose, and sucked my bulb out of the headlight. Your method was working to grab the little bulb out, but use a shop vacuum next time. Thanks for the great video.
Thank you for watching and thank you for the info 🤙🏍️
Doing major maintenance/ inspection on my 2004. Planning to order in a full set of new lamps while the nacelle/ cowl rests itself on my sofa! Glad to have your vid as a reminder, thank you!
Hello Matt. Thank you for watching 🤙. I hope the video helps. I have LED's all around the bike plus the extra blinkers bulbs upfront. You/we own on of the best Sport Touring Bikes out there. Have a great weekend. ❤️🤙🏍️
To help remove the buggered t5 globe, use Small diameter tubing hooked to a vacuum cleaner then poked through into the headlight assembly. Worked for me years ago. 😁
Thank you for watching. WOW! That is the best idea ever. You are a genius!!!! Thank you thank you over and over. ❤️🤙🏍️
@@MotoTouringWorldWide You're welcome mate.. Hope it helps you or the next poor bugger out when it happens.
@@GlideYNRG ,, i should have that about that myself mate 🙋. Simplified . 🤙🏍️
Saab heeft een zelfde systeem maar dan met een steel zodat je hem er recht uit kan trekken in een soort tube , beter over na gedacht in Zweden 😉
loved the dark melodic moonlight sonata when you started to go after the fallen bulb....such a tragic moment building intensity.....your French was most excellent too (and the final bashing with the hammer...f'n great)! thanks for the video.....I have a 2010 ST and I've been thinking about the LED lights for a while.
Hello Michael, sorry for the super late response. I noticed you sent me this message 8 days ago. I'm currently in Malaga Spain on holiday sitting on the couch looking on the coastline and reading your message. You definitely gave me a good laugh this morning 😂 LOL..... . I love your description of the Moonlight sonata, lol. You have no idea how much I edited out my potty mouth and all the "F" bombs and all the swearing ?##@!?€&#@@!! that I did when the bulb fell into headlight assembly. I literally cussed some really bad words for 5 minutes. So there's about 5 minutes of editing that I had to cut out. I love the fact you enjoyed my very special beautiful moment smashing those junk LED bulbs that I originally installed. I highly recommend some good LEDs. Don't get any cheap ones that come in package of 10, those are junk. Just buy 2 good ones and keep your fingers crossed they will last a long long time. Again thanks for watching and have a great weekend. Heading to Salzburg Austria in 2 days. ❤️🤙🏍️
@@MotoTouringWorldWide Hey, no worries! Malaga, Spain sounds way better than Louisville, Kentucky. I've only been to Barcelona (a long time ago). Safe travels to Salzburg!
@@michaelbarryprojects ,, we had a great time in Malaga and we also headed down to Gibraltar, there were 100's of motorcycles everywhere going somewhere. Definitely next time I have to rent a motorcycle. By the way your first initial comment is by far my favorite ❤️🤙🏍️
Great video ! Thanks a lot , I’m in the process of “ refurbishing “ a new to me 04 St that’s been sitting for years , will love to change to LED all around , I was wondering How hard it is to remove the headlight out ? Couldn’t find any videos so far ….other important thing will be finding the best quality LED so I don’t have to go through this any time soon ….
Hello Dan, thank you for watching. You will have a exciting project coming up with your new ride. I'm currently traveling and I will provide you the links for all the bulbs for your ST. I will update the description for the LED links to order. I am currently traveling and I will get all the information for you soon. Have a great day 🤙🏍️
Hello Dan, I added for you in the description all of the LED light bulbs that you will need. I also saw you on Facebook and I will reply to you there also 🤙🏍️
You can easily replace it without having to loosen anything. I replaced mine in 10 minutes without loosening a screw.
This is way to difficult. Did it last week in 1/2 hour with removing the plastic covers beside the fork (3 screws and a couple of plastic buttons) and going in under the front of the bike. You need do do it with a litlle bit of patience and "fingerspitsengefuhl"
Hello JD,, , thank you for watching, thank you for the feedback. 3 years ago when I did it that way the way you mentioned,, I unfortunately was victim to the bulb falling inside the headlight assembly. It was an absolute nightmare the first time and a lot worse than what you saw in this video. I think what I need is someone to make a video and show me how you twist and pull the bulb rubber socket out without it falling into the headlight assembly even few components only removed such as your suggestion (the plastic covers beside the forks which is three screws and plastic buttons). I love your idea, did you see painfully hell I went through twisting and pulling the right side bulb out? It was an absolute pain in the ass even with "straightforward access". "Fingerspitsenfuhk" LOL 🤗😆😆 Thanks again for watching and have a great weekend. ❤️🤙🏍️
Stadslichten zijn van onderaf bereikbaar onzin om halve motor te slopen 😊
Bedankt voor het kijken 🙋♂️. Start de video om 9:56. Kijk wat er bij komt kijken voor alleen de 194-lampen aan de rechterkant met "rechte toegang tot de doorvoertule". Het probleem is de rubberen doorvoertule waar de lamp in wordt geduwd. ST-bezitters zijn het slachtoffer als deze lampen tijdens het vervangen in de koplampunit vallen. Het is "ONMOGELIJK" om uw vingers en hand te verwringen om de kleine 194 lampjes te vervangen zonder dat er iets verwijderd is. (De koplamplampen zijn echter eenvoudig te vervangen door simpelweg aan het stuur te draaien.)
Als u beide 194 lampen kunt vervangen zonder iets te verwijderen, of in minder dan 1,5 uur, deel dan een videolink. Bedankt ❤️🤙🏍️
Alleen het schermpje naast voorvork wat naar het kastje loopt aan beide kanten verwijderen en je kan er van onderen bij
Mee eens, ik zal het proberen, maar de rubberen plug is heel erg moeilijk te verwijderen. Er is toegang aan de voorkant nodig om de rubberen lampplug recht naar buiten te trekken om te voorkomen dat de lamp in de koplampunit valt.
Klopt hoor erg lastig je kan hem wat heen en weer wrikken met een beetje geluk blijft ie in de houder en anders toch maar een waterslamg in de stofzuigerslang tapen en het lampje wegzuigen eigenlijk een kleine actie 😊
jullie breken gans de motor er voor af en je kan ze er zo insteken , ja het is wat wring werk maar op een half uurtje steek ik ze er in zonder iets af te breken.
Hallo 🤙🙋♂️. Bedankt voor het kijken. Upload een video of geef een link waarin een klus van 30 minuten wordt getoond bij het vervangen van de "194 park bulb". Start de video op 9:56. Bekijk wat er allemaal bij komt kijken voor alleen de rechter 194 lamp met "RECHTE" toegang tot de "LAMP" doorvoertule". Het probleem is de rubberen doorvoertule waarin de lamp wordt geduwd. ST-eigenaren zijn het slachtoffer van deze lampen die tijdens het vervangen in de koplampunit vallen. Het is "ONMOGELIJK" om je vingers en hand te verdraaien om de kleine 194 lampen te vervangen zonder iets te verwijderen. De koplamplampen zijn echter "gemakkelijk" te vervangen door gewoon aan het stuur te draaien EN de ene H4-lamp kan in 2 minuten worden vervangen.
Als je beide 194 lampen kunt vervangen zonder iets te verwijderen in minder dan 1,5 uur, deel dan een videolink of de TH-cam-link. Bedankt, ❤️👍🤙🤙🏍️
Hello 🤙🙋♂️. Thank you for watching. Please upload a video or provide a link showing a 30-minute job when replacing the "194 park bulb". Start the video at 9:56. See what's involved for just the right side 194 bulb with "STRAIGHT" access of the "BULB" grommet". The issue is the rubber grommet the bulb is pushed into. ST owners are victims of these bulbs falling inside the headlight assembly during replacement. It is "IMPOSSIBLE" to contortion your fingers and hand to replace the tiny 194 bulbs without anything removed. However, the headlight bulbs are "easy" to replace by just turning the steering wheel AND the one H4 bulb could be replaced in 2 minutes.
If you can replace both 194 bulbs without removing anything in less than 1.5 hours, please share a video link or the TH-cam link. Thank you, ❤️👍🤙🤙🏍️
im sure there’s a way to access from under the bike , once you remove the mud guards or fender liner, there shouldn’t be anything in the way
done it for Kawasaki Concours, Honda Silverwing scooter, Yamaha Majesty
also handgun cleaning kits can clean the lenses, just need to put a vacuum cleaner in there to dry it out good and any dust remaining
you have to do it by touch since you can’t see anything
Hello and thank you for watching. It can not be done from underneath. You would break your arm, fingers, and fingernails trying to remove the rubber plug that is in the housing super tight.... See this starting point: th-cam.com/video/rorWDa1d8I0/w-d-xo.html
Here is another angel: th-cam.com/video/rorWDa1d8I0/w-d-xo.html
This is an important angel on the right side. See how hard it is to remove with straightforward access: th-cam.com/video/rorWDa1d8I0/w-d-xo.html
@@MotoTouringWorldWide someone changed their bulbs from turning the handlebars
Verder naar beneden in de lamp drukken dan met stofzuiger door gat van dimlicht opzuigen 😉makkie
Uitstekend idee. Ik dacht hetzelfde later, toen het te laat was. ❤️🤙🏍️
Ook echt een dom idee en vragen om problemen daar steeklampjes te plaatsen
@@JM-de7yn Ik ben het er helemaal mee eens. Honda heeft een grote fout gemaakt bij het ontwerpen van de "push-in" rubberen plug. Honda had gewoon een eenvoudige plastic fitting voor de lamp moeten maken en links en rechts een deurtje moeten maken achter wat lijkt op de luidsprekerafdekkingen.
Hey, what is clamp that you have around the clips where thr mirror goes into? Is that something you added? My ST did not have those. Maybe that's why they keep falling out.
Hello thank you for watching. Great question. Your Clips are missing if they're not there. See if you can order those clips from the dealership or from a salvaged ST. The trick that I was doing squeezing the clips I do to keep the dowel pins snug. I Wish you success ❤️👍🏍️
@@MotoTouringWorldWide Hey, thanks for the reply. To be clear, I am referring to that round ring looking thing around the clips (27.38 in your video). I have never seen that on any ST and I looked it up on honda parts diagram and I don't see it there. Did you add those or do you happen to have a part number?
@@MRMRS2wheeler , Here is a very good website. It is difficult to see the part, but it looks like #7 and/or #20 www.motosport.com/oem-parts/honda/2007/st1300/upper-cowl
@@MotoTouringWorldWide Thanks brother. Got them ordered.
Can you tell me how you fitted the Ram phone mount to the bars plz
Hello Steve, sorry for the delay responding, you have a good eye for noticing the RAM mount. My bike already came with the heli bar risers that come with the center BMW style socket charger and then there is a threaded screw hole just below that to screw in the RAM mount ball joint. Once the ball knuckle is in there then the RAM attaches. Here's a link to my Google photo cloud. photos.app.goo.gl/ShyyQ8yTnKJ1hTTc8
I hope you're able to find what you need. Have a great weekend. 🤙🏍️
Its much easy if u remove side body cover
Great vid....do you have brand and numbers of the headlight bulbs you replaced 10k ago?
Hello Robert. Thank you for watching. Here is the link of the JUNK LED Bulbs that I bought. This is the link of the bad bulbs: www.amazon.com/gp/product/B079HSSNN8/ref=ppx_yo_dt_b_asin_title_o07_s00?ie=UTF8&psc=1
And here is the link of my 1 STAR Review. www.amazon.com/gp/customer-reviews/R1DKVHD9ORDRL8/ref=cm_cr_othr_d_rvw_ttl?ie=UTF8&ASIN=B079HSSNN8
Hope all is well and your LED bulbs are really good ones :>)
@@MotoTouringWorldWide Lol....wont be getting those leds. The headlight bulbs are still working well? H4 PIA Extreme ECE R37's
So 😔, you didn't want to play my fart back to the world lol 😆
Unfortunately the fart wasn't heard on camera. Even with the volume full 100%. The audience would have never heard it anyway. ❤️🤙🏍️
Can you send the numbers and where you got the led bulbs for all your lights pls?
Hello Candham, thank you for watching ❤️🏍️ these are the LED bulbs that I bought this time around. I'm keeping my fingers crossed these will last for many many years. I noticed these definitely have high quality. The link is below this description: MAXGTRS 194 LED Light Bulb 3000k Amber 168 2825 W5W T10 Wedge 18-SMD 3014 Chipsets LED a.co/d/bhmetgp
Ah, this is no fun.
I go in from the bottom. Very very tight but doable. I only remove the small wind deflector on the fork. 2 screws. Then I just can reach it with 2 fingers and that is enough because I pull on the cords lol.
One of my bulbs also fell. I pulled it down and out from below(main H4 headlight hole) with double sided tape on a small inspection mirror.
Hello Anders,, thank you for the valuable information and thank you for watching.😎. The last time I did this I was really upset because the factory bulb fell way down in the headlight assembly and there was no way to get to it or reach it even with wire. I spent I think around 8 or 10 hours taking everything apart and then removing the headlight assembly and shaking the bulb out which took forever to do. Thanks again for watching and hopefully this time these LED bulbs will last for many many years trouble free ❤️🤙🏍️
You can easily replace it without having to loosen anything. I replaced mine in 10 minutes without loosening a screw.
Hello Patrick. 🙋♂🙋♂ Thank you for watching. Please upload a video or provide "us" link showing a 10-minute job when replacing the 194 park bulb. Start the video at 9:56. See what's involved for just the right side 194 bulb with "STRAIGHT" access of the "BULB" grommet". The issue is the rubber grommet the bulb is pushed into. ST owners are victims of these bulbs falling inside the headlight assembly during replacement. It is "IMPOSSIBLE" to contortion your fingers and hand to replace the tiny 194 bulbs without anything removed (I would have done that). However, the "headlight bulbs" are easy to replace by just turning the steering wheel AND the one H4 bulb could be replaced in 2 minutes with a regular bulb).
If you can replace both 194 bulbs without removing anything, PLEASE share a video link or a TH-cam link. I/we have yet to see evidence that the 194 bulb in the rubber grommet can be replaced quickly. Thank you ❤❤🤙🤙🏍🏍
Must say that changing light bulbs in the st1300 is not arranged very clever from Honda. So much work to get to a place that must be much more accessible. Imagine your light bulbs burn just while you are driving at night, what are you suppose to do? I am sure there must be another simpler way getting there.
Hello and thank you for watching. Honda did not make it very easy to replace bulbs. However here's something to consider, you have 2 headlight bulbs and 2 high beam bulbs. The good news is both will not burn out at the “exact same time”. You will still have the other bulb working. To replace the headlight bulbs you can reach in without taking everything apart to replace the low beam/high beam bulbs. If you turn your steering wheel left and right, with a flashlight you can reach in there (if your hands are not too big) and replace those 2 bulbs. However the park 194 bulbs inside of the headlight assembly, as seen on the video are impossible to replace unless you take everything apart similar to what I did in the video. Once you replace all the bulbs with “Quality” LED bulbs, then you should be OK for many years without having to replace the bulbs again. Have a wonderful week. ❤️🤙🏍️
You went through entirely too much just to change your headlights and them two smaller ones. I change mine with no problem without having to remove the entire front end and the windshield.
Thank you for watching 🙋♂️. The headlight bulbs were not changed, just both 194 peanut bulbs were replaced. Start the video at 9:56. Watch what's involved for just the right side 194 bulb with "straight access of the grommet". The issue is the rubber grommet the bulb is pushed into. ST owners are victims of these bulbs fall inside the headlight assembly during replacement. It is "IMPOSSIBLE" to contortion your fingers and hand to replace the tiny 194 bulbs without anything removed. (However the headlight bulbs are easy to replace by just truing the steering wheel.)
If you can replace both 194 bulbs without removing anything, or less than 1.5 hours, please share a video link. Thank you, 🤙🏍️
bonjour l ami il y a plus simple pour changer c est ampoules je demonte les deux cache noir en plastis de chaque coter du radiateur d eau et je passe ma main par derriere et si l ampoule tombe je me suis fabriquer une tige avec un aimant et c est plus facile pour l attraperet une astuce metter un peu de lubrifiant silicone sur les douille en caoutchouc sa sera plus facile a retirer et une autre chose penser a retenir vos coque de retroviseur avec un petit filin ou colrindg sa vous evitera de les perdre sur l autoroute si jamais les fil electrique ce casse bonne route et V motard
Hello Jean pierre, thank you for that excellent information 🤙🏍️.. It is definitely a very tricky situation. I have learned my lesson to add some silicone thank you for that recommendation. It will be a lot easier to slide the rubber plug out later. Thank you again and have a wonderful weekend ❤️🤙🏍️
@@MotoTouringWorldWide MERCI BON WEE KEND ET CONTINUER VOS VIDEO INTERRESANTE
Its a 2 minute job if you reach up from underneath
Thank you for watching. Please upload a video or provide a link showing a 2-minute job when replacing the 194 park bulb. Start the video at 9:56. See what's involved for just the right side 194 bulb with "STRAIGHT" access of the "BULB" grommet". The issue is the rubber grommet the bulb is pushed into. ST owners are victims of these bulbs falling inside the headlight assembly during replacement. It is "IMPOSSIBLE" to contortion your fingers and hand to replace the tiny 194 bulbs without anything removed. However, the headlight bulbs are easy to replace by just turning the steering wheel AND the one H4 bulb could be replaced in 2 minutes with a regular bulb).
If you can replace both 194 bulbs without removing anything in less than 1.5 hours, please share a video link or the TH-cam link. Thank you, 🤙🏍
@@MotoTouringWorldWide next time I change one I will. This is is the method I use as I've changed from normal to LED and like yourself the LEDs failed and therefore change them a couple of times, admittedlythey're not the best design. I take off the mirror and then literally reach up from underneath. If you struggle remove the inner black fairing along the top where it joins to the coloured fairing but this adds to the time. I squeeze and pull the plug so the bulb is retained. Through the hole which is left from when the mirror housing is removed I push the bulb through this hole and replace the bulb. Then from underneath offer it back into the headlight whilst looking at from the outside of the headlight. Replace mirror job done. Equally I dont have an issue with the headlight bulb either. Having worked on military vehicles and construction equipment for over 35 years I try not to tear down too far if I can help it.
So..... this video is how NOT to change the bulb..... never thought i would watch 10 minutes of trying to get a bulb out......
@@malkauczok66 Fast forward through those 10 minutes,,, "IF" you're lucky enough your peanut bulb does NOT fall into the headlight assembly then you're one of the "VERY FEW" not having deal with this nightmare and awful design, and work and time involved,,, , however we have learned since the video to grab a Shop-Vac and a tiny vacuum hose and suck the bulb out. If you have a chance, record your experience with this LITTLE 💡 and post on TH-cam. I'm sure my video will save you a nightmare!! GOOD LUCK 🤙🤞🤞🤞🤞🤞🤞🤞🤞
Jesus dude, you don't have to take everything apart, just pull out the control panel and you solve everything in 15 minutes. There is no need to disassemble everything, especially not the front windshield. There are many easier methods than yours. 😂
Thank you for watching 🙋♂️🤙. There is no way to get to the 194 bulb and no way to twist it out without the threat of the bulb falling inside the headlight assembly. You MUST HAVE "direct" "frontal" access to the rubber bulb grommet. I would "LOVE" to see it done in 15 minutes. Please provide us a video of this bulb being replaced in 15 minutes (via the Google Cloud link of the video or upload your video to TH-cam). Even if you get it done in less than an hour, that would be impressive. When you do provide a video, no cheating, no editing, and no pre-prep work, before starting the video. (2007 or new Honda ST1300). Good luck ❤️🤙🏍️
Look man, I didn't come here to argue or prove anything, if I said that it can be changed in 15 minutes and in a much easier way, then I stand behind it, why would I lie about it. what you did is useful and it will surely help someone once, but there is no need for all these actions that you do. I guarantee that all this can be done with much less unscrewing of screws and much less work. I know because I've done it at least 25 times since I got the ST1300. just last night I changed all the front bulbs on it..👍🍻
@@canesvenatici7727what sizes were those 4 bulbs? Able to share?
@@SO-ff1hw , hello, and thank you for watching. My apologies for not seeing your questions until now. The bulbs are the 194 peanut bulbs available at any auto parts store. If you want to upgrade to LEDs like my bike, here is the link for the park Bulds inside headlight assembly (as seen in the video): amzn.to/41n8ZP4
Thanks again and good luck, 🤙🤙🏍🏍