Great video! I’m 70 years old and this reminds me of the times that I was my dad’s helper when he performed maintenance on the family vehicles. He also taught me patience. When the going gets tough, walk away. Cool down and go over everything in a methodical way. Eventually the “light bulb” will come on and you will realize your error and correct it. No harm, no foul. We need more automotive machine shops and repairers like you - honest and truthful!
Probably one of the hardest things to overcome is that frustration. Walking away from the job to collect oneself is very hard to do. I try my best to do so, but occasionally I become too stubborn for my own damn good. But, I'm learning. That step back to recollect is truly beneficial
@@maddawgnoll I am an elevator mechanic. I tell the young guys and have to remind myself when we are troubleshooting a couple of hours to walk away. Fixed more jobs 5 minutes after coming back than than I could count.
When I was young and didn't know any better, I pressed them out, pressed them in, bent the yokes and broke my drive shaft in about 2 weeks, bought a used one and replaced it. I've come a long way, and I give a lot of credit to the old timers who still take the time to show the willing how to do it right the first time❤
Guys who are trying to learn the trade of. fixing cars should watch ALL of Dave's videos. He explains things very well. I had to teach my self how to do U-joints. No one taught this at the automotive school that I attended.
@@Rscmgw23 Google not work? A search for Tiger Tool would have revealed to you that it's a company who manufactures and offers tools. One of which removes universal joints with ease. The real bonus is they make another tool that presses them as well, without having to use a vise or calling on another set of hands, taking those hands away from making money on another customer's vehicle. A heat gun melts the polymer out of the newer OEM joints without running the risk of annealing the yoke as is the case with a cutting torch. He's teaching alright but the level of knowledge he shares falls short. Seeing another one of his videos where he's doing a 1 ton RAM front pinion bearing on a 14-9.25 AAM axle is another example where he didn't do a proper install when he set the pinion preload torque to 70 in/lbs. when the max is 25 in/lbs.. Cheers!
First time I did u-joints I dropped a couple of needle bearings when I used a hammer to drive in the joint. Now I use the vice for all of it. Love all the videos.
I've had to replace U-joints many times over the yrs being a tech and this is the best tutorial I've ever seen 👍. Unfortunately every shop I've worked at never had the luxury of a blast cabinet, and some didn't even provide a torch setup.
Damn... This man is worth his weight in Gold. His knowledge and techniques as well as patience are all next level. I wish we could all have leaders like this in all of our lives.
@@user-uj3zk2cx8tyes it was pretty simple if you've done it before but several people are looking for leaders now because they aren't skilled at nothing that's why so many join cults and worship false prophets which this mechanic is not by repairing a U- joint
@@user-uj3zk2cx8t Don't think anyone is worshipping him, they just appreciate a good, well-explained procedure. BTW, you misspelled vise, or more exactly you used the wrong word. Vice is something like a bad habit, smoking, drinking, etc. A vise is the tool he was using to compress with.
Just to add. Mark the slip yoke so it goes back in same line as it came off to keep it in balance. I was taught to use a wheel cylinder hone to clean up the cup bores. We always pushed the cup in further so u-joint got better grab on other side cup when pressing it in. Great video.
@WhiteKnight5775 Ya, I push the cup in further too. I find it makes it so much easier. I use the Snap-on balljoint press kit to do them. Most shops I've been at either haven't had a good vice or had it attached to a tiny table against a wall.
You're a great teacher. I worked as a Transmission R & R tech and I can say it can be a tricky operation. Great work. Great video too man. You don't talk like an info-mercial salesman. I want to start a Firestone super center here in Vermont. It's tough to find 100% Auto Service like they provide.
Thanks, Dave. Very similar to how I was taught some 55 years ago, except for the heat. That you applied the pressure with the hammer to the cross, or spider, was how I was taught except we didn't have such air tools in the workshop then. May I suggest that you mark the slip yoke and the shaft so they go back in the same line. I'm retired now but I recently came across a you tube series by Professor John Kelly of Weber University Automotive Section on U joints. It was very enlightening. went into measuring axial play and the potential for that to cause vibration. Very well worth a look, particularly sections about 5, 6 and 7.
I remember when i was young mechanic, 16 or 17, i bought a 54 chev 3/4 ton and i was having a hard time changimg the u joints and i asked my father for help and with a hammer and old piece of railroadtrack and in less than 5 minutes he had them changed, pissed me off because i thought i should be able to do it as good as him but that was a good learning day lol. Thats a different job than whats' Dave is doing in the video. Nice to see father/son videos also
I watched the professor at Weber university show the whole segment on U-Joints and it was amazing. There is now a new type of tool to replace U-joints safely From Tiger tool or Lisle tool. It is worth every dime. Come in 3 sizes depending on the size of the joints. But old school is the best way to learn.. Thanks Dave.
You took me down a personal history road I did that job on a small (1970s) British car. Since the joints already came with C-clips I just used the bench vise my dad had to push one end out using≠ size sockets. I remember how tricky the needle bearings were, but I did not screw up. I did not know modern cars still had the room for installing u joints with c clips Dad had a bit of tools; he was a milling machine operator (miss u 😢) Really nice job
I use a side grinder and cut the shafts. A socket and punch out the caps. Clean it up real good and then use a large c clamp to press and do the same job. This however is the best method for shop replacements I've witnessed. Good job!
Dave, I'll disagree with you on the greasable joint preference, and especially to one with a zerk in a cap as opposed to in the cross. though I would love to hear your response. My reasoning is because I regularly see factory sealed joints hit well over 200K KM on work trucks up here in central BC, Canada, but greasable aftermarket replacements from Moog, SKF, etc. are usually doing very well if they can beat 60K. Compare a factory Spicer joint on a Dodge front axle etc. with a Moog, and it's easy to see that the Moog seals are trash in comparison - and they have to be, to allow grease to purge out. And once those seals have opened to purge, they let water in more easily also, so they NEED to be re-greased very regularly, whereas a sealed joint needs no attention for years. For highway trucks, probably not such an issue, but a large amount of my workload is 1 ton service trucks that live very hard lives coated in mud down bush roads, on ranches, in pit mines, and such, and the aftermarket joints just don't hold up. Having said all this, I've only been doing this for a little over a dozen years in comparison to your career, so I'm always open to opinions.
I agree with you i think moogs are trash i had factory spicer on mine it was great. I ended up putting a new rear end on my truck but long story short my pinion flange was a 4 bolt and the new rear end was 6 bolt so i found a u joint conversion yoke for 6 bolt and had to take the u joint of but the conversion piece added a inch and a half to my driveshaft so it was a waist of time and i ended up just changing the pinion flange to a 4 bolt. I tried out a moog u joint it was garbage so i needed my truck to drive to work and i couldn't get a spicer u joint in time so i did end up getting a Napa u joint that has worked so far but i learned just because its greasable doesn't mean its good id go with the factory spicer any day of the week.
My dodge original non grrasable only lasted 50 Thousand Ks Fitted grrasable using Wynn's grease now have 307thousand On the clock Maybe service maintenance is key
After watching your vedios i reckon havnt studied anything in 2 years of my diploma of automotive. Iam learning from the beginning while watching your vedios .. thanks for that.
Great to watch the right way to install u-joints and that is one nice vice. I was taught to always mark the yoke and put it back the same way as they are balanced as a unit.
Watching these videos is like food for my soul. As a technician who prides my self on quality workman ship I can't stop watching. Great example Dave is for the industry, especially in today's times.
I am doing all three on my RAM 2-piece driveshaft now. I got the Moog grease-able joints. I initially replaced the carrier bearing only, because it was shot. U-joints seemed OK. But after installing the shaft in the truck, there was bad vibration at 50 MPH and up. So, replacing all the U-joints now. The factory U-joints were a bear to remove. All the clips broke and were tough to remove. Used BIG NASTY and a chisel tool to break the clips into small pieces. I have a DAKE 25 Ton press, but I was worried about bending the yokes. The driveshaft is 20+ years old and has plenty of rust. I ended up cutting the U-joints out with a 3" cut off wheel and my die grinder. Then I pressed out the cups. Cleaned and de-burred the yokes and basically did what Dave did in his video here. Thanks Dave!
Nice vid, but... You forgot to mention to rock the new joint on a flat surface checking to see if one set of cups are bigger than the other (Yes, there are some like that). Also, when you're finished and checking the new joint for smooth operation. In the event the joint is tight (you'll feel it), you need to relieve some stress that's held in the yoke. I keep an old chisel that's been ground flat and strike the ears of the yoke where the joint is tight. Works like a charm. Finally, I'd avoid heating the ears of the yoke to the point where they're glowing. You're changing the grain structure of the steel at that point.
Use calipers to check size. More exact, if you don't know the vehicle you're working on. I also would be cutting the old one out. Then cleaning rust lol.
Scotty Kilmer watches Dave's channel to learn how to do the job right. When I'm done watching Dave's videos, I don't have a headache. If I watch a Scotty video, I need an aspirin afterwards.
I love watching daves videos on youtube and tik tok. He is such a good mechanic and boss! I wish i could work for him. Very well spoken and does such a good job explaining. Seems like he has alot of patience too. Love the videos!!
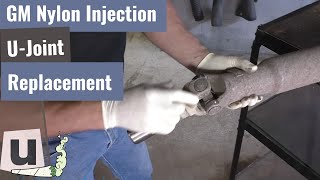
I remember heating up the GM Ujoints that had the nylon the held the caps in. Always made a nice loud POP and you made sure no one was in line of the cap as they shot out of the yoke
This is a really great educational video. I'm retired now, but over the years I've busted many a knuckle changing those without a vice or press. And sometimes on the roadside too, and in the middle of the night.
What you guys do is infinitely interesting. I’ve never been around this stuff and I appreciate the work that you guys do. New subscriber! Please keep the education coming!
Congratulations on your new TV show coming up. It's nice to see hard work paying off. Be watching all of your new shows. Thanks for putting wholesome back on TV!
Great video on how to! Also, good details! I've changed several u joints. The worst one was on a pick up all the needle bearings were gone, and a third of the trunnions were worn off.
'An element of risk...' yeah I can relate to that, a familiar feeling as I've replaced many universal joints on my British Clasics over the last 45 years. Great video!
So many new mechanics don't even know how to change joints anymore. At the machine shop i work at, we use a cut off disc, does well enough to remove the old one and we use the same method of putting a new joint in, with a socket and vice.
Yes,I did that to a 2 piece tailshaft for my car last week, they're a bit more difficult to do by yourself although I found out that I can rest the rear shaft in the vice while I press the cups into the yoke while moving the trunnion around. I also mark the shaft even on a tailshaft which has a universal joint on both ends before pulling it apart,I had to mark the mounting ears on mine because both halves are phased 180° apart, it's so that the shaft won't likely vibrate in either case. I wrap the caps with electrical tape because I like to keep each cap on their trunnion that they came off originally. I recently had a Guibo which looked alright cause vibration (it was warped) in second gear from the time that the Guibo was brand new so I slipped a spare used Guibo into my car last night & early this morning I drove it & the vibration went away !
When Dave performs his magic tricks it educates his audience by teaching them the complexity involved in learning to become a wizard. Not a job, a highly involved profession. Dave clearly demonstrates his commitment to the highest level of professionalism.
Good info. My only gripe was the vise, I was told to never put a driveshaft or yoke in a vise. It might have been an abundance of caution as I was a beginner, but I have always followed that advice.
I bought a 6 ton press from harbor freight, it has paidfor itself numerous times already. It paid for itself on the first job I used it on, replacing every single suspension bushing on my son's 95 Del sol. I would recommend one for any shadetree mechanic that has the space for it. Have a great day.@@crackpotfox
Good job! I do my farm equipment joints the same way except I add a little high quality grease in each cup to insure the needle bearings stay in place. Really like your vids!
Great tutorial.....Most times i just use the vise to hold it and use a ball joint press to do the work. Have never had a sand blaster or anything, just some emery cloth...
Thanks for the step by step. In my younger days I broke the yoke on a big Buick. The junkyard had all you can carry for $25. No guarantee. I carried 3. The ones I didn't use we threw in the dumpster. The part going into the transmission was about one inch shorter but works. I asked if it didn't work could I trade it for another " no refund" so I carried three
I like how you did one completely in first, when I do u-joints I’ve always done both at the same time and it’s hard to get the shaft in the needles perfect, can’t wait to try it next time
2:00 Keep in mind before you remove the cups, check on the inside (where the cross is) as there may be a c-clip keeping the cup from being pushed out (not where the clip was he showed later).
Thanks - son = a thousand & 87 Dollars ! No foolin’ - you fellers stay good ! Team work is Good /fun work ! You are living your lives ! I would have enjoyed working your shop sir !
🔥usually heat till plastic comes out those factory holes, looker pins in there. Usually Center push mark in shaft and Knuckle for reassembly, had them 1/2 rotation out and bad vibration 🔥👊🔥🏍🔨⚙️really enjoy your videos and how killer your shop Is
You made that look so difficult. Made me second guess my whole life and reality cause i know whenever i replaced my u joints, it was very simple and easy. Only hard part was lying on my back in the driveway for an hour.
Using a cold chisel, mark the mating inney and outey yoke parts. One strike on each side of one pair, two strikes on the other pair on the other U-joint. Heat up slightly the end tube of grease gun, torch, sun or oven and inject warm grease into Zerk to reveal at seals while still on the bench while working the joint. Purge the air in the internal grease passages. Always grease while U-joists are warm from driving and after mud-stuck. Grease joints and chain saw bar tips while hot/warm before storage. Push out the water and grit so it doesn't sit in there and rust then bind when cold start up.
Really like what Dave did here The air hammer w heat has way less chance of bending ears as compared to socket and hammer Just bought tiger tool press it grabs ears same side as cup should be good But it does push on opposite ear when removing
That's a neoprene retaining clip that injected from the factory if you had heated it more it would've squirmed out of those holes and they would come out easy as pie
Looks good, and should work for most drive shafts. The only bit I will add is to take the time to tap those clips into the grooves just to be sure they are fully seated. Also, for longer multi-axle drivelines is to line up all grease zerks front to rear to make it easy to apply grease
Maybe nitpicking here, but I was taught to use a softer metal to push on any bearing and NEVER to hammer when installing a bearing. The jaws of that vice look HARD and may damage the surface you’re pushing on. However, Dave has so much expertise and experience, I’m willing to give him a pass on this assembly. He has achieved the desired result with a finely installed U-joint !
I can hear the quality of that device when you tap it with the hammer. It has a nice chaim to it anyway, your tutorial is very useful. It’s a six in a row,Jim from Kennerdell, Pennsylvania
Did these the other night with some PB Blaster, a socket, and a hammer right in the dirt beside the truck and it worked beautifully. Squirt it with the PB to free thing up, lay it in the dirt and kneel over it, and knock it out with the socket and hammer. The entire driveshaft was supported by the dirt while the old u-joint just punched into the dirt as it came out. It was fast, easy, and didn’t require any fancy tools.
Love on gm how they filled the ridge of the cup with injected plastic to hold them in. You can hear the plastic bubble when they get hot. You can always tell the ones with plastic because they have a hole in the side.
For getting them back in, I use a C-clamp and sockets. I used a hammer at first but that knocked the needle bearings out of place and I crushed them until they broke. I used a needle from the old U-joint. I learned to keep some old needles around as well.
I have a lot of problems with heating hardened steel. I agree with the last guy about sockets. There was a period where there were some kind of hardened nylon seals used that were better melted off before removal. I always will spend more for a serviceable ( with grease ports) on u joints as well as any front end parts. I've even added grease points to parts.
Dave, Love your channel. I am 71 years old. Been in the business for about 50 years. Didn't know you could heat the flanges on a drive shaft. I thought it took the temper out of them. Very interesting! One question, a SNAP-ON socket on a vice? you are a better man than me!
The heat is to melt the nylon lock ring that is injected at the factory. Dave had evidently melted it out before making the video, you can see the groove on the cups and inside the yoke ears where the nylon was.
He just annealed the steel (softened the heat treat) on the yoke with that torch. When I was younger, I replaced numerous u joints - on Plymouth, Ford, and a Buick, never used a torch. I have never, and would never, use a torch on any torque tube, nor any hardened material, unless I purposely wanted to destroy it. Very stupid, perhaps even dangerous.
was told by driveshaft shop only heat the ujoint caps it will soften it enough to come out. Any heat on actual yoke can cause the ears to come in just from the heat
I always heated the yoke myself never had a issue until recently had one spring in but who knows it was a very old driveshaft with 20 years in the rust belt so maybe it’s not related. Just what they told me at the driveshaft shop wether it’s right or wrong idk . I did try there method last time I did one worked also. Guess more then one way to skin a cat


Great video! I’m 70 years old and this reminds me of the times that I was my dad’s helper when he performed maintenance on the family vehicles. He also taught me patience. When the going gets tough, walk away. Cool down and go over everything in a methodical way. Eventually the “light bulb” will come on and you will realize your error and correct it. No harm, no foul. We need more automotive machine shops and repairers like you - honest and truthful!
I like it good show I am a retired mechanic
😊😊
Probably one of the hardest things to overcome is that frustration. Walking away from the job to collect oneself is very hard to do. I try my best to do so, but occasionally I become too stubborn for my own damn good. But, I'm learning. That step back to recollect is truly beneficial
I was my dad's helper too. Where I learned the art of rebuilding carburetors.
@@maddawgnoll
I am an elevator mechanic.
I tell the young guys and have to remind myself when we are troubleshooting a couple of hours to walk away.
Fixed more jobs 5 minutes after coming back than than I could count.
Thanks for the advice. I struggle with not taking a step back. Going to now more often. Thanks!
When I was young and didn't know any better, I pressed them out, pressed them in, bent the yokes and broke my drive shaft in about 2 weeks, bought a used one and replaced it. I've come a long way, and I give a lot of credit to the old timers who still take the time to show the willing how to do it right the first time❤
Well said:)
Really easy to fuck them up with a press. I don't know why people say to use them. Hammer and sockets or this way is superior. Presses suck
Guys who are trying to learn the trade of. fixing cars should watch ALL of Dave's videos. He explains things very well. I had to teach my self how to do U-joints. No one taught this at the automotive school that I attended.
Huh ? Really - dang . That’s not right / teaching is a skill in itself !
Dave you are an awesome teacher. Straight to the point and clearly demonstrated. I just found your channel and it’s becoming one of my favorites.
Tiger Tool has entered the chat...😑
@@strykerentllc… that one went right over my head. What is a tiger tool?
@@Rscmgw23 Google not work? A search for Tiger Tool would have revealed to you that it's a company who manufactures and offers tools. One of which removes universal joints with ease. The real bonus is they make another tool that presses them as well, without having to use a vise or calling on another set of hands, taking those hands away from making money on another customer's vehicle. A heat gun melts the polymer out of the newer OEM joints without running the risk of annealing the yoke as is the case with a cutting torch.
He's teaching alright but the level of knowledge he shares falls short. Seeing another one of his videos where he's doing a 1 ton RAM front pinion bearing on a 14-9.25 AAM axle is another example where he didn't do a proper install when he set the pinion preload torque to 70 in/lbs. when the max is 25 in/lbs..
Cheers!
First time I did u-joints I dropped a couple of needle bearings when I used a hammer to drive in the joint. Now I use the vice for all of it.
Love all the videos.
I've had to replace U-joints many times over the yrs being a tech and this is the best tutorial I've ever seen 👍. Unfortunately every shop I've worked at never had the luxury of a blast cabinet, and some didn't even provide a torch setup.
Damn... This man is worth his weight in Gold. His knowledge and techniques as well as patience are all next level. I wish we could all have leaders like this in all of our lives.
He's using a vice to change ujoints. Not reinventing the wheel. You people will worship anyone
@@user-uj3zk2cx8t Yes, but he is still doing it quite good.
@@user-uj3zk2cx8tyes it was pretty simple if you've done it before but several people are looking for leaders now because they aren't skilled at nothing that's why so many join cults and worship false prophets which this mechanic is not by repairing a U- joint
Most of the time so never had a helper. It makes an immense difference in ease and time of installing.
Fergieman
@@user-uj3zk2cx8t Don't think anyone is worshipping him, they just appreciate a good, well-explained procedure. BTW, you misspelled vise, or more exactly you used the wrong word. Vice is something like a bad habit, smoking, drinking, etc. A vise is the tool he was using to compress with.
Just to add. Mark the slip yoke so it goes back in same line as it came off to keep it in balance. I was taught to use a wheel cylinder hone to clean up the cup bores. We always pushed the cup in further so u-joint got better grab on other side cup when pressing it in. Great video.
@WhiteKnight5775 Ya, I push the cup in further too. I find it makes it so much easier. I use the Snap-on balljoint press kit to do them. Most shops I've been at either haven't had a good vice or had it attached to a tiny table against a wall.
You're a great teacher.
I worked as a Transmission R & R tech and I can say it can be a tricky operation.
Great work.
Great video too man.
You don't talk like an info-mercial salesman.
I want to start a Firestone super center here in Vermont.
It's tough to find 100% Auto Service like they provide.
Thanks 👍
Best of luck in your business ventures. Thanks for watching.
Thanks, Dave. Very similar to how I was taught some 55 years ago, except for the heat. That you applied the pressure with the hammer to the cross, or spider, was how I was taught except we didn't have such air tools in the workshop then. May I suggest that you mark the slip yoke and the shaft so they go back in the same line. I'm retired now but I recently came across a you tube series by Professor John Kelly of Weber University Automotive Section on U joints. It was very enlightening. went into measuring axial play and the potential for that to cause vibration. Very well worth a look, particularly sections about 5, 6 and 7.
I remember when i was young mechanic, 16 or 17, i bought a 54 chev 3/4 ton and i was having a hard time changimg the u joints and i asked my father for help and with a hammer and old piece of railroadtrack and in less than 5 minutes he had them changed, pissed me off because i thought i should be able to do it as good as him but that was a good learning day lol. Thats a different job than whats' Dave is doing in the video. Nice to see father/son videos also
I’ve done many of them through the years.
It’s nice to watch someone care about someone else’s vehicle as if it were their own!
I watched the professor at Weber university show the whole segment on U-Joints and it was amazing. There is now a new type of tool to replace U-joints safely From Tiger tool or Lisle tool. It is worth every dime. Come in 3 sizes depending on the size of the joints. But old school is the best way to learn.. Thanks Dave.
You took me down a personal history road
I did that job on a small (1970s) British car. Since the joints already came with C-clips I just used the bench vise my dad had to push one end out using≠ size sockets. I remember how tricky the needle bearings were, but I did not screw up.
I did not know modern cars still had the room for installing u joints with c clips
Dad had a bit of tools; he was a milling machine operator (miss u 😢)
Really nice job
I use a side grinder and cut the shafts. A socket and punch out the caps. Clean it up real good and then use a large c clamp to press and do the same job. This however is the best method for shop replacements I've witnessed. Good job!
Dave, I'll disagree with you on the greasable joint preference, and especially to one with a zerk in a cap as opposed to in the cross. though I would love to hear your response. My reasoning is because I regularly see factory sealed joints hit well over 200K KM on work trucks up here in central BC, Canada, but greasable aftermarket replacements from Moog, SKF, etc. are usually doing very well if they can beat 60K. Compare a factory Spicer joint on a Dodge front axle etc. with a Moog, and it's easy to see that the Moog seals are trash in comparison - and they have to be, to allow grease to purge out. And once those seals have opened to purge, they let water in more easily also, so they NEED to be re-greased very regularly, whereas a sealed joint needs no attention for years. For highway trucks, probably not such an issue, but a large amount of my workload is 1 ton service trucks that live very hard lives coated in mud down bush roads, on ranches, in pit mines, and such, and the aftermarket joints just don't hold up. Having said all this, I've only been doing this for a little over a dozen years in comparison to your career, so I'm always open to opinions.
I agree with you i think moogs are trash i had factory spicer on mine it was great. I ended up putting a new rear end on my truck but long story short my pinion flange was a 4 bolt and the new rear end was 6 bolt so i found a u joint conversion yoke for 6 bolt and had to take the u joint of but the conversion piece added a inch and a half to my driveshaft so it was a waist of time and i ended up just changing the pinion flange to a 4 bolt. I tried out a moog u joint it was garbage so i needed my truck to drive to work and i couldn't get a spicer u joint in time so i did end up getting a Napa u joint that has worked so far but i learned just because its greasable doesn't mean its good id go with the factory spicer any day of the week.
My dodge original non grrasable only lasted 50 Thousand Ks
Fitted grrasable using Wynn's grease now have 307thousand On the clock
Maybe service maintenance is key
After watching your vedios i reckon havnt studied anything in 2 years of my diploma of automotive. Iam learning from the beginning while watching your vedios .. thanks for that.
Great to watch the right way to install u-joints and that is one nice vice. I was taught to always mark the yoke and put it back the same way as they are balanced as a unit.
Watching these videos is like food for my soul. As a technician who prides my self on quality workman ship I can't stop watching. Great example Dave is for the industry, especially in today's times.
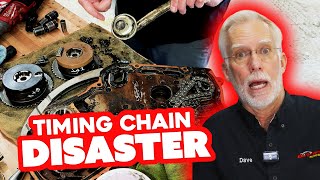
I am doing all three on my RAM 2-piece driveshaft now. I got the Moog grease-able joints. I initially replaced the carrier bearing only, because it was shot. U-joints seemed OK. But after installing the shaft in the truck, there was bad vibration at 50 MPH and up.
So, replacing all the U-joints now. The factory U-joints were a bear to remove. All the clips broke and were tough to remove. Used BIG NASTY and a chisel tool to break the clips into small pieces. I have a DAKE 25 Ton press, but I was worried about bending the yokes. The driveshaft is 20+ years old and has plenty of rust. I ended up cutting the U-joints out with a 3" cut off wheel and my die grinder. Then I pressed out the cups. Cleaned and de-burred the yokes and basically did what Dave did in his video here. Thanks Dave!
Exceptional tutorials Sir! I find myself glued to your videos. Thanks for sharing.
Dave is an incredible teacher, SO much detail. I strive to be as good of a teacher to my apprentices, as Dave is.
Nice vid, but... You forgot to mention to rock the new joint on a flat surface checking to see if one set of cups are bigger than the other (Yes, there are some like that). Also, when you're finished and checking the new joint for smooth operation. In the event the joint is tight (you'll feel it), you need to relieve some stress that's held in the yoke. I keep an old chisel that's been ground flat and strike the ears of the yoke where the joint is tight. Works like a charm. Finally, I'd avoid heating the ears of the yoke to the point where they're glowing. You're changing the grain structure of the steel at that point.
i cut the middle of the joint out ..up here inthe rust belt.. Polaris 4 wheeler clips don't fit tight spot of weld ....yes i do grease
Use calipers to check size. More exact, if you don't know the vehicle you're working on.
I also would be cutting the old one out. Then cleaning rust lol.
Gfys guy
Scotty Kilmer watches Dave's channel to learn how to do the job right. When I'm done watching Dave's videos, I don't have a headache. If I watch a Scotty video, I need an aspirin afterwards.
No one
Inside a library
Scotty kilmer: REV UP YOUR ENGINES
I agree Scotty is a bit too animated
@@garreysellars5525 animated is putting it politely, but I think neurotic is more accurate 🤣😅
I love watching daves videos on youtube and tik tok. He is such a good mechanic and boss! I wish i could work for him. Very well spoken and does such a good job explaining. Seems like he has alot of patience too. Love the videos!!
Very good video on the subject DAVE. Thank you for showing the correct way of doing a Universal joint replacement fella. Peace vf
I remember heating up the GM Ujoints that had the nylon the held the caps in. Always made a nice loud POP and you made sure no one was in line of the cap as they shot out of the yoke
Great video, Dave. Auto Shop basics 101 (1958, freshman year in high school). In this day and age of electronics, the young guys forget the basics.
I’m no where near a mechanic, I’m a EE, but after that fantastic demonstration I feel like I could actually do that!
This is a really great educational video. I'm retired now, but over the years I've busted many a knuckle changing those without a vice or press. And sometimes on the roadside too, and in the middle of the night.
Oh yea me too also it's gotta be colder than a well diggers a## too!!
A hammer & a couple of sockets is all I know
Crude
😊😊😊
Much quicker too
You've never picked up a hammer in your life except that plastic toy set from hasbro when you were 8👉🎯✌️
Definitely not beating these out without heat or a press.
This is awesome info, Dave. Thanks for the willingness to share the wisdom. You and your guys make the world a better place.
I haven't done a u joint in 30 years, thanks for the refresher!
What you guys do is infinitely interesting. I’ve never been around this stuff and I appreciate the work that you guys do. New subscriber! Please keep the education coming!
Congratulations on your new TV show coming up. It's nice to see hard work paying off. Be watching all of your new shows. Thanks for putting wholesome back on TV!
An old ER doc here, these are what we call the pearls of wisdom, from a multitude years of experience.
Great video on how to! Also, good details! I've changed several u joints. The worst one was on a pick up all the needle bearings were gone, and a third of the trunnions were worn off.
I'm an Automotive Student andI learned alot from this guy.
I also love the fact that he is no BS type of a guy and make things even better.🎉🎉🎉🎉
'An element of risk...' yeah I can relate to that, a familiar feeling as I've replaced many universal joints on my British Clasics over the last 45 years. Great video!
needles to say, he knows what he's doing
First year apprentice here who’s only just learning to replace uni joints. Thanks for this great video!
I love the way you describe and teach as you go ❤😅
He is indeed THOROUGH
So many new mechanics don't even know how to change joints anymore. At the machine shop i work at, we use a cut off disc, does well enough to remove the old one and we use the same method of putting a new joint in, with a socket and vice.
Patience, cleanliness, and teamwork. Nicely done
Yes,I did that to a 2 piece tailshaft for my car last week, they're a bit more difficult to do by yourself although I found out that I can rest the rear shaft in the vice while I press the cups into the yoke while moving the trunnion around.
I also mark the shaft even on a tailshaft which has a universal joint on both ends before pulling it apart,I had to mark the mounting ears on mine because both halves are phased 180° apart, it's so that the shaft won't likely vibrate in either case.
I wrap the caps with electrical tape because I like to keep each cap on their trunnion that they came off originally.
I recently had a Guibo which looked alright cause vibration (it was warped) in second gear from the time that the Guibo was brand new so I slipped a spare used Guibo into my car last night & early this morning I drove it & the vibration went away !
When Dave performs his magic tricks it educates his audience by teaching them the complexity involved in learning to become a wizard. Not a job, a highly involved profession. Dave clearly demonstrates his commitment to the highest level of professionalism.
I’ve always wondered how to replace a u joint. Thanks dave for a step by step done the right way. 👍😁
Dave is the last of real men doing real men work! ❤
Good info. My only gripe was the vise, I was told to never put a driveshaft or yoke in a vise. It might have been an abundance of caution as I was a beginner, but I have always followed that advice.
Really the best way is to use a press and press the cups out and in. A vice works fine, but isn't really ideal.
I bought a 6 ton press from harbor freight, it has paidfor itself numerous times already. It paid for itself on the first job I used it on, replacing every single suspension bushing on my son's 95 Del sol. I would recommend one for any shadetree mechanic that has the space for it.
Have a great day.@@crackpotfox
By the power of Dave I can change a U joint now! Thank you sir! Keep it up!
Good job! I do my farm equipment joints the same way except I add a little high quality grease in each cup to insure the needle bearings stay in place. Really like your vids!
Great tutorial.....Most times i just use the vise to hold it and use a ball joint press to do the work. Have never had a sand blaster or anything, just some emery cloth...
Listening to you is a joy. Thanks for the tutorial.
Thanks for the step by step. In my younger days I broke the yoke on a big Buick. The junkyard had all you can carry for $25. No guarantee. I carried 3. The ones I didn't use we threw in the dumpster. The part going into the transmission was about one inch shorter but works. I asked if it didn't work could I trade it for another " no refund" so I carried three
Man you put in a lot more effort than most on these u joints. It refreshing.
I like how you did one completely in first, when I do u-joints I’ve always done both at the same time and it’s hard to get the shaft in the needles perfect, can’t wait to try it next time
Dave your shop is literally equipped to fix ANYTHING. Love the videos man.
Just done mine on my jcb loadall, thanks for your advice n help dave !
2:00 Keep in mind before you remove the cups, check on the inside (where the cross is) as there may be a c-clip keeping the cup from being pushed out (not where the clip was he showed later).
Great videos Dave. Your showing people good honorable work. Love it
I didn't have a vise years ago, but I did have a huge c-clamp that worked. A little wonky at first, but I was able to manage.
Great video!
Dave and crew, you have a proper shop and a top notch workplace God 🙌 bless
Thanks - son = a thousand & 87 Dollars ! No foolin’ - you fellers stay good ! Team work is
Good /fun work ! You are living your lives ! I would have enjoyed working your shop sir !
Great mechanic, smart businessman, and a nice guy! Thx Dave
🔥usually heat till plastic comes out those factory holes, looker pins in there. Usually Center push mark in shaft and Knuckle for reassembly, had them 1/2 rotation out and bad vibration 🔥👊🔥🏍🔨⚙️really enjoy your videos and how killer your shop
Is
I always mark them too, so they go back the same way.
@@DL101ca I said that, mark both ends up a Center punch
@@jeremymullen5378 uh or yellow tire crayon.
I think those joints have been changed in the past because the nylon seal didn't squirt out, also only an idiot would get them red hot...
Add a little grease to your needle bearings. This will assist holding the needles in the cup. Great channel!!
You made that look so difficult. Made me second guess my whole life and reality cause i know whenever i replaced my u joints, it was very simple and easy. Only hard part was lying on my back in the driveway for an hour.
A great teaching and informative video that all of us can benefit from, thanks for sharing!
Missed you mention marking joint so to put it back in , in the right orientation , love your down to earth approach
If I lived in your town, your shop would be my repair shop. But if I had that vice & torch and Music, I’d give it a go. Good job.
I could watch this all day long - I’d love to see longer videos on rebuilds maybe split into 3 videos
Best U-Joint video on the internet - Awesome and thanks for the lesson!!!
Using a cold chisel, mark the mating inney and outey yoke parts. One strike on each side of one pair, two strikes on the other pair on the other U-joint. Heat up slightly the end tube of grease gun, torch, sun or oven and inject warm grease into Zerk to reveal at seals while still on the bench while working the joint. Purge the air in the internal grease passages. Always grease while U-joists are warm from driving and after mud-stuck. Grease joints and chain saw bar tips while hot/warm before storage. Push out the water and grit so it doesn't sit in there and rust then bind when cold start up.
Dave, you're a top-notch professional!
Great TH-cam Channel , like your work ethic and Honesty .
Really like what Dave did here
The air hammer w heat has way less chance of bending ears as compared to socket and hammer
Just bought tiger tool press it grabs ears same side as cup should be good
But it does push on opposite ear when removing
Wow the most COMPREHENSIVE VIDEO ON DRIVESHAFT U JOINTS EVER 👍👍 ⭐️⭐️⭐️⭐️⭐️Thank you kindly Dave & Son
Glad to see you still do this..someone told me they just replace the shaft..
I did a few of these. I used a C clamp do to the job.
I have a Chevy to do next.
I love your videos.
Dave I got to tell man that I love to watch your videos you are the boss and you are working hard. Keep it up man.
That's a neoprene retaining clip that injected from the factory if you had heated it more it would've squirmed out of those holes and they would come out easy as pie
Nice to see that.Its been years since I have had to do that. Nice refresher👍
Looks good, and should work for most drive shafts. The only bit I will add is to take the time to tap those clips into the grooves just to be sure they are fully seated. Also, for longer multi-axle drivelines is to line up all grease zerks front to rear to make it easy to apply grease
I've done tons of u joints when I was a tech for chrysler, I'm still a big fan of my u joint press.
Maybe nitpicking here, but I was taught to use a softer metal to push on any bearing and NEVER to hammer when installing a bearing. The jaws of that vice look HARD and may damage the surface you’re pushing on. However, Dave has so much expertise and experience, I’m willing to give him a pass on this assembly. He has achieved the desired result with a finely installed U-joint !
Thank you for sharing, Dave and Joey; and the camera side too.
I can hear the quality of that device when you tap it with the hammer. It has a nice chaim to it anyway, your tutorial is very useful. It’s a six in a row,Jim from Kennerdell, Pennsylvania
Thank you very much!
That's exactly how you do it. You're a very good teacher .
Great video the only difference I do is, I use them never seaze on the yolk makes the next time easier
It’s too bad I didn’t watch this video earlier. I did it with a hammer and deep socket Thank you for sharing. Have a good day 👍
Did these the other night with some PB Blaster, a socket, and a hammer right in the dirt beside the truck and it worked beautifully. Squirt it with the PB to free thing up, lay it in the dirt and kneel over it, and knock it out with the socket and hammer. The entire driveshaft was supported by the dirt while the old u-joint just punched into the dirt as it came out. It was fast, easy, and didn’t require any fancy tools.
What type of u joint? And was it an original part?
Love on gm how they filled the ridge of the cup with injected plastic to hold them in. You can hear the plastic bubble when they get hot. You can always tell the ones with plastic because they have a hole in the side.
Heat is the only way to get the polymer injected cups extracted.
U joint press tool. Much less hassle. Worked like a charm for me and inexpensive
Thanks!
For getting them back in, I use a C-clamp and sockets. I used a hammer at first but that knocked the needle bearings out of place and I crushed them until they broke. I used a needle from the old U-joint. I learned to keep some old needles around as well.
I have a lot of problems with heating hardened steel. I agree with the last guy about sockets. There was a period where there were some kind of hardened nylon seals used that were better melted off before removal.
I always will spend more for a serviceable ( with grease ports) on u joints as well as any front end parts. I've even added grease points to parts.
Some 4x4 and heavy duty joints don't have grease fittings because they aren't as strong as a solid joint and can break under torque...
Dave, Love your channel. I am 71 years old. Been in the business for about 50 years. Didn't know you could heat the flanges on a drive shaft. I thought it took the temper out of them. Very interesting! One question, a SNAP-ON socket on a vice? you are a better man than me!
What temper? There is no temper.
The heat is to melt the nylon lock ring that is injected at the factory. Dave had evidently melted it out before making the video, you can see the groove on the cups and inside the yoke ears where the nylon was.
He just annealed the steel (softened the heat treat) on the yoke with that torch. When I was younger, I replaced numerous u joints - on Plymouth, Ford, and a Buick, never used a torch. I have never, and would never, use a torch on any torque tube, nor any hardened material, unless I purposely wanted to destroy it. Very stupid, perhaps even dangerous.
was told by driveshaft shop only heat the ujoint caps it will soften it enough to come out. Any heat on actual yoke can cause the ears to come in just from the heat
Never had trouble in 30 years heating yokes until the retaining plastic starts growing out the holes.
Think you’re trying to expand the yoke though, not the cap.
I always heated the yoke myself never had a issue until recently had one spring in but who knows it was a very old driveshaft with 20 years in the rust belt so maybe it’s not related. Just what they told me at the driveshaft shop wether it’s right or wrong idk . I did try there method last time I did one worked also. Guess more then one way to skin a cat
@@johnhoops3531exactly how it should be done, not getting it red hot... But not all joints are held in with the nylon some have retaining clips...