This is such a neat finish to these tissue holders. After seeing how nice they are I’m going to use this method all the time. Thank you for the tutorial.
This is so ingenious! I love the fact that, not only are there no inside seams, it's reversible, and has boxed corners. Thank You for Sharing your Time, and your Talent with all of us.
Rosie, you have ruined me!!! I want to make the extra quick tissue holders where you just zig zag the edges but your method makes it so professional that I have to use your technique!! I am making several for a holiday festival coming up at our local church. Takes a little bit more time but really, really worth it. Thanks so much for sharing this.
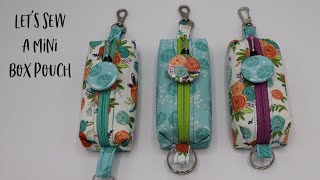
This is going to be sew fun. It doesn't use much fabric and can make use of small scraps. Can gift a person many to share with others. Great instructions and visuals.
Thank you for this wonderful pattern and tutorial. I have made dozens to give to the charity I work for - they go to the homeless families we serve - especially the children. I adapted my method to not do the pressing of the fold lines because I found that I could finger press when I got to that stage and it saved me some time. Your design is wonderful.
Thanks for sharing your version of the tissue case. This version makes a much more professional looking case than all the others. No seams showing and boxed corners give it that finishing touch. I am going to add a lobster clasp for easy attachment to my purse or backpack and will making many more for family gifts. Thanks again for taking the time to share this pattern.
I've made many Travel Size Tissue Cases. This is the first tutorial that I've seen making a "boxed" one. I love this method above all I've seen & used. Thank you for sharing!
I agree this was a great tutorial BUT I had to comment about the genius "fold n go/pack n play" invention you had with the cutting mat and pressing mat within a fold up book that appeared to close with a strip of velcro!!! Awesome for sewing class supply bag!👏❤
Thank you so much for the clear tutorial for this tissue case! I love the boxed corners and the overall design. They look great and make very nice, practical gifts. Everyone that I talk to wants one! Thanks for sharing ❤
I don't normally post comments, but I had to for this project. You are a genius! As the others have said, this version is just a little more structured than some others. I had some beautiful Asian fabric that I've held on for years and this was a perfect project to use them. They turned out elegantly beautiful. Thank you for your very detailed tutorial and kindness in sharing. It was not difficult to do at all. Wish I could post pictures for you.
As always Rosie, another great tutorial! I love the way there are no seams and the way you did it genius. Thank you for all you do for the sewing community.
You are so welcome! I wanted to figure out a way to make these with no seams showing...especially the center seam in the lining. I was very happy with this. Thank you for your kind comment and for watching!
When I first saw this I loved it because it seemed so simple and no visible seams. I couldn’t wait to try it and noticed that I had some scrap fabric that was just large enough to make one, so I did a trial run. It was perfect! I’m still amazed by how those corners magically appear but they are beautiful. Thanks for sharing and doing all of the math for this. Now I want to make more, with contrasting trim. 😊❤
Excellent video! I followed along and just completed a perfect tissue holder to give as a coordinating gift to a cosmetic bag. So quick and easy. And accurate instructions! Thank you!
Instead of tape, I am going to top stich the first side, and on the opening side I will just top stitch the sewn ends, completing it after I turn it. I am all thumbs when it comes to tape, lol. I love this tutorial, you are a great teacher. You have a new sub!
Thank you for your kind comment. I am glad you like the tutorial and you can certainly change how you close the opening. Thank you for subscribing and for watching!
Love this and each time I’ve watched you make your different bags, I’m always amazed to watch those corners appear it’s like magic! Thank you for sharing!
Got myself a sewing machine for my 29th birthday. It arrived yesterday and this was my first make. Thanks so much for the tutorial! I love the outcome and can’t wait to make a bunch more of these for my family while I get the hang of sewing :)
I just found this tutorial! I have looked at a lot of utubes for making these tissue holders, and your's is by far the best, and cleverest! Thank you so much. I'll definitely watch more of your content!
Hi Rosie! This project is just what I needed! I made zippered pouches and thought it would be complete if I added something in the pouch. Thank you for your awesome tutorials! I like to leave the tissues in the original plastic cover too!
Now this is genius! I love the fact it’s reversible ❤ so cool! When i did a search on tissue holders this popped up and it is the most unique one i saw….and of course i had to subscribe because i need to see more❤ thanks for a wonderful tutorial ❤
Rosie, you are one of the few content creators that understands what tutorials suit better for beginners, and that will give you more views than some other sewing channels. As always, fantastic job! When I finish digitizing my first bag pattern, would you consider doing a tutorial for me?
I couldn't wait to try this pattern today. I have to say I love this one so much more than the other ones I have tried. Going to make some for stocking stuffers. Thanks again, love it.
What a perfect little gift or accessory addition! Love the boxed corners. I must make these to coordinate with my handbag linings! You are always adding too my to do list 😉☺️😉
Just made one following your instructions and I love it! Thank you so much! Can't wait to make loads as small gifts. I have liked and subscribed as I am so happy with this!
I really appreciate your camera work and how it usually stays in focus. I am going to search your channel for some other gift ideas. Nice job!! Easy to understand instructions
I am glad to hear you made the tissue holder. I would love to see pics. I have a Facebook group where you can share pictures. You can find us here: facebook.com/groups/184663700298519. Thanks for watching!
I always carry these tissues in my purse and the sticky tape closure ends up not sticking after a while and causing loose tissues in my purse. I am so happy for this tutorial 💗.
Hello from Trish in Tasmania, Aust. I am a beginner and so enjoy your tutorials. Learning all the time. I wonder if you could possibly demonstrate how to make this lovely tissue holder with a top opening? Unable to buy the middle opening tissues packets here. Thank you so very much for teaching me.
Hello there. I am unsure if I am using this correctly as I can't find a response to the above. As I said I am new to this wonderful site and have a lot to learn so can someone please tell me if I'm on the right track?
Hi Rosie, Hope you are well. I just made this little tissue case as a Christmas gift for a friend! Where did you get that nifty little mat/ironing surface that you're using in this tutorial? Looks like it closes like a book and is portable for travel, etc. Please let us know! Thank you!
Hi Rosie, I do love this video. I was thinking about making these to sell. But not sure what should charge. Any suggestions? Love how your project turned out and the colors go perfectly together!
Hey Rosie I’ proably seem weird but I caught that the I think larger peice is 5 1/2 inches vertical I think but is the other side the same ?! It looks like a square ? But do you have measurements or am I not catching something you may have said ? I do love your easy sewing projects as a lot are new to sewing when it comes to hand bags and complex steps and turns ! It has to draw new sewers to your channel ! I wished I could afford classes but right now I just can’t so ty so much for what your doing gal !
*** so I went online to Walmart and typed in this product and it looks like there are three different scenarios. I guess until I go to the store I won’t know how different the thicknesses are since your pattern is designed for the explore which has 80 tissues per pack*** OK so I’m getting to the point where I’m going to make some but I just realized that this product Kleenex on the go comes in two different sizes. One has 30 tissues and one has 60 tissues I tried to pause the video to see your packaging. Could you provide that information thanks
Hello! At the point of making sure the accent pieces are overlapping, mine are BARELY overlapping unlike in the video. I know everything I measured is the correct size and I followed the video step by step. I’m not sure what could be the problem😩…can anyone advise me? TY ❤ @RosiesArtStudio
Already I finished and here is a link to my first tissue holder thank you so much Rosie ** on the strip where are you are placing the steam A seam it’s 1.25 inches that you would sew in from the edge on both sides. Because 1.2 5×2 = 2.5 +3 inches of the steam a seam strip equals 5.5 inches th-cam.com/video/i_e0O7sKBiw/w-d-xo.html


This is such a neat finish to these tissue holders. After seeing how nice they are I’m going to use this method all the time. Thank you for the tutorial.
This is so ingenious! I love the fact that, not only are there no inside seams, it's reversible, and has boxed corners. Thank You for Sharing your Time, and your Talent with all of us.
Rosie, you have ruined me!!! I want to make the extra quick tissue holders where you just zig zag the edges but your method makes it so professional that I have to use your technique!! I am making several for a holiday festival coming up at our local church. Takes a little bit more time but really, really worth it. Thanks so much for sharing this.
This is the best tutorial for tissues I have ever seen!
This is going to be sew fun. It doesn't use much fabric and can make use of small scraps. Can gift a person many to share with others. Great instructions and visuals.
I am glad you like it. Thanks for watching!
Brilliant tutorial at real time and without noise in background! Thank you x have subscribed
this is by far the best tissue holder! So clean!
This is easily the best tissue holder I’ve seen… no exposed seams, boxed corners and very neat. Thank you.
This is a GREAT step-by-step tutorial for sewing a travel size tissue case. Thank you
I am glad you liked the video and thanks for watching1
Thank you for this wonderful pattern and tutorial. I have made dozens to give to the charity I work for - they go to the homeless families we serve - especially the children. I adapted my method to not do the pressing of the fold lines because I found that I could finger press when I got to that stage and it saved me some time. Your design is wonderful.
Great video. Just the right pace and very clear instructions. Thank you.
Thanks for sharing your version of the tissue case. This version makes a much more professional looking case than all the others. No seams showing and boxed corners give it that finishing touch. I am going to add a lobster clasp for easy attachment to my purse or backpack and will making many more for family gifts. Thanks again for taking the time to share this pattern.
I've made many Travel Size Tissue Cases. This is the first tutorial that I've seen making a "boxed" one. I love this method above all I've seen & used. Thank you for sharing!
Lovely little packet!!! Love that there are no raw edges seen!!! Xx
I agree this was a great tutorial BUT I had to comment about the genius "fold n go/pack n play" invention you had with the cutting mat and pressing mat within a fold up book that appeared to close with a strip of velcro!!! Awesome for sewing class supply bag!👏❤
Thank you so much for the clear tutorial for this tissue case! I love the boxed corners and the overall design. They look great and make very nice, practical gifts. Everyone that I talk to wants one! Thanks for sharing ❤
Thank you so much for this tutorial. The directions were so clear. My project turned out great in one try! You are an incredible teacher.
I don't normally post comments, but I had to for this project. You are a genius! As the others have said, this version is just a little more structured than some others. I had some beautiful Asian fabric that I've held on for years and this was a perfect project to use them. They turned out elegantly beautiful. Thank you for your very detailed tutorial and kindness in sharing. It was not difficult to do at all. Wish I could post pictures for you.
Perfect! Makes a lovely thoughtful gift or door prize and uses up the scraps . Thank you.
You are so welcome! Have fun making them. Thanks for watching.
Hello Joyce ,How are you doing today hope you’re safe
As always Rosie, another great tutorial! I love the way there are no seams and the way you did it genius. Thank you for all you do for the sewing community.
You are so welcome! I wanted to figure out a way to make these with no seams showing...especially the center seam in the lining. I was very happy with this. Thank you for your kind comment and for watching!
Hello cara. How are you doing today hope you’re safe
The best of the best tissue case tutorials!Thank you so much!
When I first saw this I loved it because it seemed so simple and no visible seams. I couldn’t wait to try it and noticed that I had some scrap fabric that was just large enough to make one, so I did a trial run. It was perfect! I’m still amazed by how those corners magically appear but they are beautiful. Thanks for sharing and doing all of the math for this. Now I want to make more, with contrasting trim. 😊❤
I've watched a few videos for tissue holders and this is by far the best one I've seen. I can't wait to try it!
Awww…thank you! I hope that you will post some pics in my FB group. RThanks for watch9ng!
Just found this, it's so darn cute. I like that it has a boxy shape. Thank you.
You are so welcome! Thanks for watching!
Excellent video! I followed along and just completed a perfect tissue holder to give as a coordinating gift to a cosmetic bag. So quick and easy. And accurate instructions! Thank you!
Awesome! Thank you for the very clear instructions. I made one on the first go and it is really cute.❤
This is the absolute best and cutest travel Kleenex video on the web and I have watched a lot Thank you Roses!
Instead of tape, I am going to top stich the first side, and on the opening side I will just top stitch the sewn ends, completing it after I turn it. I am all thumbs when it comes to tape, lol. I love this tutorial, you are a great teacher. You have a new sub!
Thank you for your kind comment. I am glad you like the tutorial and you can certainly change how you close the opening. Thank you for subscribing and for watching!
Hello Nancy 👋👋. How are you doing today hope you’re safe?
You can always use fabric glue
Love this and each time I’ve watched you make your different bags, I’m always amazed to watch those corners appear it’s like magic! Thank you for sharing!
What a great little project! Thank you!!
Another great pattern.I have just become addicted to your patterns and tutorials.They are the best!
Awww…thanks for your kind comment and for watching!
Got myself a sewing machine for my 29th birthday. It arrived yesterday and this was my first make. Thanks so much for the tutorial! I love the outcome and can’t wait to make a bunch more of these for my family while I get the hang of sewing :)
I've made lots of these but your instructions are different. I like it, thanks!
Hello Connie👋👋.How are you doing today hope you’re safe?
I just found this tutorial! I have looked at a lot of utubes for making these tissue holders, and your's is by far the best, and cleverest! Thank you so much. I'll definitely watch more of your content!
Hi Rosie! This project is just what I needed! I made zippered pouches and thought it would be complete if I added something in the pouch. Thank you for your awesome tutorials! I like to leave the tissues in the original plastic cover too!
Wonderful! I think it makes a great set when paired with a pouch and it is sews up so quickly. Have fun making them and thanks for watching!
Great instructions, so clear
This is a great video. I'm going to do this project while on sick leave, and right before the holidays. Thank you so much.
I like your technique so there are no exposed seams. I will make mine this way from here on out. Thank you for sharing. ❤
You’re welcome 😊. Thanks for watching!
I like to remove the wrapper so it’s easier to get a tissue out. Thank you so much for this tutorial
Now this is genius! I love the fact it’s reversible ❤ so cool! When i did a search on tissue holders this popped up and it is the most unique one i saw….and of course i had to subscribe because i need to see more❤ thanks for a wonderful tutorial ❤
Rosie, you are one of the few content creators that understands what tutorials suit better for beginners, and that will give you more views than some other sewing channels. As always, fantastic job! When I finish digitizing my first bag pattern, would you consider doing a tutorial for me?
Wow, thank you! I would like to take a look at your pattern when it is complete. Thanks for watching!
I couldn't wait to try this pattern today. I have to say I love this one so much more than the other ones I have tried. Going to make some for stocking stuffers. Thanks again, love it.
I am glad you made the tissue holder. I would love for you to post pics in my FB Group. Thanks for watching!
Thee are beautiful! And so well made. Please, please, please, tell us about that handy dandy ironing booklet!!
Rosie, you always have a way to do something the best way!
What a perfect little gift or accessory addition! Love the boxed corners. I must make these to coordinate with my handbag linings! You are always adding too my to do list 😉☺️😉
I am keeping you busy so that you stay out of trouble... lol
Hello Elaine👋👋 , how are you doing today hope you’re ok?
Great video. Really appreciate all you detail!!
Amazing and so doable. Thank you. Blessings
You are so welcome. Thanks for watching!
Hello Luisa , how are you doing today hope you’re safe
Just made one following your instructions and I love it! Thank you so much! Can't wait to make loads as small gifts. I have liked and subscribed as I am so happy with this!
Great tutorial! Thank you!
I’ve been looking for a boxy tissue holder and this is perfect! Thank you!
You provide such thorough and clear instructions--very nice end result! Many thanks!
❤️ that you shared this project with us! Thanks 😊
I really appreciate your camera work and how it usually stays in focus. I am going to search your channel for some other gift ideas. Nice job!! Easy to understand instructions
Thank you for your kind comment and thanks for watching!
What a well-done video!! You made each step visible and explained each well. Thank you!
I love your tutoring and all your projects and the way you teach it.
So pretty. Well-done tutorial.
I made this and loved how it turned out! Thanks for such a good tutorial!!
I am glad to hear you made the tissue holder. I would love to see pics. I have a Facebook group where you can share pictures. You can find us here: facebook.com/groups/184663700298519. Thanks for watching!
Making this tonight. Adding a keychain loop. Will let you know how it goes.
Another fabulous tutorial!! I can see Christmas presents in my future sewing room. 😃
Wonderful! They go together very quickly. Thanks for watching!
Hello Elizabeth , how are you doing today hope you’re safe?
I love your videos. So precise and very easy to understand. Please keep the ones for the easy projects coming. :):)
just made this...its adorable! Thank you for sharing.
Hi. Just discovered your channel when looking for tissue cover. Such a good video. Going to look at your boxy pouch next.
I just love your tutorials!! Thank you!@
Awww...thank you for your kind comment. You are welcome and thanks for watching!
Hello Laura 👋👋, how are you doing today hope you’re safe?
Great work, thanks again for a lovely variation.
Thank you for this tutorial.
This is brilliant! Thank you!
Great tutorial, thank you
Thank you Rosie.
You are so welcome. Thanks for watching!
Hello Cheryl👋👋, how are you doing today hope you’re safe?
I always carry these tissues in my purse and the sticky tape closure ends up not sticking after a while and causing loose tissues in my purse. I am so happy for this tutorial 💗.
Hello Veronica 👋👋. How are you doing today hope you’re safe?
very nice
Brilliant!
Awww…thank you for the kind comment and for watching!
Interesting thank you.
I love your pressing tool, did you make it? I would love to have one for my small pressing.
great video and explained so good,
Love it!! Thanks for sharing!!! What dimensions would you use for baby wipes?
Soo cute! Love it! Just made one and now I am going to make a few more!
Thanks for your time!
Hello from Trish in Tasmania, Aust. I am a beginner and so enjoy your tutorials. Learning all the time. I wonder if you could possibly demonstrate how to make this lovely tissue holder with a top opening? Unable to buy the middle opening tissues packets here. Thank you so very much for teaching me.
Hello there. I am unsure if I am using this correctly as I can't find a response to the above. As I said I am new to this wonderful site and have a lot to learn so can someone please tell me if I'm on the right track?
I think she said at the beginning of the video that you would want to take a box cutter or scissors and open the package in the middle.
Hi Rosie, Hope you are well. I just made this little tissue case as a Christmas gift for a friend! Where did you get that nifty little mat/ironing surface that you're using in this tutorial? Looks like it closes like a book and is portable for travel, etc. Please let us know! Thank you!
Hi Rosie, I do love this video. I was thinking about making these to sell. But not sure what should charge. Any suggestions?
Love how your project turned out and the colors go perfectly together!
The thing that your are pressing on.....where can I get one of those? Thank you for any help.
Hey Rosie I’ proably seem weird but I caught that the I think larger peice is 5 1/2 inches vertical I think but is the other side the same ?! It looks like a square ? But do you have measurements or am I not catching something you may have said ? I do love your easy sewing projects as a lot are new to sewing when it comes to hand bags and complex steps and turns ! It has to draw new sewers to your channel ! I wished I could afford classes but right now I just can’t so ty so much for what your doing gal !
It’s not a square. The short side is 5 1/2 inches and the long side is 6 1/2 inches. Both are the same size
Also did you make your cutting and press mini case your self ? So cute ! Lol
Hey can you add the other zipper type the way you sew them please ? Or is it just the same way !?
This beautiful ms Rosie! Do you have a written pattern?
Thanks for sharing
I do not have a written pattern, but all the information to make the tissue holder is in the video. Thank you for watching!
What machine are you sewing on please
What machine are you sewing on please?
She tells you at the minute marker 5:51
*** so I went online to Walmart and typed in this product and it looks like there are three different scenarios. I guess until I go to the store I won’t know how different the thicknesses are since your pattern is designed for the explore which has 80 tissues per pack***
OK so I’m getting to the point where I’m going to make some but I just realized that this product Kleenex on the go comes in two different sizes. One has 30 tissues and one has 60 tissues I tried to pause the video to see your packaging. Could you provide that information thanks
Hello! At the point of making sure the accent pieces are overlapping, mine are BARELY overlapping unlike in the video. I know everything I measured is the correct size and I followed the video step by step. I’m not sure what could be the problem😩…can anyone advise me? TY ❤ @RosiesArtStudio
What sizes are the pattern pieces cut?
Go to minute marker 1:33 that’s where she starts giving you the measurements for each piece
What kind of a machine are you using. I love how it has a 1/4 “ line!
Hello Karen 👋 how are you doing today hope you’re safe?
Already I finished and here is a link to my first tissue holder thank you so much Rosie ** on the strip where are you are placing the steam A seam it’s 1.25 inches that you would sew in from the edge on both sides. Because 1.2 5×2 = 2.5 +3 inches of the steam a seam strip equals 5.5 inches
th-cam.com/video/i_e0O7sKBiw/w-d-xo.html
So much work for a small item.
That’s by far the worse tutorial for a tissue holder. The worst.