TH-cam
US
Blender 3.2 Animated Beach Tutorial | Polygon Runway
27:09
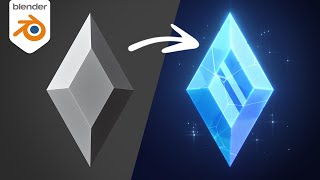
This Blender Shader is the Secret to Magical 3D Art
24:10
Ice Cube Splash Animation | Blender Tutorial
18:22
ทำผิดกฏหมาย 100 ข้อ ในวันเดียว!!
34:34
🔴LIVE กัมพูชา vs ติมอร์-เลสเต | ฟุตบอล ASEAN Mitsubishi Electric Cup™ 2024 | รอบแรก กลุ่ม A
2:33:50
ใครคือฆาตกรตัวจริง ?! EP.11 (ver. คืนคริสมาสต์ สุดสยอง !!!
39:39
Blender Glass with Ice 3D Tutorial | Polygon Runway
Polygon Runway
ติดตาม
495K
ดาวน์โหลด
โหลดลิงค์.....
มุมมอง 422 278
0
0
เพิ่มลงใน
เพลย์ลิสต์ของฉัน
ดูภายหลัง
แชร์
แชร์
ฝัง
ขนาดวิดีโอ:
1280 X 720
853 X 480
640 X 360
แสดงแผงควบคุมโปรแกรมเล่น
เล่นอัตโนมัติ
เล่นใหม่
เผยแพร่เมื่อ 29 ม.ค. 2025
ความคิดเห็น • 346
ต่อไป
เล่นอัตโนมัติ
27:09
Blender 3.2 Animated Beach Tutorial | Polygon Runway
Polygon Runway
มุมมอง 246K
24:10
This Blender Shader is the Secret to Magical 3D Art
Levi Magony
มุมมอง 99K
18:22
Ice Cube Splash Animation | Blender Tutorial
PIXXO 3D
มุมมอง 558K
34:34
ทำผิดกฏหมาย 100 ข้อ ในวันเดียว!!
My Mate Nate
มุมมอง 912K
2:33:50
🔴LIVE กัมพูชา vs ติมอร์-เลสเต | ฟุตบอล ASEAN Mitsubishi Electric Cup™ 2024 | รอบแรก กลุ่ม A
Thairath Sport
มุมมอง 488K
39:39
ใครคือฆาตกรตัวจริง ?! EP.11 (ver. คืนคริสมาสต์ สุดสยอง !!!
Sunflowava
มุมมอง 307K
1:31:16
【พากย์ไทย】สาวใช้ในวังจะถูกประหารชีวิต แต่เธอมีฐานะที่ไม่ธรรมดา คือพระราชบุตรีแท้ๆ ของพระราชา!
Fresh Thailand Pro
มุมมอง 177K
18:18
Blender Glass & Bottle Tutorial | Polygon Runway
Polygon Runway
มุมมอง 110K
27:01
Blender Glass and Liquid Animation Tutorial | Polygon Runway
Polygon Runway
มุมมอง 44K
43:15
BLENDER для начинающих. Урок 1
Prokopchik Evgeniy
มุมมอง 1.3M
16:26
Blender 3D Beginner Tutorial: Mushrooms in Bottle
3DGreenhorn
มุมมอง 798K
9:44
10 Tools Every Blender Noob Should Learn
Brad Colbow
มุมมอง 1M
15:35
3D Coffee and Cookies Tutorial in Blender | Polygon Runway
Polygon Runway
มุมมอง 110K
10:37
Hyper Realistic Water is this EASY in 3D Graphics
CG Geek
มุมมอง 282K
17:10
English 【blender】Beginner Tutorial Modeling jiggly jelly and whip with blender! (Cycles) 3DCG
3D masshiro
มุมมอง 134K
4:08:46
Live!🔴 สิงคโปร์ VS ทีมชาติไทย เชียร์สดฟุตบอลฟุตบอล ASEAN Mitsubishi Electric Cup™ 2024
Thairath Sport
มุมมอง 555K
00:41
หนูขอไปด้วย #แม่สุซูกัส #ตลก #shorts
HeHaa TV
มุมมอง 1.7M
1:23:46
【หนังพากย์ไทย】ยอดฝีมือสังหารนักโทษ แต่นักโทษเป็นปรมาจารย์กังฟูที่ซ่อนอยู่ เขาจัดการทั้งหมดในทันที
Fresh Thailand
มุมมอง 468K
00:15
ตรวจหวยงวดวันที่ 16 ธันวาคม 2567 พร้อมรางวัล N3 รางวัลพิเศษ รางวัล 2 ตัว : Matichon Online
Matichon Online
มุมมอง 38K
21:14
Highlight : นายใหญ่ฉุนใคร?
Thinkingradio
มุมมอง 124K
00:10
总算是用上情侣手机壳了 #玩一种很新的东西 #手机壳 #情侣
摩摩
มุมมอง 4.3M
39:39
ใครคือฆาตกรตัวจริง ?! EP.11 (ver. คืนคริสมาสต์ สุดสยอง !!!
Sunflowava
มุมมอง 307K
01:34
The White Lotus Season 3 | Official Teaser | Max
Max
มุมมอง 1.3M