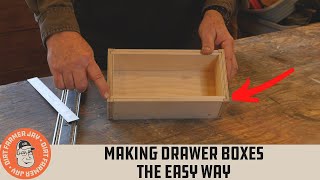
Build a stronger drawer box Part 1

ฝัง
- เผยแพร่เมื่อ 4 ก.ย. 2024
- There are many ways to build a drawer box... and I've seen lots of them! But there is one common characteristic that makes them all weak! I'll show you how, and why mine are much stronger! This is Part 1 of two videos...
In this video:
Featherboards by www.featherboa...
Sandpaper by Maverick Abrasives: Use my code to get a discount RVFF15 www.maverickab...
The Wood Whisperer card scraper (mad by DFM Toolworks): I love this thing! It's quickly become my most used and favorite! thewoodwhisper...
Want to know how to sharpen a card scraper? I'll show you a couple of key points that most, if not all others never mention! • The Incredible Card Sc...
You'll find a constant stream of tips and tricks at my Instagram account: / ramonartful
My Website: ramonvaldezfine...


I just found your channel yesterday thanks to a comment from Sawyer Design. I subscribed immediately. I agree with the comment that you are the "most under-rated woodworking channel. Like finding a diamond." I actually unsubscribed from a couple of woodworking channels I don't watch any more because yours has more to offer. God bless you and your willingness to share your experience and time.
I sure do appreciate this! I simply love sharing/showing what works for me. Thank you tons
Same, re. Sawyer Design
The handwriting is as meticulous as the work! Keep on crafting!!
Great content as usual. Most under-rated woodworking channel, like finding a diamond!
Feels great to wake up to comments like this! I sure do appreciate that! Much thanks.
Came to watch your latest video and saw this. And boy was it informative. You NEVER let us down. Felt like I was in a master class. Going to watch part 2 now before checking out the latest.
Thank you …I appreciate your feedback !
Thanks for “Rocking My World” with this alternative system for stronger rack resistant drawers on many applications which are appropriate. I love when someone “ hurts my head” with a new idea. It’s the only way we can mentally grow as individuals…..
Awesome! Thanks for the feedback
Sooo, what are you really saying....no groove, maybe?? LOL Too funny. I tend to agree with what you're showing regarding the floating bottom panel, but yes, so many ways to build drawer boxes. Love your videos~!!
Grooves in drawer boxes are so 1800’s! 😆When they were needed! 😬 Thanks for watching
I love seeing your way of doing things and always learn so much! Thank you!
Thanks Garrett…I appreciate the feedback!
Ramon, I understand agree with your drawer design, it adds strength and durability that should last forever ! I will begin making all my drawers this way also. Fabulous work once again. Thanks for sharing your techniques.
Even if I make solid wood & dovetailed drawers, I use a 1/4” plywood bottom and anchor it solid in a rabbet, not ever into a groove. After making thousands of drawer boxes I know for a fact that this design is superb! And I’m thrilled that you like! Much thanks.
I have a new way of making drawers now! Thanks for the great tip, definitely takes advantage of the strong point of plywood!
Yes! Come back for part 2. Much thanks.
I started working in a very small custom shop 3 yrs ago.
We use 1/2 imported raw plywood for everything including bottoms, glue and side staple using spacers to get the 1/2 clearance for undermount slides only.
Backs only, are flush to bottom.
Top edges, and staple holes are bondo'd then sanded (90% of our work including inside of boxes are painted), do not edge band even stained but use putty.
The full gluing makes for fairly strong boxes especially with 1/2 bottoms.
As the lead installer, hardware finisher, maintenance, electrician, jig and fixture builder in a shop of 6 who build from ff-doors-finishing I have lots of tools and maintenance parts.
I am building a 8ft h X 8ft L X 3ft deep tool crib-maintenance-enclosed workbench and wanted stronger drawers and also try out new techniques.
Bought the whiteside plywood dados set, as well as the v-groove edgebanding set for my 13 drawers.
1/2, in a dado is extremely strong for racking and twisting with just a dry fit.
I have waisted countless hrs on the v-groove edgebanding, and it's one of the few tools I've ever regretted purchasing.
In a county of 42k population, with 40-50 custom cabinet related businesses change happens very slowly.
My biggest conundrum was choosing undermount loosing 1/2 of drawer depth, vs sidemount. Since toolbox is 8ft long I used a maple ff.
So many factors go into my decisions lol.
Thanks for teaching all these concepts, it's nice when I can reach into the memory bank and use one!
Thank you for this detailed comment. I’ve been woodworking for over 40 years; in that time, everything has changed. Only the quality of the end product is the same. I love Ramon’s videos because they show another way to achieve “perfection”. Your comment is not so easy for me to follow as a video (age) but I get most of it - always interesting how professional woodworkers have evolved their own methods.
I’m super pleased and a bit surprised as to all the positive comments here. So many ways to make a drawer box, but sometimes they’re just pretty. I want em strong and functional, first and foremost. Thanks a ton for the input.
So much knowledge… I’m convinced!
Thank you. Part 2 will show more!
Great Ramon. Hopefully in the second part of this series you'll show the dominoed corners also.
I was curious of the same thing
Yes…part 2. Much thanks.
@@ramonartful Thanks Ramon. Keep the videos coming, I love watching your videos. Learn a lot.
That’s intriguing. I count the number of boxes or drawers that I’ve made over the last 40 plus years in hundreds - certainly not the thousands that you talk about. When I started, material like plywood obviously existed but it was rarely used for boxes. We used to take a piece of 3/4” solid secondary timber, joint if we needed to for width, and then plane down the edges to, say, 1/4” to fit into grooves/dados that we had made, with a grooving plane, in all four sides. Expansion and contraction is not the big issue here in the UK, generally, than the extremes of climate you have in America. We would make the dados front and back to a depth so that bottom fitted snugly. For the sides, we would leave a cumulative 1/4” expansion gap between the width of the bottom and the depth of the dados.
Now, we have engineered timber and much better glues plus loose tenons. For a jewellery box, for instance, I use solid wood for the 4 sides and plywood for the bottom which I cover with leather or suede internally. For a drawer box which is going to have a false front, I would make all the sides and the bottom out of good quality ply but not necessarily Baltic birch as opposed to a good quality A/B plywood. Because I’m using ply and because I E want to avoid a sagging bottom , I do groove/dado all 4 sides and I glue the bottom in. Racking is an issue whilst the glue is curing but I have a lot of shop made 90 degree triangles which I clamp until I’m happy with the glue set. I’ve not seen your method before and I’m not doubting that it’s the best way for you. I also see examples where the bottom is set into grooves/dados but has the back only reduced in height so the bottom overlaps the back and is screwed into the back. Again, I’ve seen much better craftsmen than me do it this way but haven’t had the opportunity to ask them why is that method better than glueing the ply bottom to the 4 ply sides.
We recently had to make very large drawers for a permanent display van. That is, the van is taken around to potential clients by our customer, who then opens up the sides, pulls out the drawers and there all the merchandise is on display. Well, the biggest drawers had to be 900mm wide x 1830 long but only 150mm deep. Our solution was half rebates on all four sides as normal which had plenty of glue area already but we also used pocket screws after we glued the bottom in, rather like cramps. Add a false front and those 2 pocket screws were hidden and the rear 2 pocket screws were facing to the inside of the van and will never be seen.
Interesting. There are a lot of ways to do things. Ultimately…what counts is strength and quality. I do find it odd that many people don’t take advantage of the fact that stable materials won’t move and can be glued in solid. Working in a shop that did countless repairs on others work (many many drawer boxes) I saw the common denominator was an inherently weak groove, too close to the bottom or split with screws holding on drawer guides.
Thank you tons for the info and input 🙏🏼
Very interesting
Great content Ramon! Thank you for all your efforts.
I really appreciate the feedback! Thanks for checking out the vids!
Atomagicly love the vocabulary, thanks, teacher.
😬 thanks for watching!
I’ve got 7 drawers to make tomorrow and now you’ve got me rethinking my entire drawer making work flow.
I do 5/8 solid wood (beech/soft maple, 1/2” bottom, captive on three sides so I can slide the bottom in after assembling. Then staple the rear. The drawers do rack, even with dominos.
I use 1/2” for the bottoms because in my workflow I can use scrap 90% of the time on my drawers. Since 1/4” was only used for drawers bottoms the excess waste made it more expensive for me to use 1/4 vs 1/2
Sounds like strong drawer boxes! That’s important to me. We use to see a lot of drawers come in the shop that needed repaired or replaced. On average 2 per week. Anyway…thanks!
How could I not make it to the end of the video :-) Thanks for the explanation of this drawer making approach. I've been gluing in my bottom panels in the small number of drawers I have made, but your approach looks way faster and probably stronger. Before I change my approach, I'm going to wait for part 2. Thanks for another great video which I'm sure took you a long time to edit and put together. Great work!!!
Ha ha…thanks David. Part 2 is shorter…I hope to have it edited by Sunday. Ended up with a flu type thing. I haven’t been sick in 6 years.
@@ramonartful that's too bad about getting sick. I hope it doesn't last long and you ate feeling better soon.
How have I never seen the shim trick before? I will be doing this tonight on some jewelry box drawers. Thank you!
Hello Nick! I went thru the video kinda fast but didn’t see a “shim trick”?! But I’m glad you did! 😆 Thanks for watching. 🙏
@@ramonartful haha, you don't remember every minute of what you posted a year ago? At 21 minutes. Anyhow I did get a chance to play in the shop last night and this trick worked perfectly.
Oh yeah! Yes...I love shims for cutting grooves and other applications. I'm creating content for an upcoming YT vid that will be all about shims, spacers, stops and blocks. Soooo much easier and improved accuracy than measuring. Anyway, glad you liked it! @@nickbailey202
100% agree Ramon. Here in Australia we mostly use melamine and everything is glued! It squares it up and 'ties' everything together for a stronger construction. Everything for us is commonly 16mm including drawer bases and cabinet backs when it comes to household kitchens ect
Yes! At my old shop we build thousands of commercial cabinets. They were constructed of 3/4” (19mm) for everything except backs and drawer boxes. Those were made with 5/8” (16mm). Very little waste with fall off from back material being used as drawer stock.
It was a fast paced job…I don’t miss it, but sometimes I do! 😬
Thanks a ton for the input 🙏🏼
all my drawers will be made your way, outstanding
Thank you tons. Check out part 2 next Sunday!
even with under-mount style drawer boxes I staple from the bottom at an angle to secure the 1/4" bottom. Really nice way to square them up!
That’s great and yes it is! Much thanks.
Can't wait to try your drawer box method!
Me too! 😬 I'm starting on a few drawer boxes soon. Thanks
Very slick way of building drawer boxes!! Definitely heading iver to watch the next video!! I have a new shop currently being built and will need to build all new cabinetry and I will most certainly be building my drawers like this! Also, It would be nice if you posted more often 😉 As always very informative and greatly appreciated!!
Sincerely,
Mike Phillips
Hey Mike..Awesome to hear about your new shop. And I already have a hard time keeping up with producing a TH-cam vid every two weeks! 😆
Thanks a ton for the good words!
Why waste all that potential strength that the bottom can provide. It ties it all together. nice one brotha!
That’s right! After tens of thousands of drawer boxes built this way…I can attest that they’re extremely strong! Thanks a ton 👊🏼
Really good video and process, i appreciate your approach and quality levels!
Thanks man…I appreciate the feedback!
Ramon, there is another angle to look at when building in a floating drawer bottom, and leaving a drawer with a very small amount of “rack”. If a cabinet box or carcass is built slightly out square by chance, or the cabinets where installed and anchored in place, and maybe pulled out of square slightly, then a drawer box can conform a bit to the front face of a cabinet box for a better, more parallel fit. But nice builds you have there! Thank you for the videos! 👍🏻
Yes…that is another angle that I never even thought of. But since I don’t make drawer boxes for other peoples existing cabinets, it wouldn’t apply. But a valid point. Thanks for the input 🙏🏼
@@ramonartful yeah, it’s not very often, but in my 32+ years I’ve seen it a few times. Appreciate every one of your videos. Well done sir!
Really enjoy your videos and 'always innovating' mindset 👍
Thanks …I appreciate the feedback !
I love your through Dominos draw box construction.
Thanks! Been making em for a while like that. Super strong!
Always learn something from you...thank you!
Thank you for checking it out!
Hi Ramon! You are trully the jewell box of ideas/jigs/tricks - thank you for showing us that. Would be really nice to have at the begining introduction of features which your drawer boxes have ( overview etc. ) it would be much easier later in video to relate particular parts of it and have it all visualized :) ( I'm speaking from non pro point of view of course ) !
I write in the description a short synopsis of the video but I like your idea as well. I’ll keep that in mind…it would be helpful. And thanks a ton
Made it to the end, I watched most 2X, genius as usual. Simple. I have questions but I will wait til part 2 to see if they are answered….please speed up production on that 😂
Hopefully, it’s in part 2. If not, ask away. thanks a ton
Thank you Ramon, Super Genius!
Thanks Tim…I appreciate it!
Great channel.Subscribed!
Thanks a ton…I appreciate it!
As always, fantastic ❤
Thanks brother 👊🏼
This is excellent. The only thing I don't see the point in is the fine adjustment for the rabet to 1/8": unless the sides are EXACTLY 5/8 or 1/2 you still have to put them back to back and measure the finished length. Love the idea with the shim for the drawer bottom and then using the same setting for the front and back and then the offcut for the filler. and just with the filler back in it is 100% the required width.
Yeah…you’re right about the 1/8” depth. I’m so used to doing it from when we used a 5/8” material that was exact. It’s still a great method for checking an 1/8” or 1/4” rebate or dado.
Thanks a ton for the feedback!
Ramon, I just discovered you on TH-cam and look forward to your other instructional videos. I watched part 1 and part 2 and I will try your methods in my next project. Presently building an 8" vanity for a master bath and I really like the look of the dresser you showed in the videos. Could you possibly tell me what the wood species on the case is and wether it is natural or stained. The tone would go great on my project.
Thanks for all the time it takes to provide these videos. I am an old hobby guy and learned a lot. Your presentation and methods are really enjoyable.
Thanks a ton for the good words Fred!
The dresser is made of Cherry. Solid wood for the frames….the panels are figured Cherry veneer. This species is well known for darkening on its own over time.
I’ll be showing the finished project soon. Thanks
Ramon, love your work! Please tell us what you did to the sides of the drawers connecting to the front panel. Thanks!
Hello! I’m not sure I understand the question. All of the drawer box sides have a rebate…glue, a couple of .23 gauge pins and then through dominos for added strength. Ask me more if you’d like. Thanks !
Awesome information as always.
Thank you! More to come in part 2. 🙏🏼
I have restored fixed dozens of antiek drawers and it's just as you said.
I make my drawers for onder mount and side mount with a rabet and than I screw the bottem on. Al my drawers are mad of MDF and a groove in MDF with so little material behind it it Wil just brake out.
Yes…an attached bottom makes em strong! Thanks for checking out the video
There's a client that has a dresser that needs repair. It was a wedding gift they've been having for 15 years and she would like it to last at least another five years. The frame is good.
The boxes are 1/2" MDF while the fronts are solid wood with center mount slides. The sub-front (true front/box front) has dowels attaching to the solid wood and glued in place with rabbets at the ends while the sides have dadoes, and the backs have butt joints, all with a bottom groove for the bottom and everything is glued in place.
One drawers side broke off at the glue joint, but I inspected the other ones and about half are starting to fail.
I am considering gluing the gaps then either adding nails, staples, or screws. What do you think is best for this situation? Crown staples, 18 ga brads? She isn't worried about appearance since it will only be visible when opened. Probably won't get filled to save cost, or is it highly recommended?
Also the slides on the bottoms only have a couple screws and we know MDF doesn't hold those small 1/2 or 5/8 screws, so would epoxying them to the MDF bottom be a good idea? I believe the bottom is 1/4". Most of the slides on the bottom of the boxes have come off and none slide well so they're all getting replaced.
Maybe down the line the boxes could all be replaced being MDF, as the rest of the dresser is good, including the solid wood fronts. In the meantime she just wants them functional, unless you think its worth now to invest redoing the boxes entirely (which material?) then maybe I can convince her. Would need to ask her budget.
Also I'm a bit worried not to under sell myself but I'm worried about the price of the repair. She may have the piece that broke off around, if not I'll need to make one side for the drawer, which I think would be the most expensive, getting the piece, cutting/milling to same size with groove and dadoe,etc.
I'm still new to working independently so I estimate based on how long it takes and calculate what I want per hour to give my estimate, but not sure if that may be more or less expensive than trying to figure out market price range to fix drawers like these.
And help and feedback would be appreciated.
Thanks for your videos! It helped with my previous drawer job.
This one is a bit tricky.
Staples are best for holding power, 18 gauge is a good choice. If the area that came apart is clean and goes back together well, some epoxy applied sparingly would help. I’d tap all of these apart to open them and so this. In addition to the staples a light squeeze with a clamp should work. Again, sparingly with staples. Too many only weakens the area.
Replacing the guides makes sense however, this doesn’t always work. Most commercially available slides need 1/2” clearance at each side. You mentioned a center slide, those usually require much less clearance. Without seeing exactly what they are, I can’t advise. Center slides in general are used on dressers because they’re cheaper, but could also be harder to find. If you do have 1/2” clearance then you have some options. Epoxy coated, 3/4 extension (bottom outside corner mount) are a good choice. Side mount, full extension, ball bearing are also good…the appeal here is the full extension. However, with both these types one would need the structure to have a way to attach the cabinet components. That can be challenging if there’s no place to anchor these. Sometimes the side walls of the dresser are too thin, for instance. If you can add support for the slides, use plywood rather than solid wood, simply because it doesn’t split.
Sometimes it is easier to just make new boxes. I like Baltic Birch 12 or 15 mm. But it needs to be sanded well and finished (sprayed lacquer typically) Another option is 5/8” melamine, but here, one needs a good saw to cut this material clean on both sides (scoring blade) and the top edges need “tape”. Prefinished 1/2” is available, but the top edge still needs addressed. Of course, solid wood is great, but needs finished.
If you can find the piece to glue and clamp, that could work. Use a block covered with clear tape or similar to get proper pressure and glue squeeze.
Pricing: I use to charge 90 to 120 per box and 40 for repair. Sometimes that covers it and sometimes it didn’t. We repaired drawer boxes weekly. Many times the front or back was broken and we could just add another piece on the inside without disassembling. But often we would disassemble, remake a side and reassemble. Matching material was usually the problem. You’re gonna have to figure out pricing on your own since I can’t offer much without seeing the dresser.
One option that was getting popular is ordering all new drawer boxes. Even with shipping this could be a good alternative, just be aware of the drawer guide size requirements and the ability to add mounting material.
Dressers can be a challenge to repair because they can be more work than buying new. In general, they’re made kinda cheap. Many are built so lightweight with thin materials, that they’re hard to make strong. I’m not sure without seeing it. Perhaps, epoxy where you can with good clamping is best. Good luck!
Don't know if you remember but I talked about that I didn't liked the grass tipon glides (I don't like tipon in general) but when I installed those I madey drawers in a different way I do now now I screw the bottem on on three sides and the front has a groove to except the bottom and the sides and back has a rabbet. But I used to put it in a groove al around making the drawer not rigid witch might be the problem of the tipon not working correctly. Wich is a good example why the drawer needs to be rigid
Yes…you’re right. That’s one of the reasons that drawers should be rigid. thanks 🙏🏼
Thank you for sharing
Thank you for watching!
I enjoyed the video! Would it be possible to link the drawer hardware used? Thank you!
Glad you liked! Here is a link to the Grass drawer guides. Of course, you'll have to check the length of the slides you need and the front clips are a separately purchased items. thanks
www.cabinetparts.com/g/dynapro-2d-drawer-slide-grass-g12359
Furniture builder 38 years, NEVER glue bottoms into drawers also raise panels in doors , their are supposed to foat in the 1/4 or 1/8 inch grove. All my drawers are dovetailed.
You may have missed my message. Floating SOLID WOOD drawer bottoms and floating SOLID WOOD raised panels should never be glued…you’re correct. I’ve built cabinets for 44 years and I’ve learned the flaws of MODERN methods where grooves are cut for drawer bottoms. Since most modern drawer bottoms are plywood, there is no need to allow for expansion/contraction. Same with dropped panel doors (plywood center panel). Glued into place creates a singe unit that is extremely strong! As an owner of a large shop and production manager in others…we routinely repaired or replaced all kinds of broken drawer boxes made by other shops or from factory cabinets. The main issue; weak material at the groove near the bottom edge. The methods I describe developed by my brother and I, completely eliminate that problem and we have literally made thousands of drawer boxes. It was not rare to build one commercial job with over 100 drawer boxes. And we did dozens upon dozens of jobs per year. In over 30 years in one shop, we did not have one single failure. Many architects would not spec dovetailed drawers, perhaps to reduce cost. No problem…we had a perfect solution for composite or plywood material to make drawer boxes that would last for decades. Thanks
Do you think the drawer box groove would still be the Achilles heel if it were glued all the way around?
Maybe…maybe not. It’s challenging to get glue into a groove without making a mess. If the panel fits correctly when dry fitting, usually when glue is added the fit is too tight…and panic sets in! 😆 I’ve made drawers like that and had the sides or fronts/backs bowed out. If the panel slips in easily when dry fitting, then it’s hard for the glue to do it’s job. But for what it is, a drawer box with grooves and a somewhat loosely fit panel and glue…is probably quite strong. Just not as strong as bottoms stapled on directly to all components with glue. Maybe I’m splitting hairs here😬. Thanks for the question. 🙏🏼
Very cool... Did you say "automagically"? If you did; brilliant!! lol
Remember when teachers would say..:”tell me, in your own words”…😆 Here’s two more:
Gription; I like using sanding blocks (with a clamp) as stops at my drill press fence…you know, for better gription.
Sliption; I like using TopCote or GlideCote on my table saw, jointer/planer…for better sliption. 😆
You have mentioned you brother and his shop multiple times but is he a furniture maker as wel
He owns a large commercial shop…they do tons of cabinet/countertops for schools, banks, doctors offices etc. He could build incredible furniture if he wanted to…and has made a few pieces, but no, he’s not a furniture maker.
@@ramonartful aha thanks for clearing that up
Brilliant.
Thank you. Come back to see more!
@@ramonartful Ramon, I'm subscribed to your channel. You are in my top five channels to watch. Love the in depth information.
@@mmmdesignllc thank you!
Watching this video was certainly time well spent. You're obviously highly skilled at putting videos together. You must invest many hours in shooting and editing a video like this. How long did this one take?
Thanks Mark! I’m not sure if I want to know how much time I spend editing! 😆
It does take a lot of work. I’m trying hard to grow my TH-cam channel, and I love sharing what works for me, so I guess I’ll keep at it 😬
I’m convinced. Drop mic
Cool to hear! I promise…they are strong 💪🏼 😬
I’ve been watching a ton of your videos and learning a ton
What router bit are you using to create the rabbets for the drawer slides - the one with the replaceable cutters? All mine have a top bearing, and doesn't look like that would work.
Hey Mark...I'm not sure what you mean..."rabbets for the drawer slides". Do you mean the rabbet cuts for the front and backs to engage with the drawer box sides?
For that, I use a bit like this. amzn.to/3W54nev
That one is 1/4" shank...I prefer router bits with 1/2" shanks for less vibration/chatter, but that one has worked well for me.
Or maybe I misunderstood you...LMK. thanks
@@ramonartful Sorry about that, I was only operating under one cup of coffee... Yes, rabbet cuts for the front and backs of the drawer sides.
I thought it looked like a surfacing bit - have a few of those for my router sled, but they are 2 1/2 inches.
Thank you.
@@mpoffenb As long as you can "bury" some of the router bit within the router table fence, it should work, yeah?. thanks
I guess I knew that once and then I got in a hurry and messed it up😊. Happens without fail when I wanna do shortcuts, sigh.
Yeah but…when we make “mis-takes” is when we learn! 😬
How do you go about cutting the dominos on the sides without getting chip out on the plywood? Ive used rabbets and dominos for a bunch of drawers and I always get chipout on the domino holes.
I show a bit more in part 2. On these boxes, I offset the domino slightly biased toward more space inwards. As I plunge, I take it easy to start…then normal plunge rate. I had one that chipped, but that was an easy fix. I share that process in another YT video if you’re interested. Thanks
Excellent video love your work. What brand of drawer slides do you use?
I love the Grass Fultera. I like them better than Blum. But it’s Blum all the way for hinges. Thanks
I just switched to Hettich. Love them! So quiet and smooth. Just as adjustable as Grass or Blum.
I really like this method but was wondering how weak would they be if I did them without the rabbits in the sides and just use dominos?
They’d still be quite strong. The bottom being attached solidly…without a groove, is the key here.
@@ramonartful awesome thank you very much.
@@ramonartfuldon't laugh but my customer also is very ademit about doing 1/2 but preferably 5/8 bottoms with 5/8 sides, would this be ok to do with a 1/4 groove and rabbiting the bottom to fit the groove?
@@RobyWanKenobi 5/8" drawer components will be super strong (albeit heavy) so make sure your drawer guides are proportionate to this added weight. Two ways to do this...one can cut a deep rabbet (1/2" into the 5/8" material) and anchor (glue & staples) the bottom directly to the drawer sides and front/back pieces. Or...make a 1/4" groove that's about 1/2" up the drawer components, then rebate the drawer bottom to correspond to this groove. I prefer the first method. Strong! Hope that makes sense.
@@ramonartful we are using Grass Heavy Duty under mount slides. Drawer plus contents work on paper with lots of wiggle room.
I like the simplicity of the first method but with the undermounts would you do a 5/8 tall groove 1/8 to a 1/4 deep?
Love that sliding table saw! Joints are pretty but nobody looks.
I've only made a few dozen drawers over the years. Maybe a hundred.
I'll hide a couple screws behind the drawer front and through the back.
Full board sides. Ply bottoms. Finger joints. To much time spent. All non-pro.
Years ago, I used to hand cut dovetails on my higher end pieces. Customers called them “neat” or “nice box joints” and it made me realize that the only people that appreciate dovetails are other woodworkers! 😆 thanks 🙏🏼
Lol- that saying never made sense to me, my balls sure as hell aren't dead on accurate🤣🤣
Ha ha…yeah, you may be right! I just go with it cuz it rolls well!
Ramon you didn’t fill the pin nails and 1/4” bottom has exposed MDf. Que pasa carnal??? The box is strong I agree but I am just here to quality control.
Come back for Part 2! No nail holes showing. No MDF edges showing. Thanks a ton
Drawers built 37 years, massive Ash,dovetailed with the drawer-bottom grooved, still fine, no warpling and no racking....
That’s great to hear. My experience may have something to do with what was in the drawers. Loaded with junk! 😆 thanks