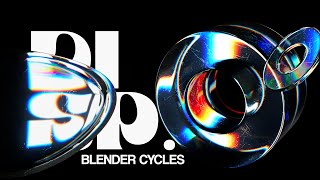
Ultra Realistic Procedural Quartz/Crystals - Blender Tutorial
ฝัง
- เผยแพร่เมื่อ 2 ส.ค. 2024
- In this video we will create a fully procedural system to create realistic crystals with insane depths and internal cracks, using geometry nodes and a beautiful yet simple shader system!
Project files: alexandrealbisser.gumroad.com...
Check out my Instagram / alexandre.albisser
Chapters:
00:00 Intro
00:25 Method Overview
00:38 Instance Cracks
05:01 Fix Cracks Size
09:51 Cracks Thickness
11:37 Attributes and Shading
12:21 Materials
15:21 Outro


![NONT TANONT - ดอกไม้ที่รอฝน (spring) - Reimagined [Live Session]](http://i.ytimg.com/vi/nY2PsFZFEOg/mqdefault.jpg)


Absolute gold
Haven't met tutorials about crystals with extra mesh, not only material, very useful!
Glad it was helpful!
instant subscribe. I'm a blender/houdini artist and the solution to avoid booleaning is really elegant and something I can utilize in Houdini too. Love this.
Thanks for the sub! Glad you could take something from here :)
very well explained, thanks for the effort in making this video
Glad you liked it!
Great tutorial and stunning renders.
Thanks so much!
Thank you, awesome as usual 🙂
Thank you too!
Looks very cool!
May be you can recreate an ice surface? Like winter lake ice layer
Dude. You’re the best!
Wow, thanks!
Sooo glad I subscribed to your channel!
Glad to have you here!
Very cool Thank you 🎉
Thanks for watching!
awesome!
Thanks!
thank you, this is really helpful to me.
Glad it was helpful!
Amazing
Thanks!
Thank you so much!
You're welcome!
neat tutorial!
Glad you liked it!
This is insane! Wish I was as clever and creative/
It only takes experience!
Nice tutorial
It was 🕶Crystal clear
Thanks, glad you liked it!
Good work.
Thanks!
Thank you
You're welcome!
What kind of sorcery was this? Amazing, thank you for tutorial. 🦄
You’re welcome 😊
Thank You Thank You Thank You!!!!!!!!!!!
You're very welcome!
not sure where i messed up but when it game time to remove the outside stuff it stopped working, not entirely sure where i fucked up, when you plugged into the Viewer your crystal was black and the planes were grey, but when i did it the outer areas became black and the crystal became grey
Are you in the latest blender version?
Did you try to debug it with the file available on my gumroad?
SUper dope! only remark: Make the UI a little bigger in your settings, very had to read sometimes
Noted!
Super tuto ! Comment fais-tu l'effet de morphing entre les cristaux ?
Merci ! Sur les exemples c'est des simples shapekeys !
This is a very nice tutorial, but on 9:00 the jaggedness of the edges is only partially removed. If you view them from the front, the edges are perfectly smooth. But viewed from the side, they are still jagged. The edge vertices snap to the inside of the gemstones, but they don't all end up on a straight line, hence the jaggedness. Does anyone have an idea on how to fix this?
I don't think there is an easy easy fix for that, you could do that with some math to make sure they only snap to the surface in a planar way regarding to the normal, with ray cast nodes or further fix with set position nides, which is easily doable but might not be so straightforward in a tutorial
So far this is an awesome tutorial! But I'm having a critical error in fixing the cracks size to the interior of the shape. Instead of deleting the edges that peek out, it seems that the dot product projects the side view of the object into the planes (I used an icosphere) and so, I end up with the planes only having the corners white and all the rest black. The nodes are the exact same, I don't know where the mistake could be.
Do you have a negative scale or flipped normals on your icosphere?
Hi, I've followed your instructions bit by bit and still stuck at step 2. Firstly, how do you get the black and white/positive-negative rendering of the mesh, which is first featured in 5:01?
Secondly, for some reason the cracks are not confined by the rock, the crack planes are rounded, but stick out and have holes ... generally just looking like messy geometry. I don't know how else to explain - please help!
This is here to help you visualize but it is achieved with the "Viewer Node" which allows to display data in the viewport!
If you want more details do not hesitate to download the assets with the first link in the description and take a look at my nodes
Is there a technical reason you set the random rotation min/max to -pi and pi, instead of 0 and tau?
That's just a personal preference :)
@@alexandre.albisser Okay! That's what I thought, but just wanted to make sure I wasn't missing something. Thanks!
hi, thanks for this tutorial! i was wondering if somebody could explain why when I press Ctrl + L -> Copy Modifiers the generated rocks become flat-surfaced and jagged-edged? I understand it copies the shading of the icosphere. and if I do the same when selecting generated rocks it does the vice versa to the icospheres (making them rock-like) But it doesn't happen when Alexandre does it.
SOLVED (I think): The generated rocks have a bunch of modifiers, all of which I applied to the geometry. Thus, when Copying Modifiers from Icosphere it only copies the Procedural Nodes.
Sorry about the late reply but yes that's it, you might want to apply the modifiers of the rocks to ensure it works as intended!
5:00 quick question, how do we open this menu and proceed to highlight the excess faces on the outside of the object? Sorry I am just very confused on that front.
This view is just something I zoomed in on the edit so you can see better, but you can previsualize attributes like I do with the built in Node Wrangler addon, and the shortcut shift select, or the viewer node
@@alexandre.albisser Thanks. I am still lost on the part where you made the object black and white to highlight and delete excess faces though 😅
I keep getting random dark spots on the planes outside of my shape. For the most part it works but it is definitely a problem. I'm using blender 4.0 so didn't know if maybe that could be a problem or not
I also tried to follow your gumroad file and it still kept having random parts on the plane appearing outside the shape
What are your render settings? Is the Light Path count for the Transparent rays set to a high enough value?
followed everything but my gem looks opaque and the textures have a fuzziness to them that i cant fix, help!
Are you using Eevee? You might have to see other tutorials for the render settings for glassy materials
Bonjour j’ai une question ! Lors de la partie sur la correction de taille des fissures vous utilisez une case appelée « Subtype » dans les group input. Hors je n’ai pas cette case sur mon blender, je n’ai que Type puis Name directement. Y a t il une case à cocher pour la voir ? Merci beaucoup!
Hello, les subtypes ont été intégrés dans Blender assez tardivement, est ce que tu utilises une version récente ? Datant au moins de la date de publicationrde la vidéo ?
@@alexandre.albisser ah je vois! Non effectivement je n’utilise pas la dernière version et impossible de l’avoir pour le moment je pense… je ne suis pas en charge de l’installation des logiciels sur nos machines !
Mais est ce qu’il y aurait une équivalence au Subtype distance du coup si on utilise une version plus ancienne ? (C’est à 10:08 )
@@sugarys dans les versions antérieures le subtype etait assigné implicitement il me semble, cest a dire que pour avoir un input de distance par exemple, il fallait la creer a partir de linput radius d'un curve circle node par exemple.
Mais dans le pire des cas ce n'est pas important pour le fonctionnement
@@alexandre.albisserd’accord merci beaucoup ! Bonne journée :)
Bonjour à nouveau , j’ai suivi toutes les étapes du tuto mais quand je passe par la case shading et que je mets un glass material sur mes objets je n’ai qu’une surface lisse de verre et pas la trace d’une fissure…
Pour + d’infos je sais que les fissures sont à l’intérieur, je les vois si j’augmente la thickness des cracks mais la surface simple des objets ne semble pas transparente pour laisser voir les fissures ?
J'imagine que tu utilises le moteur de rendu eevee ? Dans ce cas je t'invite a aller regarder des tutoriels pour les matériaux de verre optimisés sur eevee
does he give credit to someone who did it 1st? curiosity mainly. viewing later.
& display of the character.
lol nope says: his method: Alexandre.Albisser
JaAlVir657
11d
Glad you had such success with my method!
If you have a reference of the same method used for this effect I would be happy to share it, as I usually do if my tutorials are built on the method of other artists
Nice rocks, I like crack... Wait no! That came out wrong.
**insert a Breaking Bad Joke about how they are minerals**
Great tutorial!!! But not able to get the rotation. Also request for screen cast and slower speed !!! We are Noobs!!
Noted!
I am following the node set up from the file and group input to sample nearest surface node connectors turn red instead of green as in your file?
super tuto , mais il va VRAIMENT taffer l'accent , j'ai les oreilles qui saignent :D
Tes français ?😂
👍