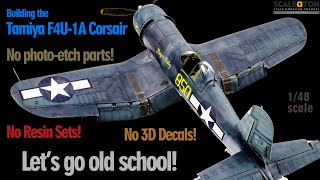
1/48 Tamiya F4U-1 Corsair Full Build

ฝัง
- เผยแพร่เมื่อ 23 มิ.ย. 2020
- A full build feature of the Tamiya F4U-1A Corsair "Jolly Rogers".
Simple techniques show you how to create a detailed display model from Tamiya's already superb kit!
#tamiyacorsair #corsairmodel #48f4ucorsair
For a step by step how to on making foil and wire seat belts, check out my video tutorial here: • Take Your Project to t...
Follow Me Online
★ / flyingsmodels
★www.flyingsmodels.com
Links to Products used in this video build and others on the bench:
1/48 Tamiya F4U-1A Corsair: amzn.to/2YvL8Pv
Tamiya Cement: amzn.to/3ghZWbk
CA glue: amzn.to/2Mn67x1
Solder Wire: amzn.to/2AzclXM
Pewter foil: amzn.to/39XpxWg
Dental Resin Powder: amzn.to/2BSEz0o
Tamiya Fine Putty: amzn.to/36turX3
Tamiya Tape: amzn.to/2WZbxED
EZ Line Rigging: amzn.to/2FKmzrj
Airbrush: amzn.to/36tu5zH
Compressor: amzn.to/2A4vkt8
Tamiya Paints: amzn.to/2LTSmph
Tamiya Thinner: amzn.to/3cUxOZE
AK Gauzy: amzn.to/3dr4Lxf
AK Thinner: amzn.to/302UXFU
Oil Paints: amzn.to/3gkn4pp
Mineral Spirits: amzn.to/2yu67bf
Brushes: amzn.to/3goPPSf
Tamiya Fine Putty: amzn.to/36turX3
Sanding Pads: amzn.to/3c5io3K
Copper Wire: amzn.to/3eGLPL2
Razor Blade: amzn.to/3d0OkqW
Olfa Circle Cutter: amzn.to/2Avly3V
Evergreen Styrene: amzn.to/2B4zJN2
Micro Drill: amzn.to/2Zw1Rmx
Straight Pins: amzn.to/3bVmlb7
The Camera I use to shoot the video: amzn.to/3bXlMxl - บันเทิง


This is hands-down one of the best corsair models I’ve ever seen. I’m getting into the modeling scene and hope to do this good one day.
I really appreciate the kind words. I wish you all the best as you start modeling and hope the videos I’ve put up help in some small way. Don’t hesitate to ping me here or over on Facebook (same flying S models) if you ever need anything.
I think I've never seem someone so skilled with an airbrush. You nailed the look of the Corsair.
Thank you for those kind words. I really appreciate the feedback!
Excellent video, have had this Corsair in my stash for years, and look forward to giving it a go! I love your video build format, I've been watching some others that show the build sequence in real time, and you end up skipping over a lot of material to "get on with it"! The fast forward, still showing what you are doing, is more enjoyable. Thanks!
Thanks! I appreciate the feedback. I know what you mean, I find myself fast forwarding a lot when I watch other builds so I figured I'd help that "problem" along by just fast forwarding through the repetitive parts and hopefully hit the important highlights. Glad the format is working for you.
I liked the way you painted the dials and gauges.
I thought it looked really good and have not seen that done before on these types of models.
I am a figure painter, but like to watch model builds particularly for painting techniques, which you guys have some very interesting ideas about, and I like to learn as much as possible about model painting.
I really like your methods and you are a fantastic painter, wouldn't really say I have any real interest in planes but for some reason I have always loved the look of the Corsair, it's a strange looking bird but I always find myself drawn to model builds of this plane.
I agree, the Corsair is a good looking one, albeit odd with its inverted gull wings. I appreciate the feedback as I feel the same way. There are lots of figure painters that I really admire. To me, that's a true art form and talent!
my favorite plane, done by an amazing modeller, with the best paint scheme ive ever seen. Well done! i like how the paints look almost grey blue, and not just blue.
Thank you for those good words. I've always loved the Corsair as well.
Great build especially like the detailed flow of the build without the editing out of certain stages like most videos. Great job !
Thank you, Dave. I appreciate the feedback and will try to keep the same format/content going forward.
Really good results, as usual.
I have 1/72 & 1/32 Corsairs, built and in my stash, but no 1/48s. Must get one of these.
I like your video format as it highlights the major and more interesting aspects of the build without getting bogged down in too many little details.
You'll definitely want to get one of these. Their 1/72 kit is equally as nice. Drop the flaps and open the cowl flaps with a set of Aires resin parts and you are in business!!
Perfection achieved! Thank you for demonstrating each paint technique and providing all product ID. Excellent video and results. I have this kit in my stash and look forward to a project with the Tamiya quality product.
Really appreciate the kind feedback. I'm glad the video may have helped a little. Best of luck with your Tamiya Corsair build. I'm sure it will be awesome!
Amazing build. I’ve built the same kit and it’s truly the perfect Corsair in all categories.
Thank you! I really is best Corsair around, despite its age.
Perfect results which are clearly laid out in the video. Thank you !
Thank you for that feedback and taking the time to provide. I hope that the video helped a little.
Great to see a master at work
Thank you for that good feedback. Much appreciated.
Excellent. after I finish my HMS victory, I’m getting back into plastic modeling of aircraft from WWII era.
Thanks, for this video DickT
Appreciate you taking the time to provide the feedback. I have a hard time straying too far away from the WWII aircraft myself. Happy modeling!
One of the best corsair builds I’ve seen! Great job!
Really appreciate those kind words and for taking the time to post them. Was a really fun build.
Great video. Your instruction and demonstration of techniques is really quite good. Also, your production quality is very good too. All around, I will give you an A+ for this video.
Right now I am building a Corsair I won at a model show. It is the Trumpeter 1/32 and I will press on with it. There were about 90 pieces just for the engine and even at that, the detail sucks compared to the Tamiya. I plan on building the Tamiya 1/32 next after this Trumpeter is complete. I will use the Trumpeter as my paint dummy as a pre-runner for the Tamiya build.
I really like everything about your paint scheme and finishing of this Corsair. You really nailed it. Great job on the build and great job on your video production.
Thank you for the good feedback. It was a fun little build as is the case with all Tamiya kits. I hope you have fun with the Trumpeter kit. I've been working to convert my Trumpeter F4U-4 to an F4U-5N. I need to get back on that project. Totally agree with you on the kit comparisons. You'll really enjoy that 1/32 Tamiya kit. Look forward to seeing some results. Feel free to share over on my facebook page. Happy Modeling!
One of the best cockpits Ive ever seen!
Thank you for that compliment. I really appreciate the good feedback!
Great build. Fantastic painting and weathering techniques
Thank you, Dean. I appreciate the feedback!
That was the first kit I completed 15 years ago after returning to the hobby after a couple decades, and it was also my first attempt at using an airbrush. I was quite happy with my finished product. For the first time I ended up with a model that looked like the box art and not something a fat-fingered pre-teen assembled with tube glue and brush painted enamels. I still have a Tamiya F4U-4 kit in my stash. Maybe I'll get to that one after I build my Accurate Miniatures TBM-1! Thanks for sharing your work and tips.
Excellent! They are really great kits! I really need to do an Avenger myself soon. Feel free to share some pics over on my facebook page: facebook/flyingSmodels. Cheers!
Stunning job once again Chad. It's always a pleasure to watch and learn from your well executed videos. Keep 'em.coming.
Thank you David. Glad you enjoyed this one. There's always another in the works and not too far behind.
Excellent video & job building your Tamiya F4u-1 Corsair model too!
Thank you! I appreciate the feedback and kind words.
Very realistic looking model, with excellent paint job and great weathering techniques.
Thanks, Jose' . The Tamiya Corsair just about builds itself!
That was really enjoyable! I think you do a superb job of explaining the steps in painting and finishing the model. I'd like to see you add a pilot to one of your builds and go over how you paint and detail them.
Thanks, David. I have had others inputs about a pilot figure so I think I will need to do that. I typically don't add pilots but I think I may have to in the future. I actually did this in the F-35 video I have up on the channel but I still haven't finished that build and I don't think I really talked about the steps to painting the pilot. Appreciate the quality feedback!
Again simply beautiful job with this model
I built this one myself and thought it came out ahh nice your blows it away
Thank you, Jim. I'm sure your Corsair is spectacular. Appreciate the kind words.
Just bought this kit in hopes of following along with this video. Outstanding job putting this together.
Thank you for the good words. It's a great kit and I hope you enjoy it as much as I did. Happy Modeling!
Great work and technique. Thanks for sharing.
Thanks for the good feedback!!
Love building Tamiya!🤗
For sure!!
I've not long discovered your channel. I must say that your work is superb. Greetings from the UK.
Thank you very much for the feedback. Glad you found the channel and appreciate the good words.
Corsair looks fantastic, I really enjoyed your video and I learned some helpful tips. Thank you.
Thank you and I'm glad that there were some useful tips in there! Appreciate the feedback.
Wow! what a beautiful piece . Every step of painting and weather brought on more and more depth. It's a stunning model.
Thanks for sharing....also like the full build video format.
Thank you for the good feedback. The Tamiya kit is a great one. Glad you like the full build. I’m going to try to do more of them in the future. They do get pretty large trying to cram the many hours of work into a video that doesn’t put you to sleep 😁
@@FlyingSModels lol would never fall asleep watching you build. I don't have tv so TH-cam is all I watch if I'm in front of the tube.
Hahaha....thanks. If you ever find yourself falling asleep, just let me know so I can mix things up and keep them more interesting 😀
Beautifully done!
Thank you, sir!
Canadian viewer. Awesome build. The seat belts look so much more convincing, in my opinion, than the one dimensional PE ones.
Thanks! I really like using the pewter foil and solder wire much better than the PE ones. And they are much cheaper too!
What a beauty! Nicely done 👍🏻👌🏻
Thank you for the kind words. Just a really enjoyable build!
Excellent work and great tutorial!
Thank you! Really appreciate the feedback.
Hi, it's nice work and beautiful finish. I'm looking forward to watch the next.
Thank you for your kind words. I appreciate the feedback.
Just a note to say many thanks for the tips etc on this kit - my next project I think
Thank you, Simon. I hope that they help. I look forward to seeing your results. Hopefully you'll consider sharing a pic or two over at facebook/flyingSmodels. Best wishes!
Awesome Job !!!!!!
Appreciate the good words. Tamiya is always a fun build.
Just discovered your channel. Thanks for the knowledge.
Glad you found it. Hope the videos are useful/helpful.
wow thats stunning work a great build love the colours & how you explain what you have done a real help to a 61 year old newbie modeller like myself 👍
Thank you Steven. Glad you like it but more importantly, I'm glad the format helped explain things. Let me know if you have any questions or need anything down the road to help on your modeling journey!
@@FlyingSModels I have this www.scalemates.com/kits/tamiya-61046-chance-vought-f4u-1-2-bird-cage-corsair--106391 Corsair in my ever growing stash is it the same one just an older kit ?
Wow - you work fast. Ha Ha. Seriously - that is a beautifully built kit. Thanks.
Thank you. I'm not always that fast but Tamiya makes it easy. Appreciate the kind words.
Great build 👌. Thanks for sharing sir.
Thanks for watching
Wow beautiful
Thank you and thanks for taking the time to provide the good feedback!
Thanks for the advice and help
Sure thing. Thank you!
Amazing!! I'm trying theCorsair model Revell in 1/72 scale!!! I have some problems for taping the canopies! 😂🤣
Good luck and have fun. I like to tape off the canopy with a solid piece of Tamiya tape and then hold it up to a light and cut around the canopy frames with a sharp razor blade.
Outstanding
Thanks for the feedback and Happy New Year!
Liked and subscribed mate.Beautiful kit 😍👍
Thank you! Appreciate the feedback and the sub!
Hi buddy your corsair is fantastic love all what you did to your kit amazing thank you for sharing mate.
Appreciate that, Gary. The Tamiya Corsair is always a fun build. Cheers!!
And thanks for the your good words on the base video. For some reason, when I went to go reply, it was gone. But they are super easy to make. Let me know if you have any questions/comments. Glad the vids are helpful!
Hoping mine comes out just as well as yours...!! Awesome stuff..!!
I'm sure it will....and even better. Look forward to seeing some results. Feel free to shoot me some pics over at facebook/flyingSmodels!
Baa Baa Black Sheep I love the underside, with the stark contrast between colors.
Thanks! That was such a great show! Don't make 'em like that anymore :)
Very well done 👍
Thank you. I appreciate your feedback!!
great job
Thank you. Appreciate you taking the time to watch the video and provide some feedback.
Wow! Absolutely beautiful!
One of my favorite planes of WW2!
While I prefer armor, all time periods, I will seriously consider building this kit!
Well done Sir!
Thank you. I too love the Corsair. Working on a 1/18 one now. Appreciate the good feedback!
Thank you.
Hope that it helps or provides some inspiration.
Skillful work, very nice 👍
Thanks! A great kit makes it all that much easier 😀
Damn good job
Thank you! Appreciate the good feedback!
2-words, "OUTSTANDING"...
Thank you!
How often do you find that by the time you finish weathering you can't see the preshading at all? Your build videos are some of the best, bro...keep them up!
Thanks for the good words. Sometimes it is hard to see the contributions of a single finishing/weathering step. I guess it all adds to the whole look. But I know what you mean in the sense that sometimes you do so much that it's hard to appreciate the contributions of a single step in the process.
great video, I would really like to know the blue colours could not find them in your info thanks
Thanks, Brad. Sorry that I didn't have those colors id'd in the description. I used AK real colors which were dark sea blue, intermediate blue, and insignia white. Of course, I blended colors here and there to create a weathered effect so nothing used out of the box. Appreciate the feedback.
Hi again thanks for the reply got a question can I use a enamel hobby paint as a wash over acrylics thanks
I have never tried that. You might have some luck but make sure you thin them really well and certainly try a test piece first. I'm guessing the won't do as well as the artist oils using white spirits and the enamel thinner may harm the acrylic base coat.
Gloriously beautiful build and finish. The kit did not have any machine gun parts for the wing openings. Your thoughts on that detail? Thank you !
Really appreciate the good feedback. You are correct on those guns but given the scale and the small size, I chose just to leave them as blank openings. Could always get some aftermarket guns and add them to be more accurate than mine.
Turned out beautiful. Question, how do you like the AK colors and does the ultra matt need to be thinned?
Thank you for the good feedback. I do like the AK colors. My local shop only stocks Tamiya so I usually default to them but the AK brand is really good and they have more FS color matches than Tamiya. I didn't thin their ultra matt but to be honest, the newer bottles I've used have been chalky so I switched over to Gunze flat. Hope this helps!
Incredible build and detailing! I have a few questions on the products/process. For the oil wash, is it a plain oil based paint?
For the mineral spirits, gloss and matte varnishes, do they affect other paint brands and decals negatively? Thanks in advance. Again, incredible work on the model!
Thank you for taking the time to provide that feedback. As far as the questions, yes, it's just a plain oil based paint. I apply it directly over the painted model (no gloss coat) but I do lay down a layer of white spirits first. I have seen no negative affects on either Tamiya or AK Real Colors (paints I use). I then lay down a coat of AK Gauzy clear gloss for decaling. No negative affects on decals either. Hope this helps.
really great model! I'm just not too sure about the final matte coat... but that's just my opinion
Thanks...appreciate the comments. As far as the matte coat, you think it's too flat or not flat enough? Haven't seen many photos of shiny Corsairs that were "in action".
Outstanding! Question can you customer build
Thanks for the feedback. Glad you enjoyed the video. I have build for customers in the past but have been limited by my work/home schedule recently. Feel free to contact me through the website for additional information. Thank you again.
On your formation lights, did you drill out the molded plastic before adding the foil and epoxy?
I did. I created a small 1/16" rounded dimple so that the lights would sit down inside there.
I am literally building that cockpit from scratch in 1:72 ....😔 Well I have a pe seat . Hopefully it will resemble something.
Great build love the colours
That's excellent! Would love to see some pics. You can post them over on my FB page at facebook/flyingSmodels or contact me through my website using the contact tab!
Yeah sure, i will try and get some pics to you, via contact don't use Facebook sorry. Juggling a few kits atm, so I haven't actually put the parts in so should be easy to photograph... the hobbyboss kit had no detail at all, so that's why I attempted to add some detail.
Well done. Corsair's a beautiful bird, ain't she?
Thanks! Always loved the Corsair. Working on a -5N now.
@@FlyingSModels Look forward to seeing it.
Hopefully I'll have the build and video complete over the weekend or early next week.
Sir, I have recently found and become a follower of your channel. Love your builds but do have a question regarding this one as I am a huge fan of Corsairs and have two of these kits why do modelers seem to shy away from the folded wings, is there a problem in the kit or is it me? Either way looking forward to more builds.
Hi Stacy. First, thanks for following the channel. Really appreciate that. As far as the folding wings, I think it's just that most of these early Corsairs were land based so they never really had a need to fold them. But I have build the Hasegawa kit with folded wings and it really does make for a different and interesting look. As far as the Tamiya kit and the wingfold, the kit mechanism is sound/solid so don't be afraid to fold the wings if you want it that way!! You can see some pics of that folded -5N I did over on my facebook page. Just look at the "photos" tab and scroll down till you see the Argentinian -5N build. Cheers!
Hi Chad just a quick question. Do you thin the AK Gauzy for spraying
Hey Mick, I just use it straight up.
Hmmm... Niiiiiiiiiiiice!
Thanks! Was a fun little build too.
I really enjoyed this build, As NZer it's a pity that the Corsair wasn't in RNZAF markings,maybe next time?🤔 Also may ask what sort of PSI/Kpa you are running your airbrush at? it's something I'm currently getting use to and am always interested in how other builders approach this.
Thank you. Glad you enjoyed it and my apologies on the markings 😁. Can always build another one of these excellent kits. As far as the airbrush, I’m usually running around 15-17 psi. Let me know if you have any other questions.
Amazing hand on the airbrush, excellent weathering technique.
Only issue I had was with the chipping, because you painted the chipping medium on the result looks out of scale and unnatural, it looks, you know, painted on.
I believe it would've looked better if you sprayed the area with the chipping medium and let the brush make smaller more natural chips, done slow and subtle it may render better results??
Thanks for the feedback. I appreciate the constructive criticism and suggested approach for the future. I'll use it to make better models and better content for the channel. Thank you!
Another great video as usual :) I'd love to see a more in depth video of how you hand paint the cockpit and any tips and tricks when painting in such small details. Some constructive feedback which I'm not sure what you can do about but the camera focus changing was a little distracting. Still a very enjoyable watch, liked the format, so please keep them coming!
Thank you, John. I'll try to get a better angle on future videos to show more detailed painting. My current setup isn't the best for allowing me to work with my visor and video all at the same time. My eyes or old so I have to use a visor when painting those smaller details. And I agree, I need to work on that camera focus as it was distracting for me too :) I think it's the angle I was shooting at the way the camera is trying to focus on the closest object (sometimes my hand or the airbrush). Really appreciate the constructive feedback as this helps me make better content going forward!
Awesome build! Question, did you thin your AK Ultra Flat varnish with anything or did you spray it out of the bottle?
I thinned it with a little Tamiya thinner. Thanks for the feedback. Was a fun little build!
Dear Chad
once again an outstanding artistic work. I have a little request if I may, if you please quickly repeat the technics like under wing light and others you mention that you made videos concerning them.
Hey Philip, Thanks for the good feedback. I think the 2 videos I mentioned are also cards in the video series but here they are again. One is the foil belts and the other are those lights you mentioned. Let me know if you have any other questions.
Belts: th-cam.com/video/e0JLOteygE0/w-d-xo.html
Lights: th-cam.com/video/aJuG5q_KzPo/w-d-xo.html
FlyingSModels thank you Chad
, I thought it would be a kind of repetition to your previous videos on the issues you mention through the builds as everyone new who watches your videos know what you’re talking about. I although know it takes a lot of your time, but just wanted to share the thought with you.
@@infernumdk I appreciate that. I typically add cards to the video but if you aren't looking for them, they are easily missed. I'm going to start adding links in the video descriptions as well. Very good suggestions, thank you!
FlyingSModels Hi Chad I never missed a video of yours I almost know them by heart now 😁
@@infernumdk Thank you. Working on the next few now
Stunning work and a very enjoyable video. I have some questions for you. Big jump on the instrument panel, you show painting details then show a nearly completed panel adding epoxy to the instrument faces. Did you punch out the individual instrument decals? What are you thinning your AK Real Colors with, and where do you source them. Finally, do you go back and touch up the paint on the attachment points of parts that have been painted on the sprues? Really like the videos!
Appreciate the feedback. Yep, I skipped over the instrument painting. I just hand painted the individual gauges using a fine brush. I thin the AK paints with their own thinner. I sourced them directly from AK out of Spain in the past but depending on your locale, you may have other options. I found a good spot in the US that i can share with you if that would help. And yes, I go back in and touch up areas that are exposed where I have removed parts from the sprues. Most times I don’t have to as the manufacturers often place them on attach points/locations.
@@FlyingSModels Thanks for the rapid reply! Yes, if you don't mind I'd like your US source for the AK lacquers! Been wanting to try them since my old stand by Model Master is becoming harder to find.
@@FlyingSModels And, hand painting individual instrument dials in 1/48! I did not think I could be more impressed with your work, until this revelation!
I think you'll like these much better. They spray far better than MM paints, in my opinion. Here's that link: www.scalehobbyist.com/manufacturers/AK_Interactive/Paints/browse.php?sn=AKI000RC245
Thanks. I think I'll try to make a video with more specifics on instrument panel paintings.
Hi again.. can I ask why you didn’t prime the entire model before pre- shading the panel lines?
Cheers
To prime or not to prime, that is the question...haha. I don't always prime my models. If the fit is good and I'm not doing a natural metal finish, I rarely prime. I know there are all kinds of thoughts, opinions, and passions about this subject and some guys always prime. I'm just not one of them. I really haven't seen much difference over the many years I've been building from priming vs. not priming when it comes to durability of the model. Like I said, I'll always prime when I need to prep for nmf and when the fit is bad and there's a lot of rework that I need to check fit/finish on.
Good point. I also build model cars and I don’t always prime unless I’ve used fillers or have done work on the body, otherwise I just sand the surface with a fine grit sandpaper to improve adhesion and spray without primer.
@@gatblau1 Yep, same here. Has always served me well....in most cases :)
Could you please try and answer a question for me?. The decals for the model include the Jolly Rogers, the roundel on the side and wings have a red outline. I have have a reference book where this aircraft does not have the red outline on the roundels. Which was right?. I know there's decals without that in the kit that I can or could use, but I'd just like to know why. Great build as well
I think you'll find if you do some research that the US Navy applied the red surrounds for only a brief period of time in 1943. I'm not quite sure how long or from which dates during that time frame. But it's likely that both with or without the red surround would be correct dependent on what time period you were modeling. Hope this helps. Thanks for the good feedback!
@@FlyingSModels Ok will look into that many thanks
Fantastic build ! Nice details ! But I thought the overall colors we more "blueish".
Thank you, George. I appreciate the feedback. On the colors, I guess it depends on what look the modeler wants to achieve. Pics I have show that these planes weathered pretty heavily in the Pacific Theatre. But maybe the top and/or side color isn't as blue as it should be.
Gread video
Amazing work. I want to try and use your technique. How long does the oil paints take to dry? I will be using tamiya paints. Should I flat coat first? Or gloss?
Thanks for the the feedback. I use Tamiya paints most often as well and you do not need to put a gloss or flat coat over the model before using the white spirits and oils for weathering effects. I just apply them straight over the acrylic paint. As far as oil dry times, I work in sections and I don't wait more than a couple of minutes (sometimes not at all) to start removing and blending the oils with more white spirits. I do let everything dry overnight once I am done. Hope this helps.
Awesome. Thank you. Keep those great vids coming.
Sure will. Thanks again!
How did you build it with out using krazy glue and gorilla glue.
Haha....these Tamiya kit practically need no glue.
Excellent job! How did you like the AK real colors? Thinning ratios and psi?
Thank you! I really like the AK colors. They are thicker than some other and I thin with a ratio of about 3:1 (thinner to paint) using their AK thinner. I spray at about 17 psi or so. Hope this helps!
@@FlyingSModels Thank you for your response, looking forward to following your work and channel !
I understand that you used the Dark Sea Blue. Was the regular Sea Blue a little to light in terms of color? I’m thinking about making a Corsair model and I’m trying to make a decision.
Yep, it was a little too light. That being said, it can be used to lighten the DSB as part of the weathering process.
@@FlyingSModels I was about to say. If I were to use the regular sea blue, I would use it on various panels to make them look sun bleached
I am building the trumpeter 1/48 c47 skytrain where did you get the thin wire for the antenna
You can get it from Amazon or other hobby shops. Here's a link if you want to check it out. I should have added this to the video description. Sorry about that. amzn.to/2FKmzrj
@@FlyingSModels This is my 1st build in many years. My brother who is buried in Arlington worked on the EC47 which was used to listen in to viet cong transmissions. He was on the 360th TEWS out of ton son nhut during the tet offensive.
My question is this I want to make it as accurate as possible, the nose art and the tail #.
Also it has the windows on both sides. Hiw do i make sure not to airbrush the windows when i'm painting the fuselage
Many thanks
@@johnseifert4951 Hey John, first off, I'm sorry for your loss and appreciative of the sacrifices your brother made in the service of our country. I think building an accurate EC47 is a great way to honor his service. As far as the windows go, you can cut masks to cover them while you airbrush the exterior or you could use masking film. If you want to discuss either or these in more detail, please feel free to message me through facebook @ facebook/flyingSmodels or through my contact information over @ flyingSmodels.com. Those will be easier methods to talk details vs here in the comments section. Look forward to talking more. Chad
What happened to the f35 build will we be seeing more of that Great job
It's still "in work". Just got sidetracked with a few other builds. I'll be getting back to that in the future. Thanks for keeping an eye out for it!
Great video and build! Painting and weathering looks awesome! Are the AK Real Colors lacquer or acrylic? Take care! Drew
Appreciate that! The AK colors are an acrylic lacquer, not a water based lacquer. They go down really well!
FlyingSModels thanks! I’ll have to look into those!
Not sure where you are but I've gotten mine from here recently: www.scalehobbyist.com/manufacturers/AK_Interactive/index.php
FlyingSModels I love Scalehobbyist! Good to know they carry this. What do you use to thin them (if needed)?
I use the AK Brand Thinner and it works great!
Can i know what type and make is airbrush used here?.
Sure. I'm currently using a Badger Velocity Renegade. I believe there's a link to it in the video description if you want to see more specs on it.
Which kit would say is the best Corsair in 1/32?
Tamiya....hands down!
Great job ! But I have one question ! Is it a real color using during the WW2 ?
I think you are asking about the colors of the model. Corsairs originally were blue grey over light grey but then switched, along with all other Pacific Theater aircraft to a 3 tone scheme of Dark Sea Blue and Intermediate Blue over white. later in the war, those markings changed overall Dark Gloss Sea Blue. I hope this answers your question.
What PSI do you set your air brush when you paint the tri colors
I'm usually running between 17 and 20 psi. Hope this helps!
@@FlyingSModels ...Thank you, this will be my first time doing tri color......Do you thin down the Real Color Paint ?
@@ericspear4401 I do. I use AK real thinner for that. Hope this helps.
can you use mineral spirits and oil paint over top tamiya acrylic paint without it washing away the paint. i am new to this fancy painting
I don't use home depot type mineral spirits over the tamiya paint. I use artist grade white spirts and it doesn't hurt the tamiya pain at all. Here are a couple of links if you want to check out what I use: amzn.to/3qmMc2U or amzn.to/38en6wM
@@FlyingSModels thanks alot for the reply, also it is nice to hear somebody talking in a video. good video, even let some adds play so you get paid. thanks again.
@@ericgillin4319 Appreciate that, Eric. I'll keep talking too as it seems that others appreciate the commentary vs. just hearing some background music. Cheers!
@@FlyingSModels some peoples background music jest drives me fucking nuts, i have a good amount of oil paint for painting , painting ,paintings, but i only ever used the so called oderless thinner. will have to try the white spirts. keep talking!!
@@ericgillin4319 I'll keep talking until folks get tired of it, I guess. You might want to try your odorless spirits on a test piece. Sounds like it's artist grade stuff and it may not be as "aggressive" as the cheap stuff you get at home improvement stores. Let me know if you do and how it works for you.
Great build and technical skill! Only critique, the auto focus on your M50 flips back and forth from hand to model a lot, enough so to be very distracting (even slightly nauseating at the increased frame rate/time lapse). I would lock on MF at/near the model, with a sufficient aperture (f8 should do) to get the dof you want to achieve to show the model, but not your hand and airbrush cup.
Thank you. I appreciate your good words and your constructive feedback. I have struggled with getting the setting correct to eliminate the issues you mentioned. I agree, it is annoying and even a bit nauseating. Sorry about that. No one wants to see the hand and airbrush, that's for sure.
@@FlyingSModels No prob, again your builds are amazing! I've got a few decades of photo/darkroom experience, and now am just getting into airbrushing and model builds. If you do a quick search on "focus peaking", and how to set your Canon lens to manual focus mode, this should turn off the auto focus tracking and stops the lens from "hunting" for something to focus on. Once you lock the focus peak on the area you want, focus will remain fixed on that area, until you change it by focusing on a different spot. The focus peaking even illuminates the area in focus on your display (making it easy to verify you have what you want!). Hope this helps!
I have a question "Mr Surfacer" or something unnecessary? awsome corsair without surfacer! can i save some dimes?
Thanks! I use primer every once in a while but not too often, only when I'm doing some major surgery and need to check fit and finish. Never have any issues not using Mr. Surfacer.
You do sensational work. Your model looks terrific. The only mistake I can see is the color of the gear legs, wheel wells and wheels. Because those things were exposed to the salt air, it was standard navy practice to paint the gear legs, wheel wells and wheels the same color as the bottom of the aircraft. When Chance Vought learned of this their Corsairs came with all that stuff already painted in the appropriate colors. They’re still doing that to this day on Navy aircraft. Please understand, I am NOT criticizing you or your model. I can only dream of building a model as good as you do.
Thanks, Michael. I really appreciate the kind words and the constructive feedback/criticism. This helps me improve so keep it coming. I'm certainly guilty of just going with what I "think" is right or what looks good to me so sometimes my builds may have a few inaccuracies in them. I enjoy the building and sometimes spend too much time in that "department" vs. the "research department". Thank you for the intel.
You are quite welcome and again, I only wish I could build a model as good as you do. I guess I’m the opposite of you. I’m disabled now and have lots of free time. Reading is something I enjoy and airplanes are my thing. So, I spend lots of time reading and researching things, but not near as much time on actually building a model. My airbrushing skills leave little to be desired and I’m just learning that with acrylics a good primer is pretty much a necessity. As for fine lines free hand like you do, again, that’s not happening with me and my skills. Or lack there of. I’m not putting myself down, just being honest. Anyway, I subscribed to your channel and I’m looking forward to seeing a lot more of your models. You truly are one of the best!
Thank you, Michael. You and I should partner up for sure...haha. I don't spend enough time researching and spend too much time, apparently, building. Thanks for the subscription and more importantly, thanks for the constructive feedback. Really appreciate that!
No problem my friend, happy to have helped. You truly are a gifted modeler. My best friend is the same way. He’s built some of the best models I’ve ever seen. Especially his ships. And if there’s no kit for a ship he wants, he builds it from scratch. When it’s done I guarantee you’d think it was from a kit. He also modifies things. For instance; two 1/200 scale ships from Trumpeter. One was the Bismarck and the other one was the Missouri. He modified the Bismarck into the Tirpitz and the Missouri into the Iowa the way it originally looked when first commissioned. Like you, he’s a very gifted modeler. The only thing I’m good at when modeling is screwing it up and sending it to a landfill. LMAO! 🤣😂
@@michaeltruhett4170 Appreciate the compliments. Sounds like your friend is my kind of builder. I'm sure he's a cut above where I am at the moment. I can't tell you how many of mine went to landfills or my burn pill when I first started 😆
Whistling Death at it's finest.
Thanks, Mike!
Why does everybody use black primer (or “Base coat”) instead of a nice neutral gray primer?
I actually use a good bit of grey primer (Tamiya fine surface primer) when working rebuilds and stuff. But when it comes to painting, the black base serves more to create shadows and depth in the follow coats when they are lightly airbrushed over it. It's more of an undercoat and less of a true primer which is used to get a smooth coat for painting. Hope this makes sense.
@@FlyingSModels Very interesting. Thank you.
what colors did you use?
For the exterior, I used AK Real Colors insignia white, medium blue, and sea blue.
@@FlyingSModels thanxs bro
Выбираю между Tamia и Hobbyboss, какой лучше взять?
I personally prefer the Tamiya over the Hobby Boss. The Hobby Boss has some nice features but it is just hard to beat the Tamiya engineering, fit, and quality.
Мне показалось , что у H B лучше детализация? Или я ошибаюсь.
👍
Thanks!
Like the plane. Just some of that plane is weathered and some looks to new. I don't know. Maybe it's just me.
Thanks. Pretty weathered all over. Maybe the markings aren't weathered enough. But we all have our own styles so it's probably just not exactly how you like to see the model finished. Totally understandable.
I never saw a Corsair that’s not blue and blue!
Early Corsairs were either Blue Grey or this tri color scheme with white, intermediate blue, and dark blue. A lot more interesting than just blue/blue :)
@@FlyingSModels Dad and I made a 1/48 in the White, Dark Blue and Light Blue carrier version. It was one of our best. That was about 40 years ago. My brother still has the model and I still have the Paasche Model H (Air Brush).
No primer?
I don't typically use primer unless I'm painting a natural metal airplane or one that has had a lot of modification done to it. I know, sacrilege in the modeling world..haha.
@@FlyingSModels thanks for the answer, I’m a beginner and I have a lot of doubts regard the use of primers. Your projects are outstandings and I trust you. My first will be without primer: no putty and no metal finish like you say.
I hope it will be ok 💪🏼
Greetings from Italy
@@TheVoooray You bet. Sometimes the primers can hide some of the surface details if you aren't careful. I'd recommend washing your kits plastic parts in a little warm water with soap to get some of the oily mold release off. If you have some fine grit sandpaper (like 1000 or so) you can sand the surface before painting to help things stick a little better. Keep me posted on your progress. All the best to you and happy modeling!