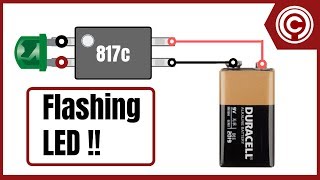
led flasher circuit with optocoupler

ฝัง
- เผยแพร่เมื่อ 12 พ.ค. 2024
- led flasher circuit with optocoupler : #optocoupler_led_blinker #ledlights #easy_led_flasher
you learn how to make a simple flashing circuit with the fewest parts.
This electronic circuit turns the LED on and off, and the power supply is a battery.
In this DIY project video , I'll show you how to build a simple and effective led blinking circuit using an optocoupler. This circuit is designed to create a blinking effect with minimal components, including a PC817 optocoupler, a 10k ohm resistor, a 1k ohm resistor, a 220 microfarad 25V capacitor, and a 5mm LED.
With its low part count, this circuit is perfect for beginners who want to learn more about electronics. Plus, it can operate within a wide voltage range of 9-24V, which means it can be powered by a 9V battery or a car battery.
Throughout the video, I'll explain each component and its function in the circuit. I'll also provide step-by-step instructions on how to assemble the circuit, making it easy for anyone to follow along.
Whether you're a beginner or an experienced electronics enthusiast, this video is for you. So sit back, relax, and join me as we build a fun and exciting LED flasher circuit together.
00:00 install Optocoupler
00:36 install Resistor 1k
01:11 install Capacitor 220uF 25V
02:01 install Resistor 10k
02:42 install LED
03:17 install Battery connector
03:42 schematic
03:53 circuit testing
#led_flashlight #optocoupler_led_blinker #12v_blinking_led_lights #led_strobe_light #DIY_led_flasher


Se usa los mismos componentes para 12 voltios
Yes, you can use a 12-volt voltage.
Nice. Working perfectly.Thanks bro
That is the exact blink I am looking for.
However, I am working with 12-14 VDC from a vehicle.
What changes do I need to make?
Can you add a beeper in parallel to the led and it work just fine sir?
gracias amigo me funciono perfectamente gracias
Bonjour ! quel type de loupe utilisez-vous SVP MERCI
Simple and practical,
Can we connect multiple leds in this circuit?
Nice but fix the schematic - the LED is in backwards.
Could power a 12v rely for something needing more power?
i want to make it with 3.7v li-po battery with same light effect, please guide me with circuit.
Working perfectly
Good idea Thanks
Your video picture shows it real simple just one chip no other doodads
Good job
Bonjour maître svp comment faire pour que ce la soit brancher au courant
Excelent excelente
Sir per 3 second me 1 bar bling kare kaise banaye... 12 volt ka plz sir boliye
could it work if my input is 5volts?
Nice project brothers
Hello there if I going to use 3v for my led . I don’t need to use resistor and capacitor??
Hoye amigo donde puedo conseguir esas piezas que se necesitan para armarlo?
Also the internal LED inside the optocoupler is drawn backwards. Pin one should connect to the anode.
Sirve para conectar una moto??
Hola que tal necesito hacer un destello con un flash de celu con una batería de 3.7 lipo este circuito me servirá o hay que cambiar algo desde ya muchas gracias
Beleza.pura
Nice video, thanks :)
If you add more led !! What you need to add resister
Hi, this is exactly the flash I'm wanting but I don't have that type of capacitor
Beleza.e.topy.vou.fazer.um.p.minha.bisicleta.p.asvezes.eu.saio.anoite.obrigdo.gostei.muinto.etopy
Supper
Y se puede hacer con una vía de reloj?
What if you were running it off a 5v usb with a voltage divider?
Peut on utiliser un flash xenon?
Great stuff! What can I do if I want 6 LEDs if I don't want to do this for each one?
Put them y parallel
❤
Cuánto dura la batería.@??
5 v pr kese banaya
Puedo a un carro instalar esto ???
👍👍👍
Hi, I made this and it ate through the 9v battery very quickly and then the led stopped flashing. I connected a new battery and it still would not flash(strobe). Can you make a circuit pls where the led flashes once every 30 seconds? and where a 9v battery will last years. thanks
the video that can help you is this 1 Year LED Flasher with one 1.5v Battery
from the hacktuber channel
@@eliashernandez1429 you can't light an led with 1.5 volt except it's ir led...
@@naniraju1917using a "Joule thief" circuit, yes
You burnt up your led.
@@starmc26 Ah! that makes sense now. hmm. i need a possibly add more resistors to decrease the voltage going to the led.
Will this work on 12v dc input ?
hi
this circuit sport up to 15 volt
You need to add a bigger resistor
It also works with pc981
Wwwwoooo súper cool wwwwwwwwwooooooooo
muy bien hermano . le puedo meter 12 voltios . y tambien puedo acerlo que parpadee mas rapido
Belezaetop
Buy confirm Hoga ya nahin
Incresae speed of flashing , change of capacitor
Sir please share circuit led blink one time after 30 sec
I have EL817 will it work ?
Yes this is can only made by 817
yes, its work.
I tried to buy 1k and 10k resistors and they ask me for wattage and end up not buying it because i dont have any idea. Can you help me.
1/4 watt is just fine.
@@georgeiceman867 thank you..
@@jamespatricknemenzo7282 No problem man. 👍👍👍👍👍👍👍
All resistors of this circuit are 0.25 watts.
Wattage is no problem when you are doing tiny practicals...
Reques 2 lamp
How to increase gap between blinking??
you can use a higher uf capacitor, like a 470uf
Aku bikin ko ga berkedip. Nyala tok
10 leds circuit same
Voice senser
Not working.led is not blinking
Hello dear friend. I was very happy to see that you built this circuit, but I'm sorry to hear that it's not working. This circuit is very simple and you can easily troubleshoot it.
Please follow the steps below for troubleshooting:
Check the placement PC817 IC.
Check the placement of the LED.
Check the placement of the capacitor.
Check the values of the resistors and capacitors.
If you have connected the circuit incorrectly, there is a possibility of damaging the IC.
Y did you use fake thumbnail? I disliked your video. When u lie, you cant achieve your dreams...
Hahahaha resisror are you sure
Thank you for your high accuracy.
I will point out this typo in the video description section.
errore
👍